After the machine is successfully connected, it can light up and preview the selection normally. However, after clicking start, the laser does not work and does not move.
My computer is Windows 7. After connecting, I can select the position for preview and also ignite the laser, but the laser does not move after I click start. I am operating on an Android system. However, I have been using an Apple system before without any issues, and I don’t know why the laser is not working this time. Is this a software problem? How should I resolve it?
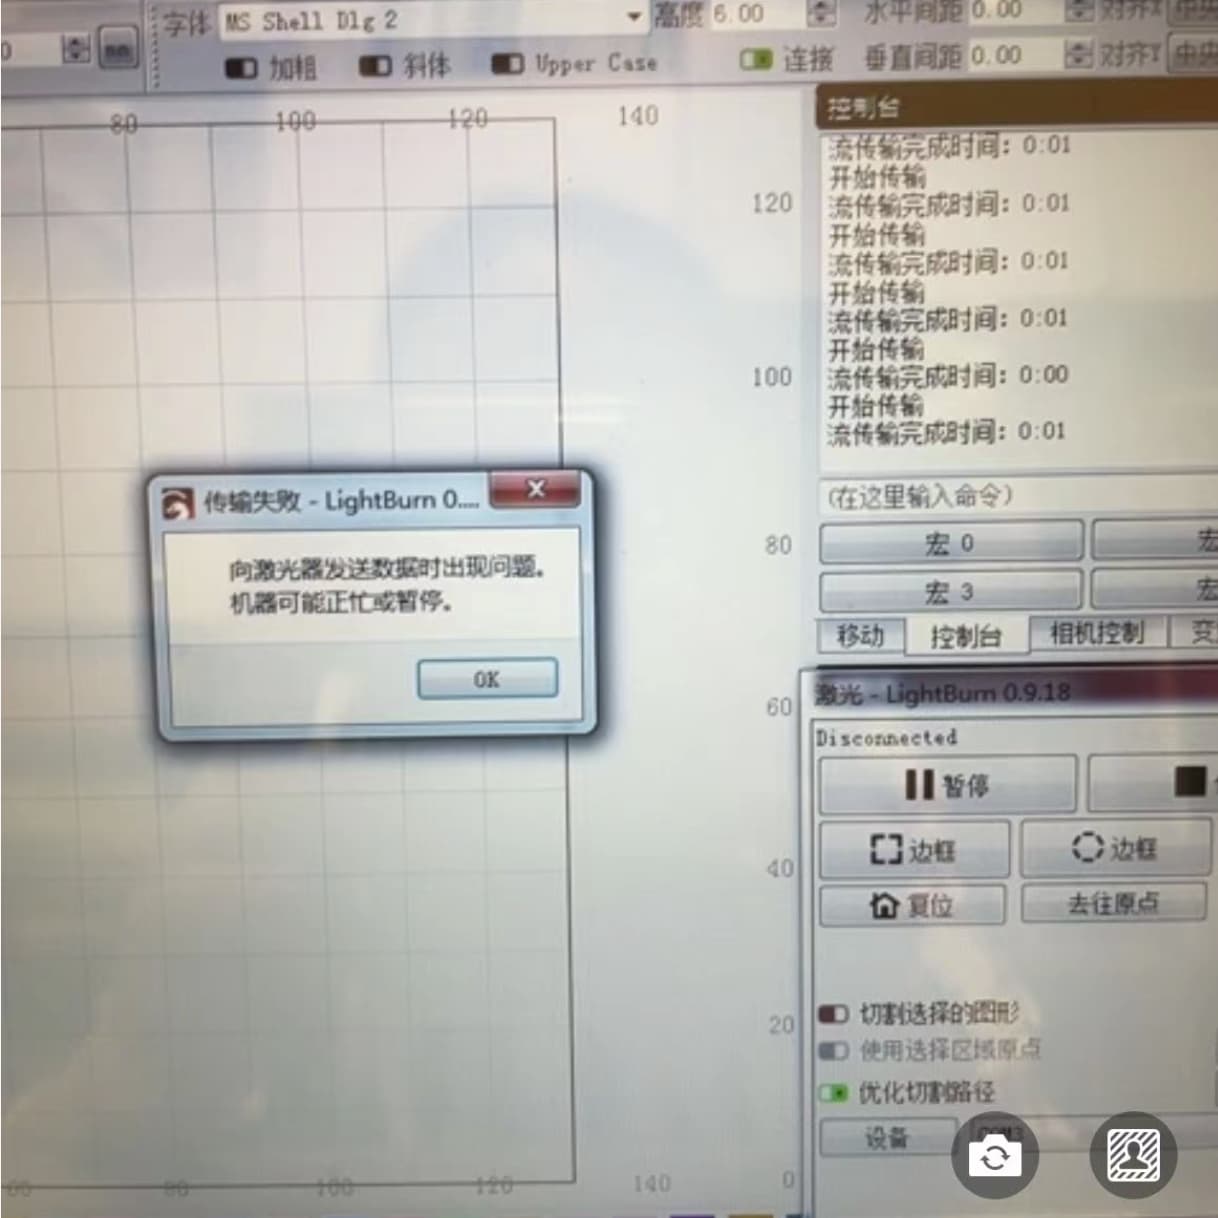
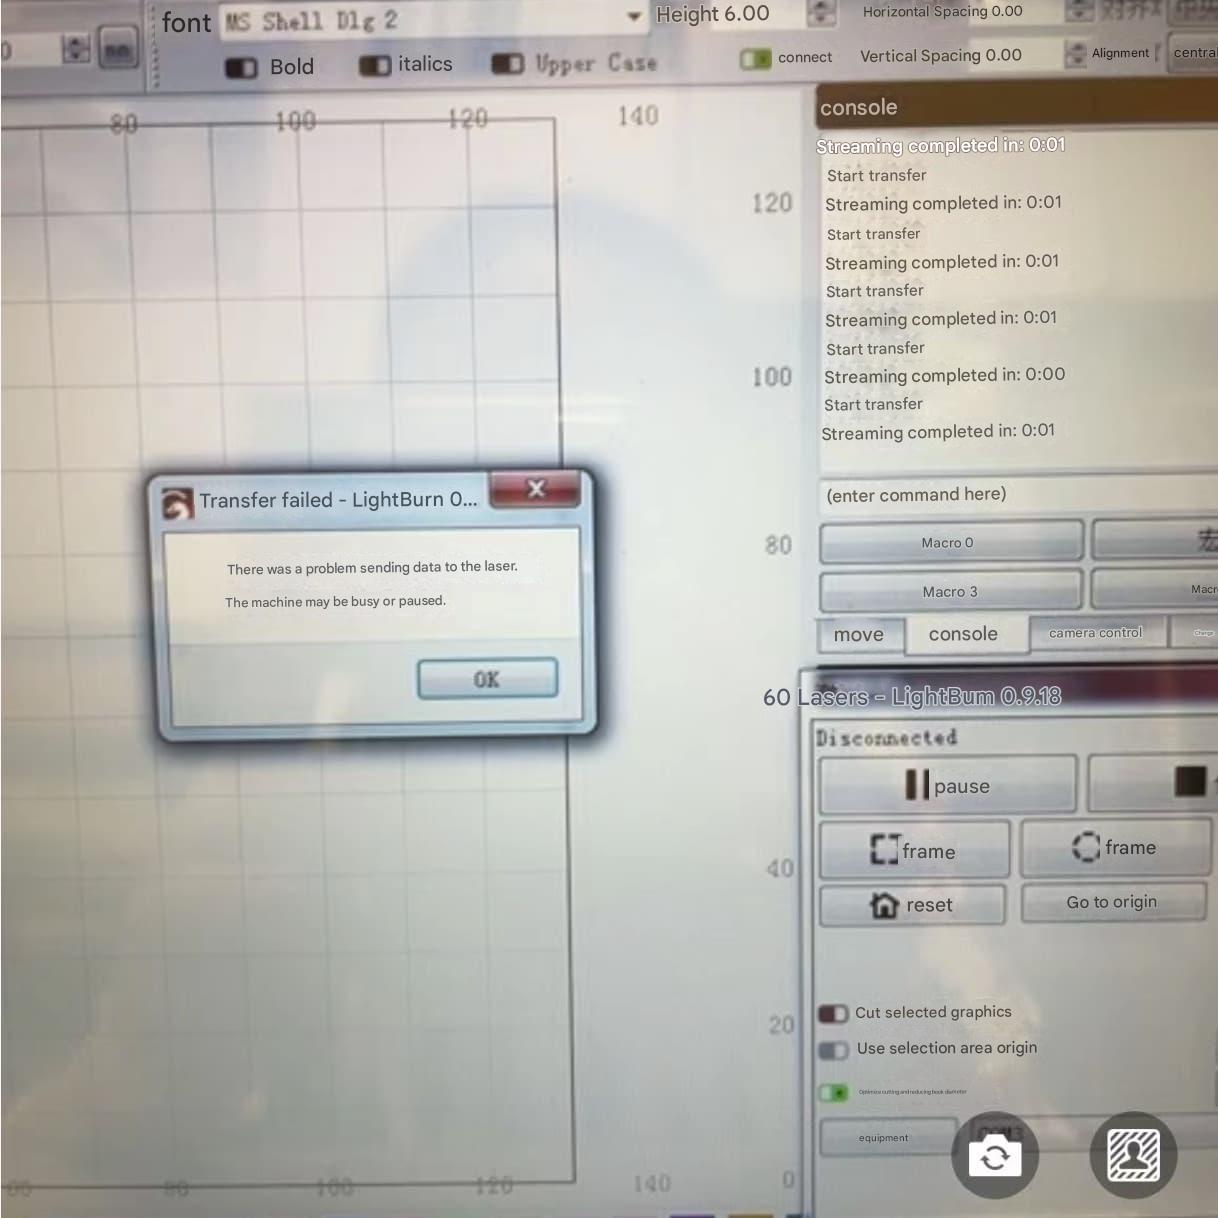
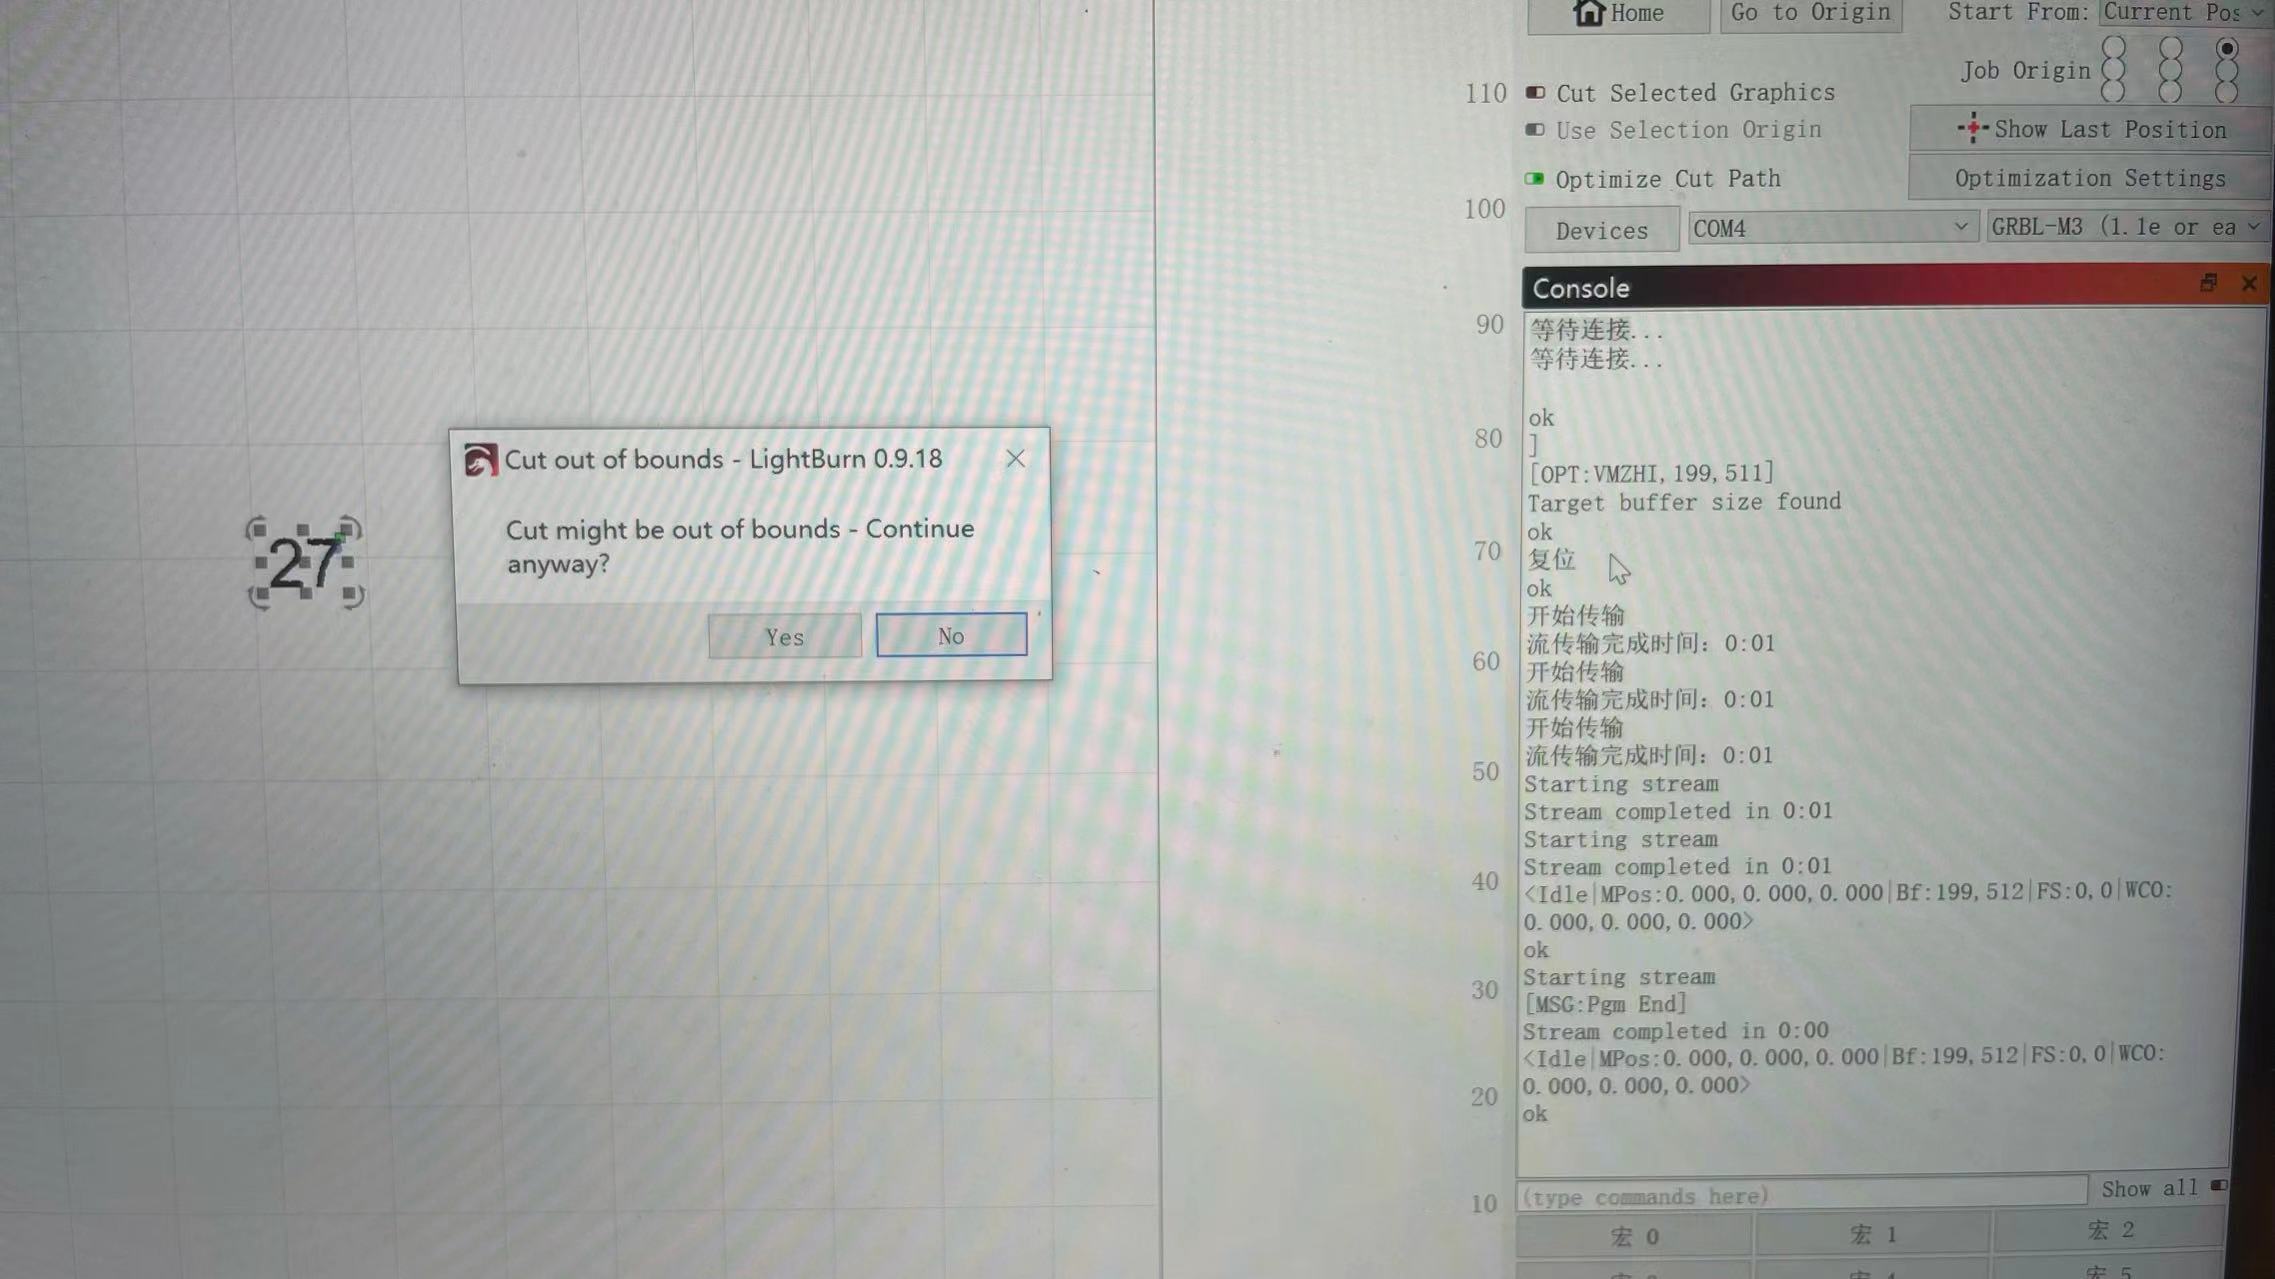
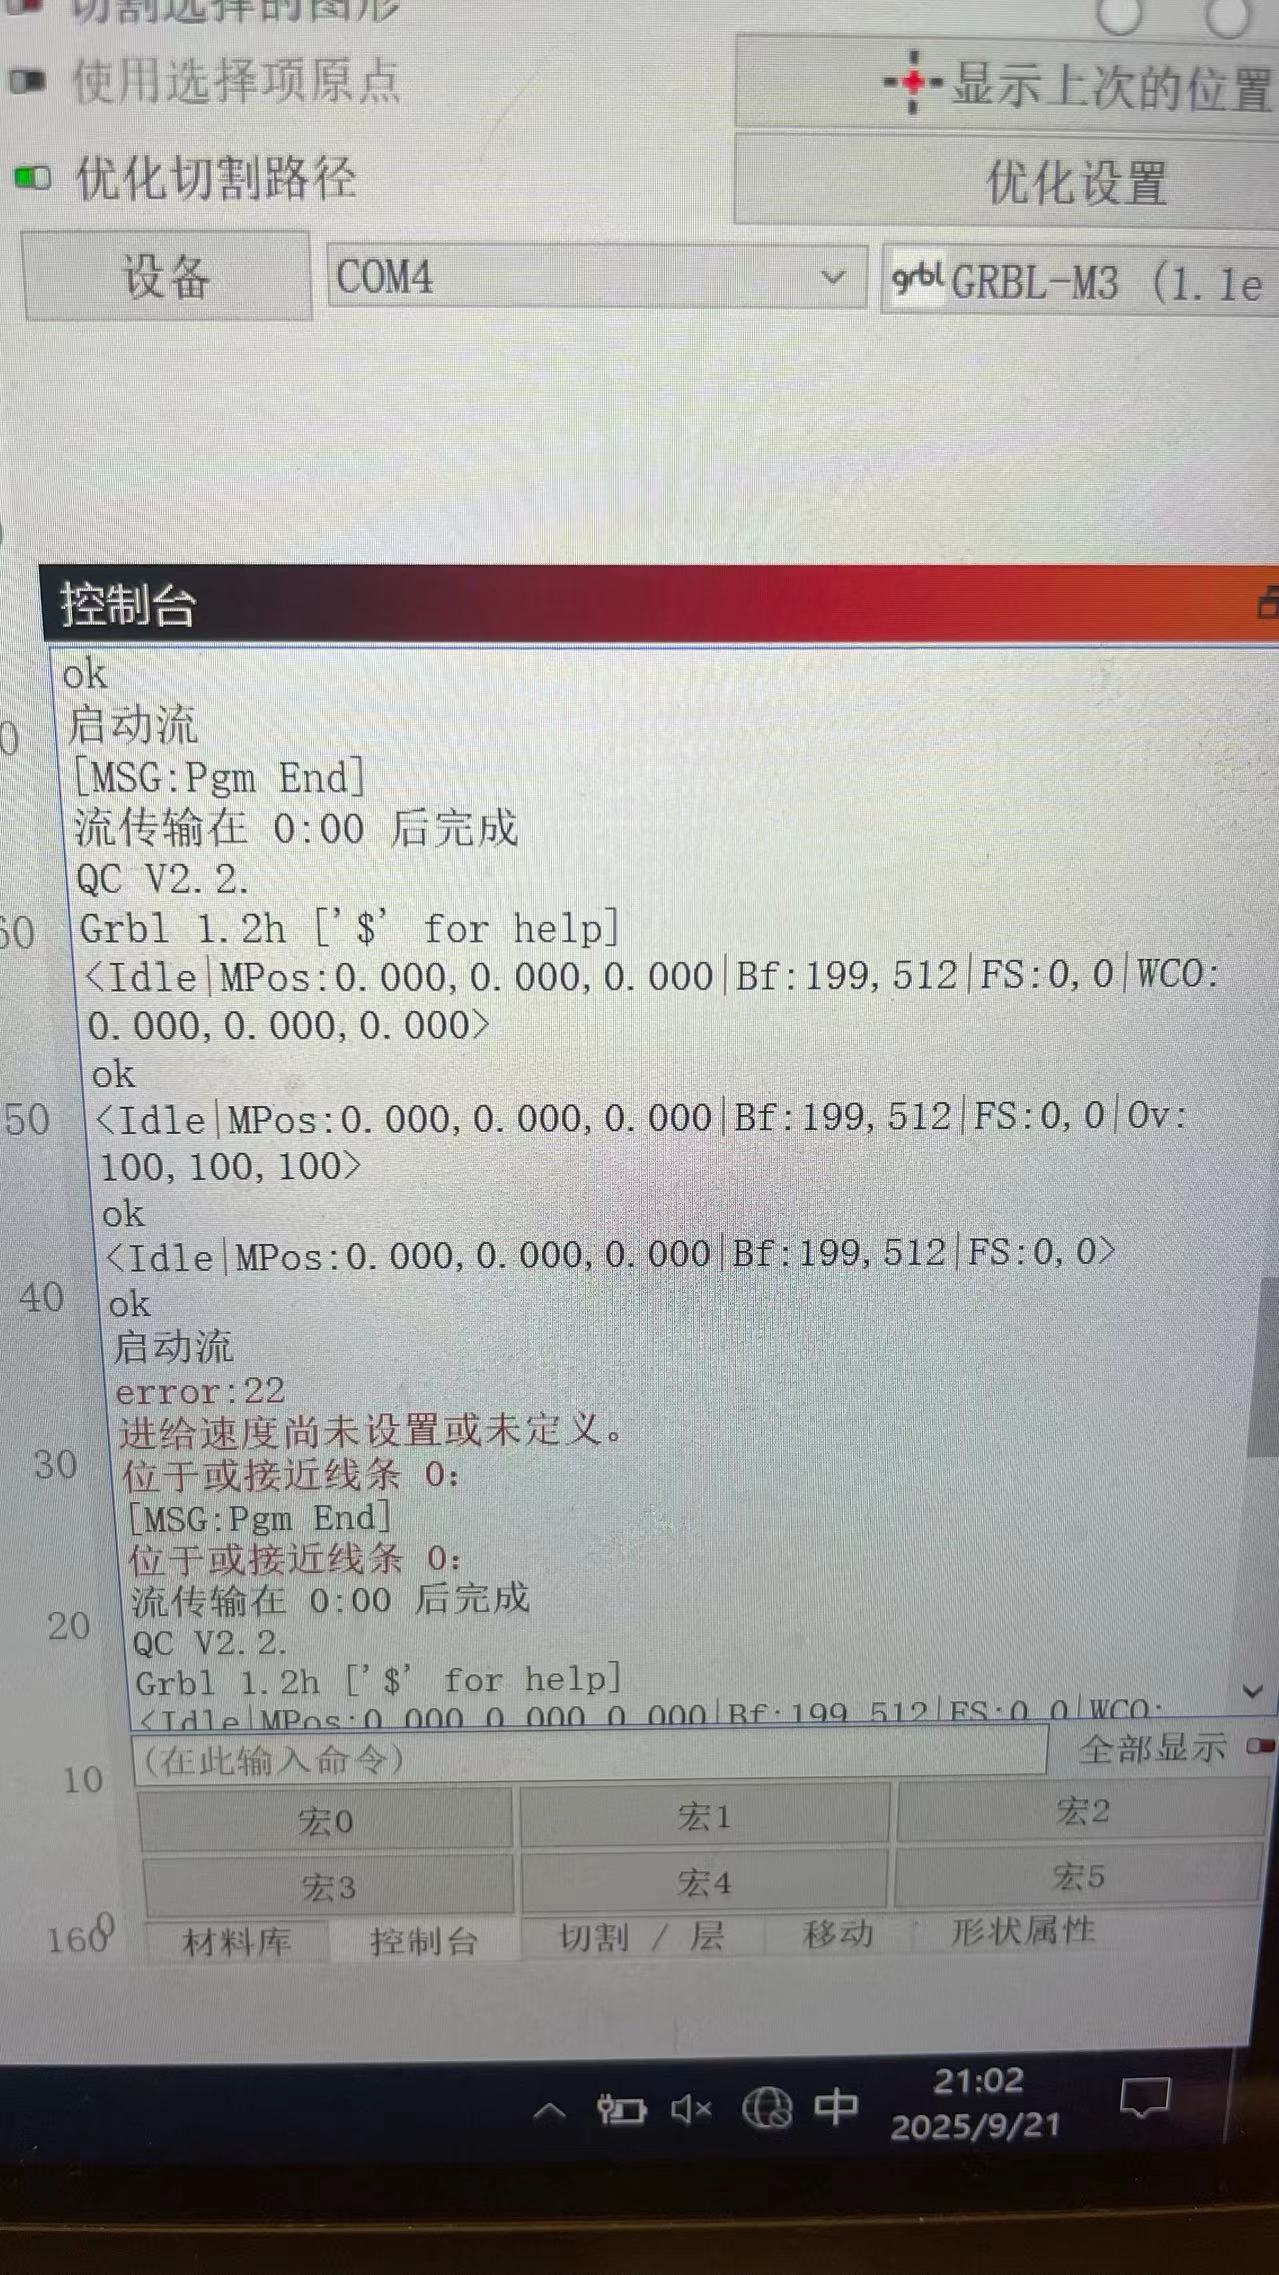
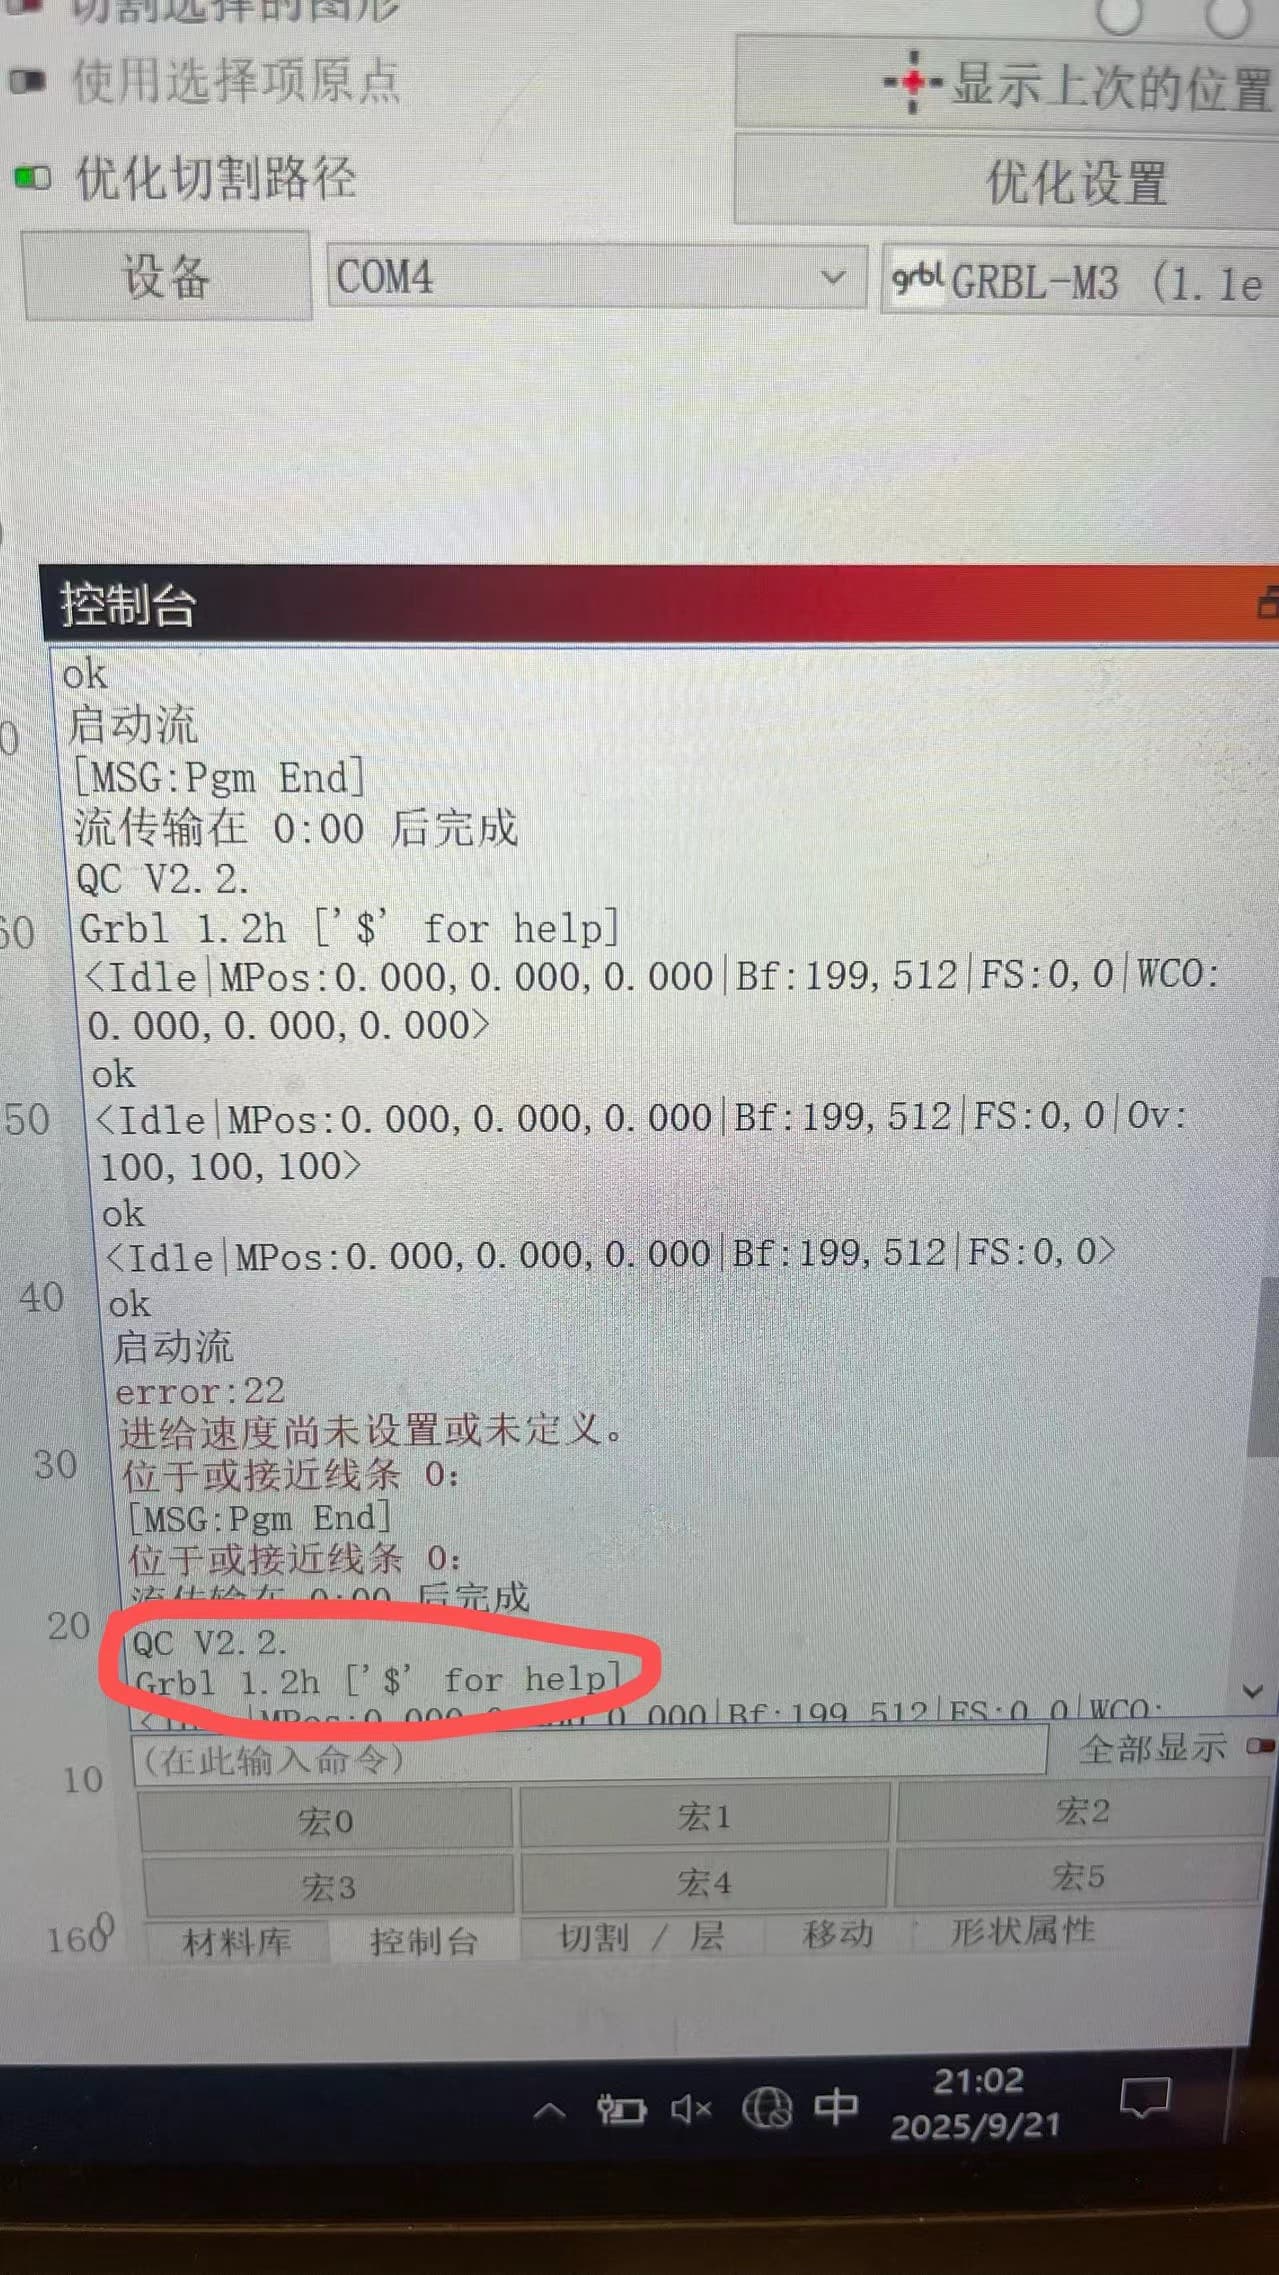
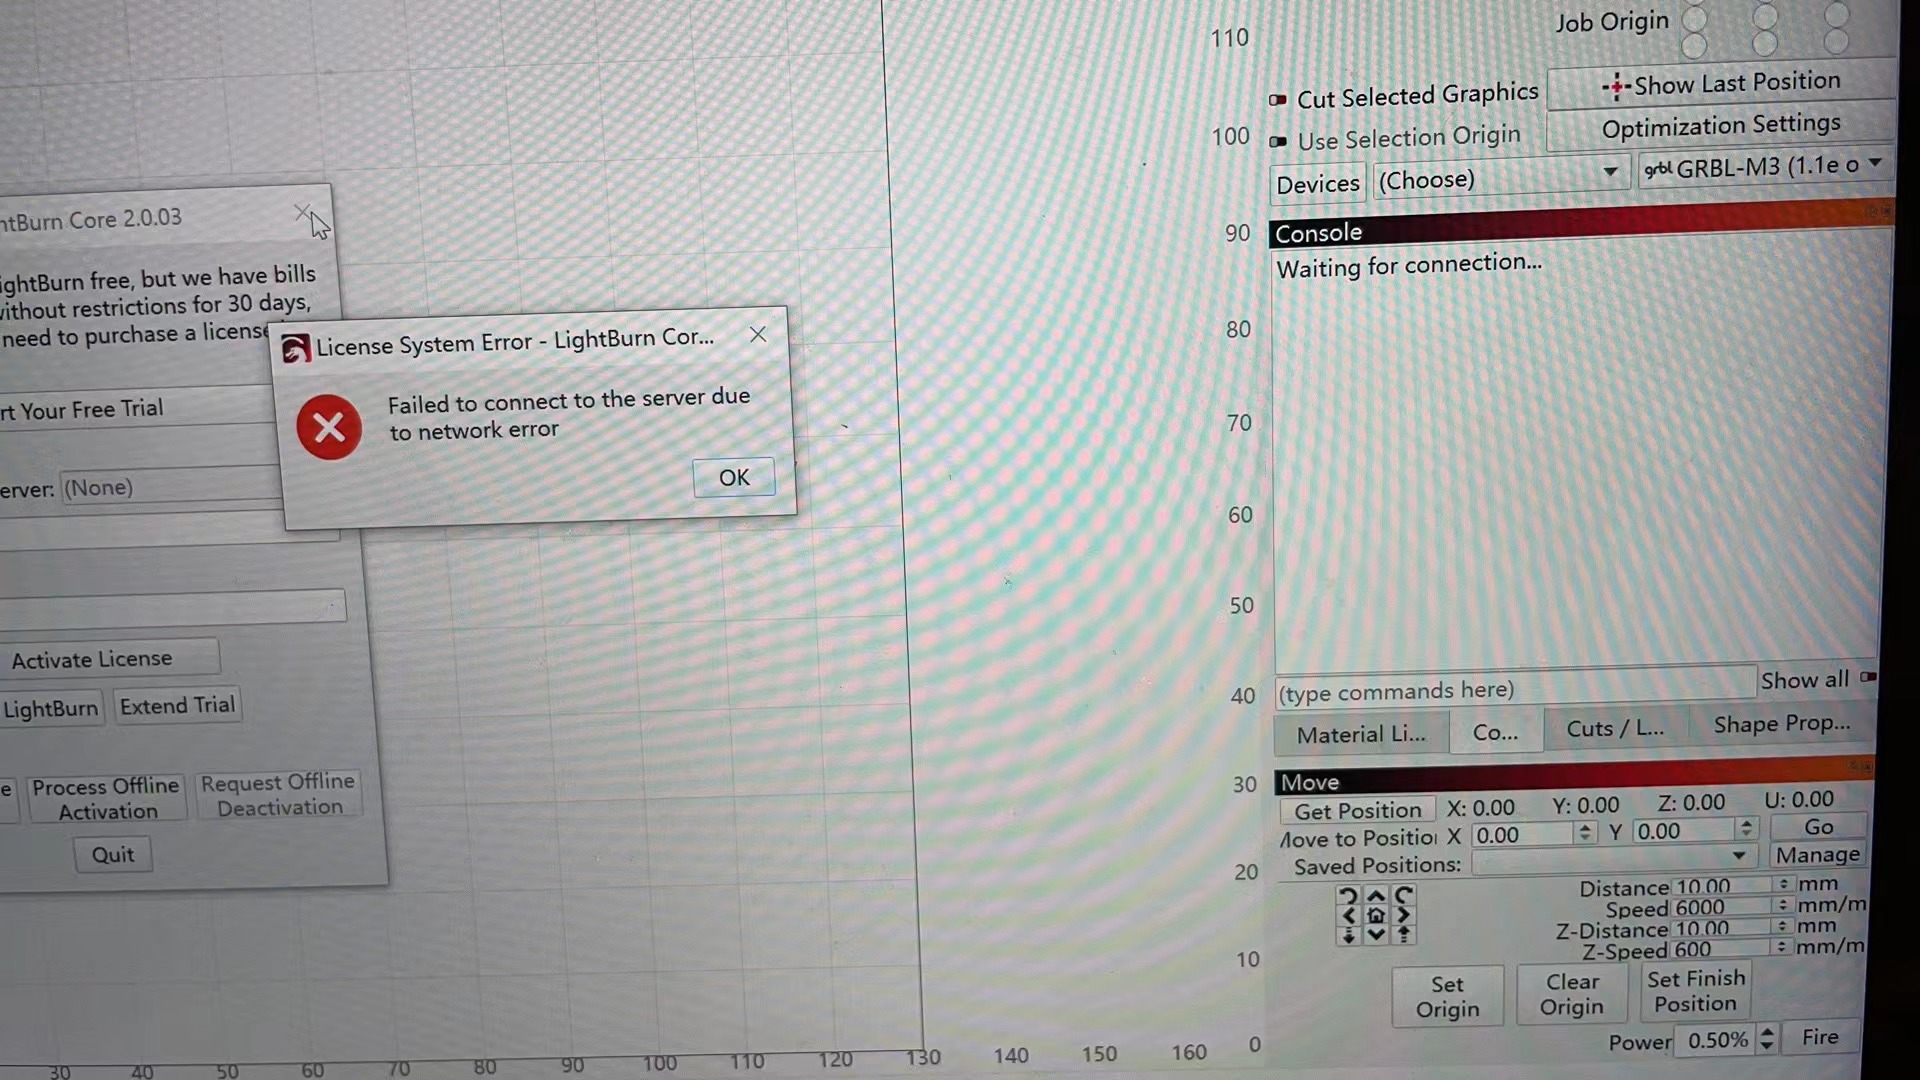
When I first tried to click start, it prompted me like this.
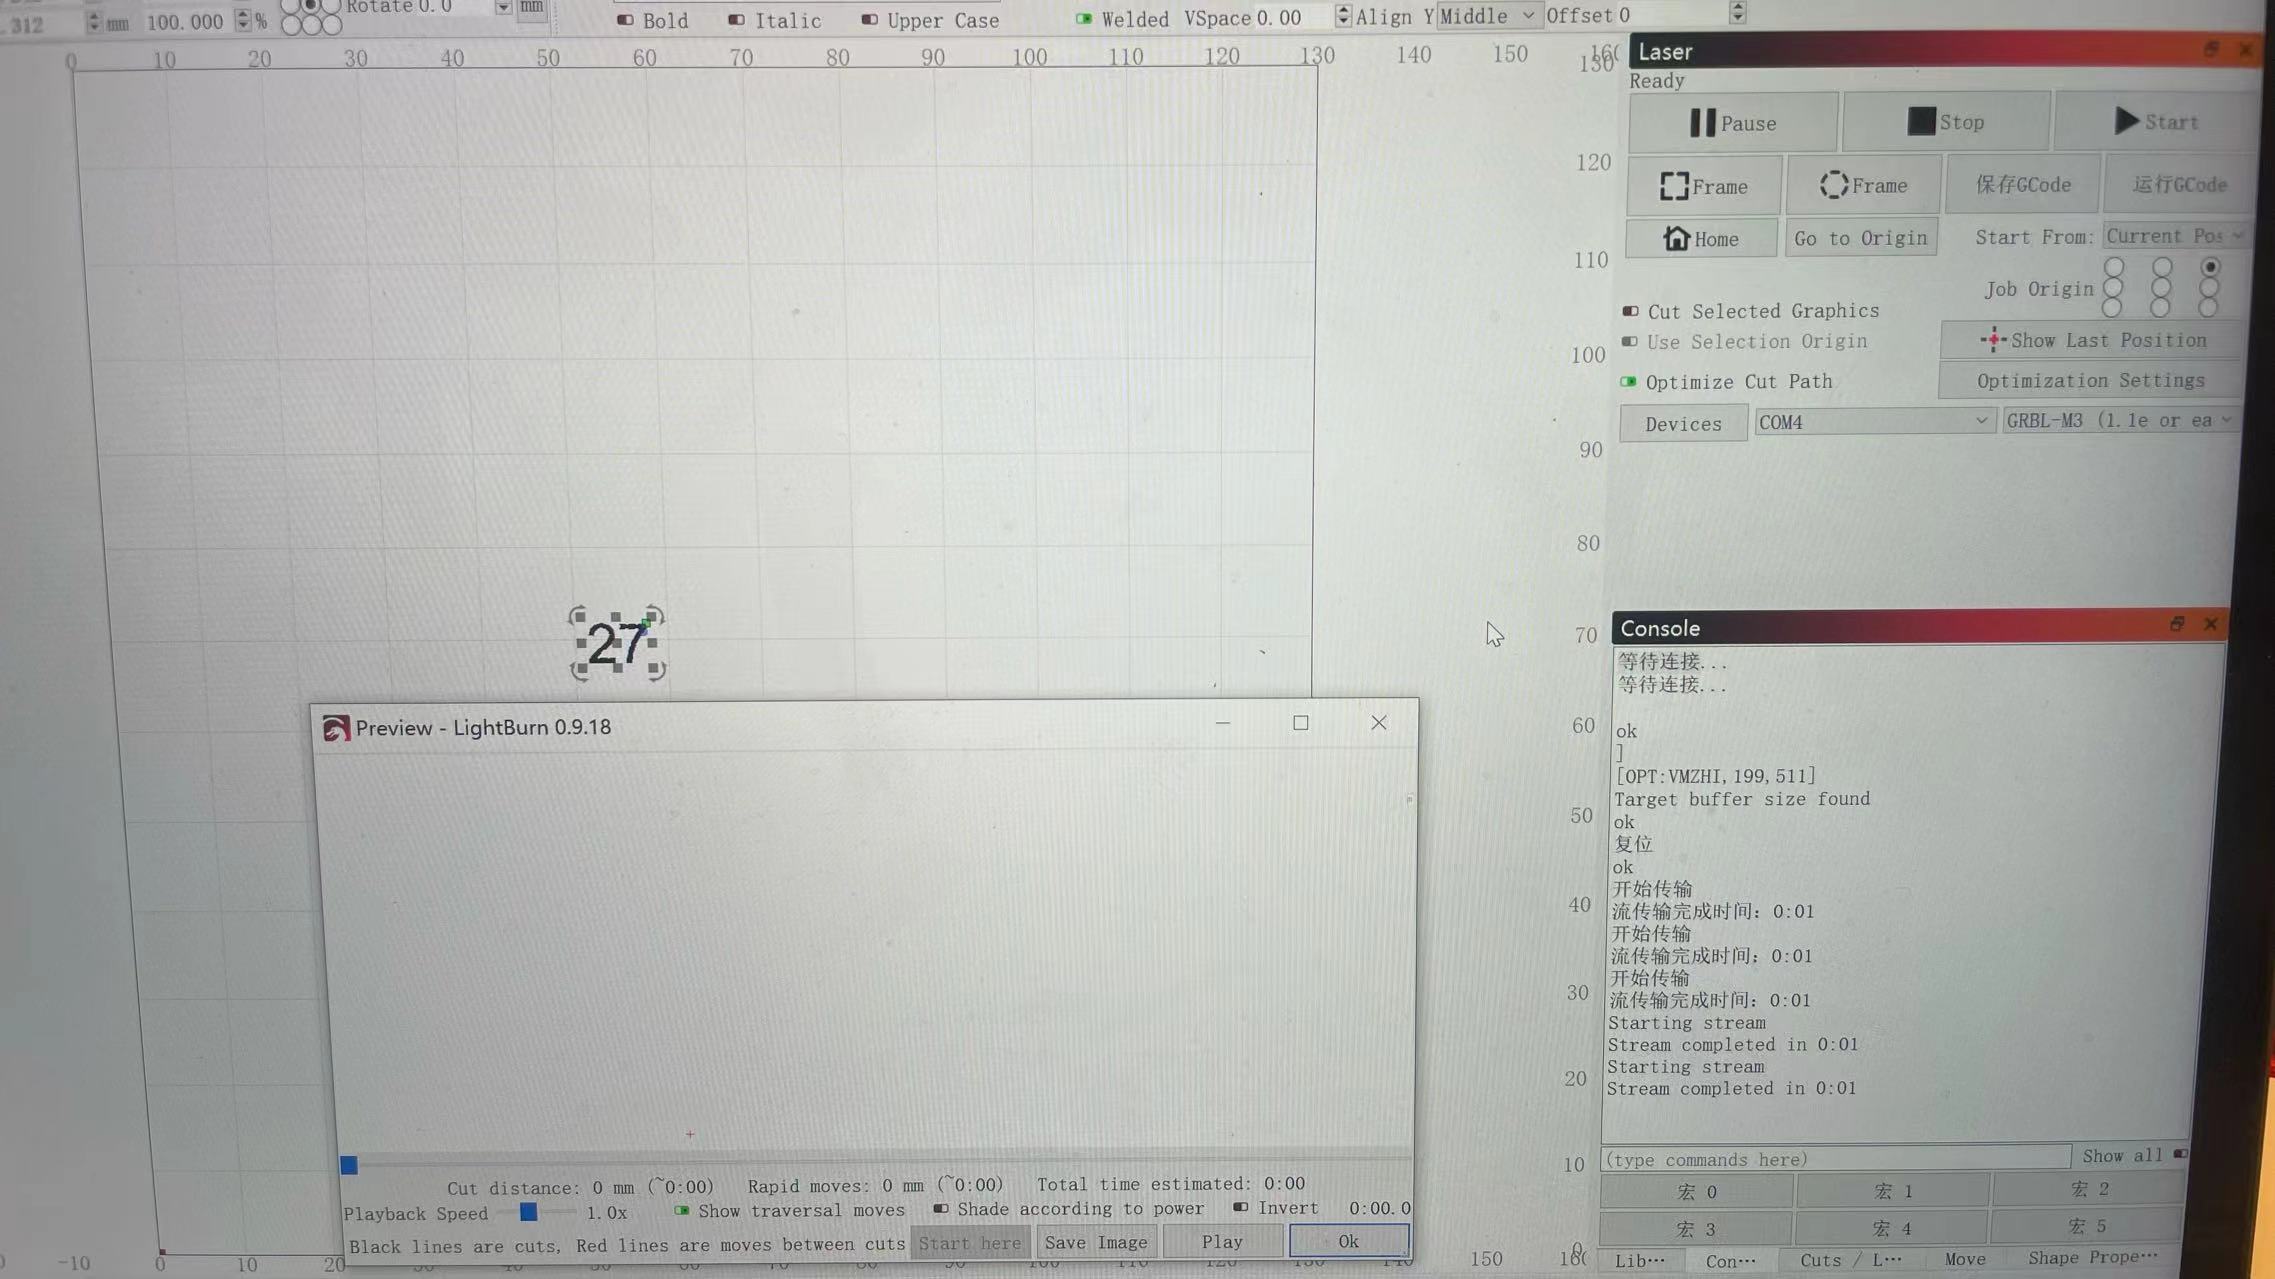
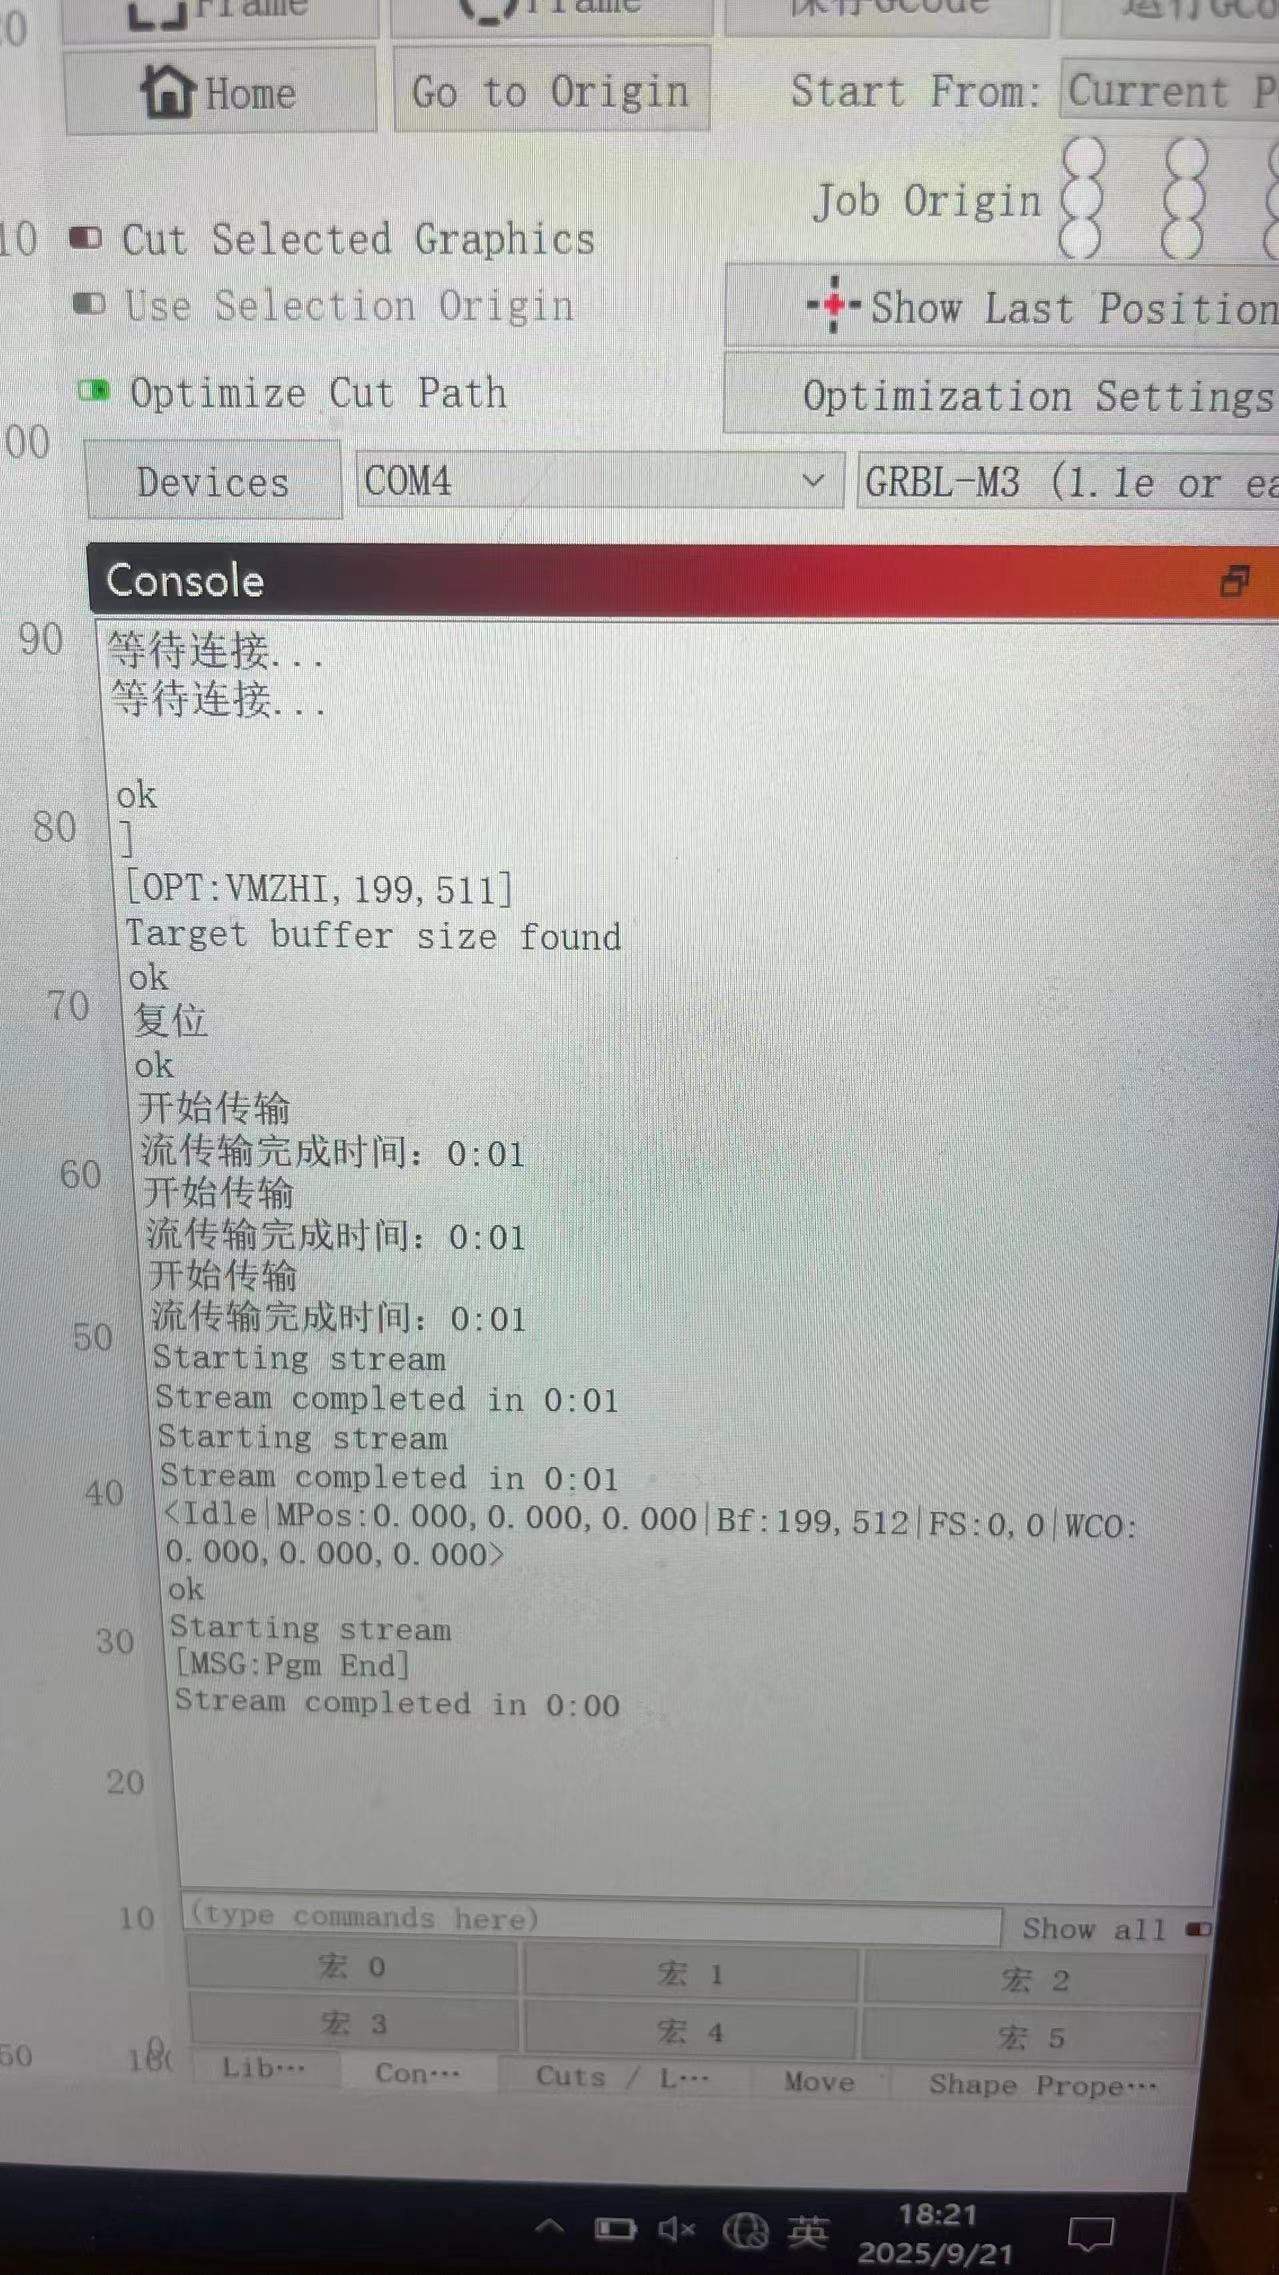
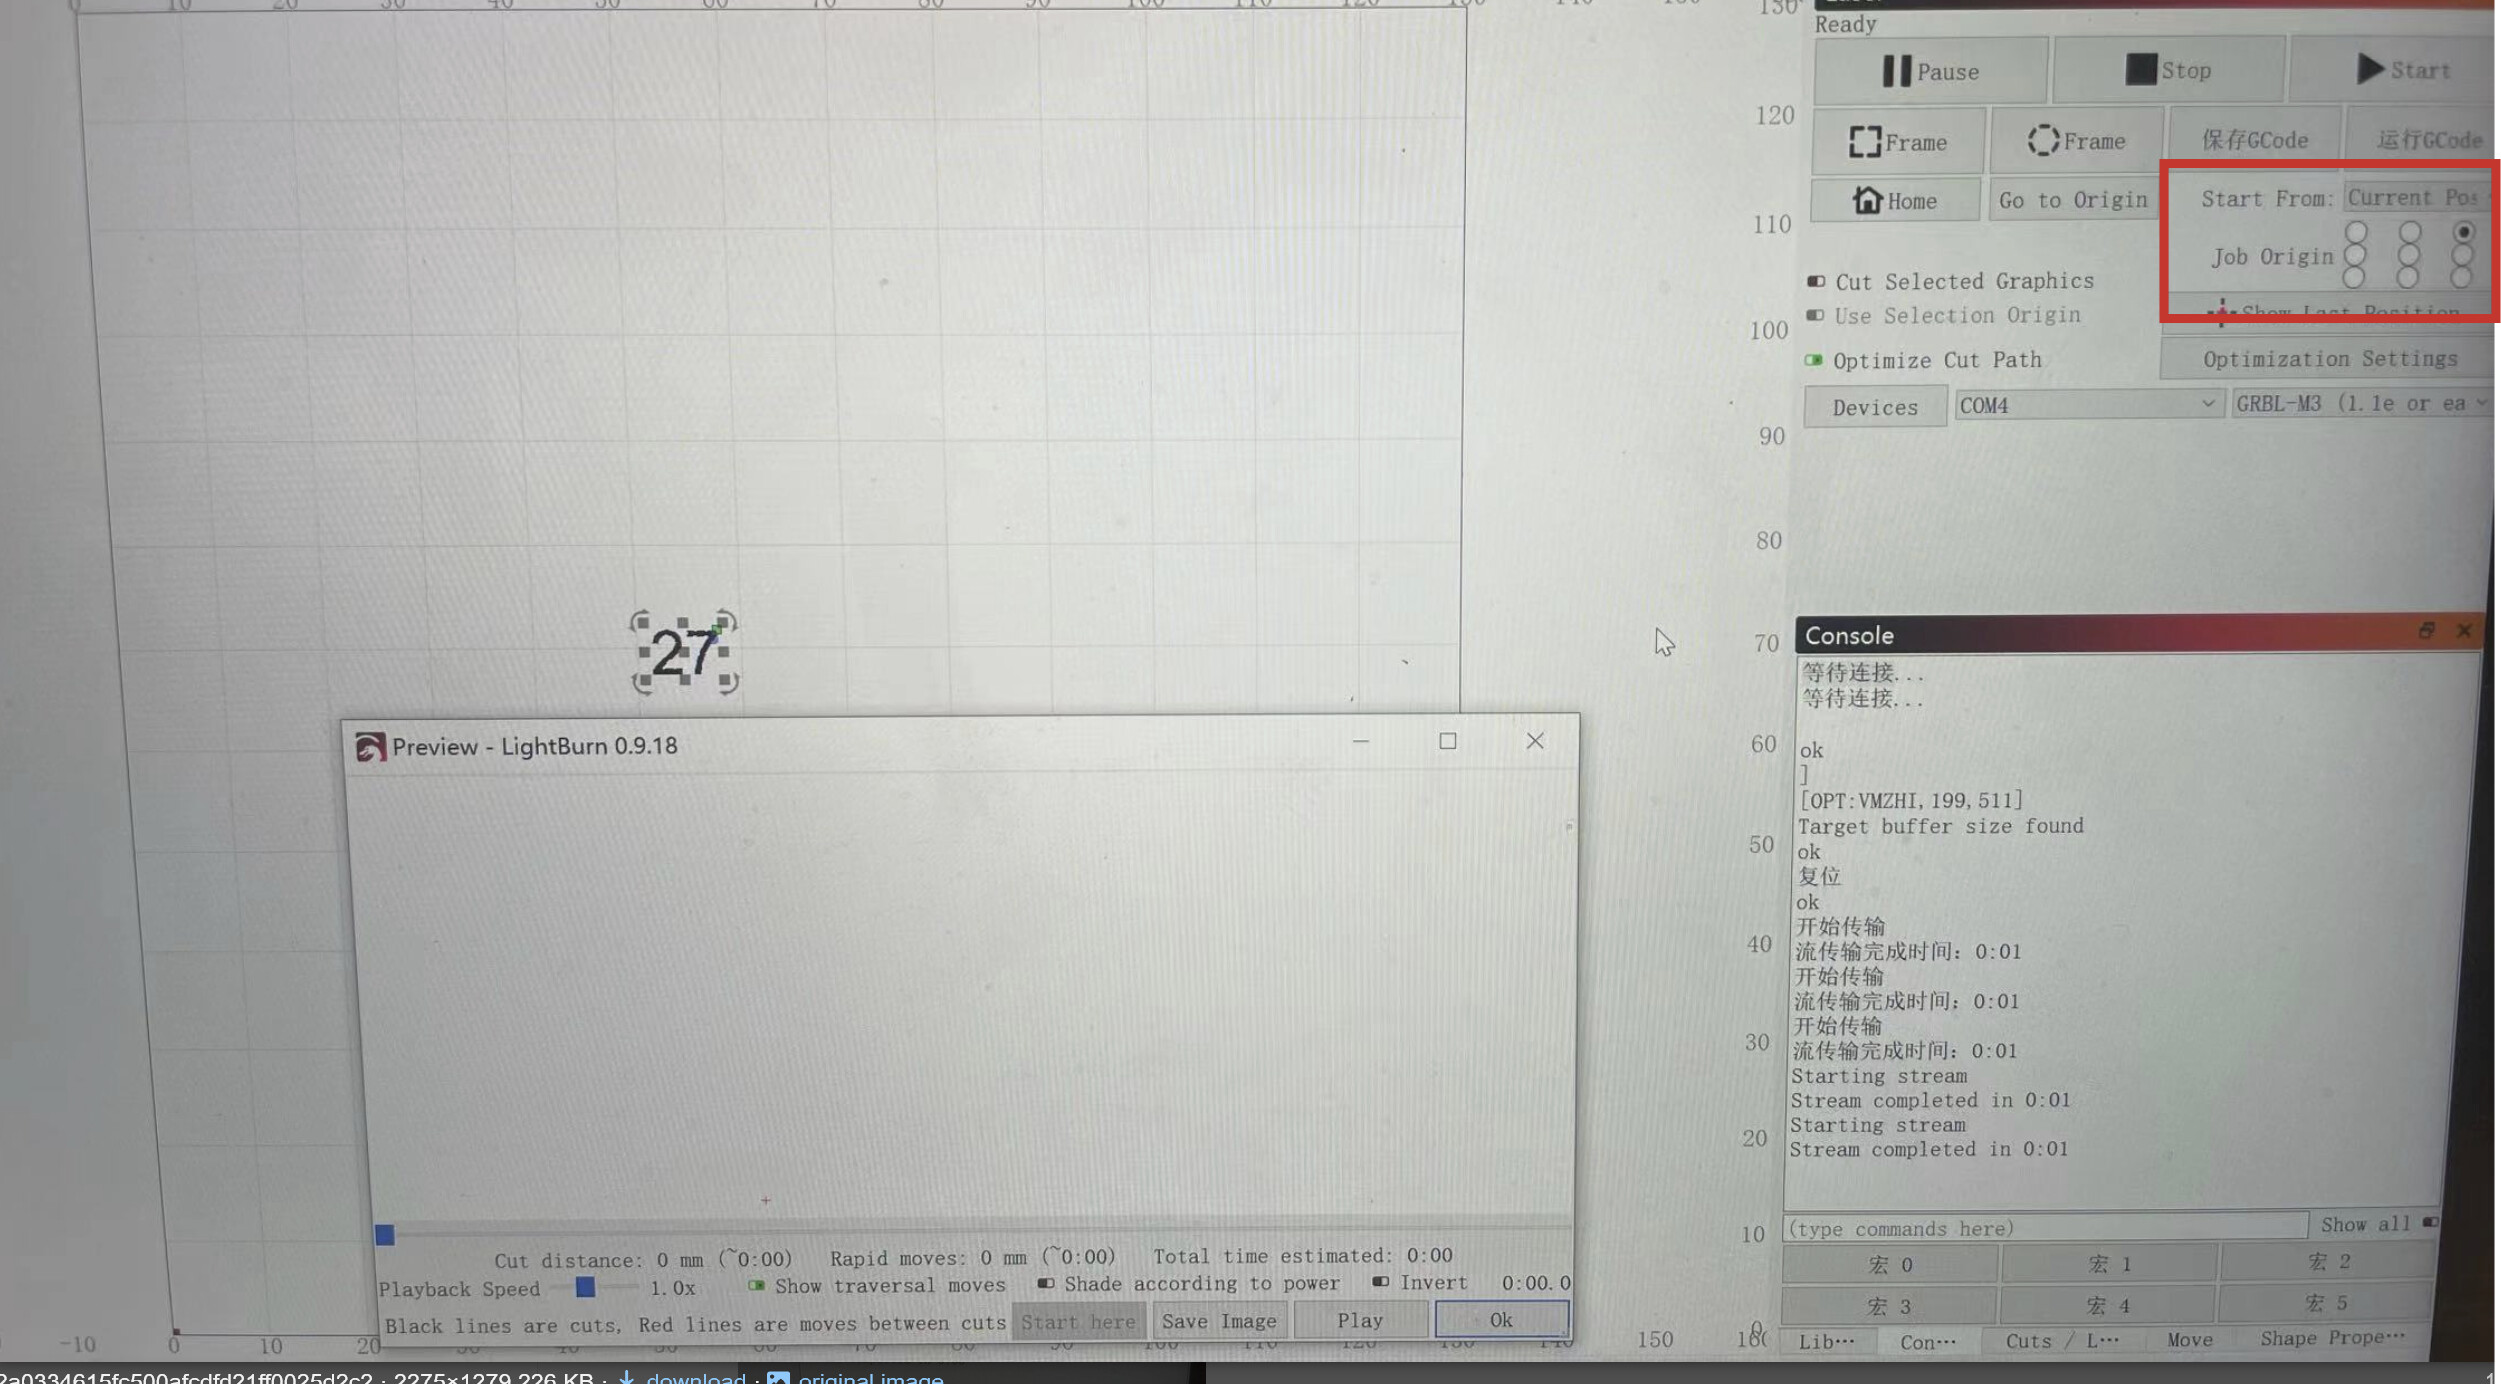
This is my second attempt. The console showed ‘ok’ and at this point the laser can preview the selected area. I think this means the connection was successful, but I cannot be sure because it didn’t pop up another port for me to choose like it usually does. However, the laser can ignite the preview selection, but I just can’t start working.
It should be version 0.9.18. I downloaded the software using Windows 7 without any problems and successfully connected to the machine. The laser can be moved and previewed. However, the laser will not start.
Do you see the artwork in the Preview window in LightBurn?
Are error messages offered in the Console window in LightBurn?
This is all I can think of that might be stopping you.
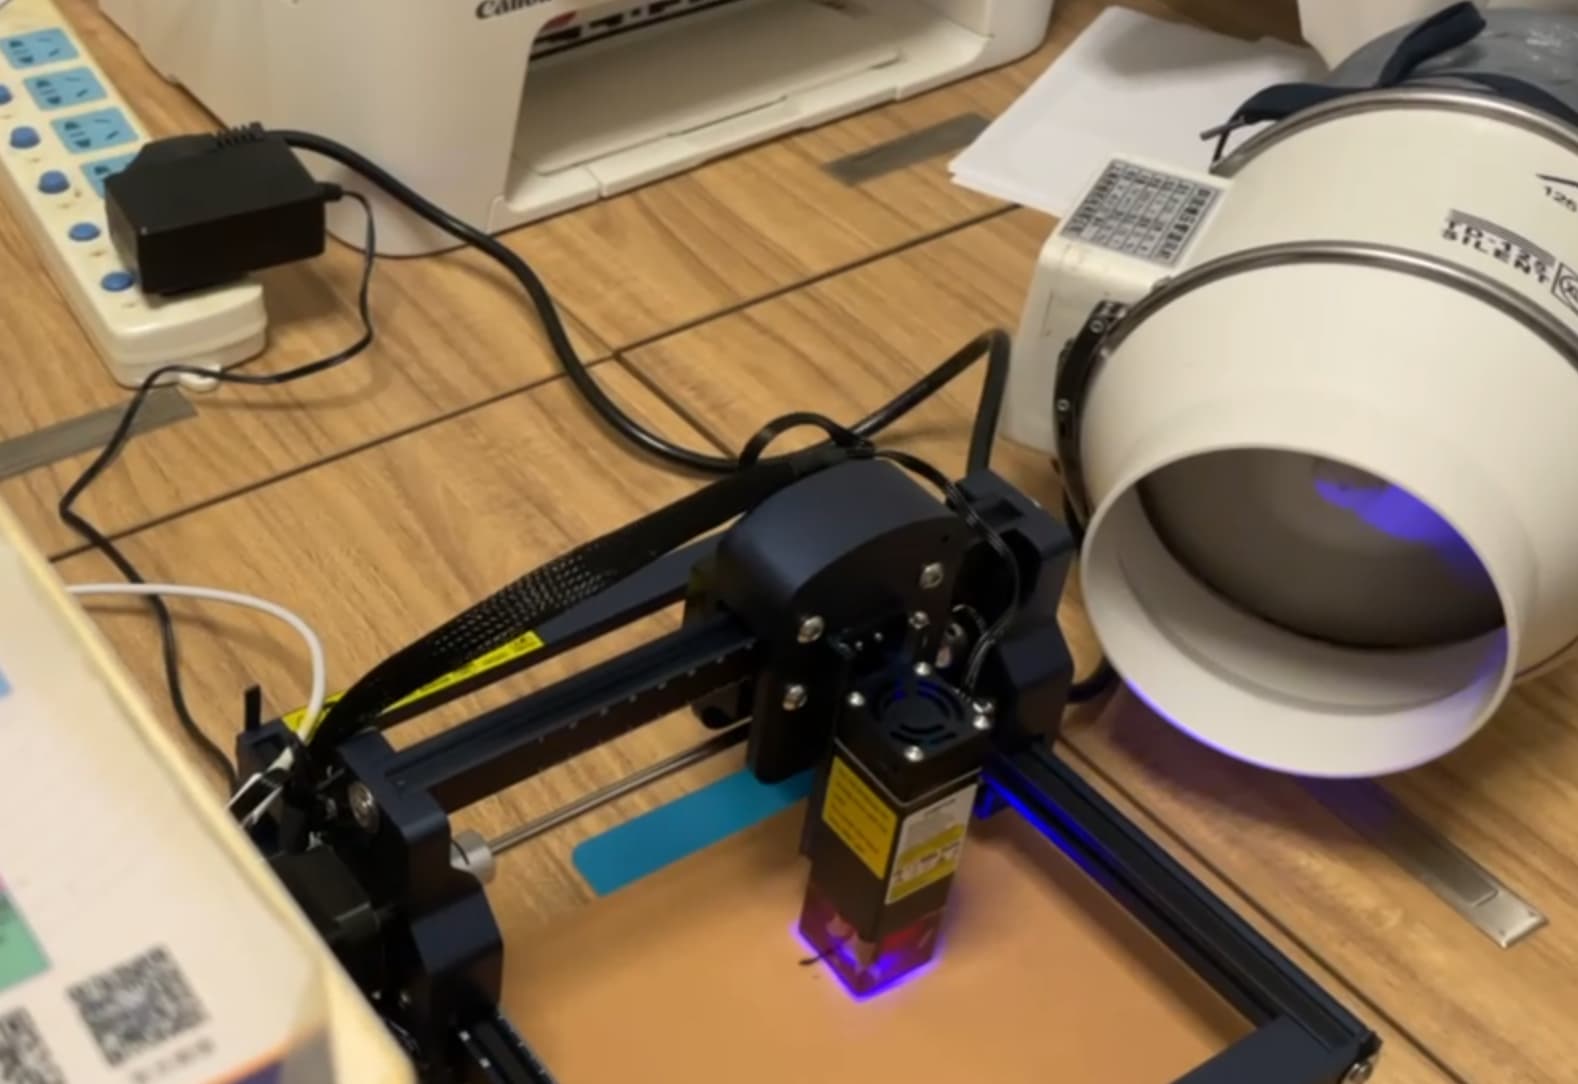
Telll me more about the Dimfun Laser engraver. Is it a large CO2 laser or a Blue diode laser or something else?
When LightBurn connects to the laser, the laser usually sends some identification information that can be seen in the Console window in LightBurn. Please select and copy that text from the Console window and paste it into a reply here.
The preview window works fine, the ignition turns on fine, and the laser lights up. But when I press the start button, nothing happens. I also tried another Windows 10 computer and the same problem occurs.
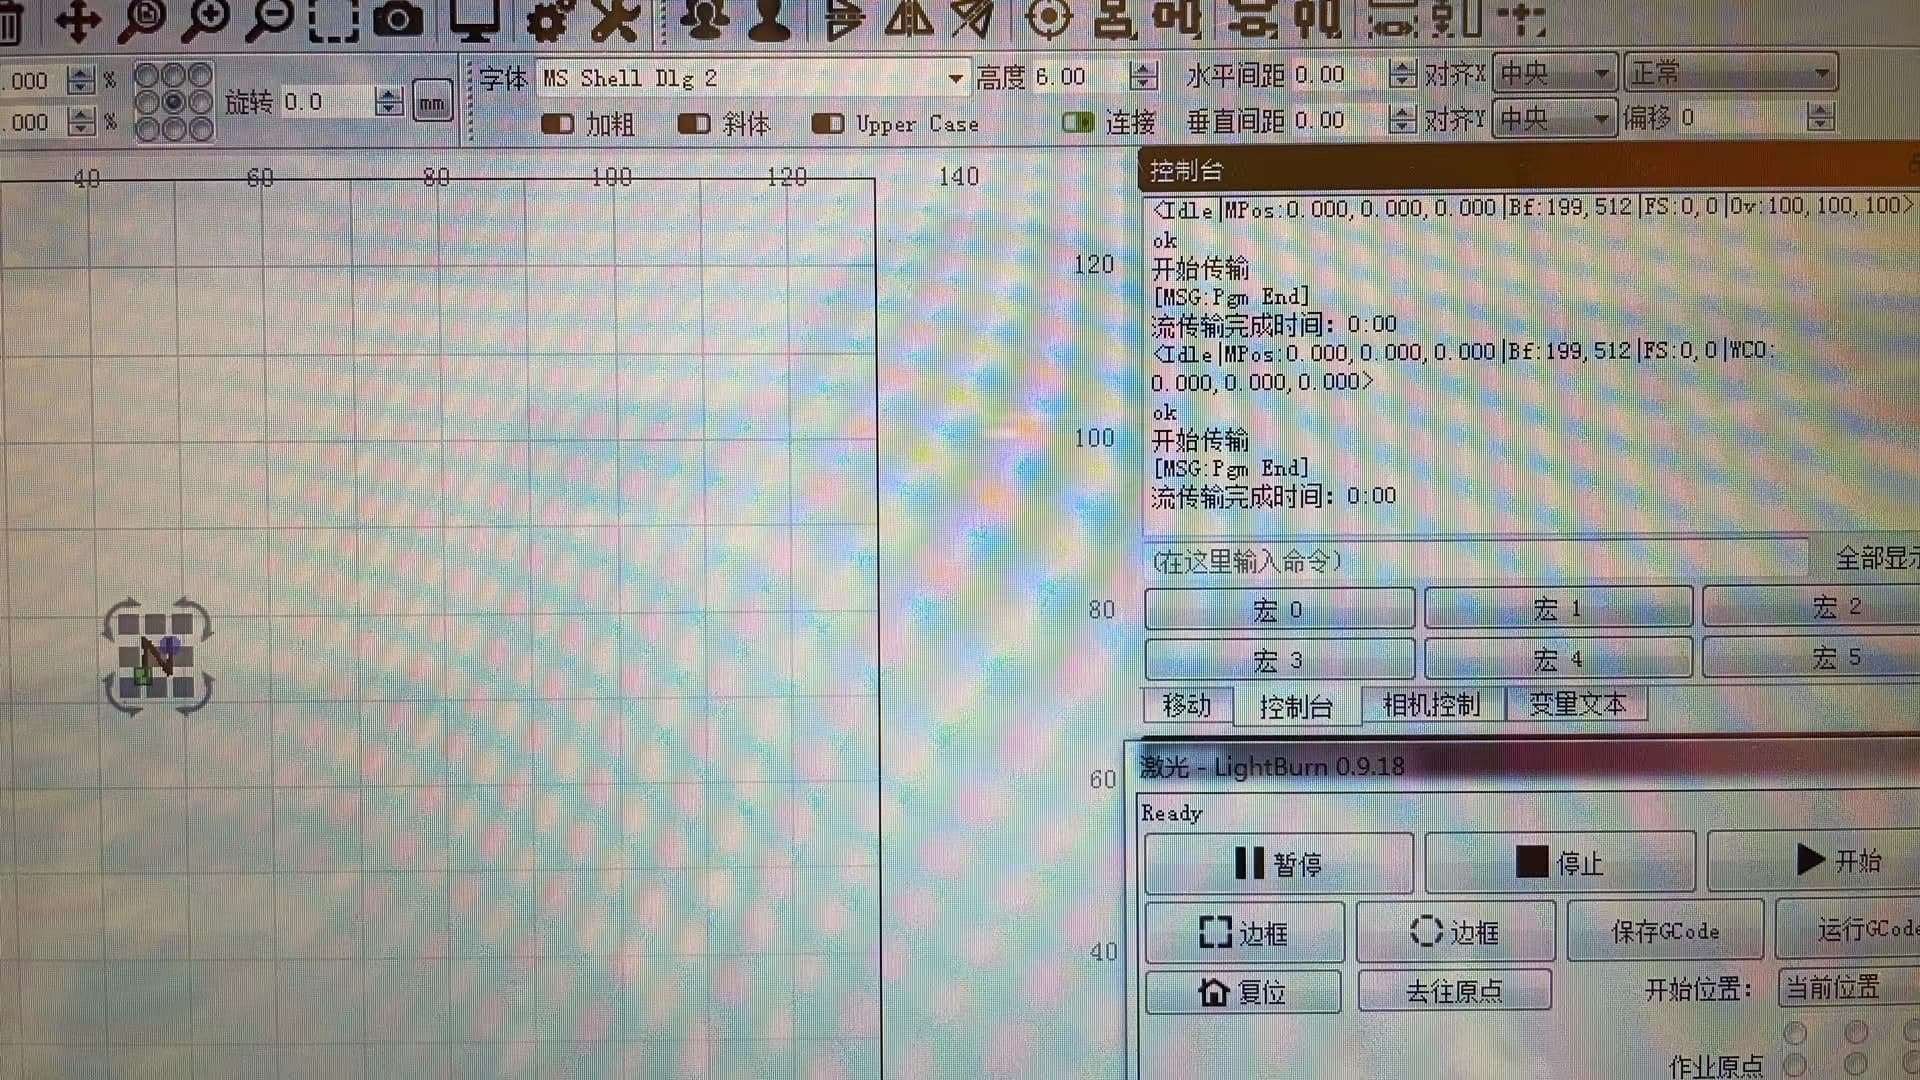
Every time I click “Start”, the laser does not run. After a few seconds, I am worried that the machine may malfunction, so I press the stop button. The two lines in the red circle are what appear after pressing the stop button.
This way, you are telling the laser to start engraving from the “Current Position”, indicated by the red square in the lower left corner of your image, and engrave the design towards the lower left.
Your laser can’t go there!
Please review this page for more info about the different Start From values:
Does your laser have limit switches? If it doesn’t, review this page:
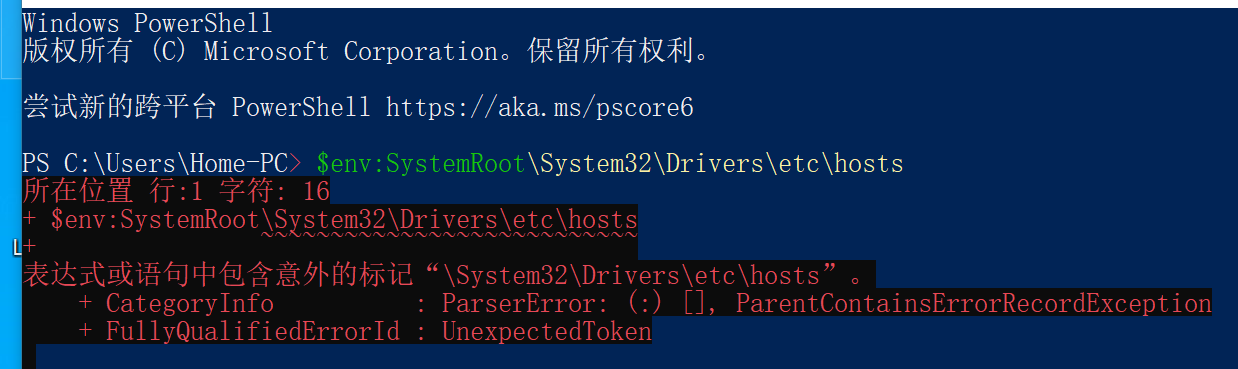
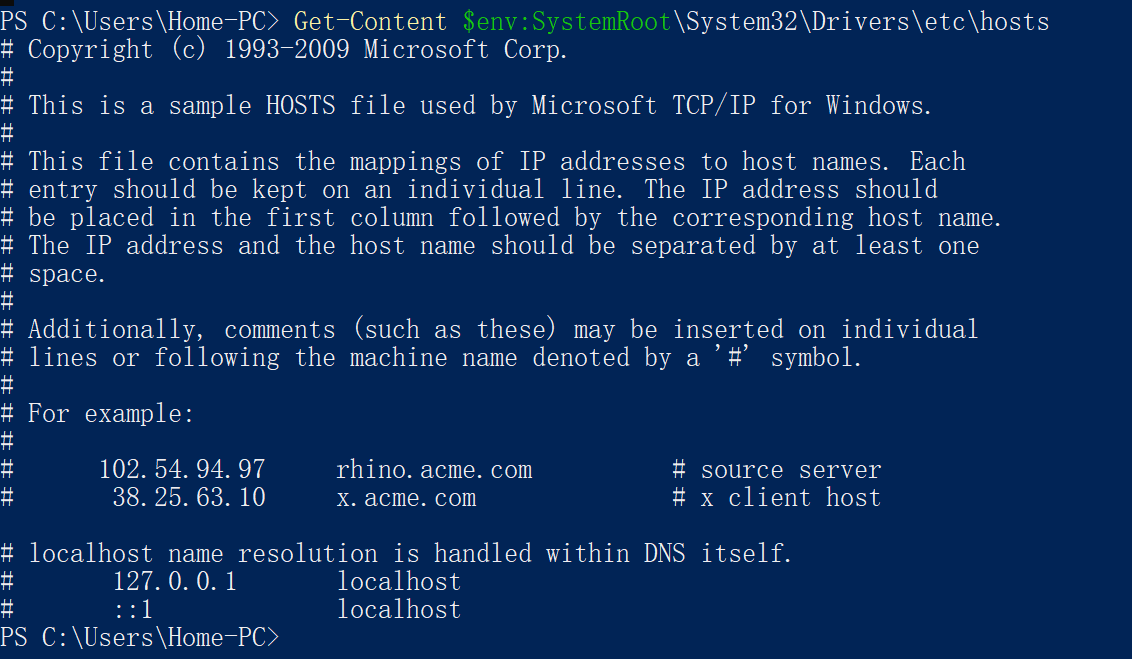
Paste exactly this command in the PowerShell (including Get-Content in the beginning), and press Enter Get-Content $env:SystemRoot\System32\Drivers\etc\hosts
Send us a screenshot of the reply, please. You can use the Windows Snipping tool to take screenshots. (Windows + Shift + S)