Hello,
I use the Eleksmaker Laser Engraver Mega as a drawing machine.
The board is the Eleksmaker Mana SE V3.2.
The pen is raised and lowered by means of a servo motor connected to the servo connector of the board, which actuates a lever. This really works with other software (LaserGRBL, GRBL Plotter), but when I operate it with LB, the lever only shakes very quickly.
It can therefore only be due to a setting in LB, but I can’t find the right one.
Does someone know which setting I have to modify?
How is the lever controlled using LaserGRBL? Z axis commands? Can you explain a bit more what steps you’re taking in LightBurn to control the pen? A comparison of the GCode produced by LaserGRBL versus the GCode produced by LightBurn may also help.
Without knowing more, you might need to adjust your Z axis control settings in your existing device profile, or set up a Custom GCode device profile:
Hi,
Thank You for Your message!
It is controlled by the Laser ON/OFF signal. In LaserGRBL I have concluded from my experience that the nearly best value for the lowered pen is S100 and S400 to raise it.
Attached is the GCode from LB and from GRBL Plotter that works (I created it from a .dxf and LaserGRBL doesn’t seem to be able to do anything with .dxf).
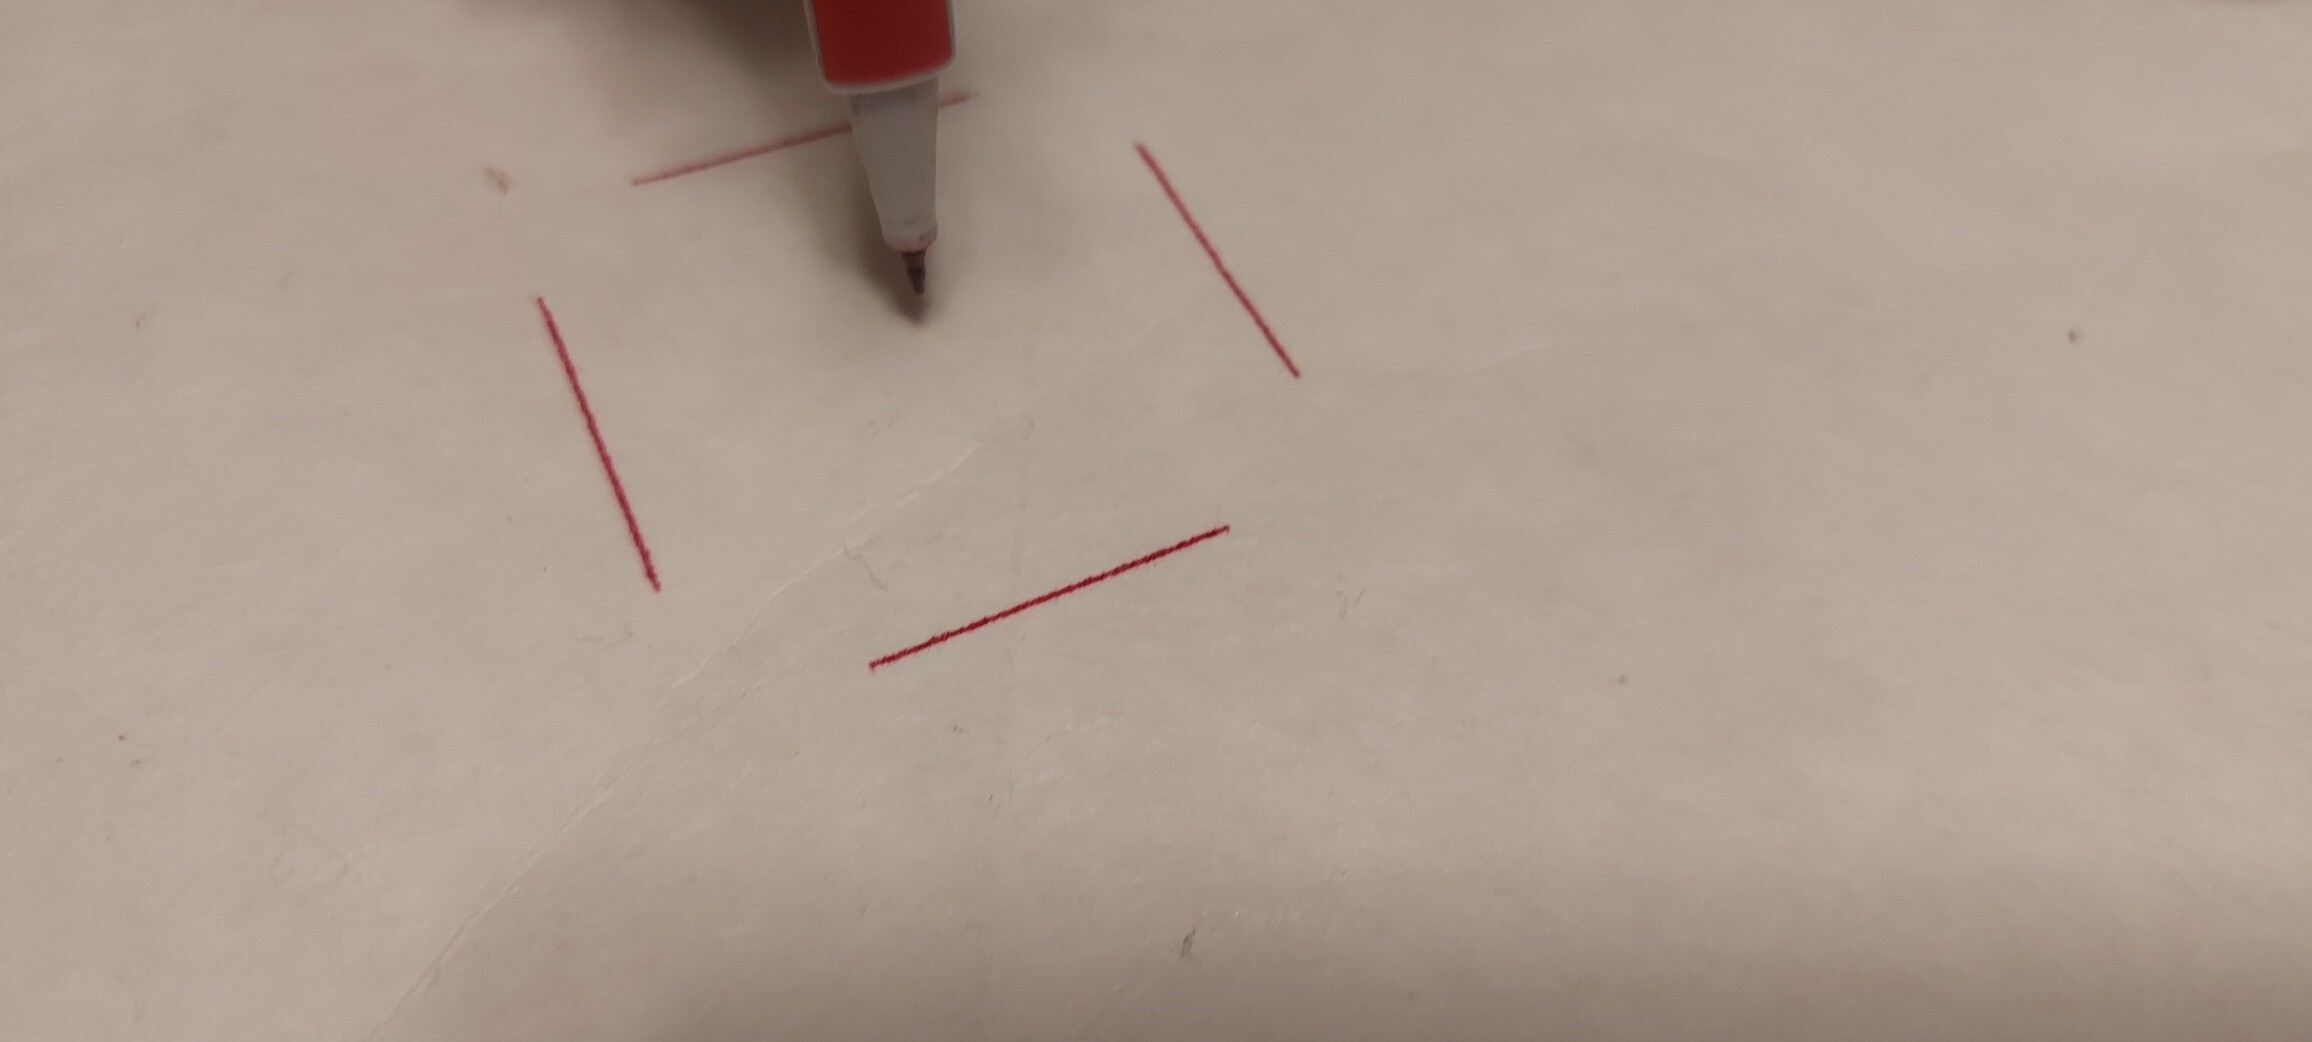
It should draw a square of 50mm.
In the code of GRBL Plotter there are values for the Z-axis, but I think they are superfluous and probably based on a wrong setting. The S values should be adapted to prevent the lever from swinging out too far, what I had done in LaserGRBL.
I also join the .dxf file.
LaserGRBL is sending the M3 command to turn the laser on, while LightBurn uses M4 by default, for device profiles set to GRBL. To have LightBurn use the M3 command, you can either change your device type to GRBL-M3, or enable Constant Power Mode in the Cut Settings Editor.
To change device type:
-Click Devices in the Laser window
-Double click your laser in the list
-Change the selected device from GRBL to GRBL-M3
-click next until you’re done
The pen holder is now raised and lowered, albeit a little too slowly.
I can execute the GCode for the 50*50mm square, and the plotter draws, but the corners are strangely missing.
The distance between the parallel lines is indeed 50mm.
If the height of the pen is controlled by the S value, then this is behaving as if it is still in Variable Power (M4) mode, and reducing power while it turns corners.
Aside from M3 vs M4, the other discrepancies between the GCode samples you shared is that GRBL plotter is sending Z commands and you are running at a lower speed (2000 mm/minute with the GRBL plotter GCode versus 6000 mm/min with the LightBurn GCode).
I recommend experimenting with using Z axis controls in LightBurn, unless you are absolutely certain they are unimportant, and slowing down the job. Reading up on our documentation on Custom GCode may also help.
This is an unorthodox setup that I have no direct familiarity with (and which stretches the intended use of LightBurn), so, unfortunately, I can’t offer much more guidance.