I have a question as regards TIFF files, can I say have 4 files and load these to different layers in LB?
If so how is it done?
/Bengt
You could import each TIF file, and place them on separate layers. Turn 3 layers off, and then trace the layer that is on, and remove the TIF file. Repeat this step for the remaining layers. You might need to realign the layers when finished.
1 Like
Hi RU
Can you be so kind and tell me how to do this. First no problems next no go as I have to save or discard.
/Bengt
There is a “delete image” switch in the Trace Image window.
As you import each image, assign it to a different layer (color). Or not.
You can either use the image, or trace it to turn it into lines.
I recommend you import 2-3 images and play with the layers and settings.
Hi Mikey,
Sorry but I can not get this to work. I dont get what trace is for. I need 3-4 TIFF files in CUT/LAYERS.
/Bengt
Trace converts from image to vectors.
Image = Laser scans back and forth to complete the burn. Like a TV.
Vectors = Laser follows the lines without passing over white areas except to move to a different area.
Image=slow.
Vector=fast.
If it looks like a picture, it is an image.
If it looks like a pencil sketch, it is a vector.
Spend some time searching the Lightburn docs and viewing online videos.
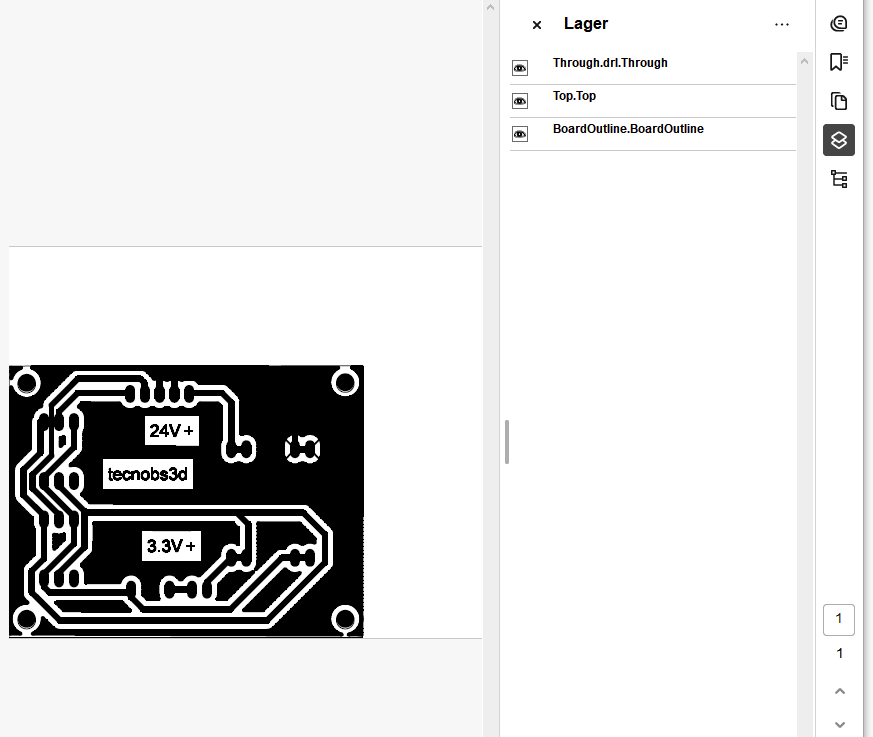
20250106.pdf.txt (46.4 KB)
Take a look at this PDF (erase .txt) on right side you have layers.
What I want/need is to get 3 TIFF files loaded ino CUT/LAYERS
Been searching the web and found nothing on how to do this.
/Bengt

Hi FerAS,
I have no problems with Image or Vector, my wish is to have all 3 images *** in CUTS/LAYERS for easier stacking/verifying position.
So lets say I import TIFF and trace it and save as *.ibrn2, how do I import these to CUTS/LAYERS so I get as many vectors I need?
/Bengt
*** files in PDF
Is this what you’re wanting to do? You select the vector/image/item you want to assign to a layer and click the color layer you want to assign it to on the botton of the screen.
I am sorry, I only see one image in your PDF. @parsec did exactly what you said, he put the image on 3 different layers (turn off C01, Co2, C05).
Maybe we are not understanding what you want. Are you asking for something like resist, copper etch, and mask layers? Those are the things you normally do with a PCB.
1 Like

I don´t use Acrobat, but will install and check
However to separate in LightBurn you have to Ungroup the traced image.
Installing…
Did not default to the Layers mode, see it now.
Unfortunately, Lightburn does not import layers from a PDF. Best I can tell, it flattens everything out, then imports Yes I know, it imports and stacks them.
You have to export each Acrobat layer separated then set a Cut/Layer for each.
Let me explore Acrobat Reader to check if the free version allow this.
1 Like
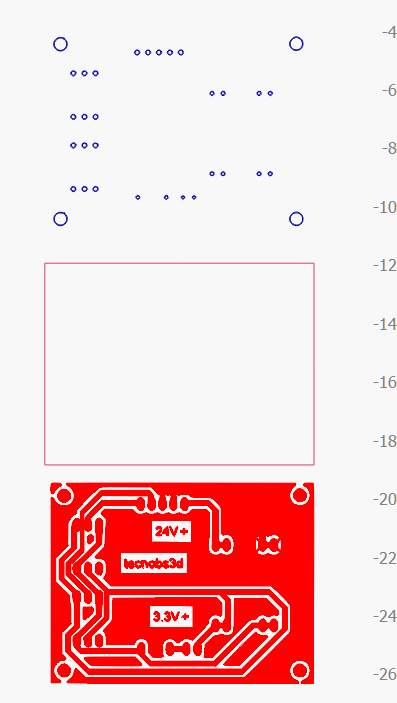
Separate layers from PCB.
Those are the 3 files as an example, these are TIFF and I want all 3 to be in Cuts/Layer either as images or vektors
I believe this is what you’re looking for. The problem I see is Acrobat doesn’t save the layer information when you convert it, or Lightburn can’t read it. Either way, I had to export each layer individually and imported to Lightburn. The next issue is, tiff is an image format, not a vector. Lightburn only supports dithered images and therefore cannot be used to cut.
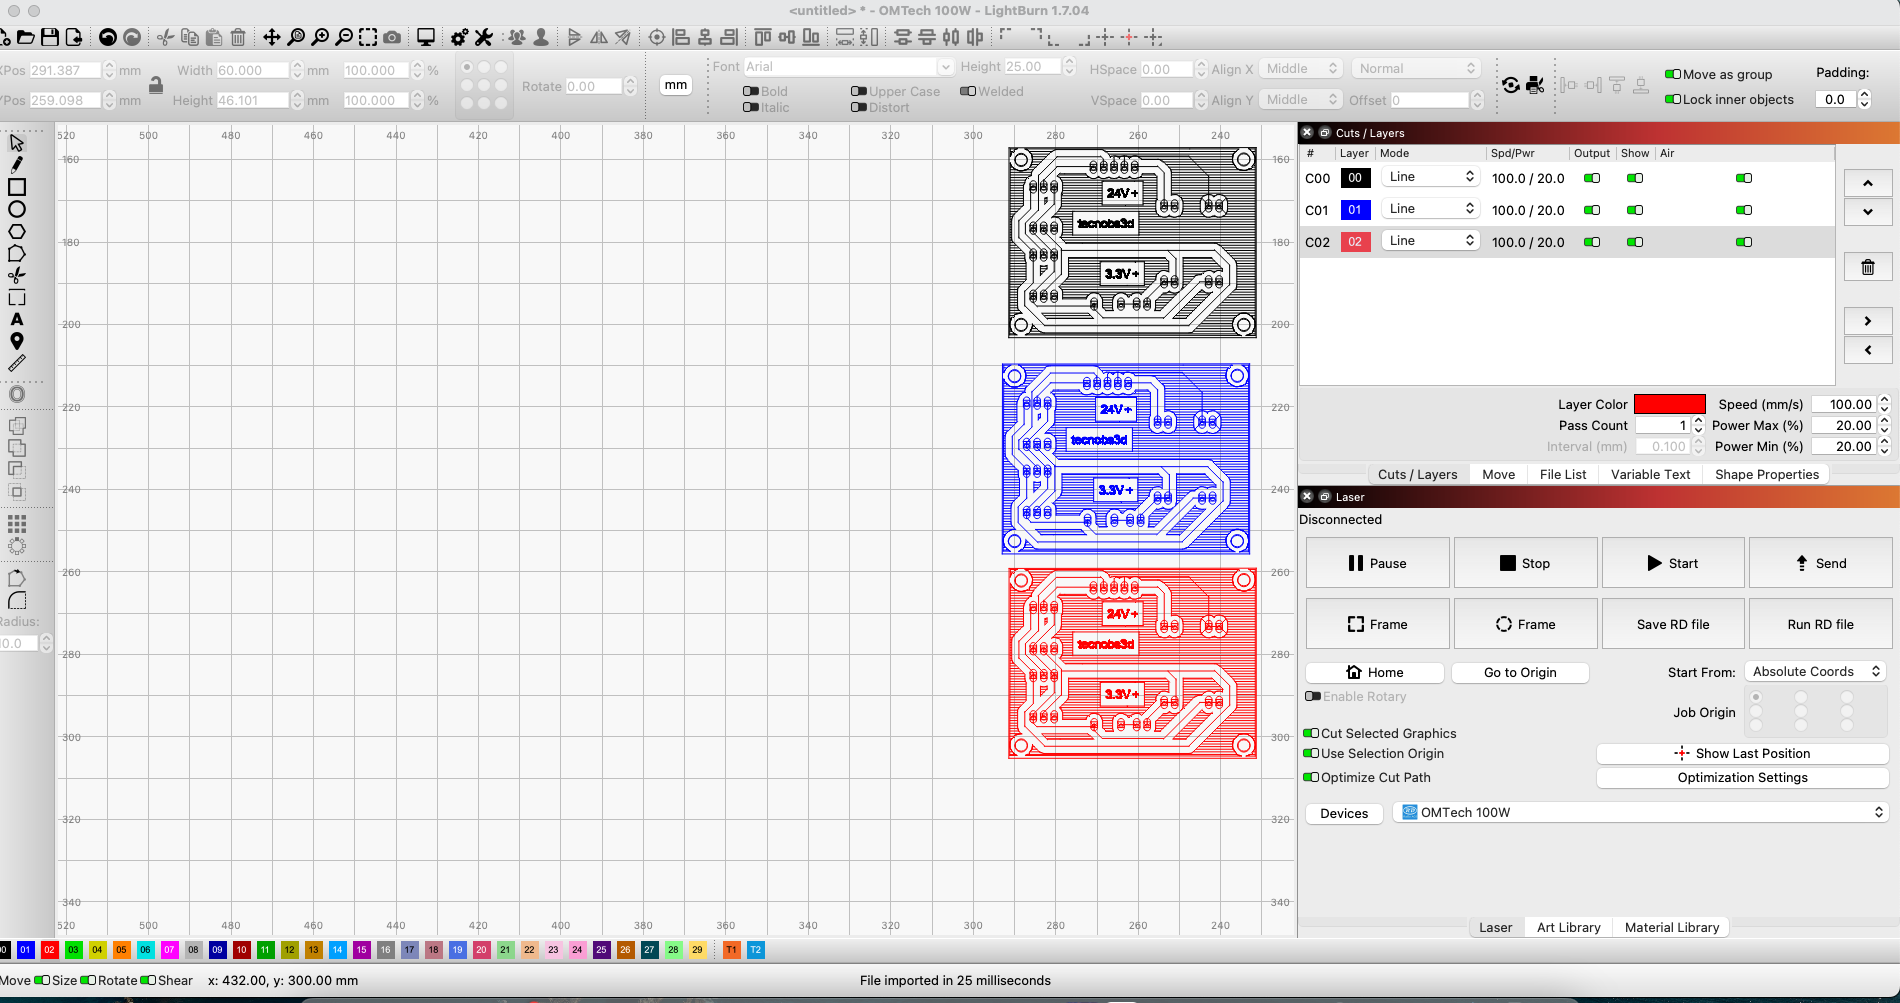
Here is how the 3 files imported and I assigned each layer to it’s own color.

This is the preview image with the 3 layers stacked and on different layers.

This is the 3 layers after doing an image trace to vectorize them. The quality is severely lacking.

The best method in my opinion would be to save the PCB as either SVG or DXFand use one of those formats to import to Lightburn.
You are making this complicated.
- Drag the first TIFF image into the Lightburn workspace. Click on the C00 layer at the bottom.
- Drag the second image in and click on the C01 layer.
- Drag in the third image and click on the C02 layer.
Black, blue, red, done.
By the way, you will spot your mistakes in the originals when you try to align them.