Looking for some tips on engraving a photo! (Aren’t we all…?!!)
Running a 100W CO2 machine so I know I’m already somewhat at a disadvantage there, but seeing how good I can get it anyways.
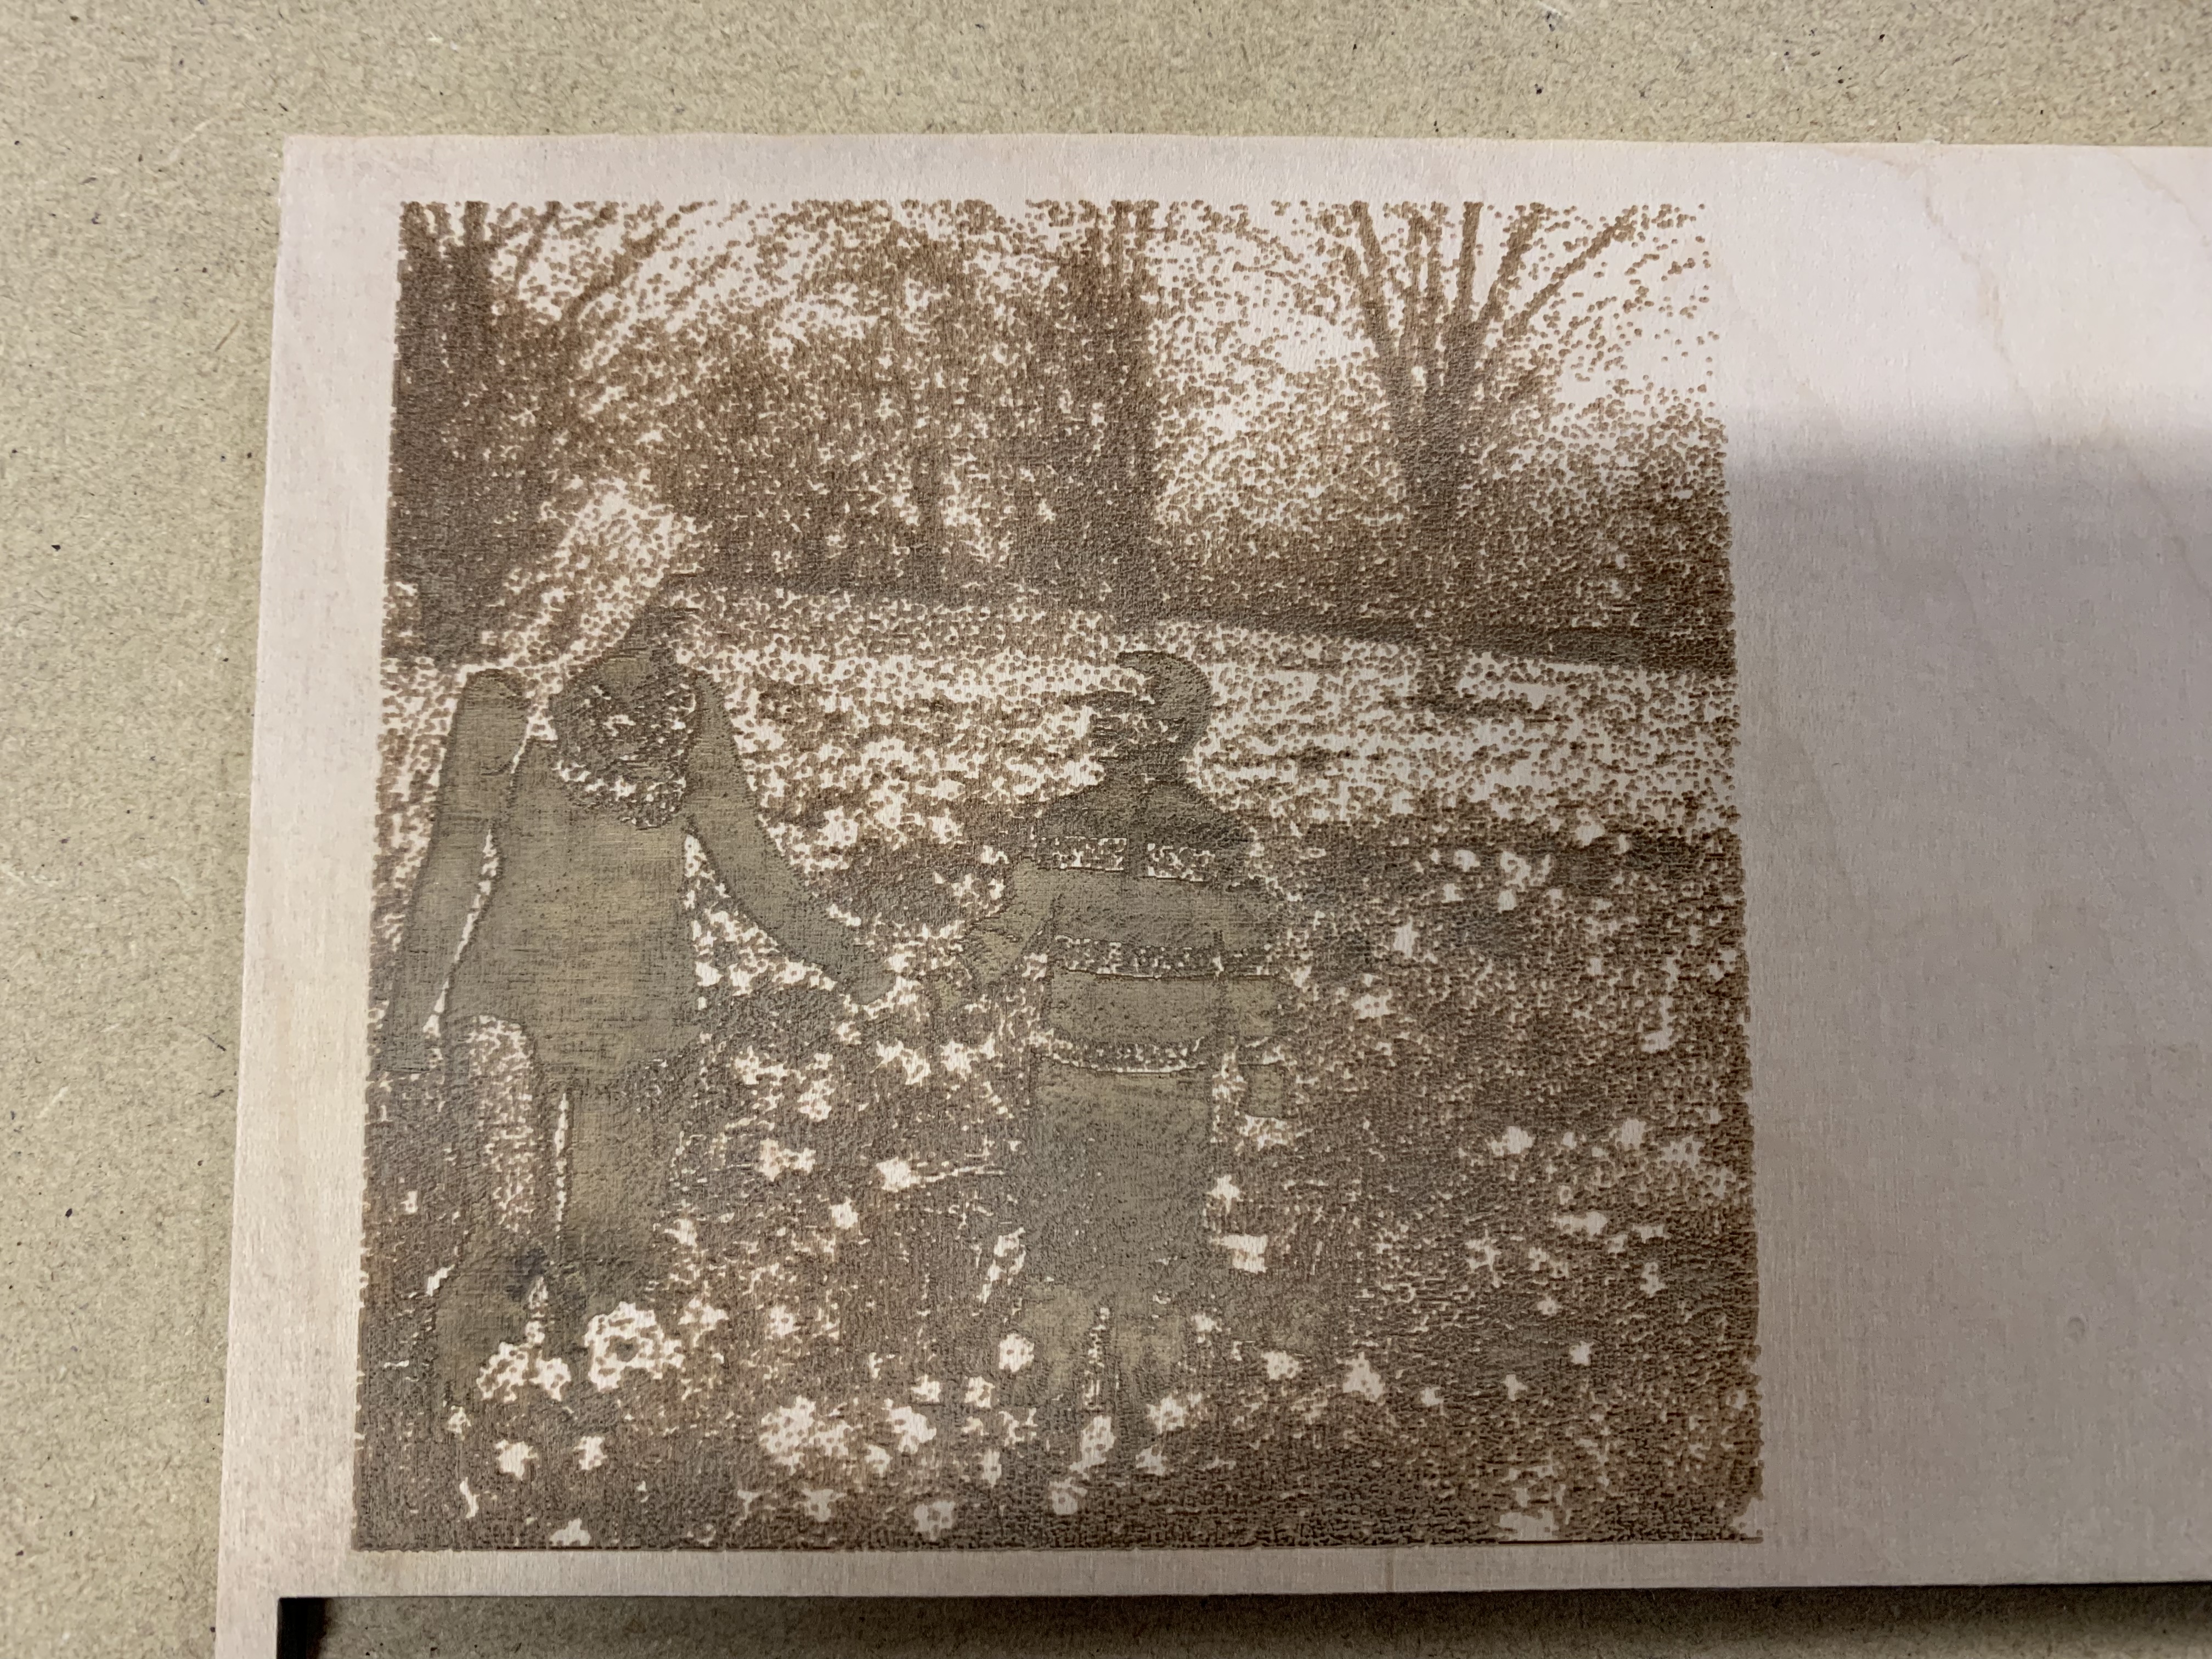
My settings for this 4” x 4” piece were 200dps, dither, 300mm/s, min/max of 15%/25% and it was done on Baltic birch ply as a test, I know that’s also not ideal material…
Drop your dpi to 125 to 150, and do the same with your speed. Adjust power as necessary until you get a good result, then pick one parameter and start increasing until the results suffer.
A 100w tube won’t have a fine dot, and CO2 power supply / tube combos generally can’t fire much faster than 1ms. At your settings, you’d need it to fire in about 0.4ms, so you’re likely missing some small dots, and burning the larger ones too close together.
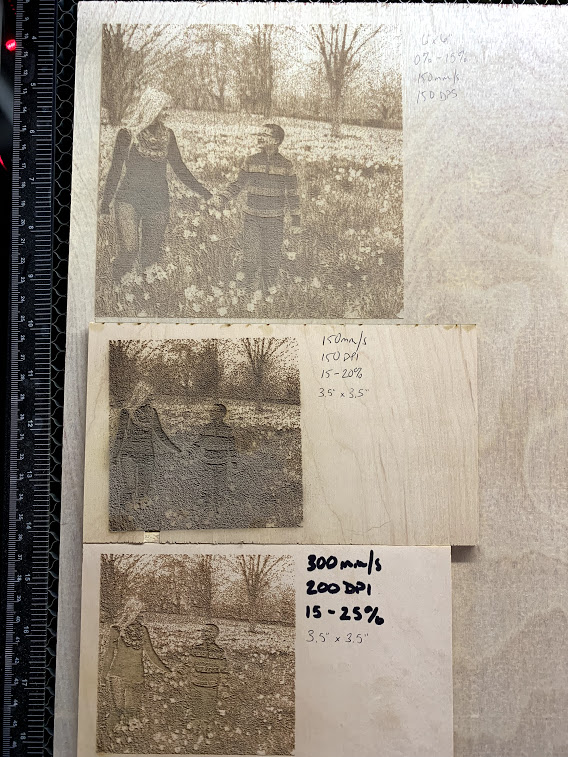
Alright so I ran a few more tests and things are starting to look better!
The bottom two were the first runs and I didn’t really care for how they came out. The biggest problem I think I am having is probably the size overall. It’s trying to fit a pretty details picture into such small dimensions and therefor it seems to be burning way more (@LightBurn Oz Please correct me if I’m wrong.) To be fair, the bottom one I sanded to see if it would clear up some, but the middle and top I did not.
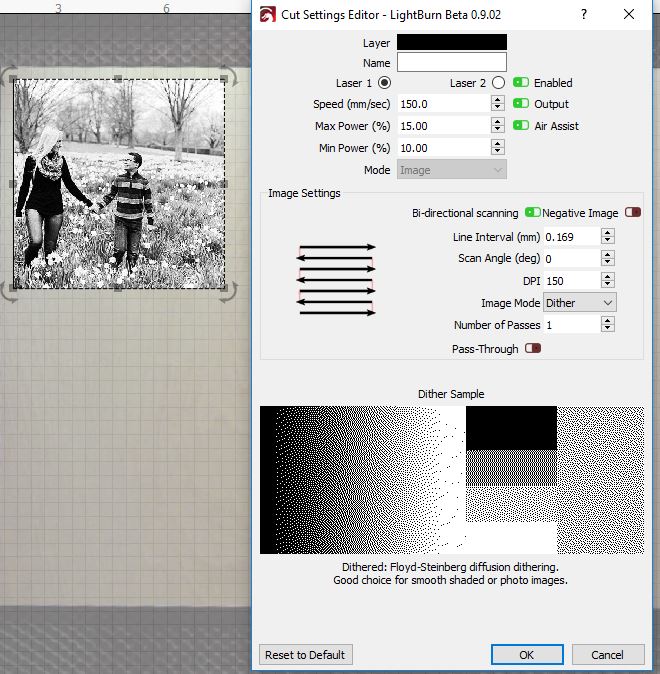
I also tweaked the power and speed which seems to have helped. So far the Top one came out the best which has the following specs:
The biggest difference between the top and middle one was you lowered the power by 5%. The Min Power value doesn’t really do anything when engraving, unless you’re using grayscale.
For reference, I photo engrave @ 190dps, 100mm/s, 18%. 100w co2 as well. The biggest thing is getting your focal distance nailed down. Make sure you do a dot test to be sure.
I watched a video from SarbarMultimedia on YouTube, and then made my own file to run.
The idea is to run it at various distances until you find the crispest looking set of dots. You’ll probably need a magnifying glass. I also ran this on a piece of white card stock.
I think this is the video:
And here’s the test file I created. dot_test.lbrn (2.4 KB)