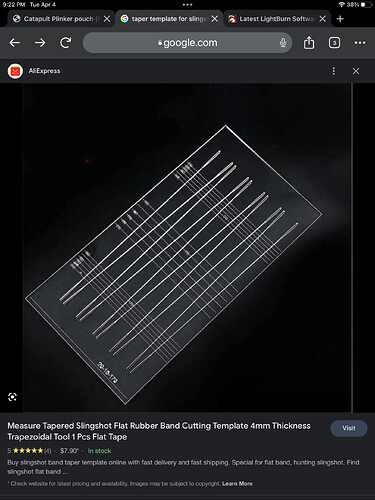
Hey all! I’m new to the forum, and new to LightBurn. I’m a hobbyist laser guy, and I purchased the laser specifically for supporting my other hobby. I make and shoot slingshots, and I’m very good at it. Within the slingshot world, there are things called taper templates. I would like to try and make my own to save spending $ on them. (A piece of acrylic is $5. These run $20+).
I’ve been told I can design these within LightBurn itself, but I have no idea how. I have no design background or anything, other than playing with paint in windows 95 as a kid. Attached is an example of what I’m trying to design & create. I have a Monport 40w CO2 laser and am running LightBurn on my HP laptop so cutting clear acrylic won’t be an issue.
I’d suggest breaking down the objective into three subtasks:
- knowledge of what’s required for the template. I assume you know this or can figure out the nuances and dimensions required of the taper template. You will need to know all the specifics of the design including size and relative location required for each design component.
- understanding how your laser functions and ideal settings to allow for engraving and cutting of your material of choice. I’d suggest getting some sacrificial material of the same type that you plan to use. Then use the Material Test function in LightBurn or another source to identify ideal settings for engraving and cutting which you will use for making the marks and cutting the material respectively.
- learning the mechanics of actually doing the design work. The good news is that the template itself looks relatively simple in terms of design elements. LightBurn should cover this fairly readily. I’d suggest watching some introductory videos to get a feeling for the application and doing some reading in LightBurn documentation for specific tools.
Here’s a good first video:
Getting Started With LightBurn: Set up & First Project - YouTube
Here’s a link in the documentation to understand some of the creation tools in LightBurn:
Creation Tools - LightBurn Software Documentation
The rest of the documentation is also quite good. I’d suggest with starting with the video so that you have a frame of reference. Then use the documentation to get details on specific aspects of the application.
I’ve watched several videos, and my issue with the instructional videos is the aspect ratio is off so I cant see what controls they’re using to do what they’re doing. I’ve played around with LB and figured out some things, but still dont know how to do what i need to well enough to do a test cut, yet. One huge help would be learning how to do the measurements in mm instead of cm. These templates are metric, and some of the tapers used are odd sizes.
I have it just the other way around, everything in imperial especially with many digits after 0 and a comma…
I don’t want to say that one is more true than the other, it’s primarily a matter in your head, an old habit…
You “must” concentrate on the millimeters, centimeters are for carpenters and gardeners ![]()
Besides that, as @berainlb writes, you have to start from scratch with LightBurn and your laser. You cannot skip here, everything is based on this basic knowledge, the rest is routine and experience. Start with simple projects and get satisfying and useful results. For example, it is important to know the properties of the various materials when they are laser treated. Construct your own test template that gives you some challenges and results.
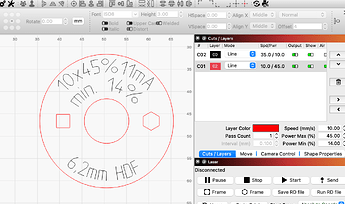
It’s a template I made in my first laser lesson (the values are fictitious), this item I still use for all my materials and on all my machines. It involves finding the perfect process values and finally writing them on the reference part for my collection.
Although it is very simple, there are still some LightBurn operations that need to be performed.
It’s drawable in Lightburn but honestly, I’d look for an SVG on Etsy. They usually cost about $5 and saves TONS of time. ![]()
I highly doubt anything like this is on Etsy. It would be nice if they were, for sure. Lol
Also, a lot of these are totally custom with the dimensions & length, so learning to draw them up in LB itself is something I need to learn how to do
I just made this little video to show a way to make those knife slits or whatever they are called.
The video is not so smooth because I have to force myself not to use shortcuts, people can’t see them ![]()
You are my hero. Thank you. You showed me more in that one video than all the instructional stuff I’ve watched so far.
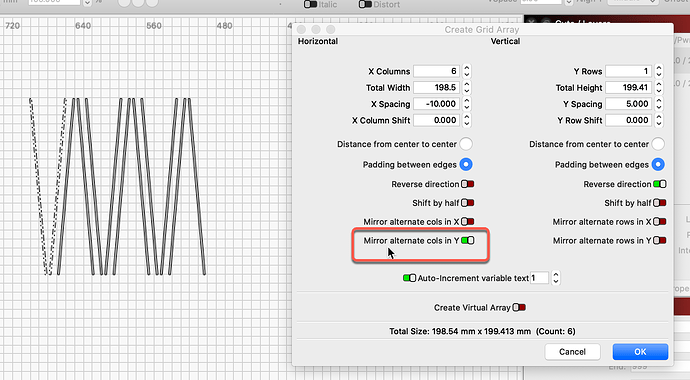
To assist in workflow, there is no need to duplicate and flip the original prior to building the Array. There is an option to flip these from the Array dialog. ![]()
I’d be interested to see what a single one of these items looks like. Please provide some real-world pictures from different angles, so we can get a feel of what the desired shape of the finished produce should look like. What is the final produce made from. If you provide greater detail, We might be able to provide additional workflow suggestions. The image you provide above is not as clear as one would need to fully understand the desired design.
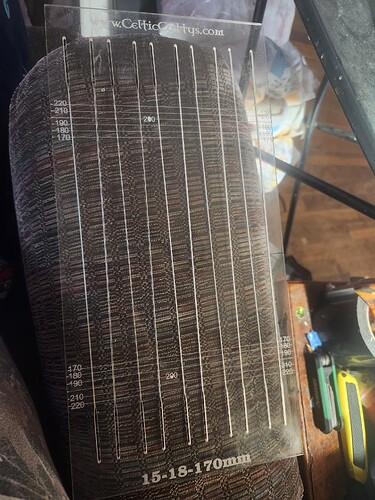
They’re a flat piece of acrylic, typically rectangular in shape. The markings cover a certain length. You cut the material to a length on the template, line it up with the lines, and it cuts the taper at the desired length. The wider places above the slits are for inserting a rotary cutter to cut the material you place under it. Here’s an up close picture of one I have
That is correct, but then there are not the 2 other LightBurn functions that Josh can get from the video. ![]()
This topic was automatically closed 30 days after the last reply. New replies are no longer allowed.


