Hi All,
I am new not only to Lightburn but also engraving, I have an atomstack A20 Pro, and with all the basics I am following the tutorials and getting some good results.
But then you hit some problems, and I am just not sure if it is a limitation of Lightburn or something that I am not getting.
This is my aim.
I have a 25cm round chopping board and I want text to follow the circumference of the chopping board.
Sounds easy, but my design is using central text top and bottom.
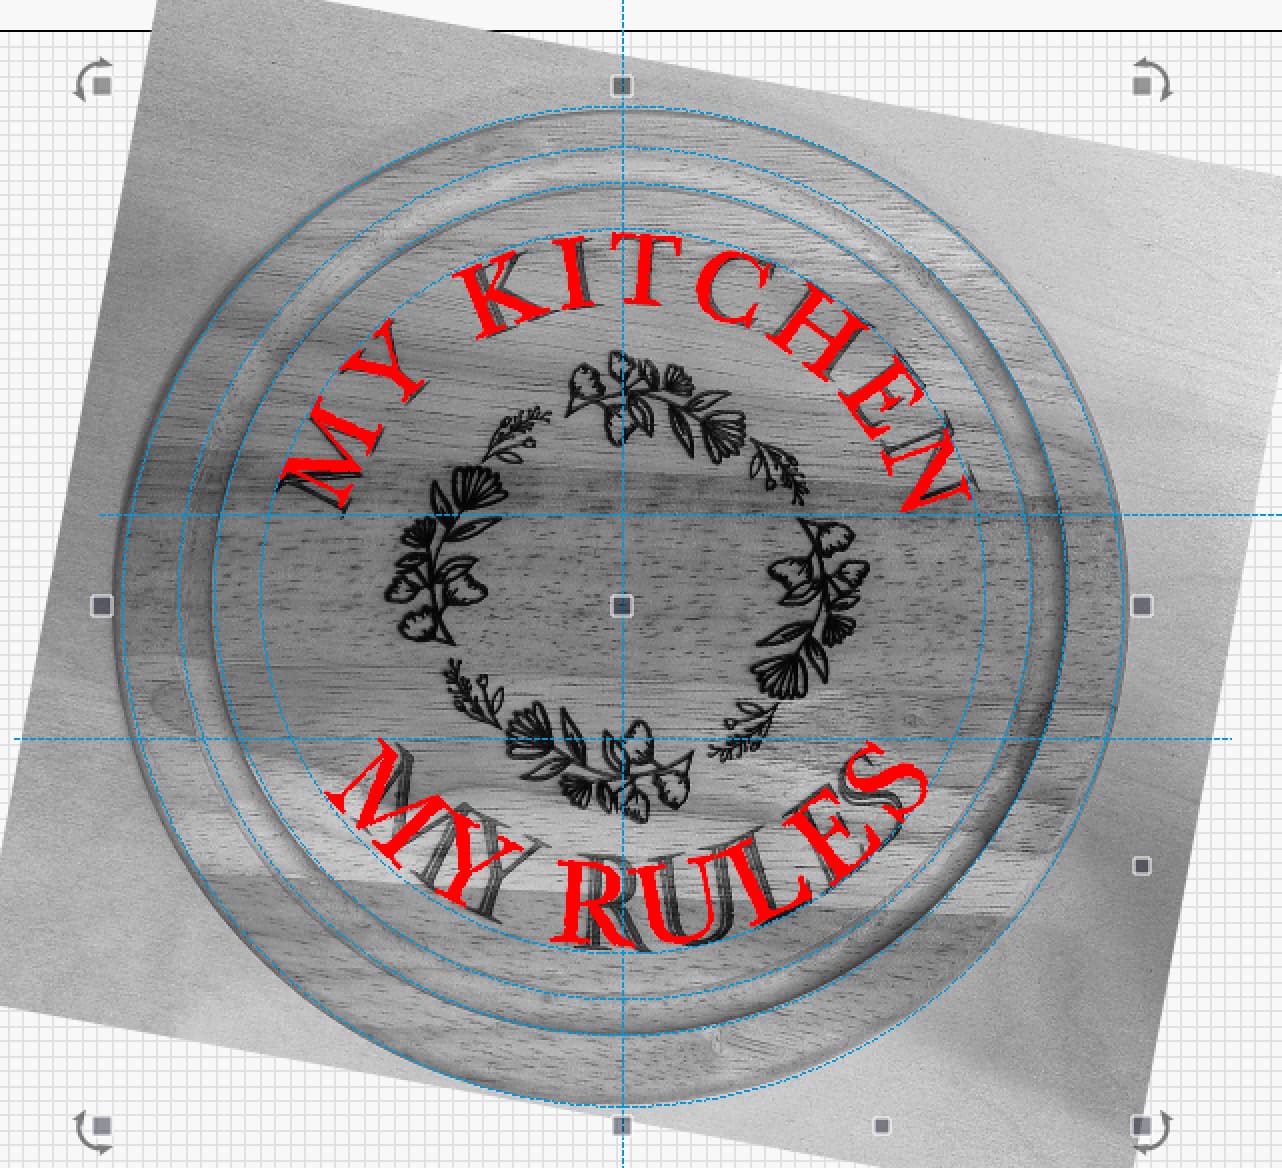
As you can see “my kitchen my rules” follows the circumference of the chopping board, but looking closely at my “My Rules” the text is not central and skewed a little.
At first I thought it was an alignment problem, but that would have effected my kitchen and the rest of the design as I completed the TEXT first before the patten in the centre.
The first problem I found when I used the apply path to text option, it would align “my kitchen” to the side and not top, then when adding the My Rules I couldn’t add this to the existing path to text as it was greyed out.
So I had to create another circle, then apply the My Rules to that new circle (apply path to text).
then I had to modify the text to mirror as it would be upside down (if you are following) which then distorted the text (as you can see in the picture).
Can anyone give me any pointers how to resolve this?
I may be over thinking, but I am scratching my head on this.
Create your circle for the top text and place the text.
Select the circle only and duplicate it. While it is still selected, rotate it 180 degrees then mirror that circle and put it on another unused layer. turn show layer off on the original circle. Now select your lower text and the second circle and apply path to text.
Follow the order of steps.
That should get you what you are looking for.
Layer accordingly so you can turn the circles off.
I just draw the inside circle of the juice groove on a tool layer (often also offset another circle as a “guide” for alignment) and use the plain bend text handle and eyeball the curvature. You can still use the align and warp/skew/rotate tools, too. After I get the bend and placement right, I usually still end up having to node edit and/or convert to path and individually adjust certain letters.
I also want to do it almost like Mike and Chris, but after finding/creating the design I will use camera to put the writing on the workpiece.
PS. Guides are your best friend.