I am new to Lightburn and Lasers. I have a ACMER P1 10 Watt and am running the current Lightburn version (1.7.07). I do almost all my work on an iMac M4 running Sequoia.
I have some drawings that I am cleaning up in Lightburn and I did so by tracing. Some of the text was hand written on the original document and during cleanup became illegible because some of the text had lines running over it that were deleted.
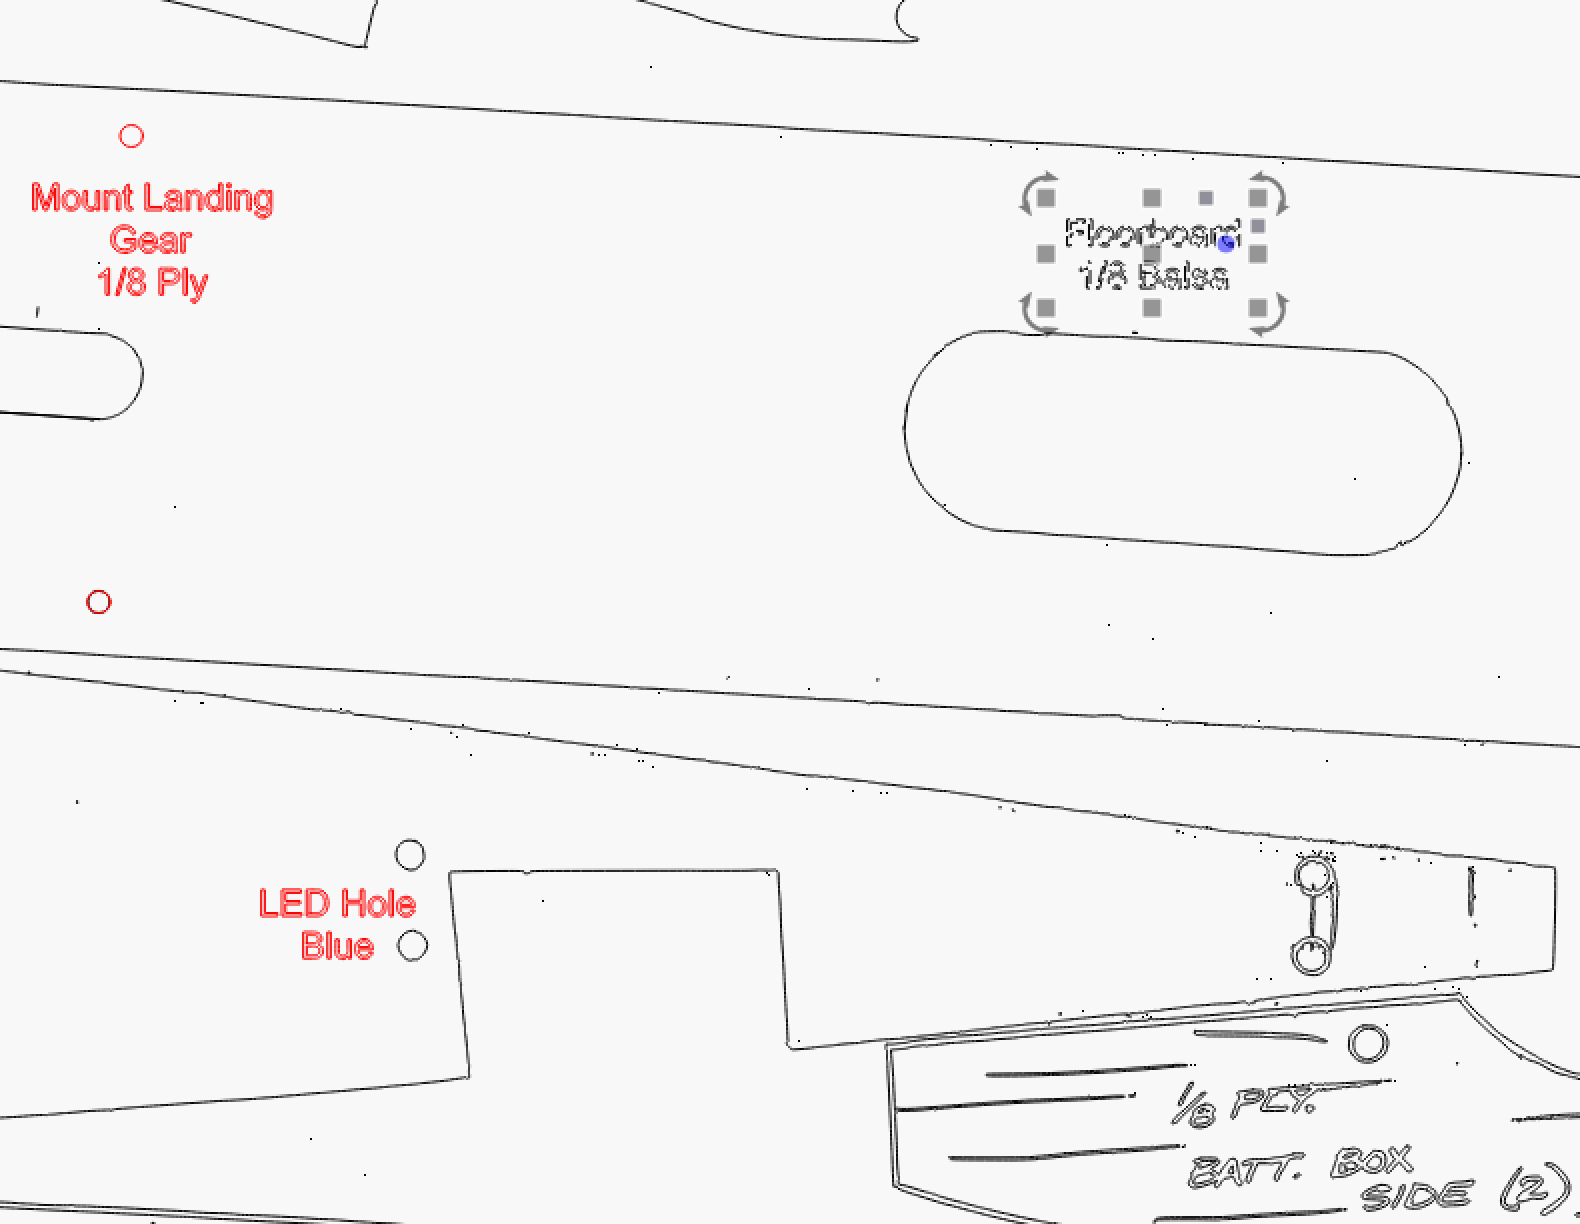
All the text that is showing in RED is associated with layer 02 and for some reason I did something wrong and the text that is in grey on the right “Floorboard 1/8 balsa” is not going to RED and layer 02, it is in Layer 00. I tried highlighting the grey text and then selecting layer 02 but it doesn’t change it. And by the way layer 00 is in “Mode: line” and so is 02.
I hope that makes sense, and I appreciate any help you can provide. My goal is that all the text on the parts to be cut would be lightly engraved on the part.
It is 100% easier to help you if we can see what you settings are, and even better if you can upload a small sample of your file for us to poke around. Use the button to import your file into the chat.
How are you assigning the layer to layer 02? Note that this is done by first selecting the object you want to change, then using the layer buttons typically at the bottom of the main window. Based on your wording it sounds like you may be selecting the layer in the Cut/Layer Window.
Brian, thank you. When you said “sounds like you…” all I had to do was highlight the text go to the bottom and it now belongs to the right group. Problem solved.
Jim, thank you for your help and if I need help in the future I will certainly upload what I am working on. Thanks to you I now know how to do it. Appreciate the help.
Jim: do you mind me asking. I have a set of plans that I downloaded from the AMA site and have been talking to the designer about the plans. He said he didn’t even use CAD and freehand his plans. He added woodgrain and other items to the plans and I am trying to clean them up (helps me learn Lightburn) and also going to print them. I ordered the canopy and landing gear from him and thought this would be a great overall learning experience…definitely not complex.
Do you think you could take a look at the plans, happy to send the original and then what I have done so far and give me some pointers or next steps? I would really appreciate your help and insight.
FYI: this is the link to the site where I download the file. My AMA publication got me to think this was a good learning experience. Build the Sky Scanner | Model Aviation
I will be happy to work with you. There are several threads here from guys doing the same thing as you. Many have problems because the plans are done with a thick felt tip pen, and on the import Lightburn does not have a center line tool. So LB will bring in the inside and the outside lines rather than the average. That can cause some fidelity issues.
Remember that the drag box to select objects works two ways …right to left is green, anything touched will be selected …left to right is red, only items/groups that are completely surrounded will be selected.
I do suggest that you become conversant with the tools of LB (mastery is too much to ask)…but learn the basics before you get tangled up in cutting wing ribs and formers.
Jim: Thank you I appreciate the information. I have watched quite a few of the Lightburn YouTube videos for the UI and getting started. I also decided a great way to learn would be to use their “First Project” and that really helped. I feel a bit more confident (a long way to go to feel confident with the laser) and am taking my time to figure out the drawing and breaking it into packages that I can cut reasonably.