Hi All. A friend asked me to engrave some poplar items to inlay an engraved medallion. The medallions are approx. 25mm circles, 3mm thick. I’ve never had success doing deep engraves like this. I never get a flat bottom to the engrave; it’s always very jagged on the bottom. I figured if I engraved deeply enough the jaggedness wouldn’t be a problem. I did a lot of experimenting with settings and ended up running my 50 watt Chinese laser (Ruida controller) at 80mm/s, 80% power. Because of the grain in poplar, it often burned irregularly, but these settings usually got me a deep enough engrave. BUT, I found that the engrave was consistently deeper at the top and bottom of the circle, where the laser was making short passes, and much shallower in the middle where the laser was making longer passes. I adjusted the Max and Min powers, but this didn’t seem to make much difference.
I was using bidirectional fill, and my conclusion is that the laser was hitting the same area so frequently that the wood hadn’t stopped burning from the previous pass before it was hit with the next pass, causing deeper burning? I have no idea how to avoid this, though.
Any way I could avoid this issue? Any other thoughts/tips/suggestions on doing successful deep burning in the future would be greatly appreciated. Is there a way to avoid the jagged bottom in the engraved area? Thanks!
If you’re using a scan type operation, such as a fill or image, the Ruida only allows it to lase when it has reached scanning speed. It applies overscan via it’s hardware.
How fast are you engraving and what is the interval you’re using?
I am using bidirectional fill, at 80% power (50 watt laser), max power 88%, min power 78%, with an interval of 0.09mm.
I feel like maybe I didn’t explain my issue clearly. If you look at the photo, the engrave is much deeper on the left end and the right end, and much shallower in the center, so that the bottom of the engrave is curved like a cylinder. The main travel of the laser head is toward you and away from you (relative to the photo). So, the deeper parts of the engrave are where the laser is making very short passes. As it gets to the middle where the passes are longer, it’s not burning as deeply. I had considered that the laser might not be getting up to speed, and is burning the short passes at a slower speed (and thus deeper), but as you said a Ruida controller should only fire the laser when it’s up to speed.
So my thinking is that, due to the short travel distance, the laser is returning to nearly the same spot very soon after it was just there, while the wood is still burning, resulting in excessive burn. But I’m not sure about that and was hoping someone might have a more concrete answer.
It’s generally a good idea to post photos that show orientation of the original piece. Sometimes we figure out things by which axes is a problem. Which axes is the main direction of travel?
I think you should scrutinize your settings… this is likely the cause of the problem.
I assume you are scanning (fill) at a 0 deg value, so the X axes is moving the most?
Realize that the beam or spot size of a normal hobby glass co2 laser is about 0.20mm, so you’re passing over the same area about 2.2 times, not once. Hence the excessive burn. You can take out the material and leave a brown hole, it doesn’t have to be burnt.
I’d suggest you back off the interval, make it larger, and see if that helps.
You can also try turning off bi-directional fill, that way it’s only lasing on one direction. Keep in mind, it will double the job time, assuming the other settings remain.
The minimum power setting isn’t used or needed for scan/fill operations.
Do you have a mA reading at that 80% (88%?) power setting? It’s generally more usable than a percentage power value, however both are nice to have spelled out when you’re trouble shooting issues like these.
Can you explain or re-word, I’m not so sure I get what you’re trying to say. How can you tell maximum power, do you have a watt meter?
This is a Trotec video on inlaying. Not sure if this is applicable, but it’s an informative video nonetheless.
Thanks for your input. I rotated the project in the photo in an attempt to show the issue (the curvature of the bottom of the engrave). It’s difficult to photograph anyway, but would have been impossible to see if I’d left the material oriented as it was in the laser. With the material in the laser the main direction of laser travel is on the X axis, which in the photo is the Y axis.
My “80% power, 88% max power” comment was an error. I typed that sentence in two sittings, lol, and was thinking of some previous settings. The laser power is set at 88% using the onscreen controls on the laser. It makes sense that the minimum power doesn’t matter since the laser doesn’t fire until the gantry is up to speed, so thanks for that insight.
I don’t have an amp meter installed. I have it sitting on a shelf waiting to be put in.
Regarding this:
…I have some questions. That is interesting info about the interval and the laser kerf. I was told years ago that the kerf was 0.1mm, but never verified. The interval is the same over the whole burned area, so every spot in the engraved area should be hit by the laser the same amount, but the depth of the burn is not consistent. I’m not following how an increase in interval would cause the top and bottom of the engraved area to be engraved less without doing the same to the middle. Shouldn’t I expect to see less engraving throughout the entire engraved area if I increase the interval? Also, how does an area get lasered 0.2 times?
Turning off bi-directional fill is something I had considered and will be testing out this afternoon.
Usually these are very dependable, so I’d think a hardware issue of what you describe is unlikely to occur and even more difficult to pin down with any tools we have access to use.
I think you were probably correct in the assumption that there is more heat in those areas due to scan duration although less time. It repeats in a shorter amount of time. Which is why I suggested increasing the interval.
At this point I can’t see any reason to believe it’s actually a hardware issue. That only leaves power and speed with these. It appears and you can confirm or deny that there is a high point in the center and both edges drop off too deeply, not a sudden step.
Note the direction of the grain - I find that cutting with the grain results in a more uneven bottom in deep engravings. What I do now is use multiple sublayers. Sublayer 1: Fill @45º scan angle; Sublayer 2: Fill @-45º scan angle; Sublayer 3: Line at a higher power; Sublayer 4: a light fill across the grain.
That works really well for me, though I’m not 100% convinced the final layer is needed as I sometimes accidentally rotate a scrap of wood without changing the scan angle (so the final pass goes with the grain) - and I don’t notice a difference…
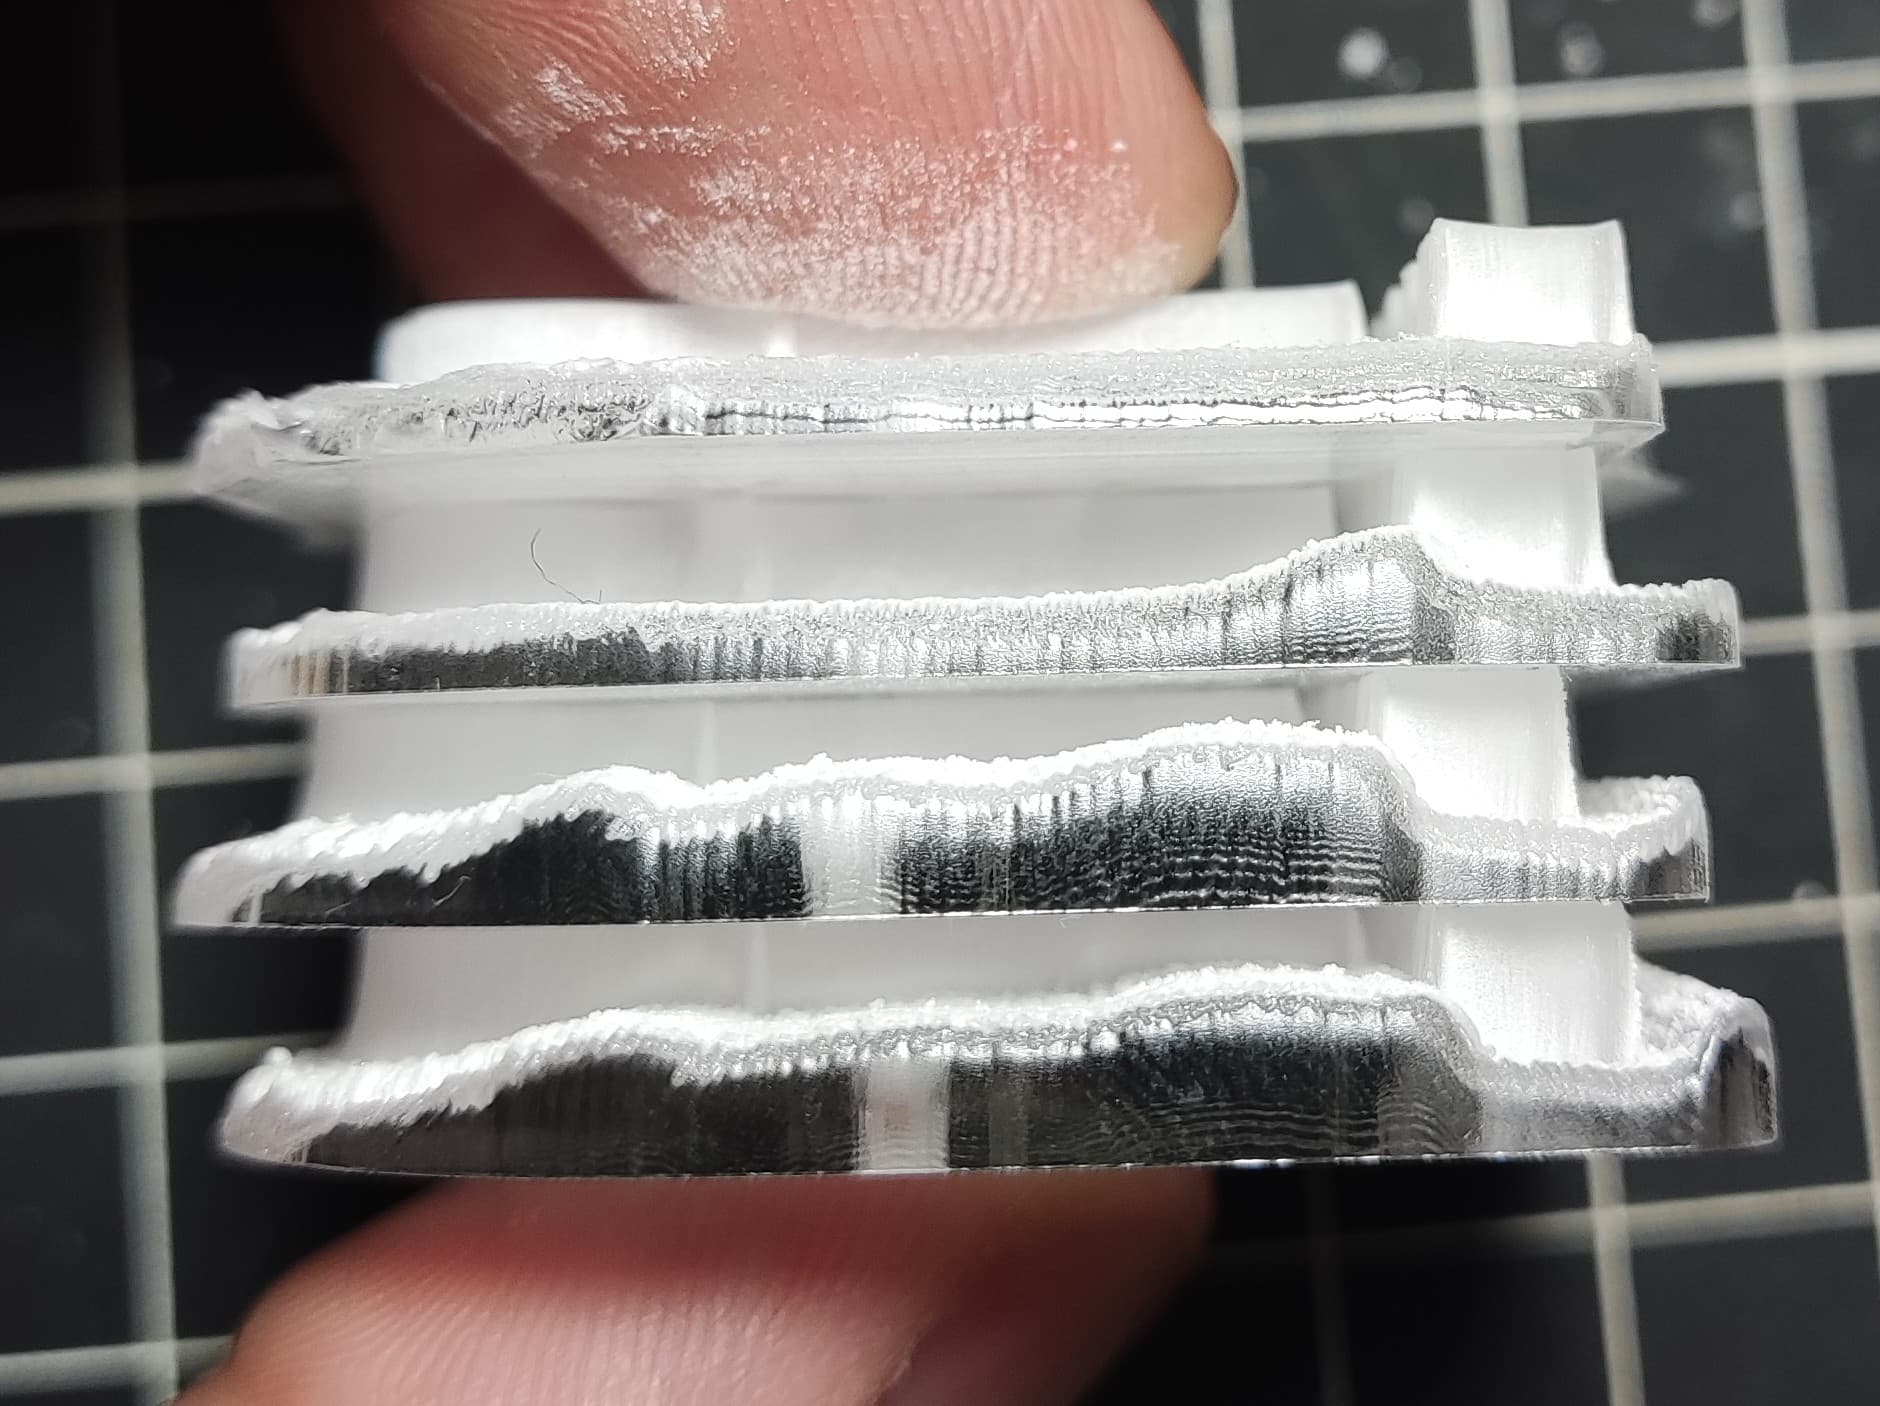
In the top one I did a equal depth but the tube broke, after the replacement of the tube I can’t do the same relief in the acrylic, always uneven just like your wood.
No, I had to get the job out the door so I did the best I could and passed the parts off to the customer. They were happy enough with how it worked out.
I’m fairly convinced of what my issue was, and I think I know how to prevent it, but I haven’t done any experiment to prove it. I was engraving a single circle in wood, and at the top and bottom of the circle the engrave was much deeper. I think this was because the scan lines were very short there and the laser would come back and “revisit” the same area very quickly, while the wood was still burning from the previous laser pass. That made the engrave very deep on the top and bottom. In the middle where the laser was taking longer passes, more time passed before the laser came back to the same area and the wood had time to stop burning there, so there wasn’t such a deep engrave.
I couldn’t figure out at the time how to avoid this, but I think there are two possibilities: 1) Turn off bi-directional fill, and/or 2) add a larger engraved rectangle around the circle, with the laser power set so low the laser doesn’t actually fire. That way the laser would travel a larger distance and would give the wood a little time to stop burning before the laser revisits the same area.
Your issue appears to be something else. Your first engrave looks great. The bottom two aren’t burning right, but it’s interesting that they are wrong in the same way (the contour of the engraved area appears to be nearly the same in both examples). I wonder if you are having a problem with a power supply, or if the new tube may be faulty.