So I finally decided to bite the bullet and buy a genuine ruida as it seems the KT332N was causing all of my problems of misalignment and lines in the wrong place.
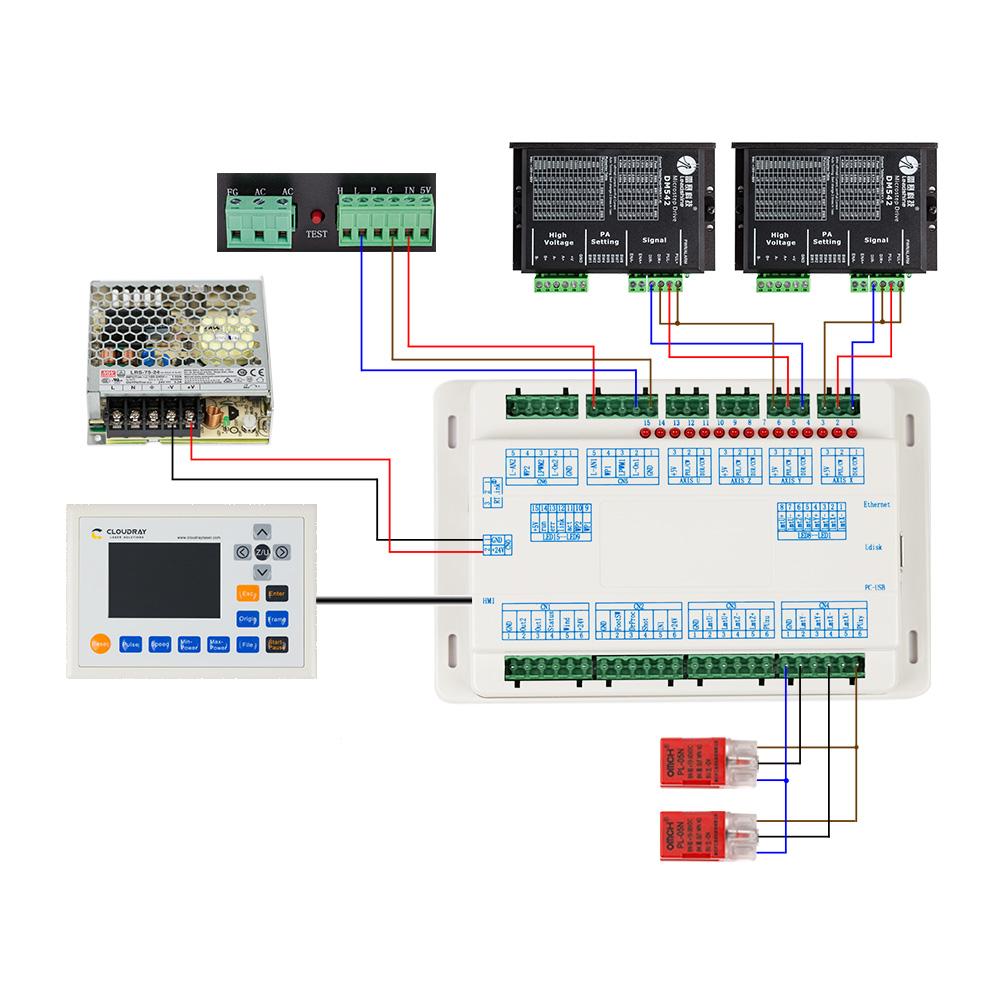
Looking at the diagram to wire it in has me a little confused when compared to the KT.
So, i completed the task today and boy was it a F*** About!!
First thing,
Save your KT332N controller settings from the machine settings tab.
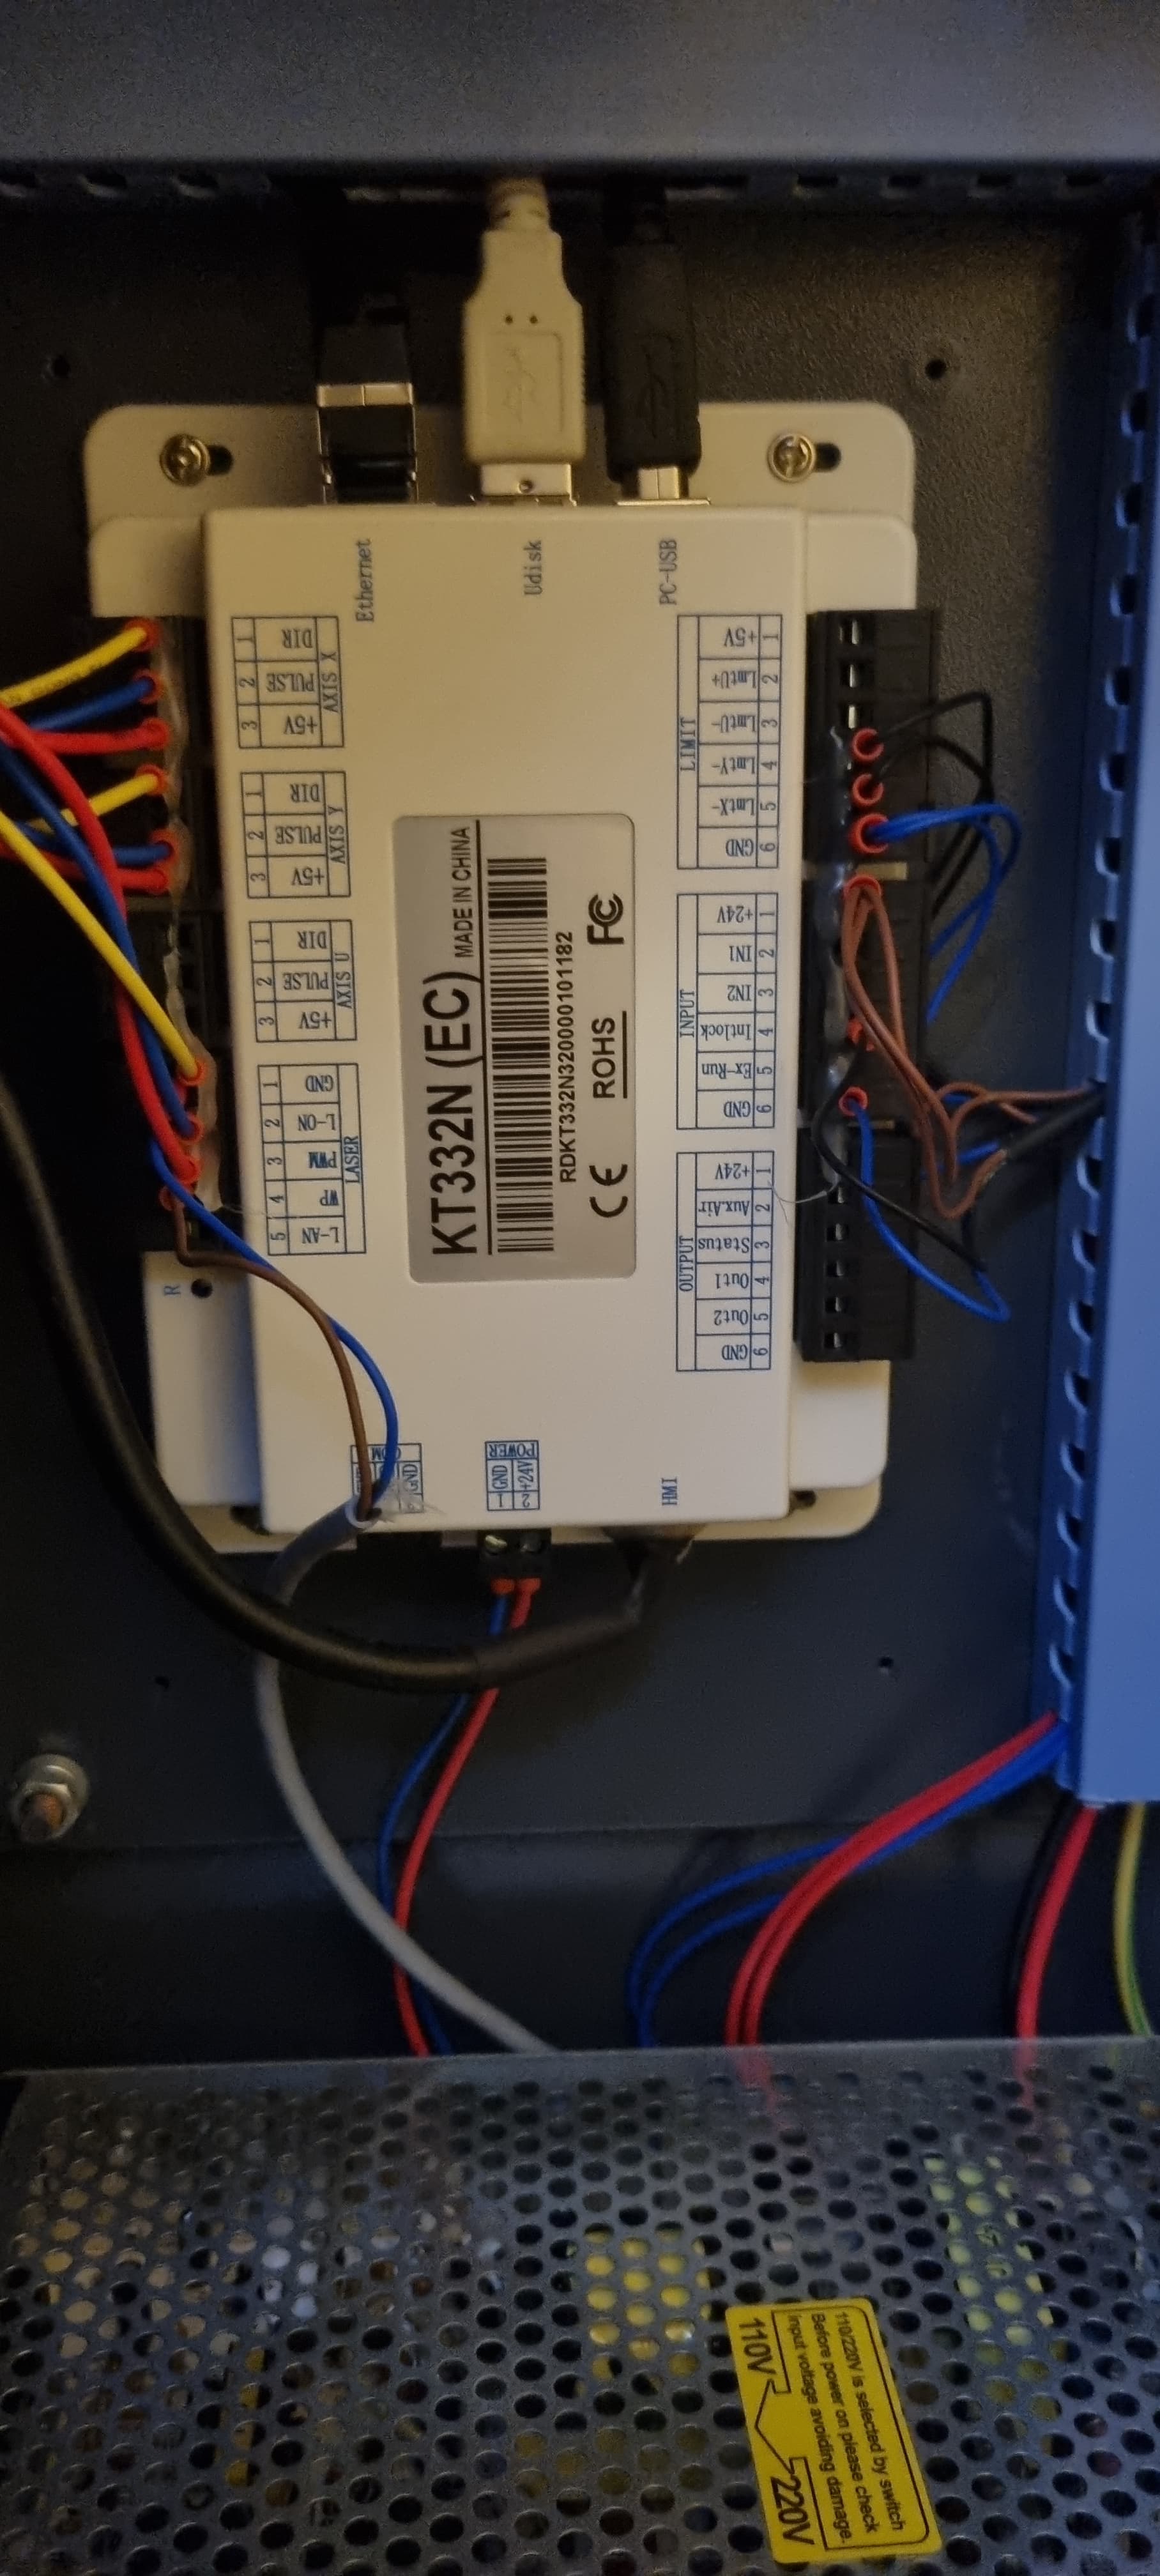
Take a photograph of the controller unit wiring.
have open a copy of the diagram from cloudray ( unsure why it differs from the manual diagram)
pull out the black blocks, cables and disconnect the controller
put in the new controller ( Only the top 2 screw holes line up, fine with 2 or tap 2 new)
You will need to change roughly 5 wire positions.
Now comes the fun part,
First problem - Controller language Chinese, had to use google camera to translate on the fly.
I had to swap my X & Y connections (3 row black blocks) around and also the black signal wires from my position sensors (Red bricks on gantry)
reason i swapped was because my gantry was crashing into the sides trying to do a reset to find home, swapping them around sent it back left to home so it stopped, also my keypad keys were inverted and it was all a mess tbh
power on the machine and connect to your controller in lightburn and load your KT332N settings and write them to your controller.
Power off the machine
Swap your signal wires and X/Y connectors back to how they should be, power on the machine and let it reset.
test functions by jogging the gantry and a test cut or two.
Then i calibrated my axis and over the following week I will be increasing my speeds and acceleration settings since i throttled them on the KT332N inline with the recommended ones from the manual.
But so far i can already see an improvement, my circles don’t have flat spots anymore and the laser isn’t engraving random lines or not turning off when it should.
i can take a picture of my cable settings tomorrow which should hopefully provide a base for people, I also plan to add the compressor and use the wind settings for that extra assist when cutting.
And if you hit the Esc key on the controller while it’s homing, it will stop. That would let you write the new settings without having to re-wire things.