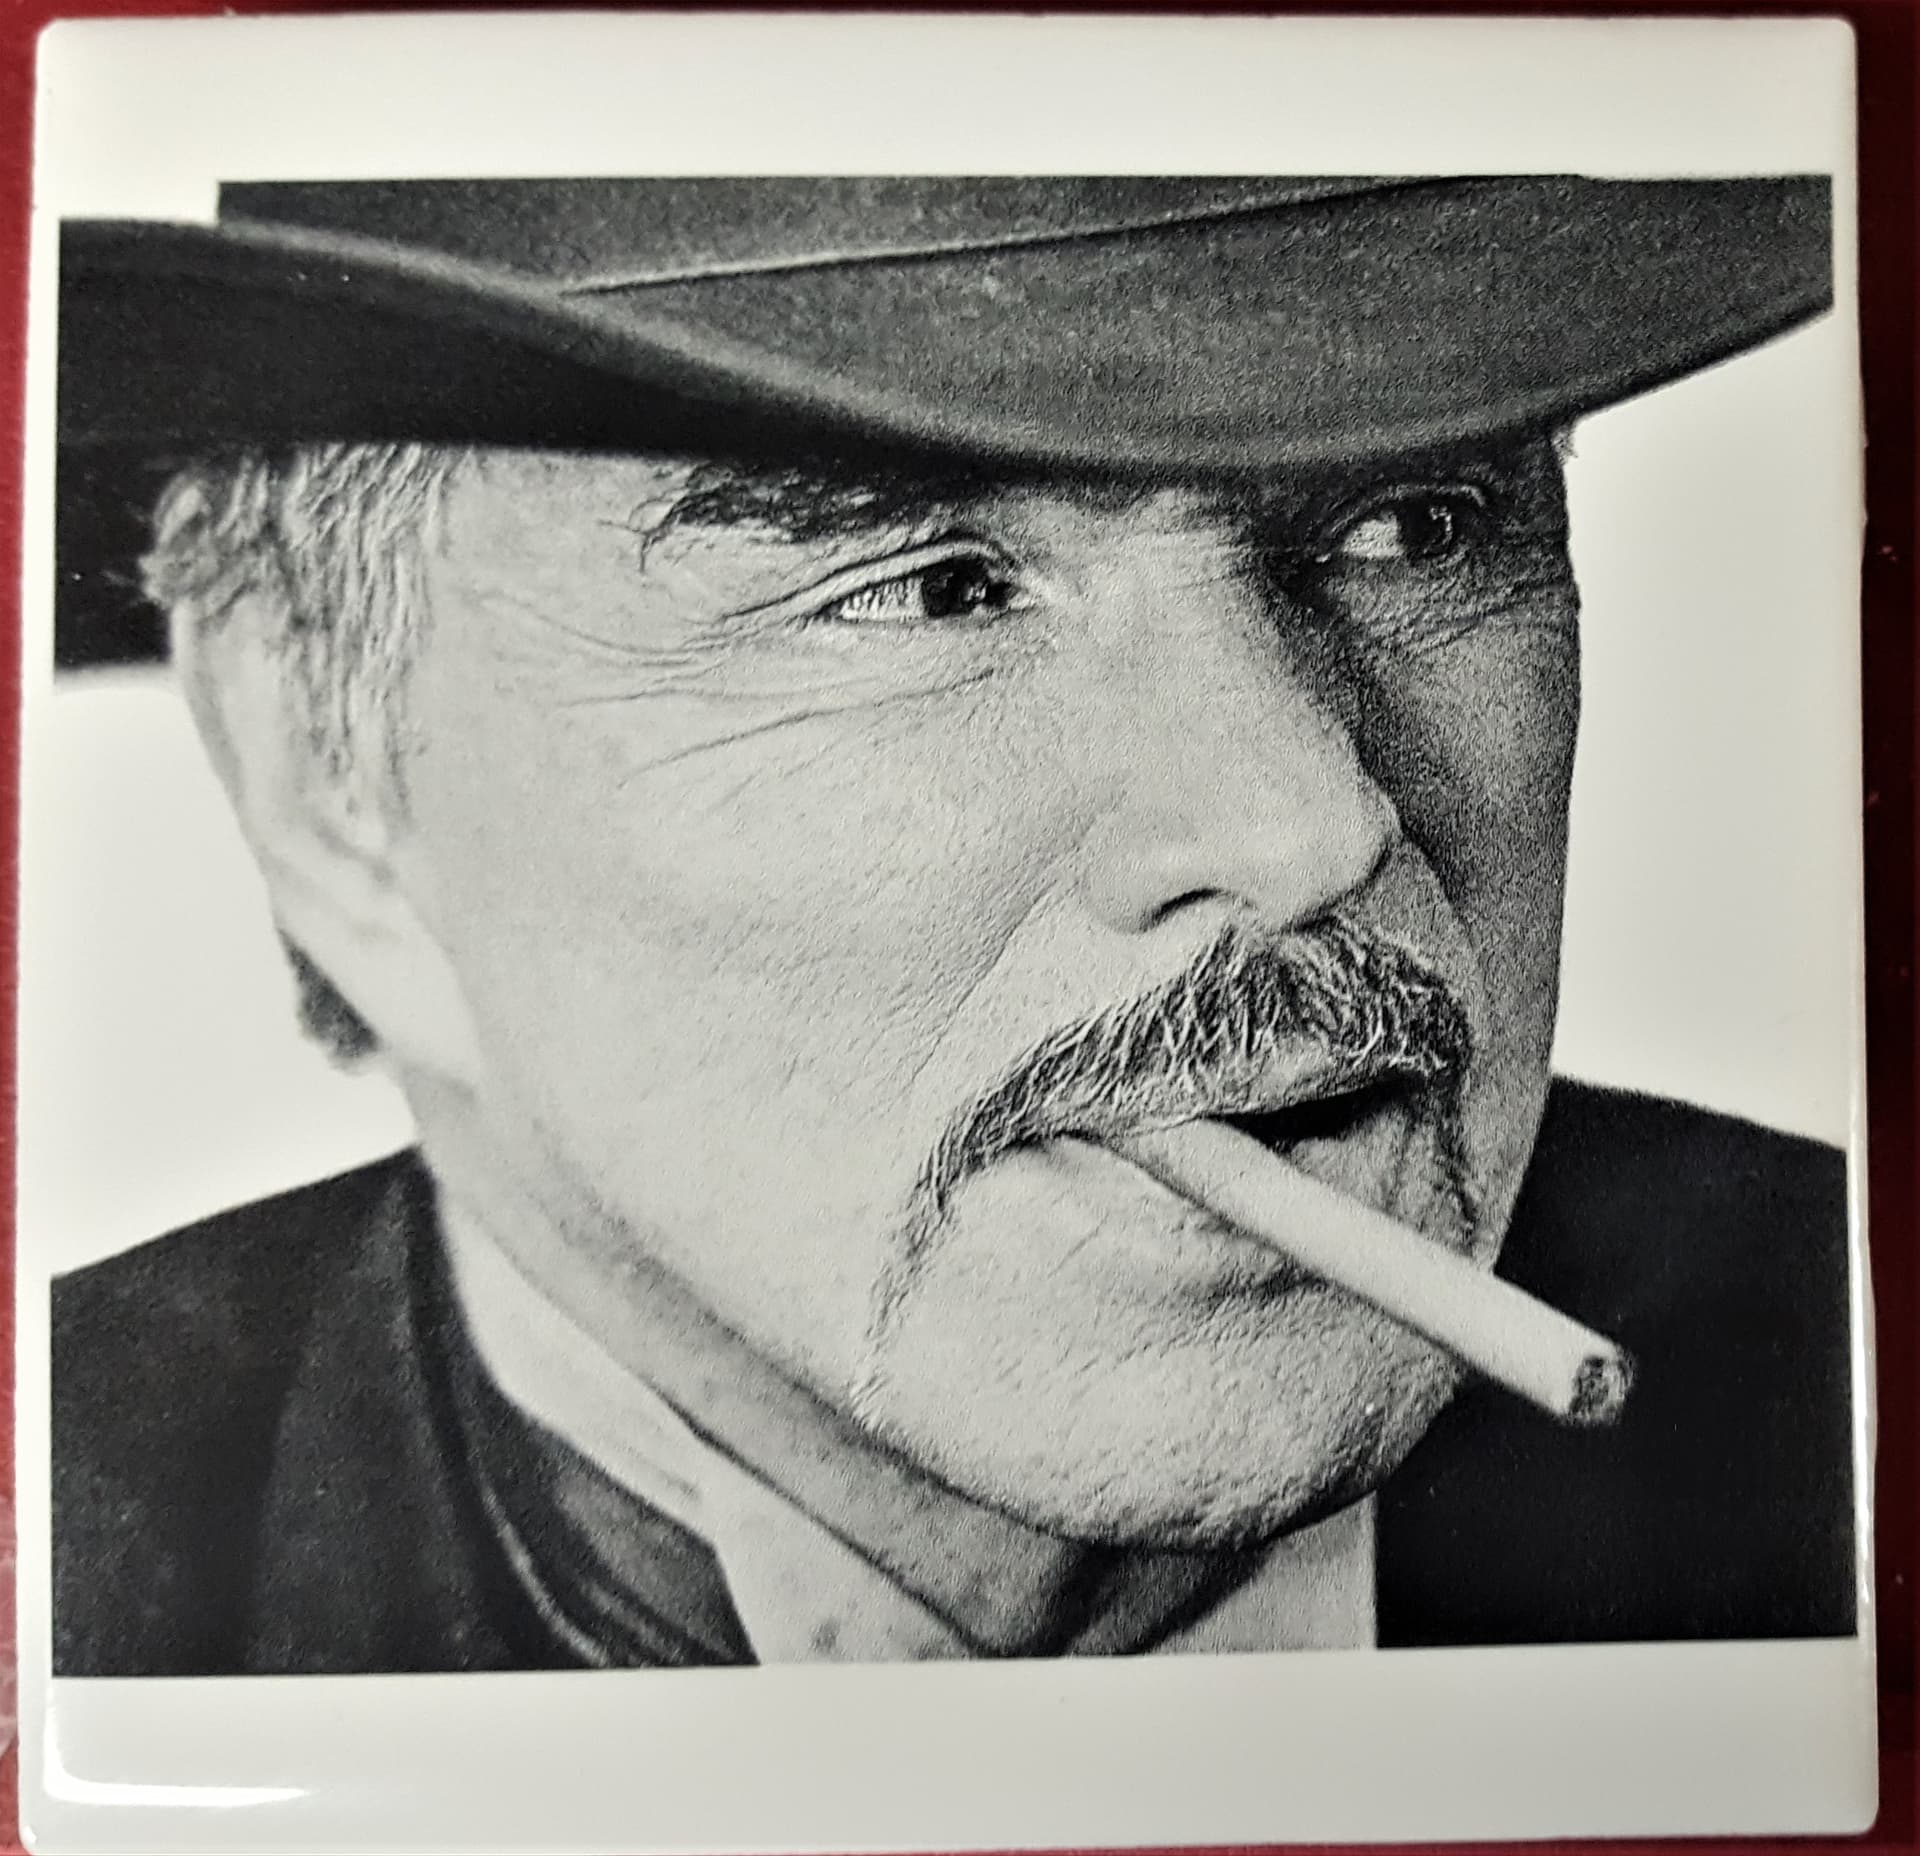
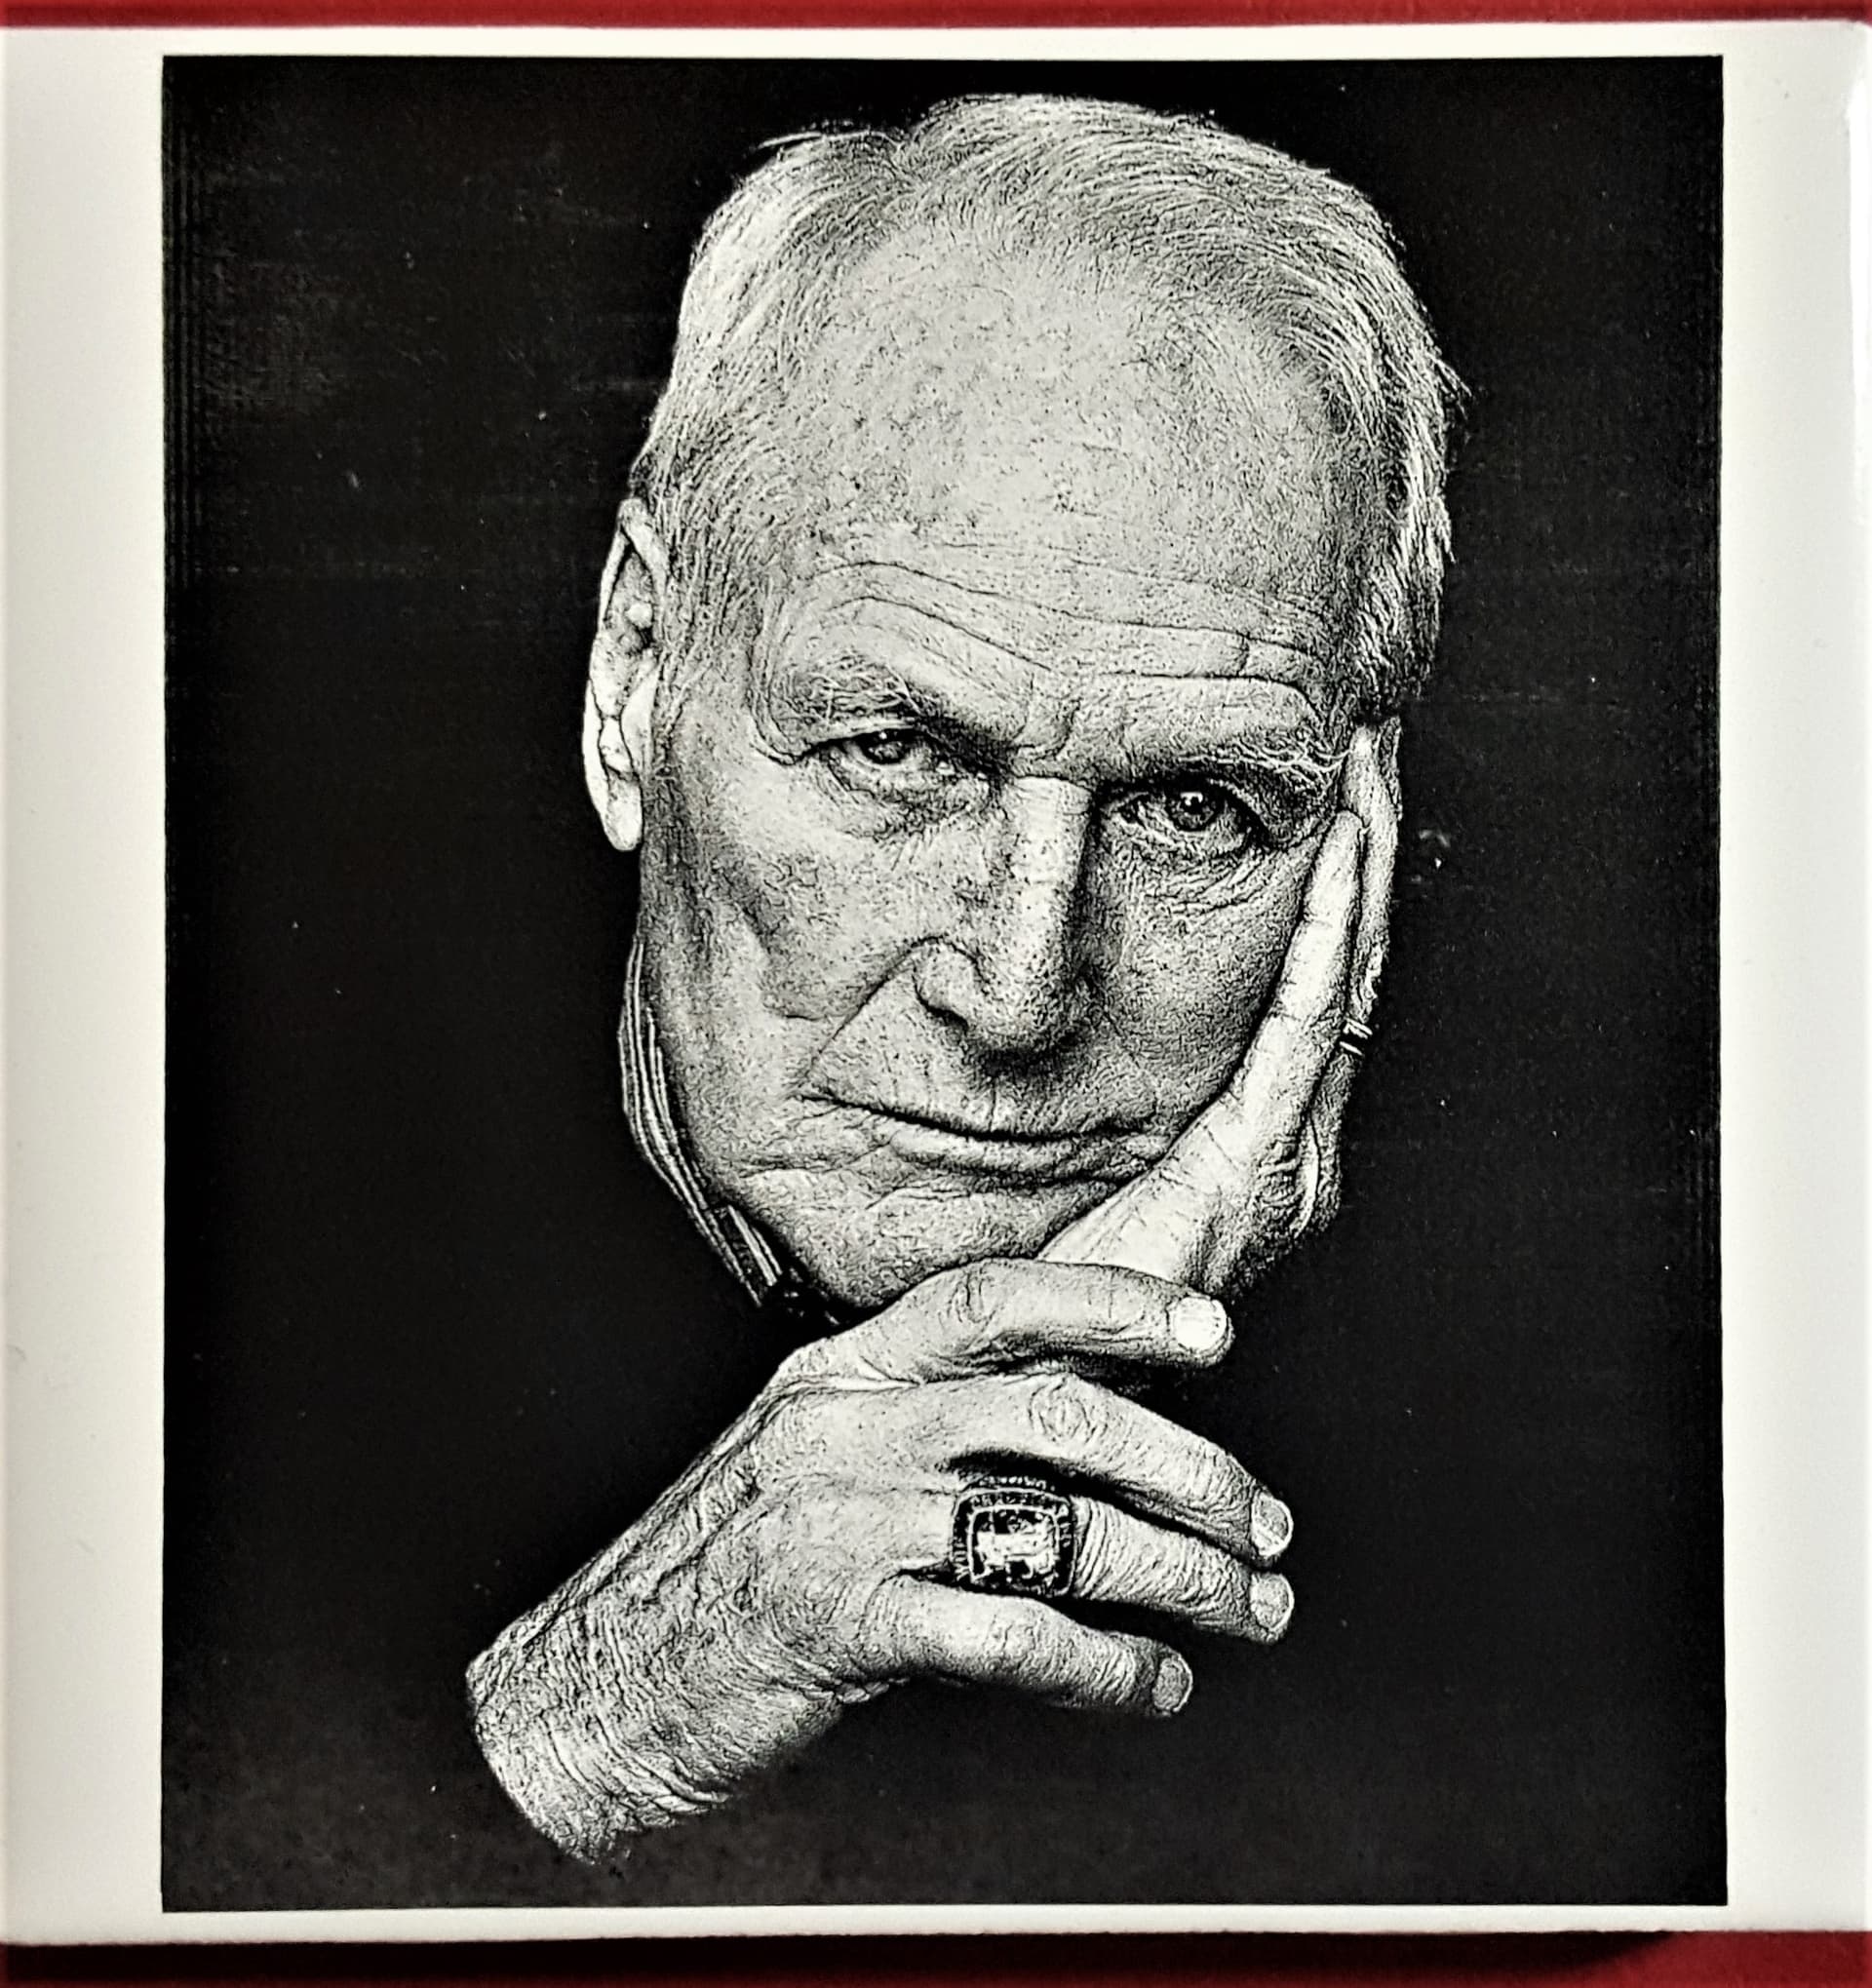
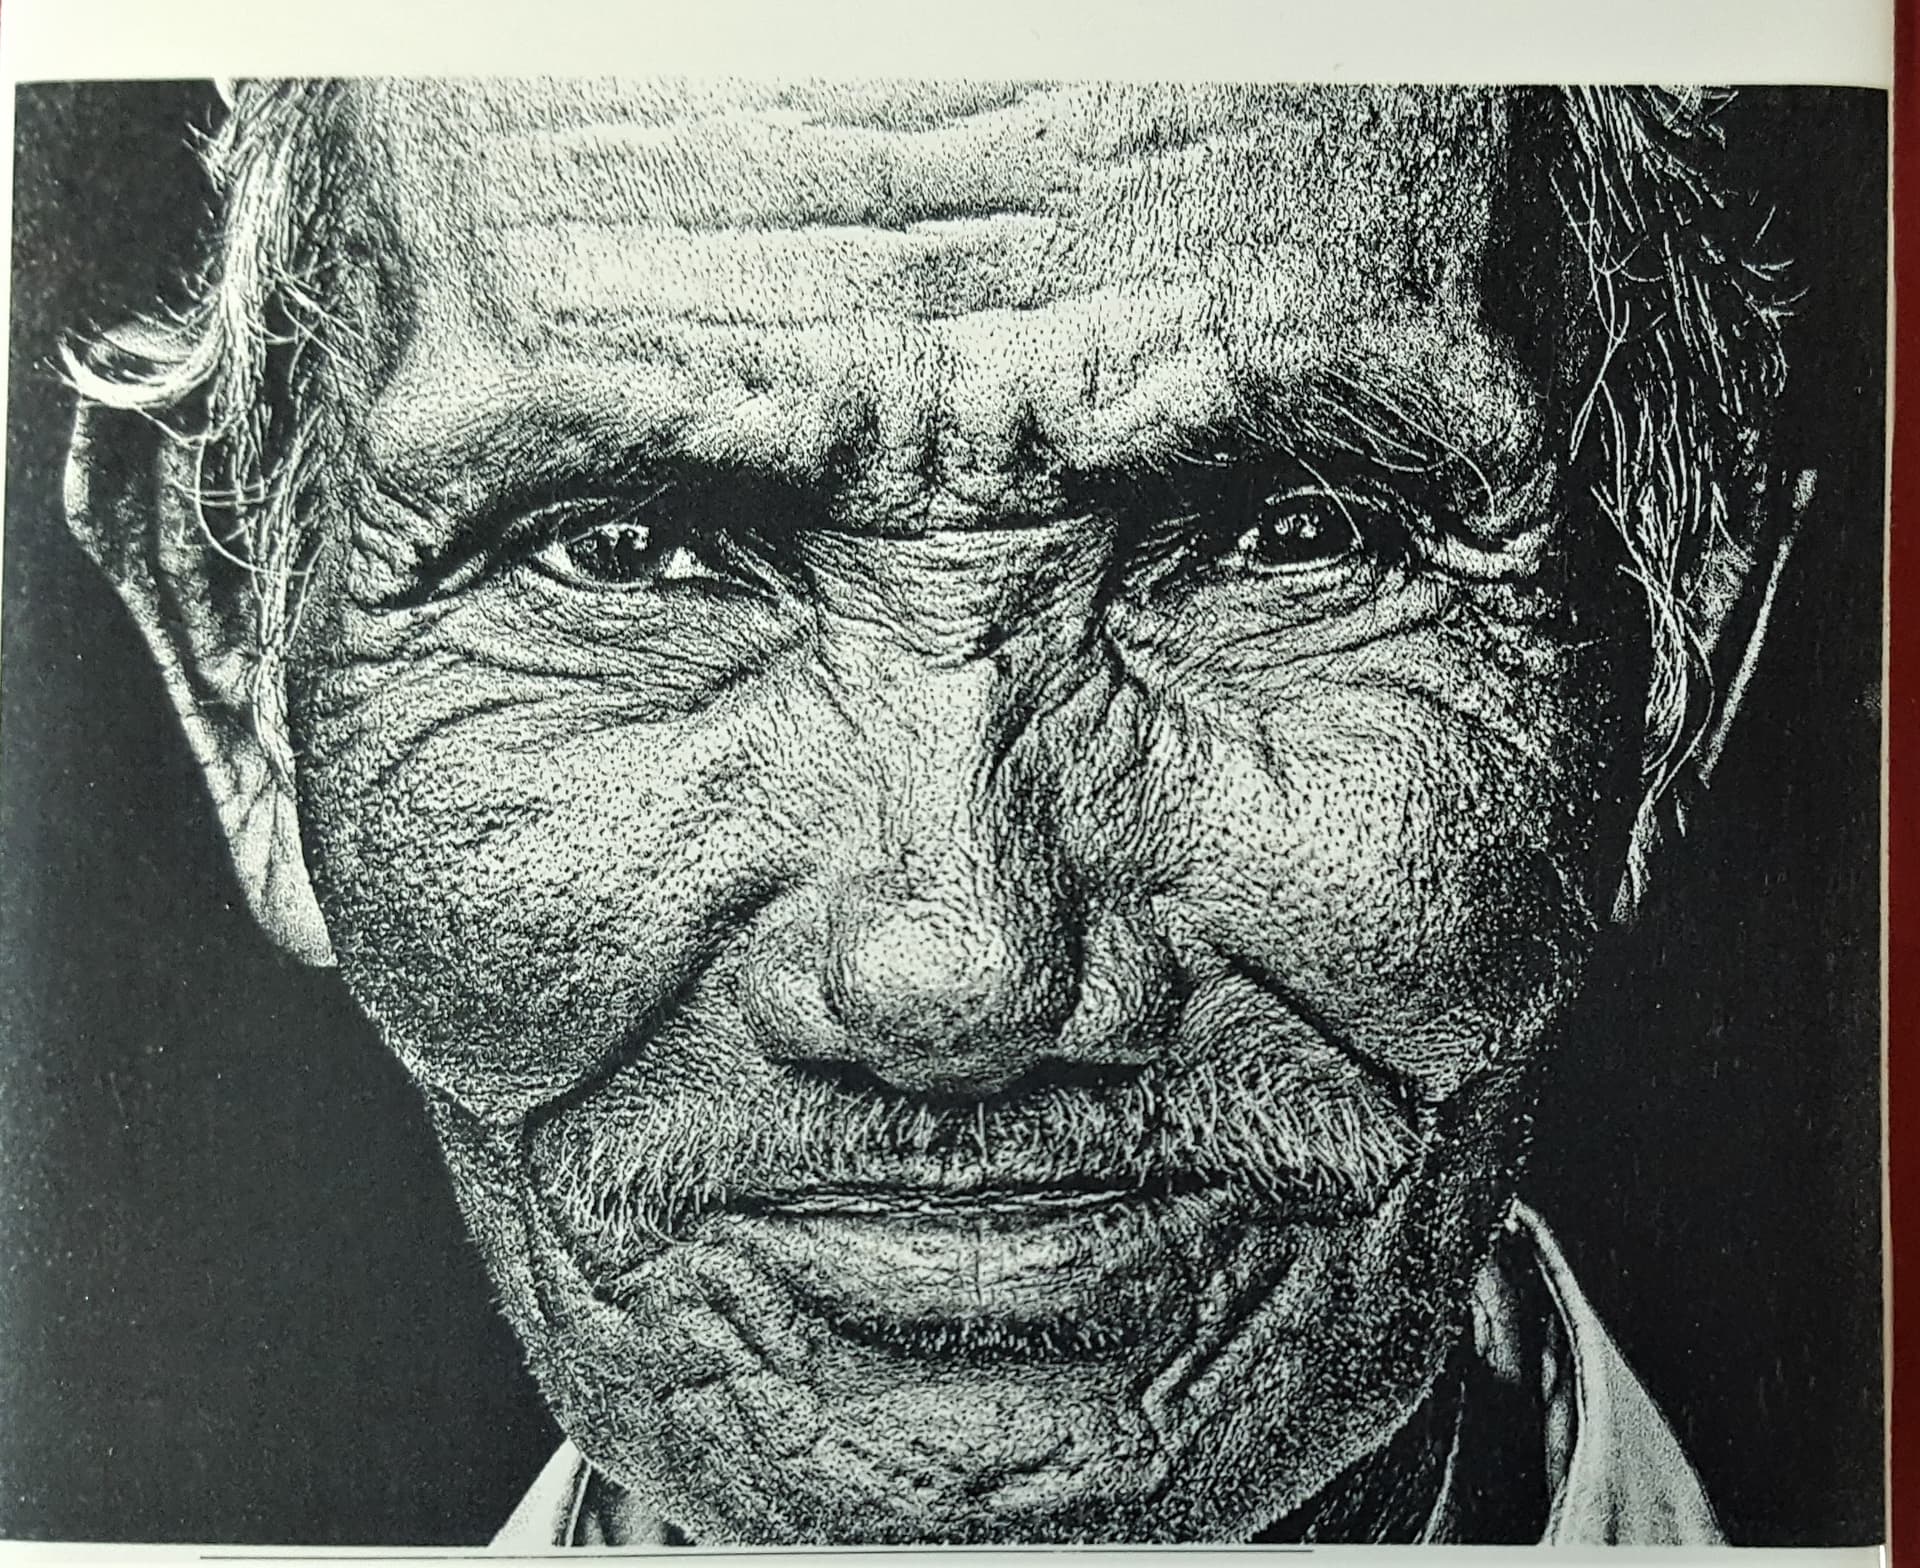
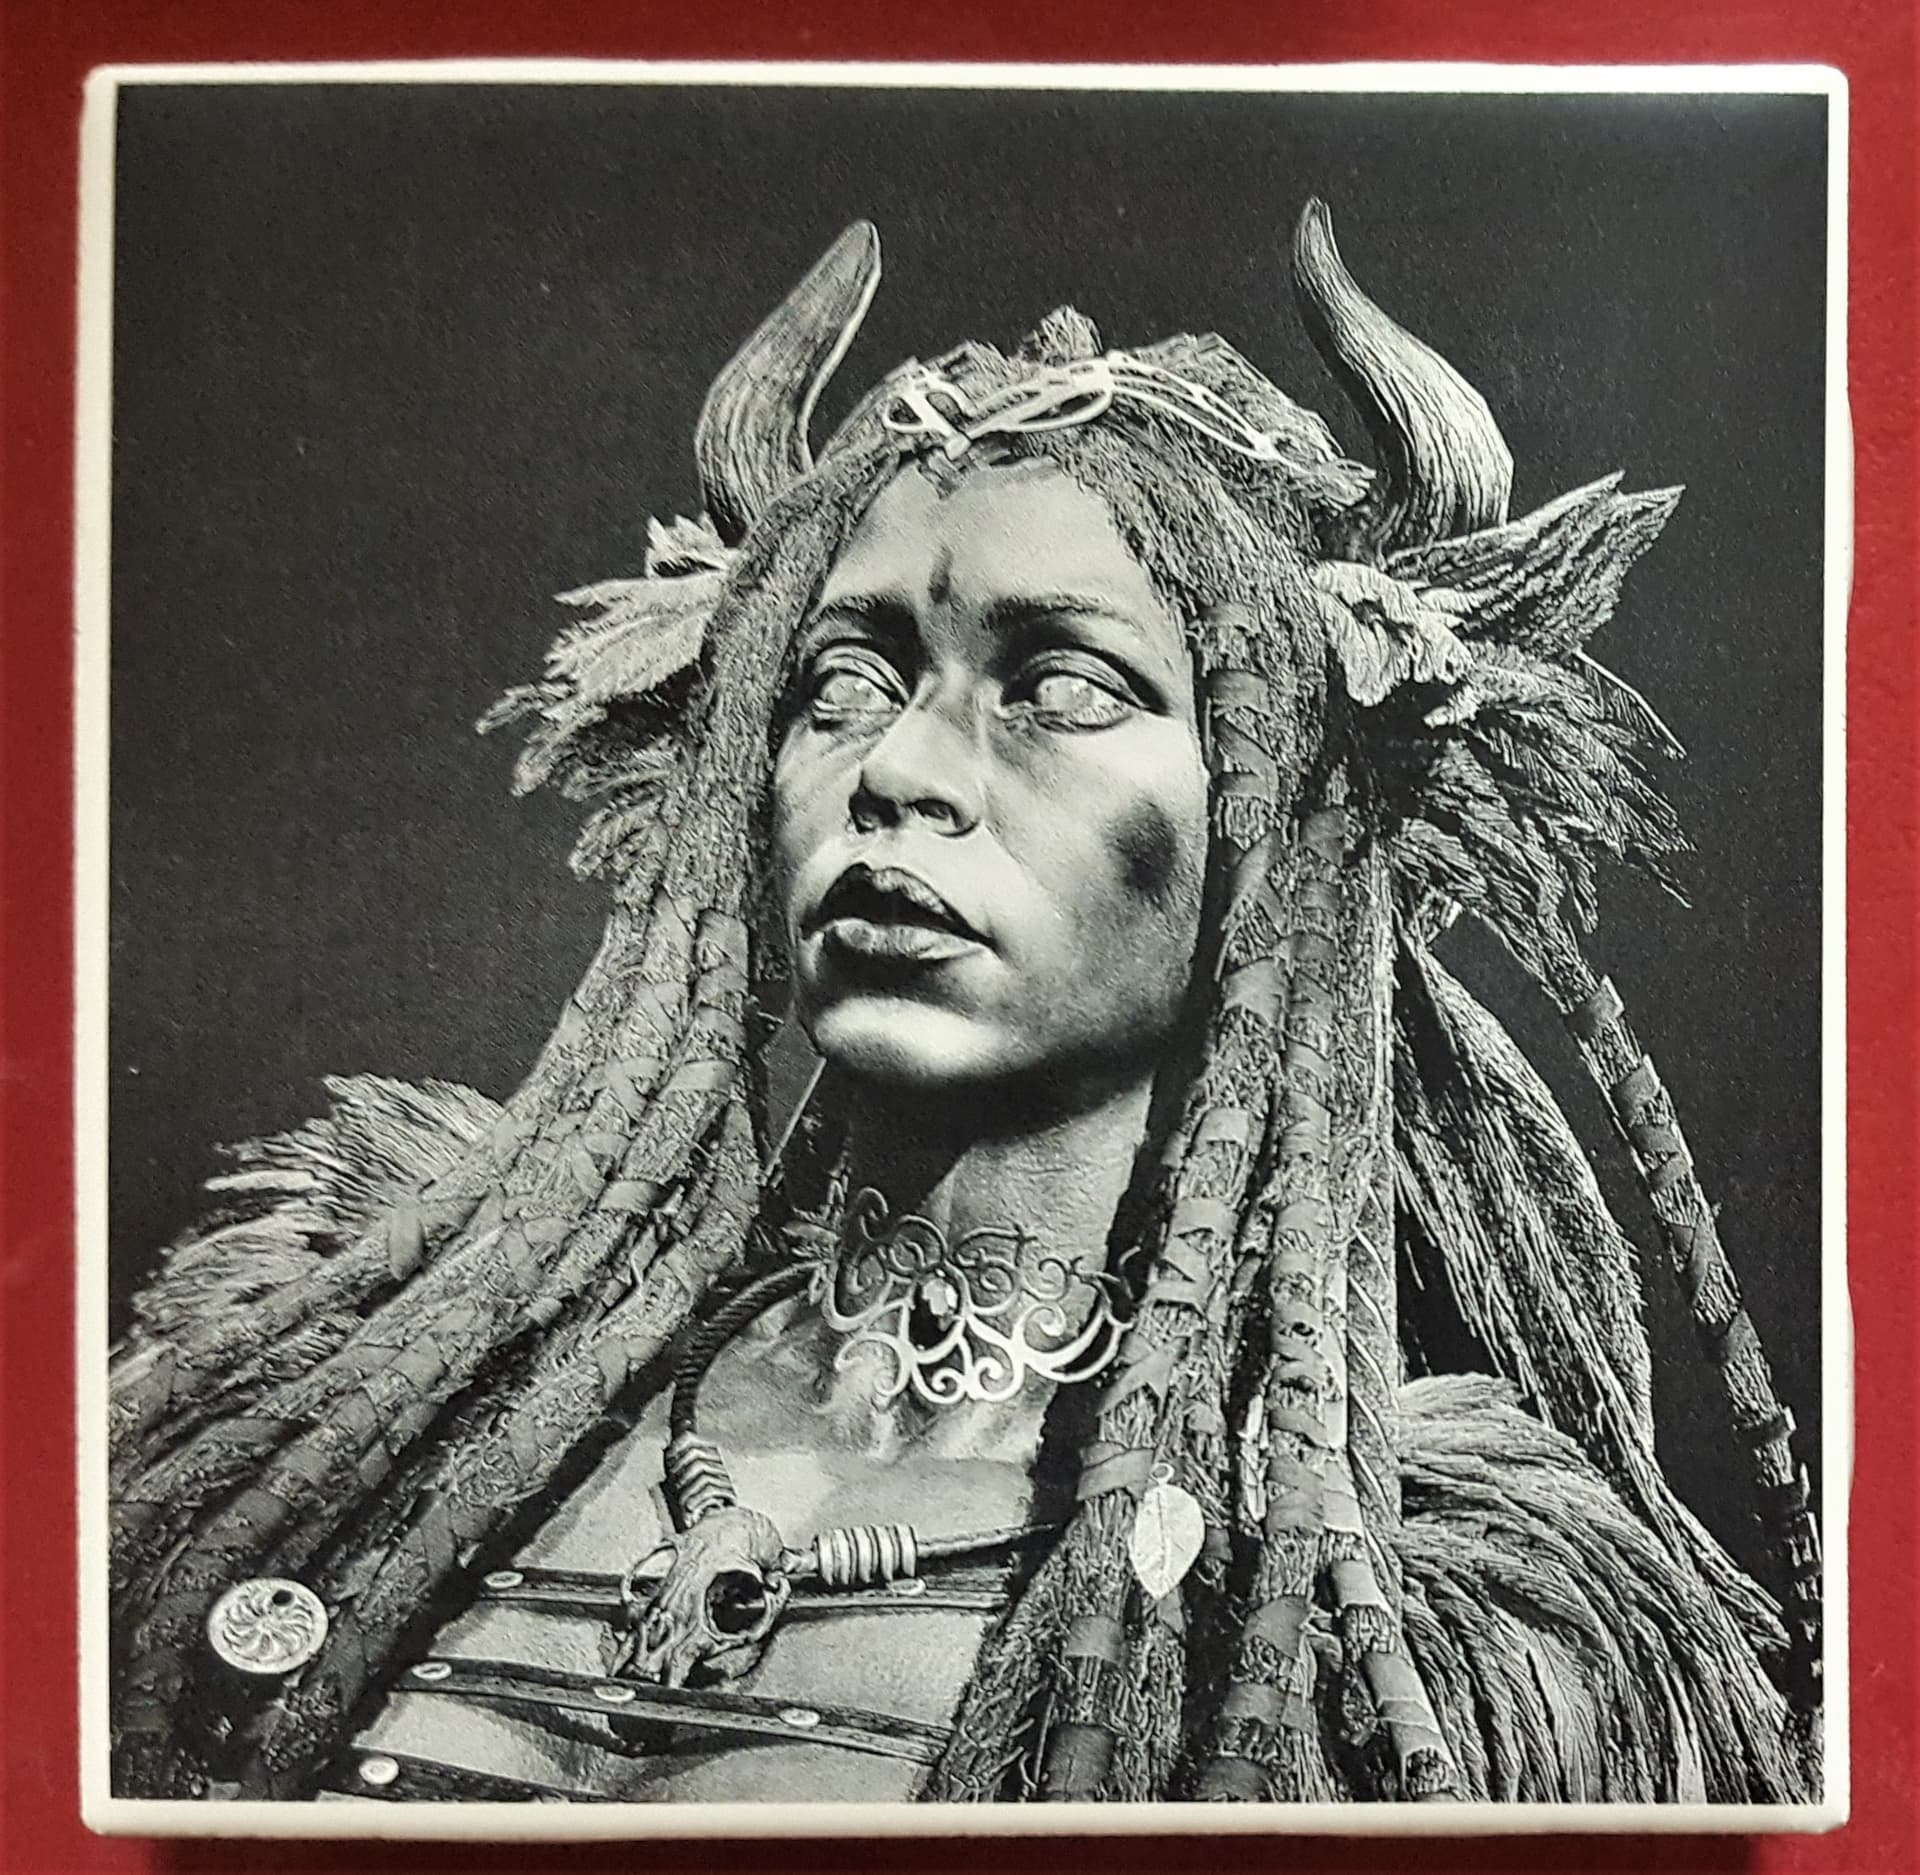
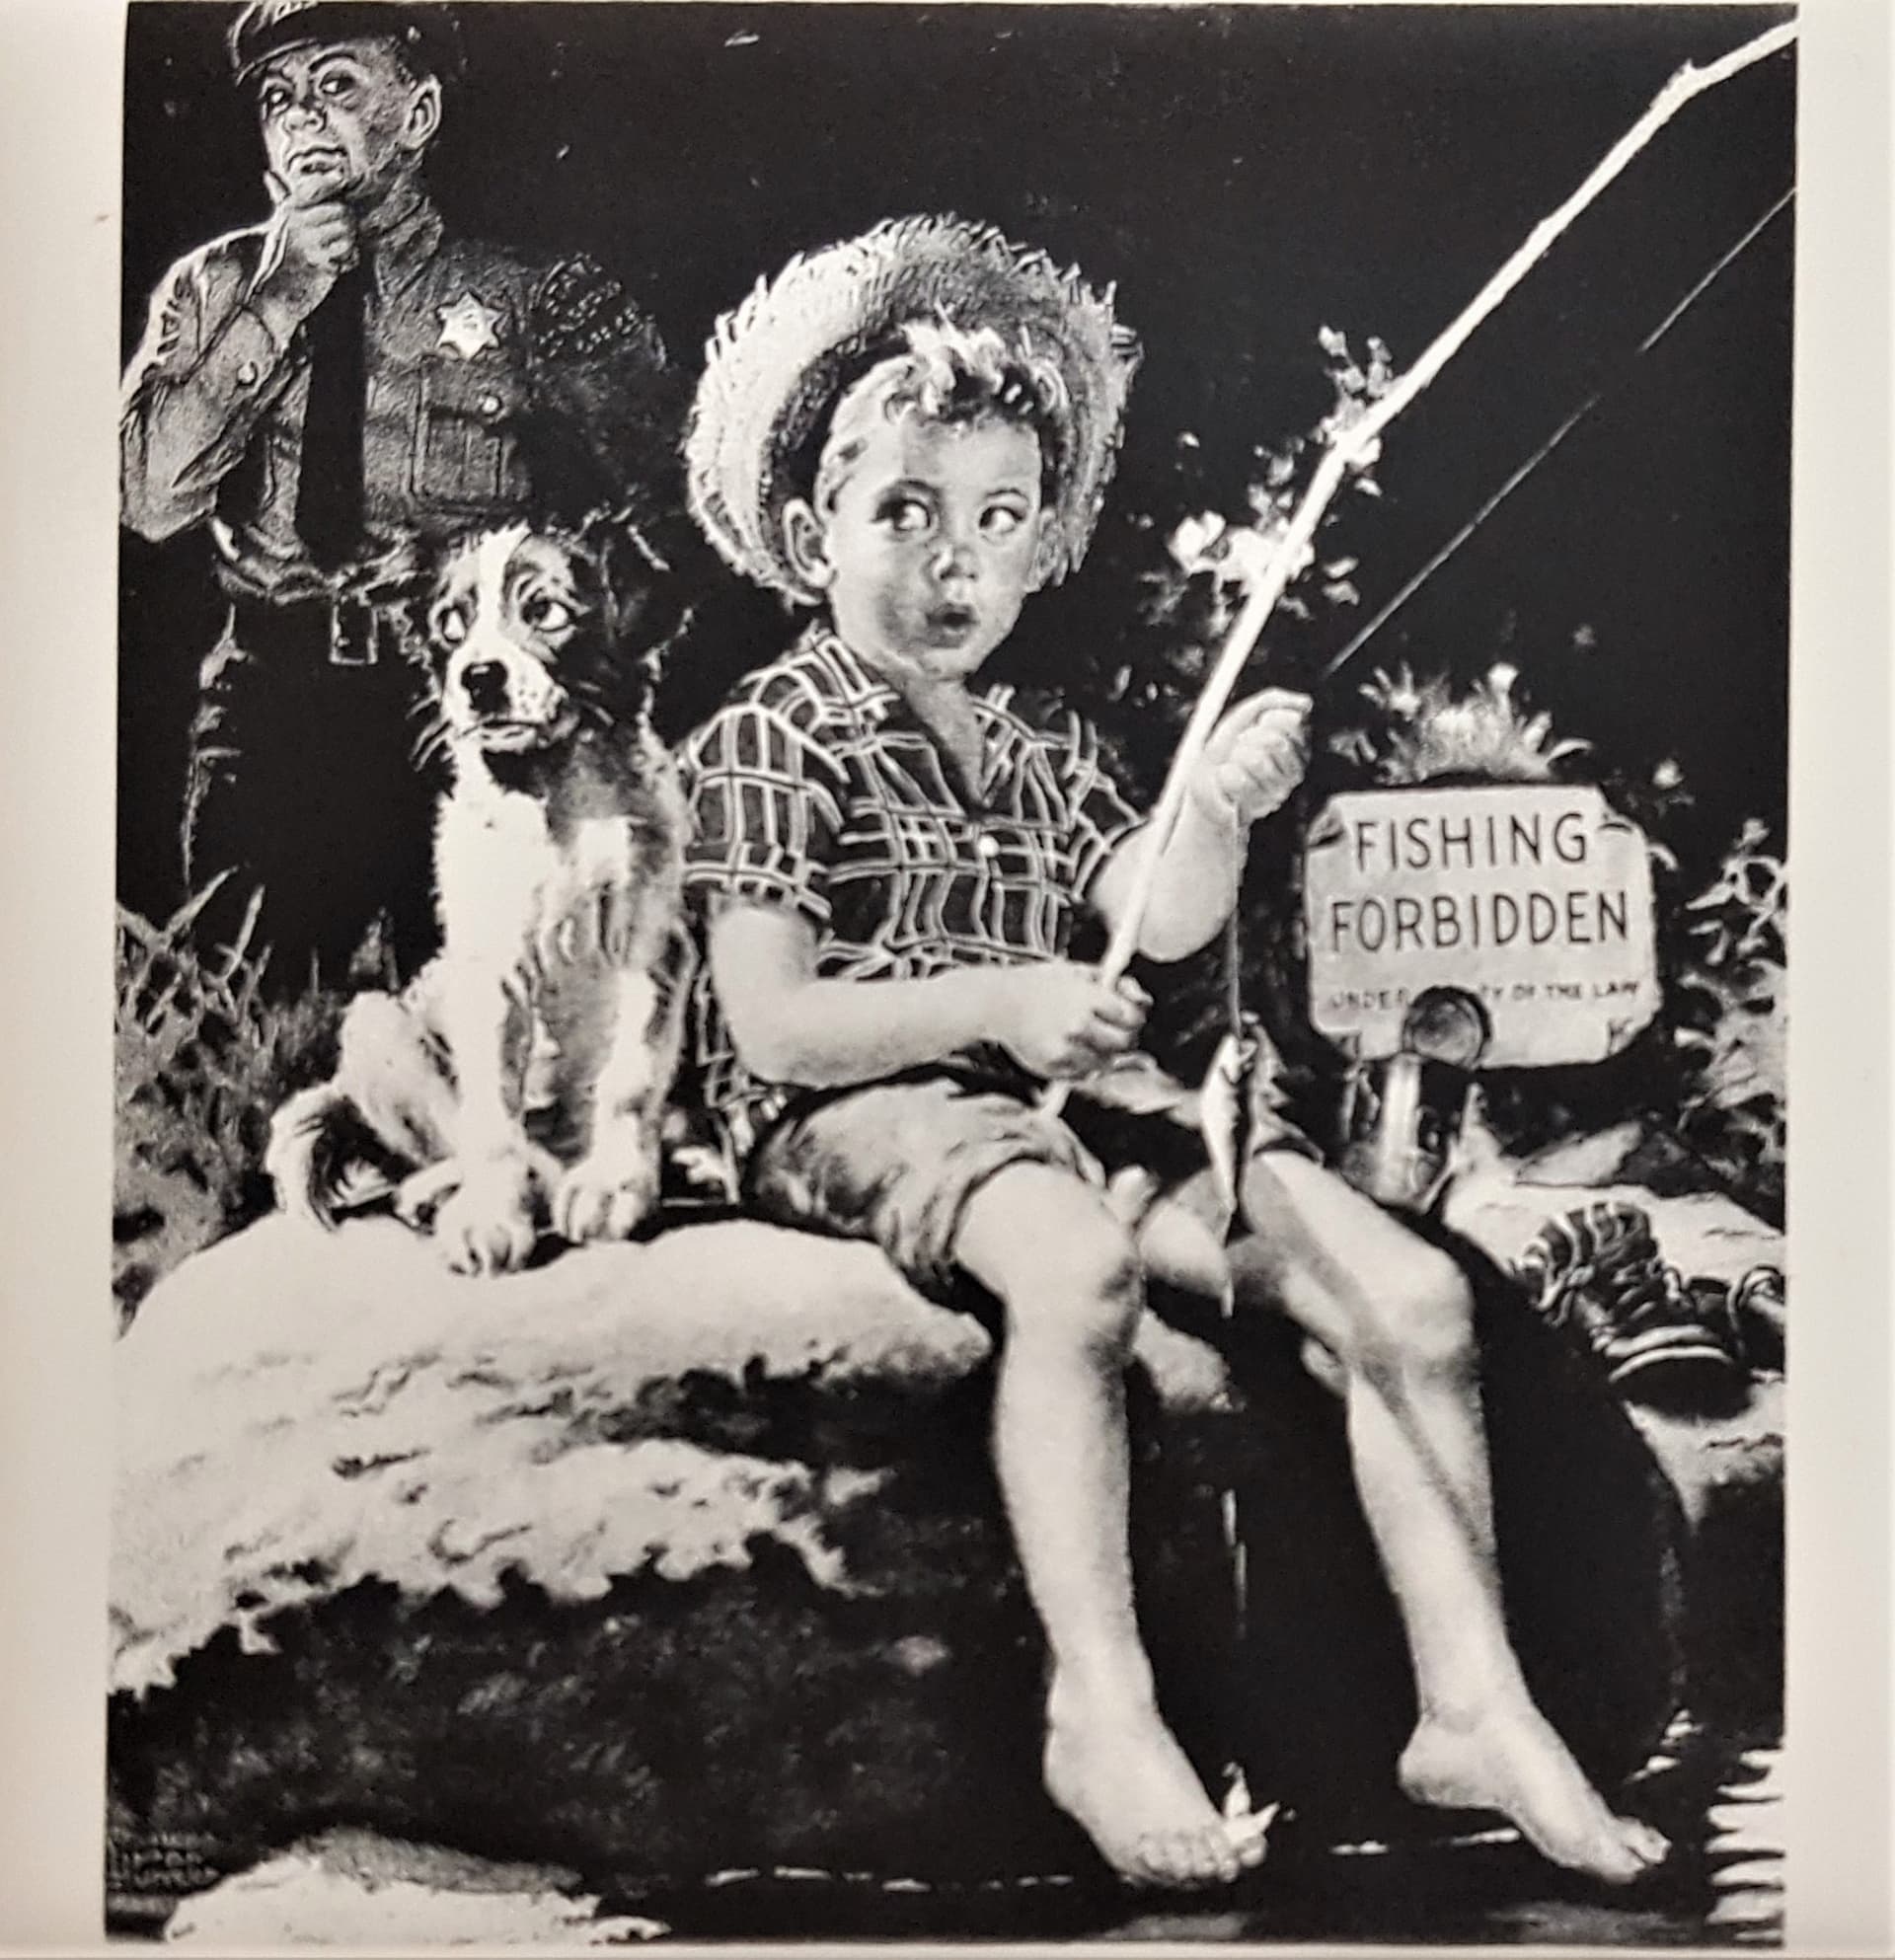
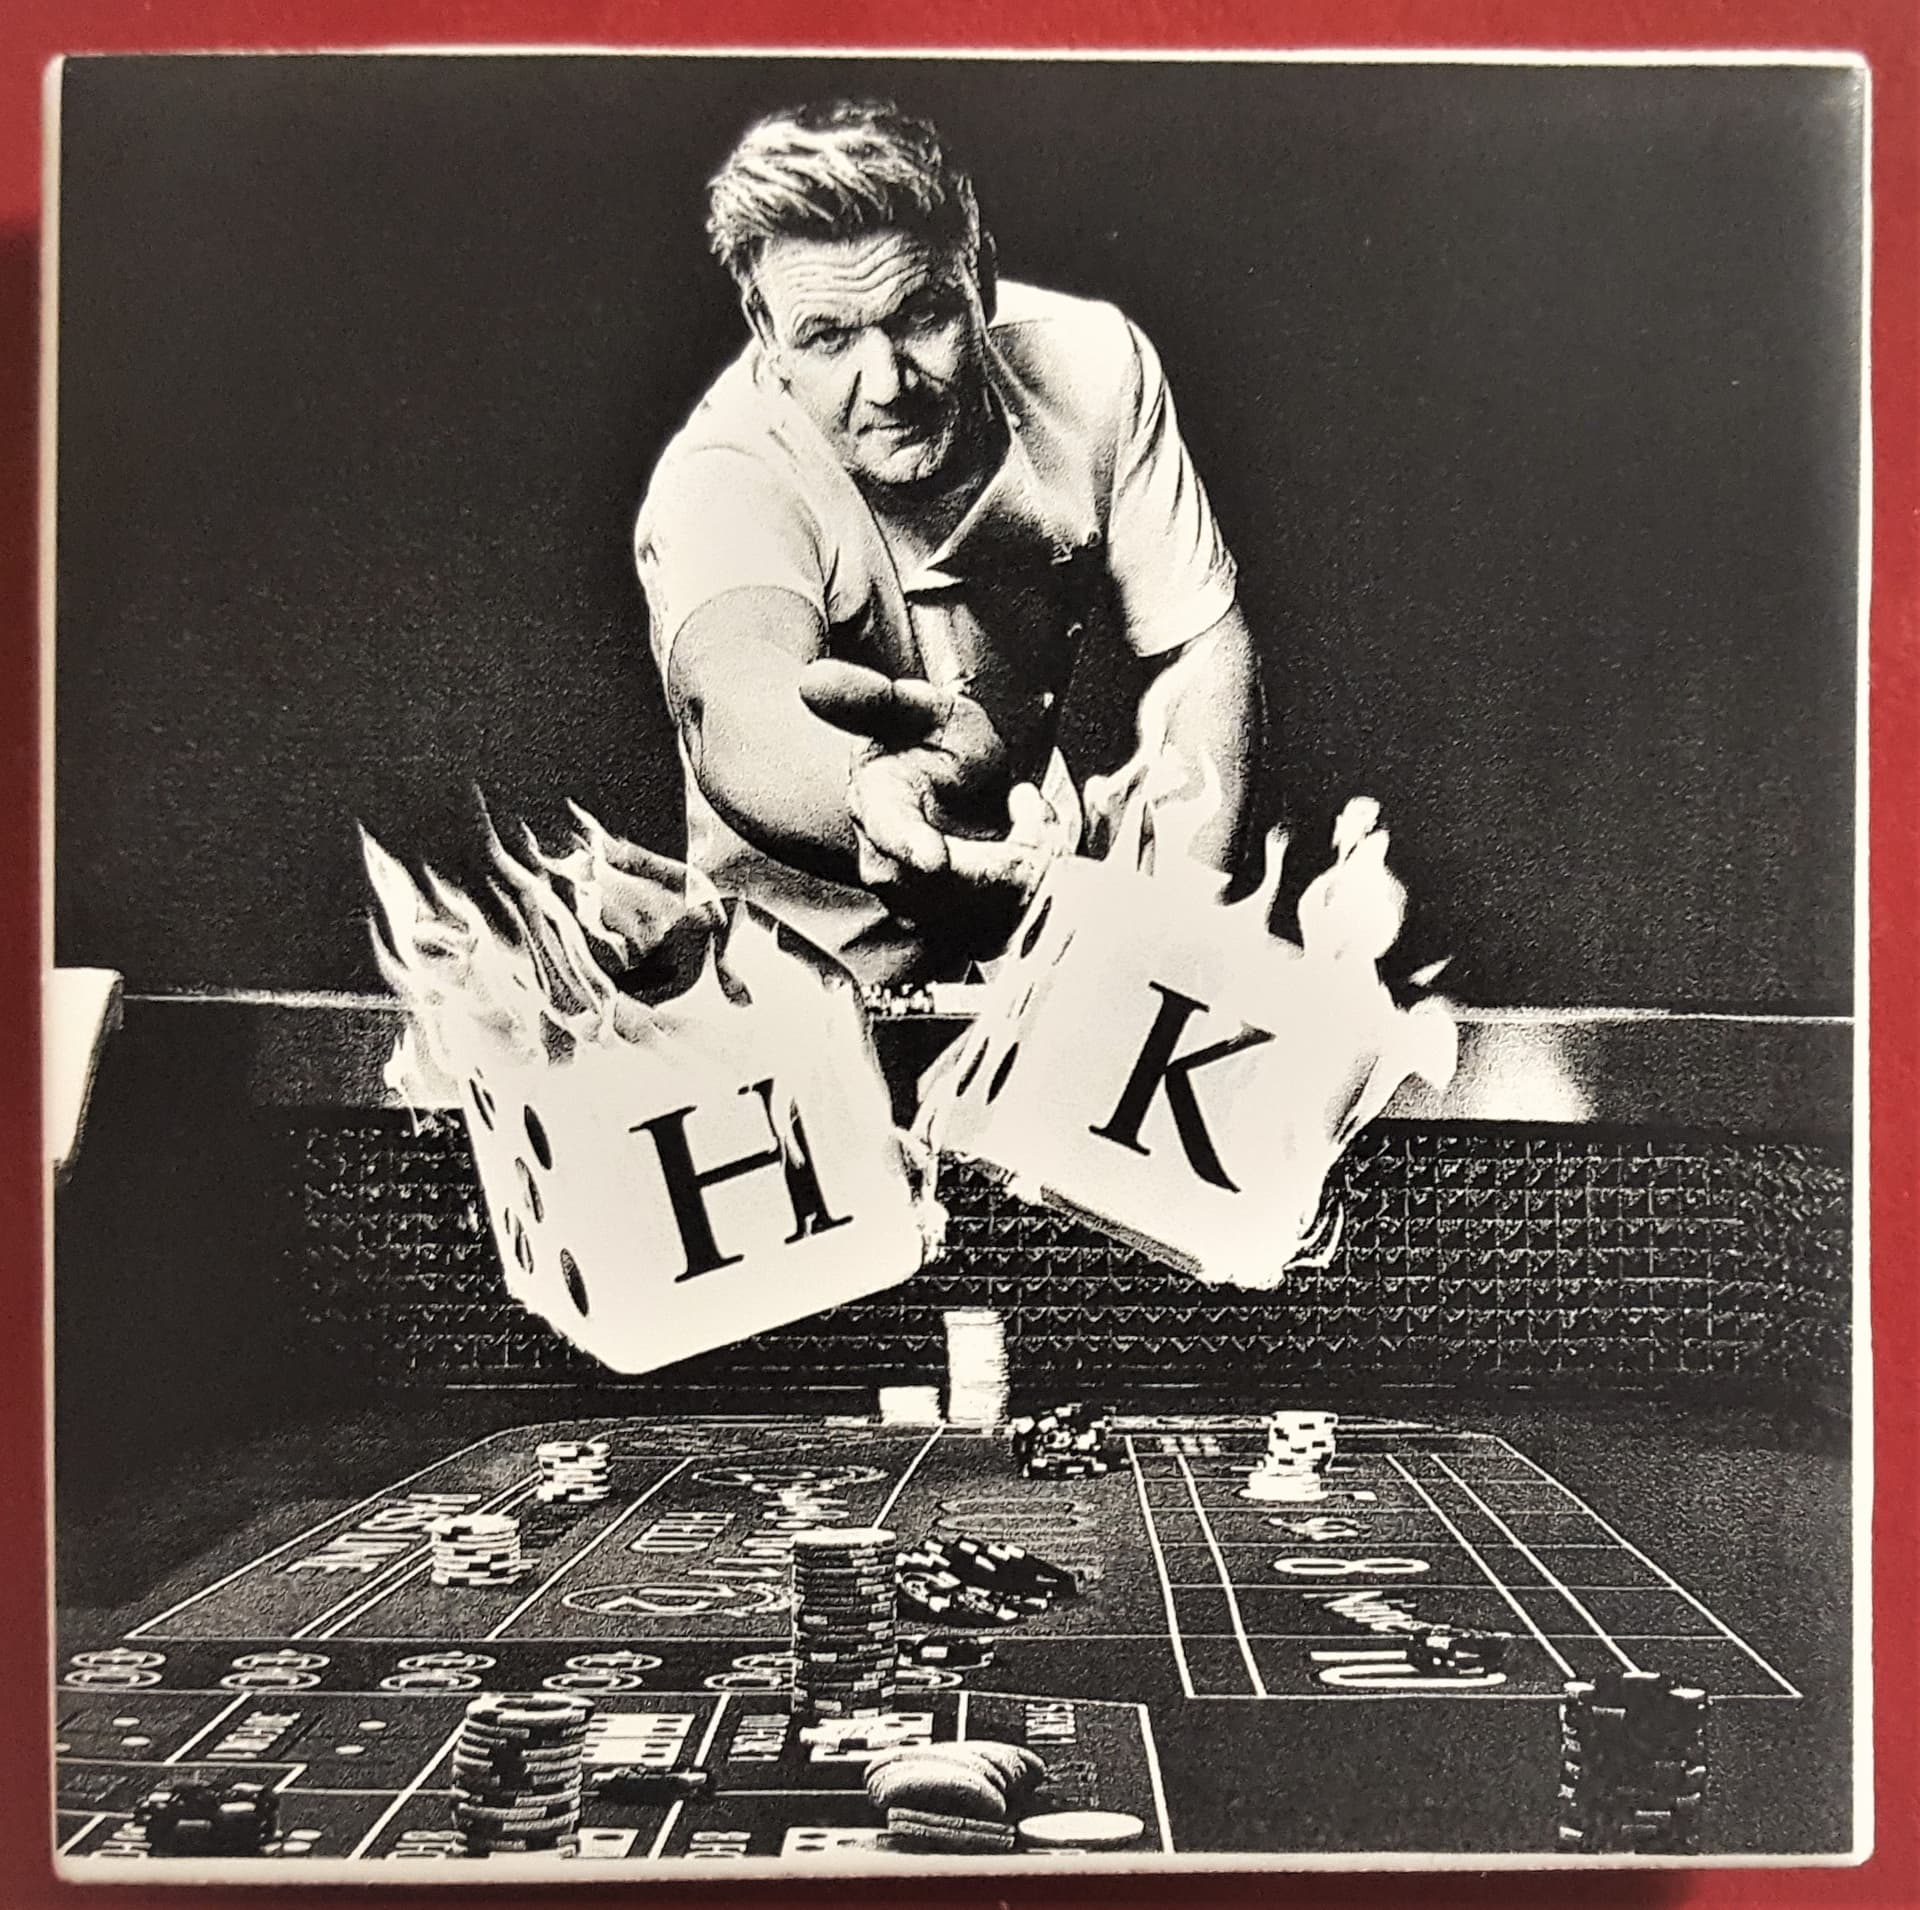
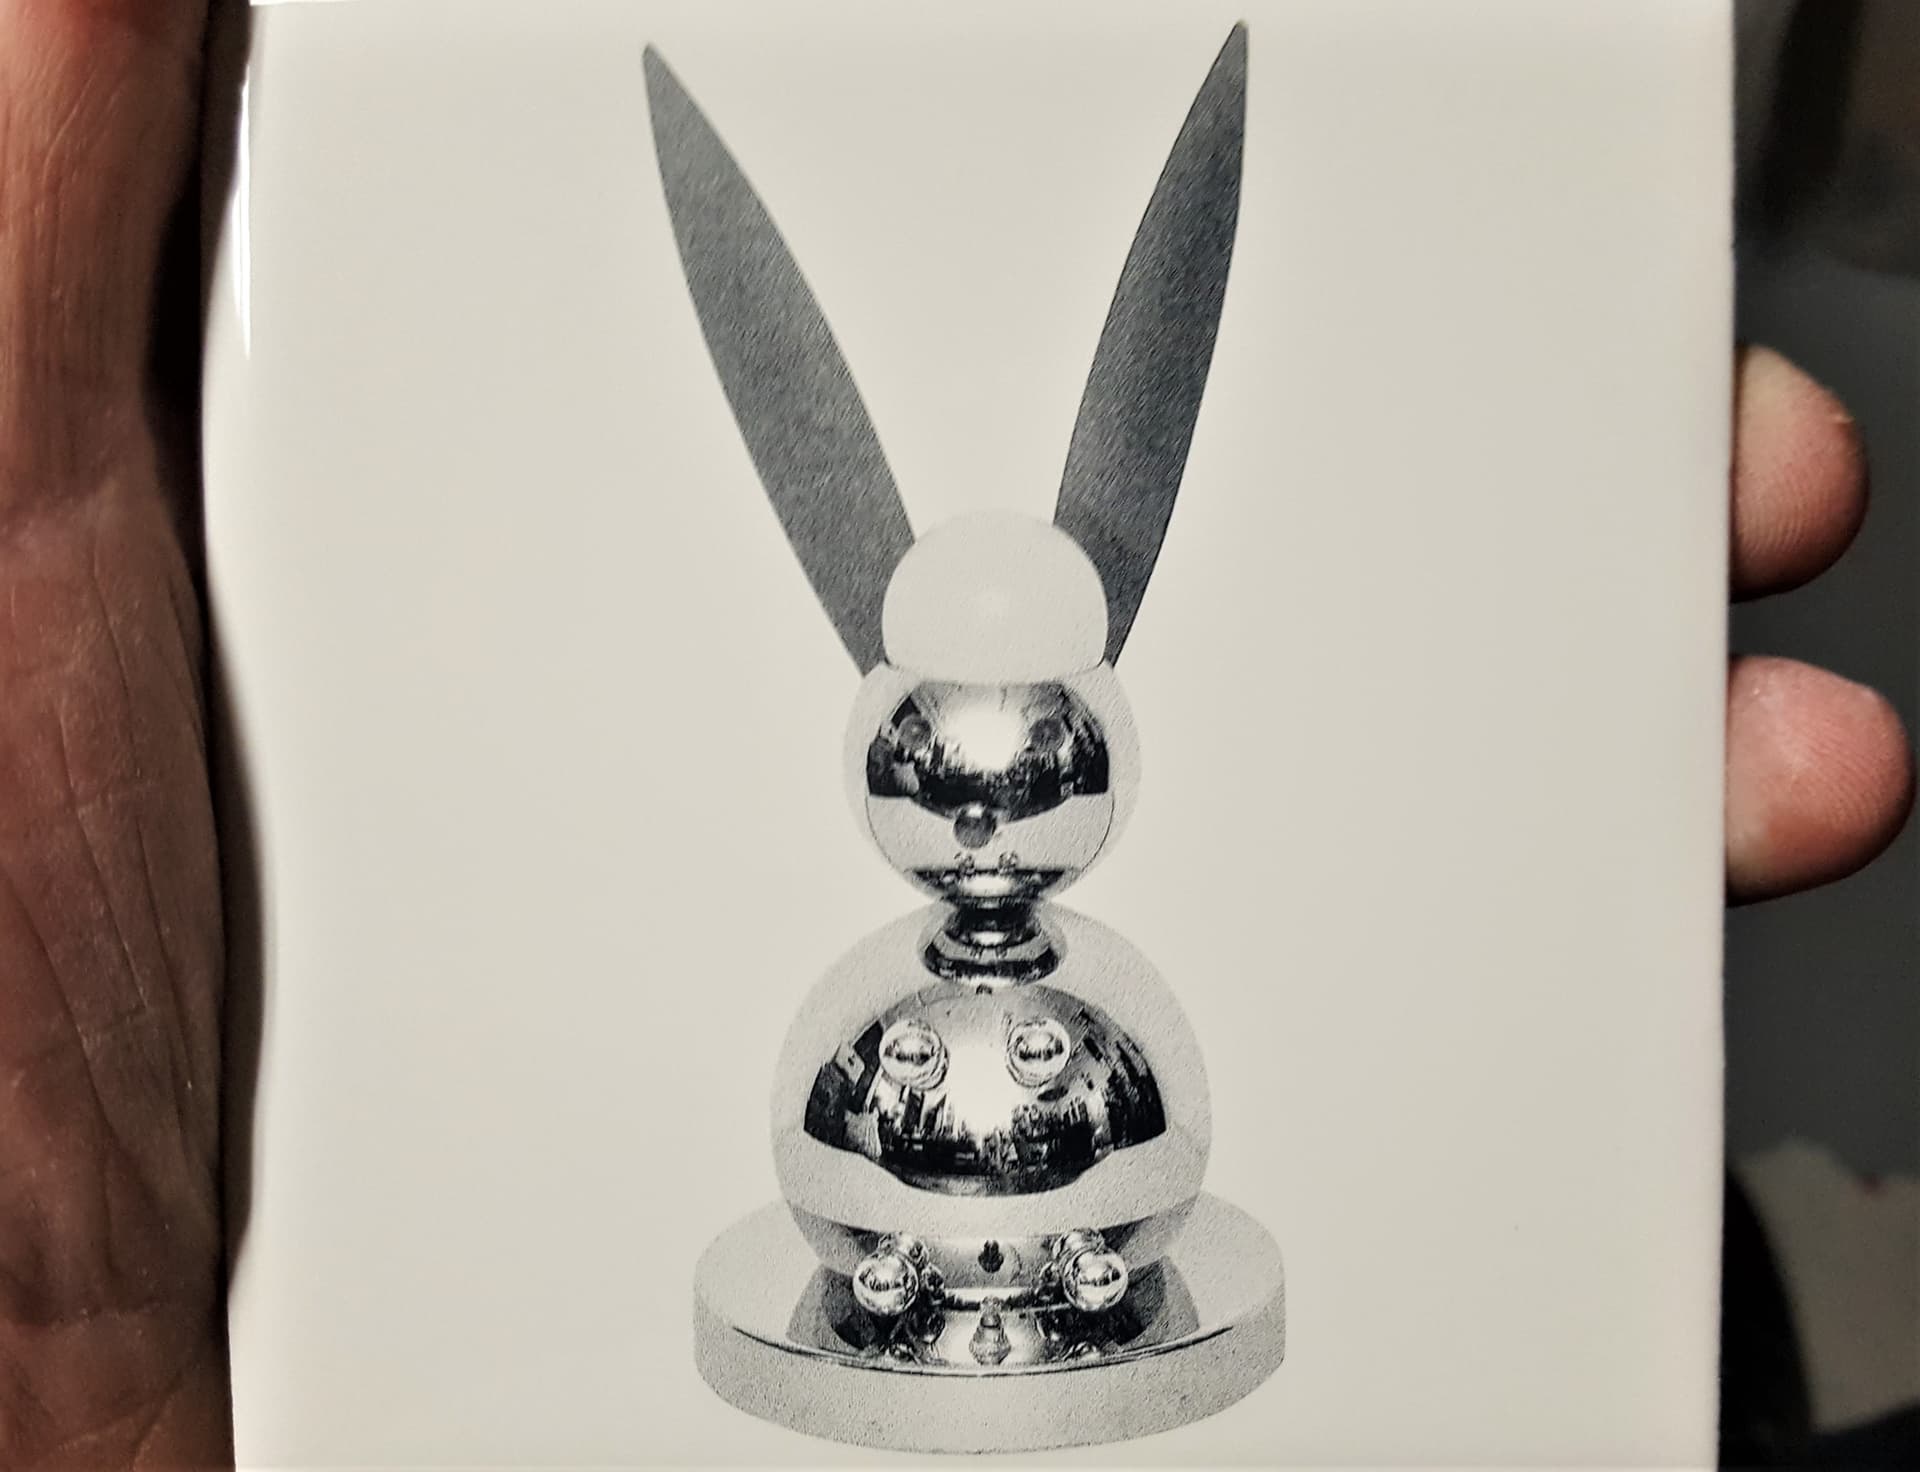
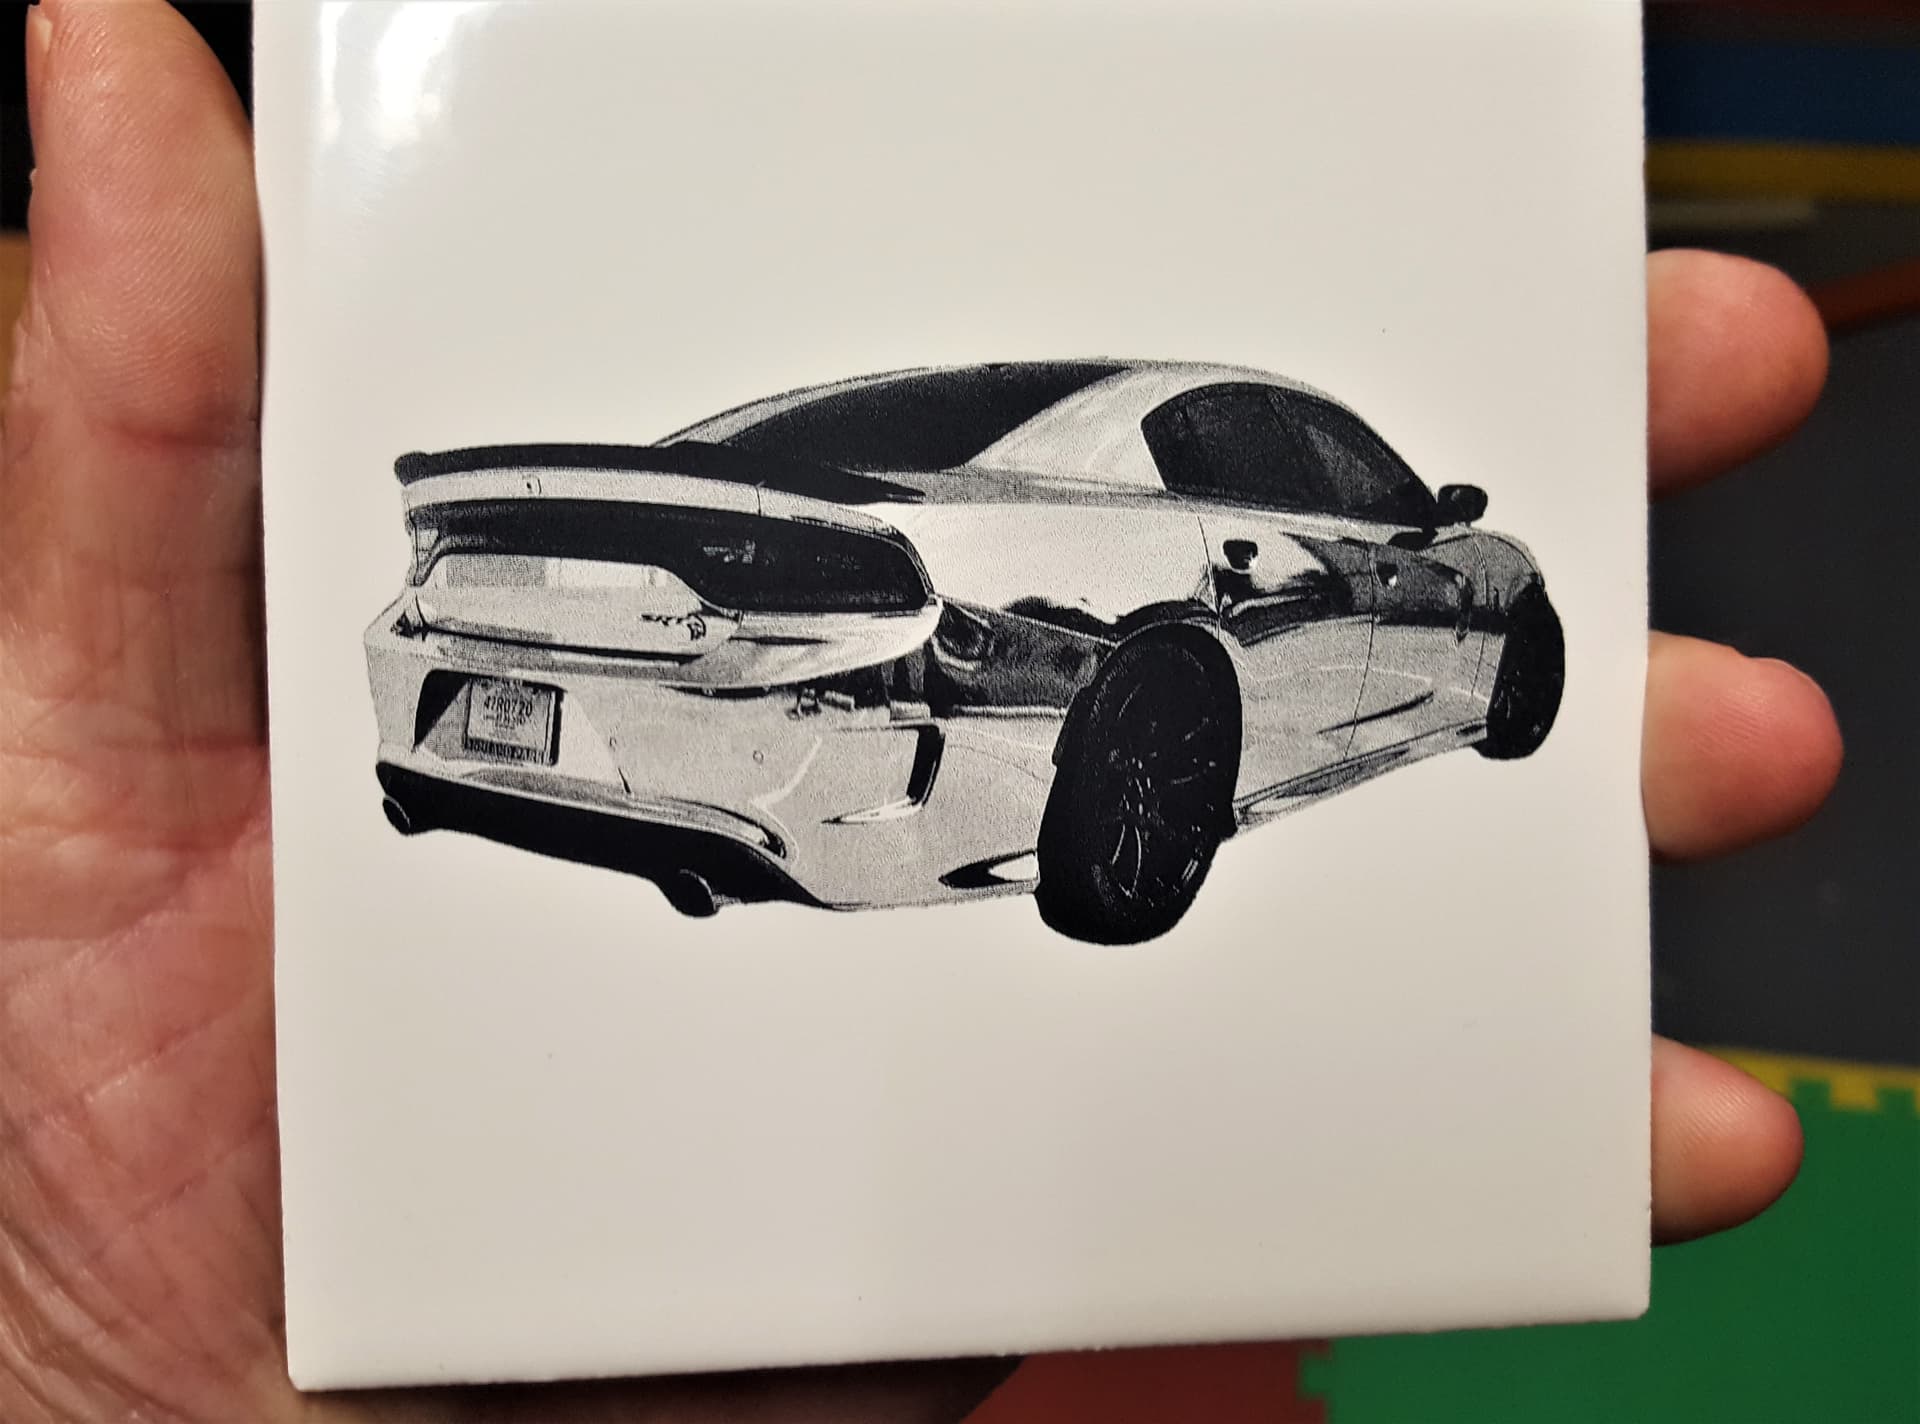
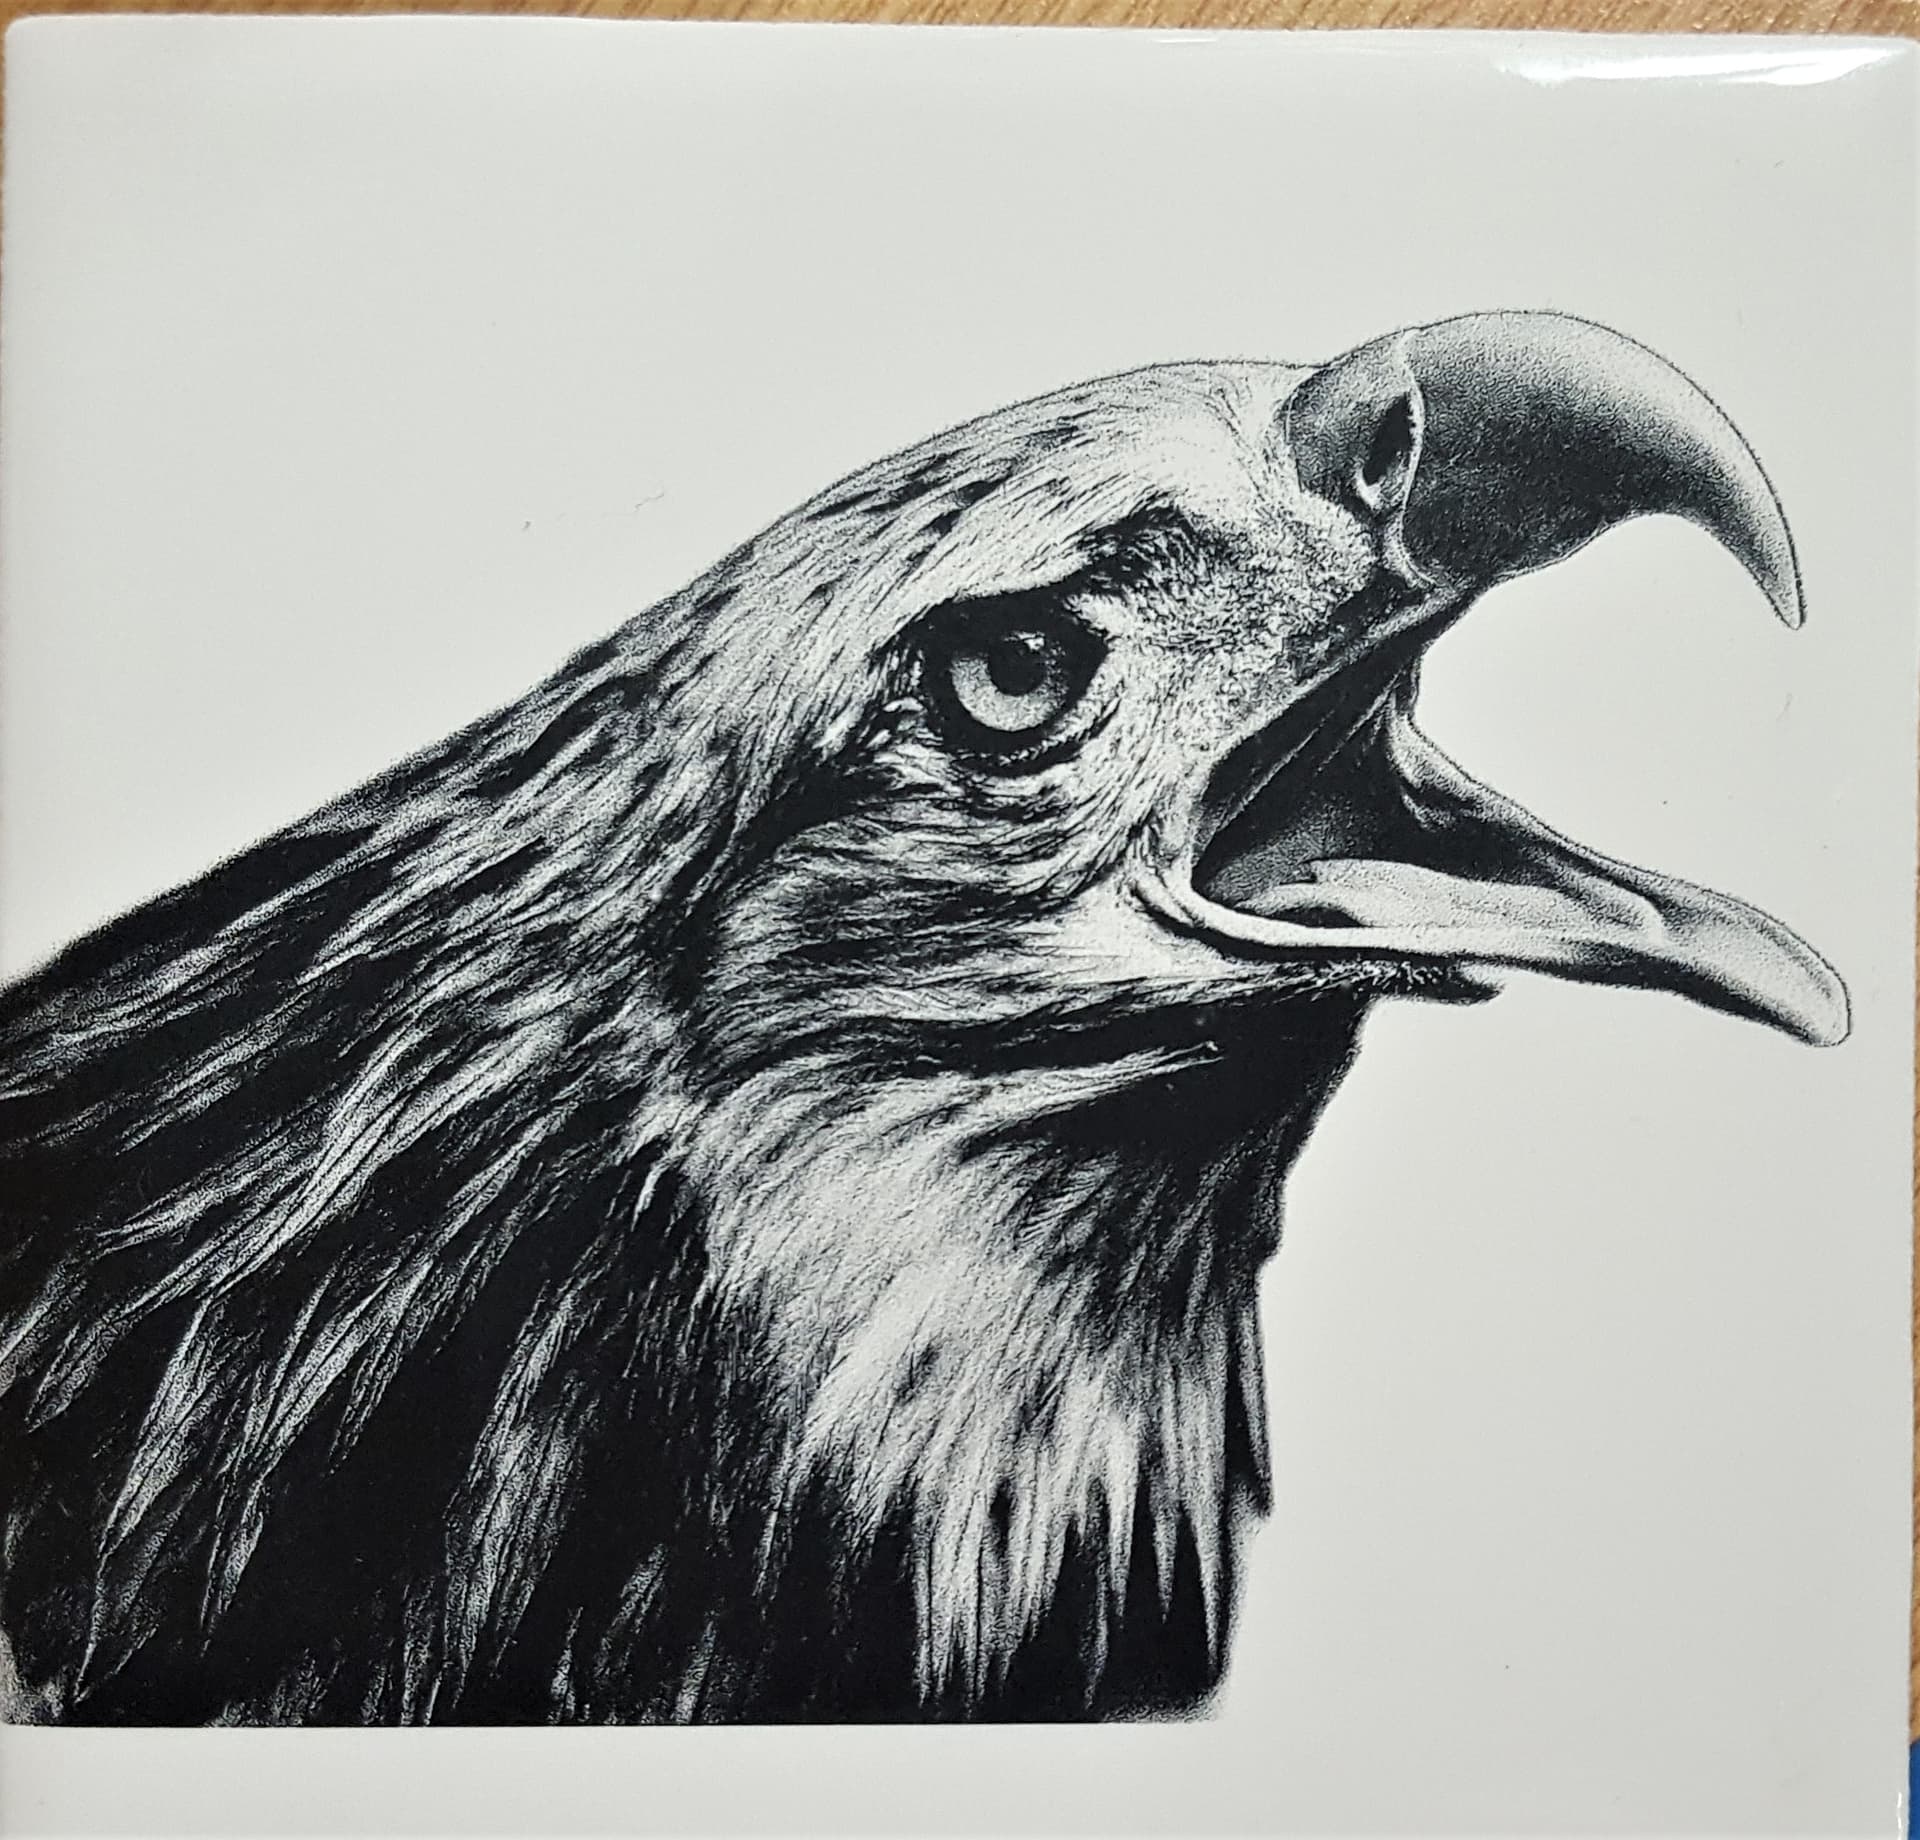
All these tiles where prepped in Lightburn and lasered using Stucki Dither
2 watt Oxlaser 1200 mm/min 70% power 318 DPI
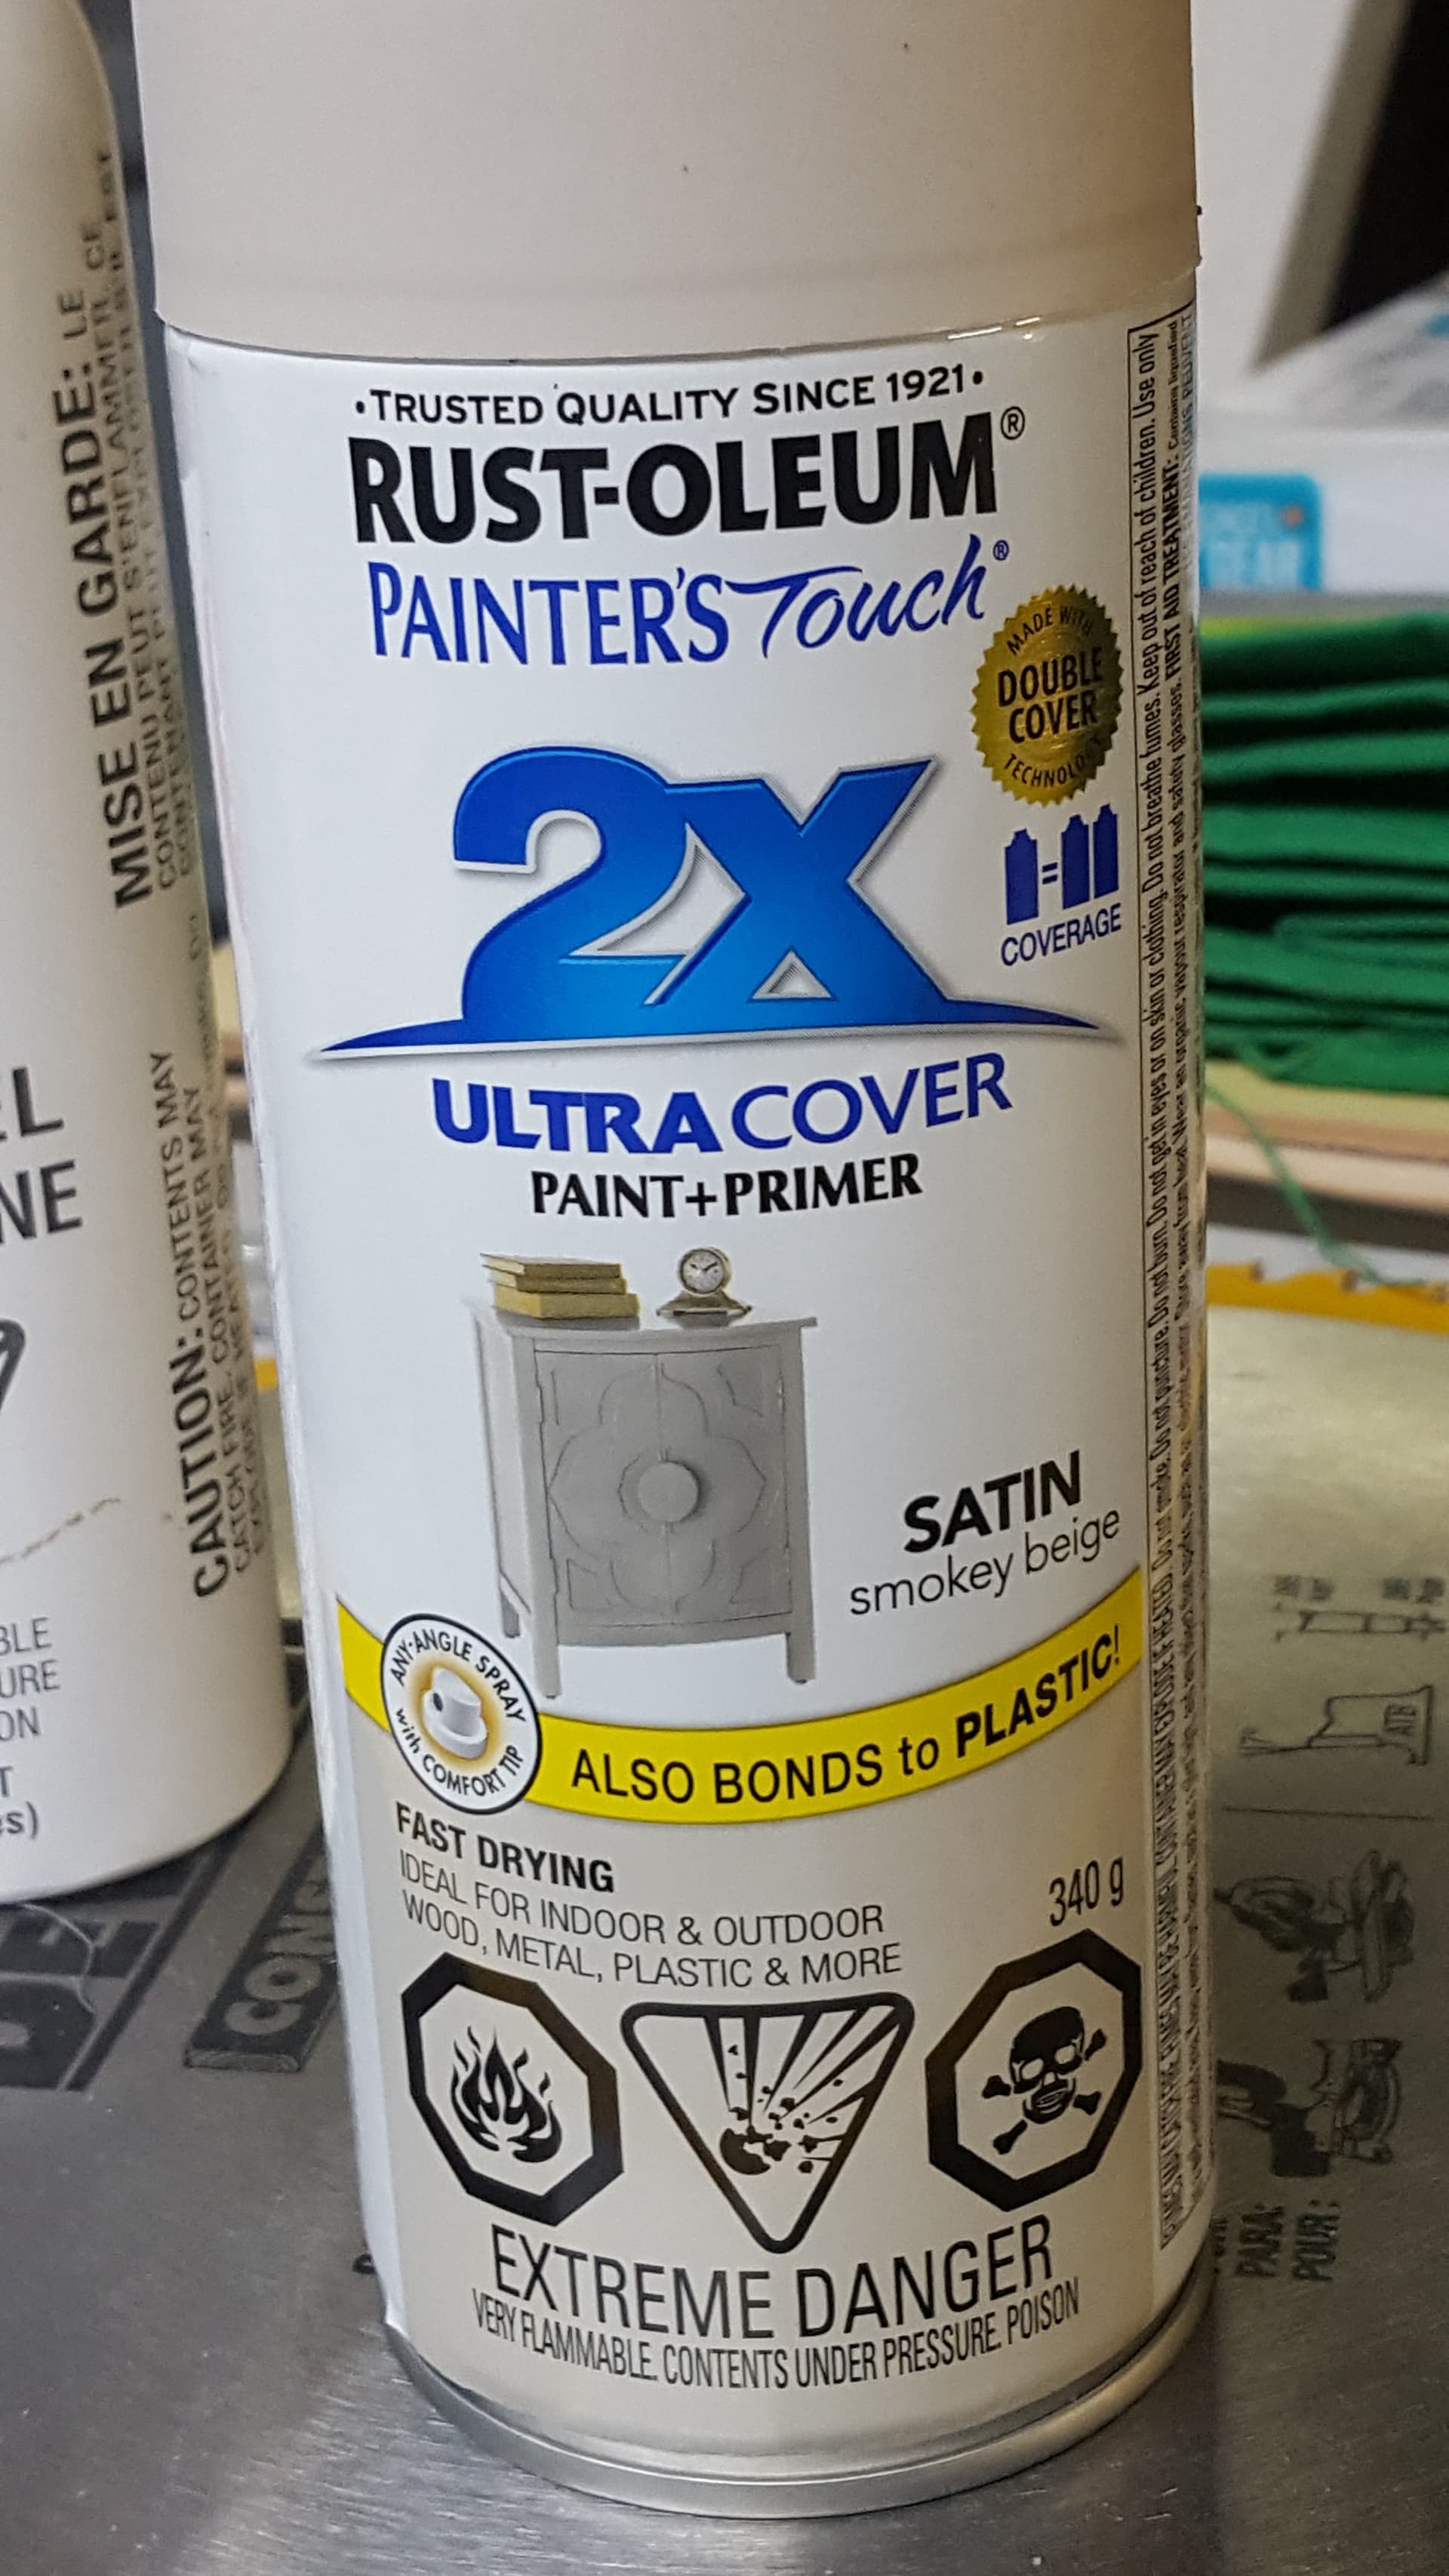
Trying Sandy beige satin paint


6 Likes
Great looking work as always! I have had good luck with the beige paint on my CO2 laser with tiles.
1 Like
So does the beige paint work better than white? I thought previous wisdom was that white was best.
It works as well as Flat white (TiO2 content) Plus I can see the paint coverage
3 Likes
Ahhh, see the coverage better. That makes sense. Thanks!
What kind of settings are you using? I’ve tried a few of the market preparations for metal and tile, but the deep blacks elude me. I have a China Blue 50 watt.
Those tiles by Nicky (thanks) are beautiful… 
I’ll have to go look at my system. I will get you that information tomorrow.
1 Like
Flammable, explosive, and poisonous!? SWEET! 

1 Like
What? no radioactive? Pffff… amateurs.
1 Like
@jkwilborn I have a OMT 60 watt running a Ruida controller. My starting parameters were 50 mm/sec speed and 35% power and no air assist. You do need a low speed fan at the side to blow away the paint that will accumulate around burn area or else it will get in the way of area you want to engrave. Using white tile and beige Rustoleum 2X.
For testing, I would play with the parameters on the Ruida controller and see which ones had the most effect on the engraving. Increase/decrease speed and power. Unfortunately I do not have any pictures of the finished product because I never actually finished one! I was doing a lot of experimenting on trying to get the best engraving so I have a lot of partial engraves but did get some great information on what was working and what was not. The numbers above gave me the best starting point and I was able to dial in the paint I was using at the time for the best results. All paints are going to be different so do not expect the same results unless you use the same paint every time.
2 Likes
Thanks for the numbers. Wrote them down in my book. I will give it a shot as soon as I’m back up and running. Have an alignment issue I’m trying to work out…
I generally run a very low air pressure when engraving, just for lens protection. When ‘status’ is active, I get low air pressure, high when I select air assist for the layer.
Thanks again.
1 Like
Great looking work! None of my tries have come out looking good yet.
Beautiful! How much trial and error is involved in getting any one of these turned out right?
Wow…checked on Amazon to purchase the paint…from 40$ to 75$ Canadian. If I intent to make a number of tiles, I will have to take a second mortgage on the house…
Those tiles are amazing. I’ve just begun my work on white tiles and have gotten some decent results, but nothing in this class of work - simply beautiful.
I have a question on these tiles before I go further in my experimenting though. My laser definitely projects a rectangular spot - very tight in the Y direction and wider in the X direction. Which direction is it better to sweep in order to make great tiles?
Also is it better to use Stucki or greyscale? I’ve been stuck with Stucky on my CO2 laser, but recently got a diode laser and hope to use greyscale.
Don’t know if it’s the same in Canada, but here (France), a lot of things are cost on amazon and cheaper in shops. Like this exact Rust-oleum.