this is the model of the laser machine that I have, it is 100W:
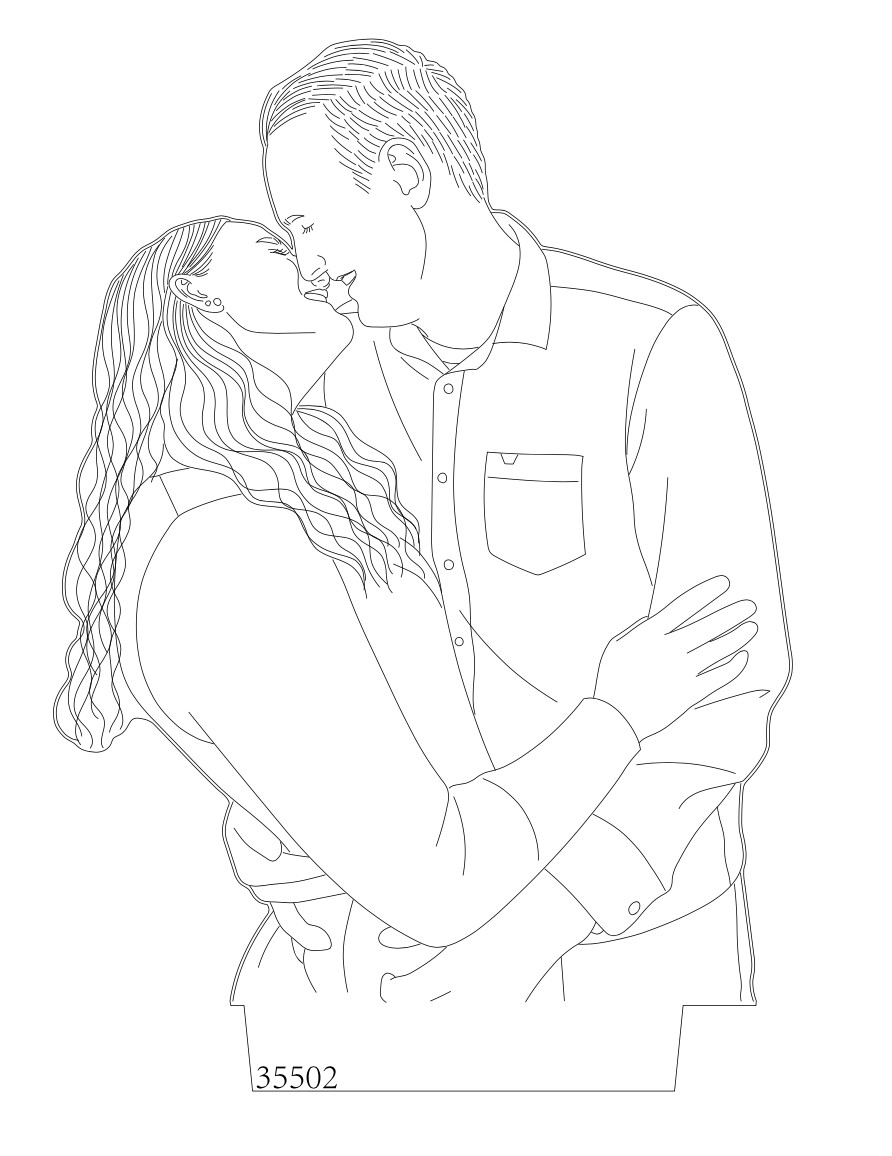
It is a new machine and I am a beginner. I have not much knowledge about all this but I want to make those plates. I did not do the example on the picture.
Also the acrylic is 6mm thick. Plexiglas cast acrylic.
There is no issue however with cutting it. I just do 60% power, 20 speed and run it 3 times. Thats not the problem. The problem is I can’t figure out how to vector engrave the lines inside the design. They need to be super thin like this guy does:
As you can see towards the end of the video, he also does it on acrylic. If you can tell me how I can do that on Lightburn with my laser I will make you a lamp and send it to you as a thank-you gift
I dont have the lbrn file just an .ai file.
What setups do you mean? How can I do that?
I should clarify: so at 400 speed and 10% power i dont cut completely through but I do scratch the surface of the acrylic something like 1mm deep. And for my need that is too much. I think the video above shows pretty well what I am trying to say that I need. Just very thin vector engraved lines. Not raster engraved.
And for the cutting i do three passes because if I do one with more power and less speed, it leaves burn marks on the edges of the plate.
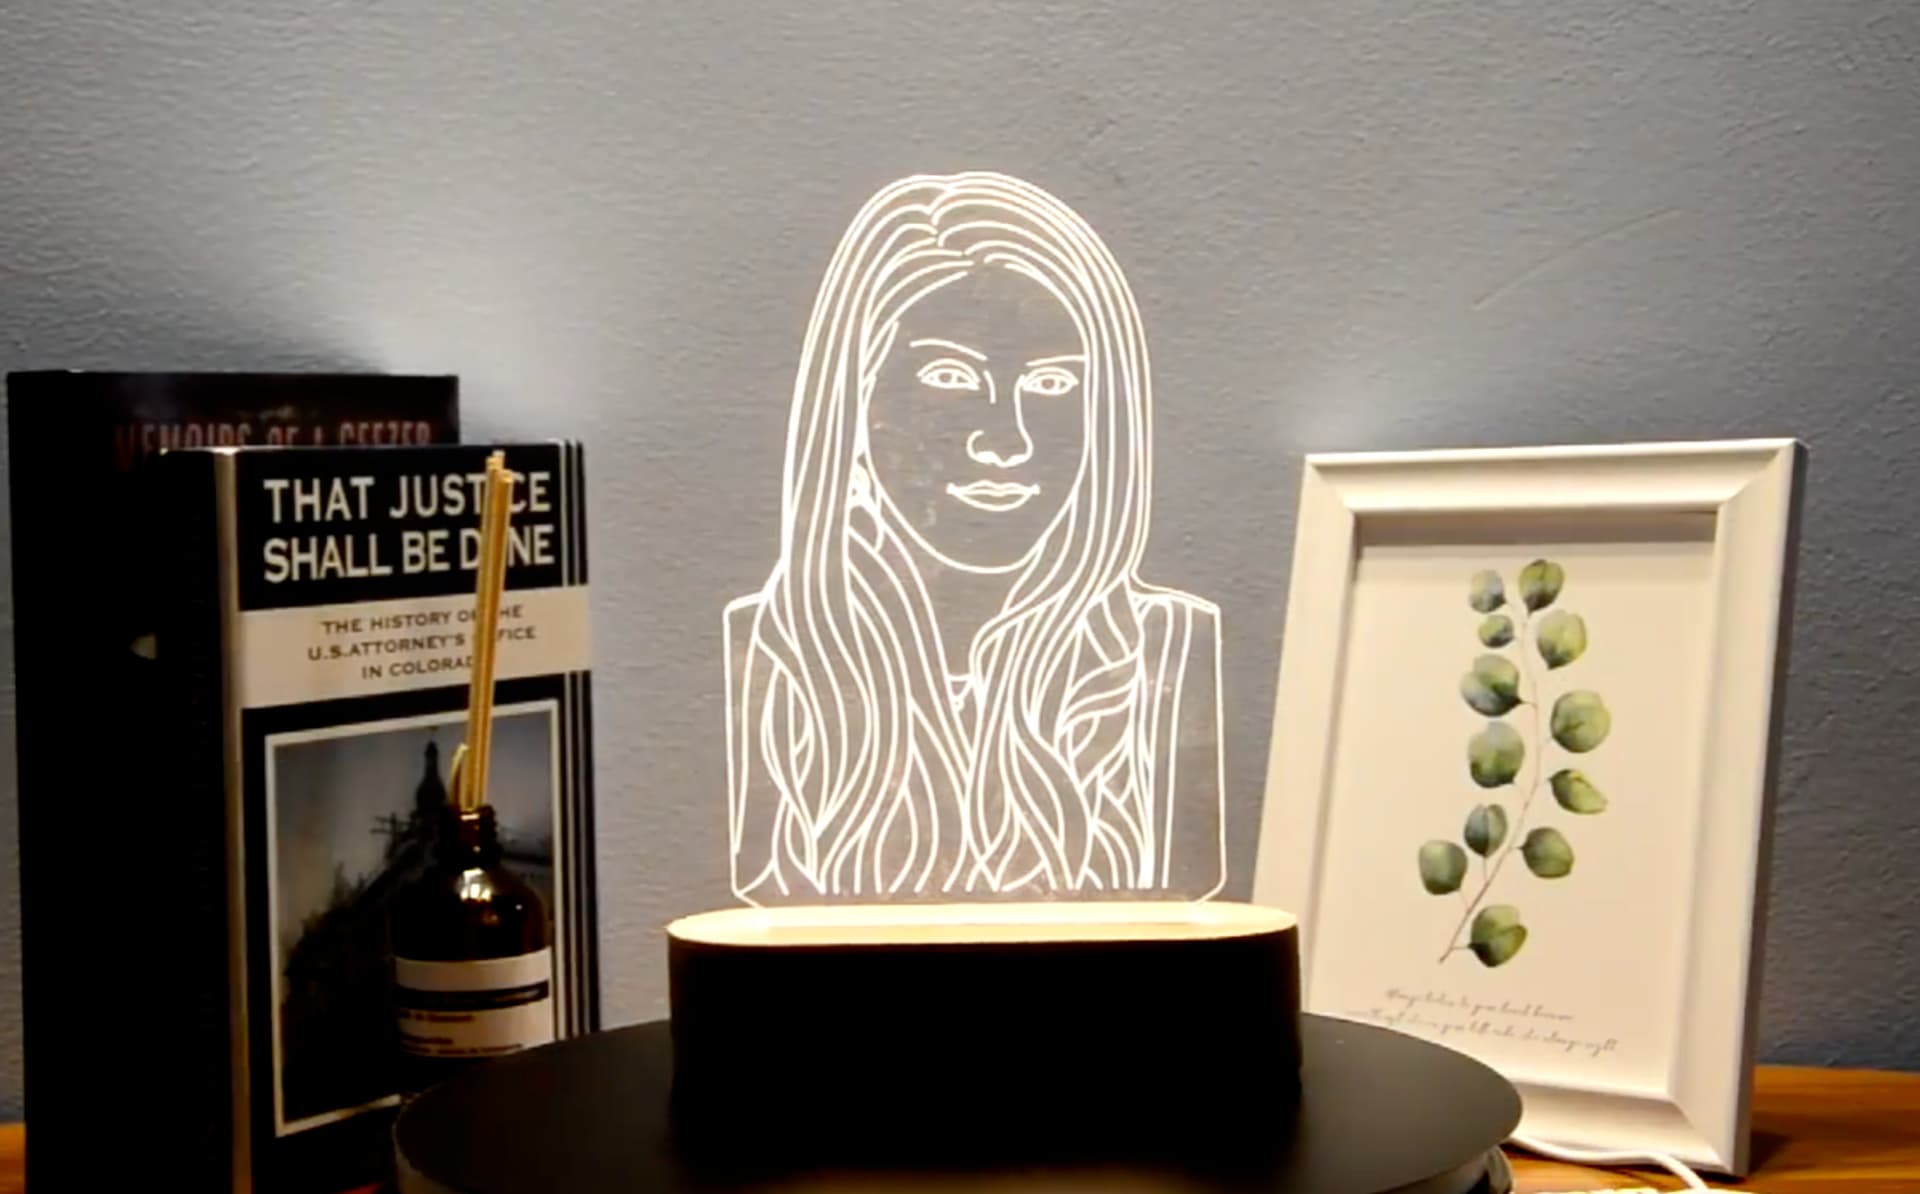
I’ve downloaded the text file, renamed it to AI, imported it in LB. It consists entirely of vectors as expected, no closed shapes to be set to fill. The amount of manual effort necessary to create fills to be engraved would be enormous, but there’s an easy work-around.
I’m not sure how to do it in LB or if it can be done, but in Inkscape, there’s a stroke to path feature. I set the line width for the entire image to 0.150 mm and converted all strokes to paths. The result came out nearly perfect. I had to remove the outer path to create a proper fill/stroke count, otherwise the entire image was a filled silhouette.
You can now create this as a fill operation with appropriate higher speeds and lower powers (and extended project time!) or use the line settings, likely with the same undesired results as before.
Both of the files I attached have the vector image to the left and the modified image to the right. You can delete the right hand image and ensure that the remaining layer is set to line. The left hand image did not have any flaws (or I corrected them and forgot that I did) and when the layer is set to line, should perform as in the video.
I am able to cut 3 mm acrylic with a single pass with a 60W tube. The numbers you’ve provided with respect to repeated passes creates a question about the laser. 60%, 20 speed? and 3 passes seems excessive. Does your 20 speed reference mean 20 mm / second?
If your laser will fire at 10%, you should be able to get a speed setting that engraves in vector form. My 60W will not fire below 12% and I understand that higher power lasers will have a higher minimum power setting.