Can anyone tell me what causes Vertical lines while engraving a large file on cedar pickets?
I have the Monport Reno 65 pro. Any help will be appreciated. John
Can anyone tell me what causes Vertical lines while engraving a large file on cedar pickets?
I have the Monport Reno 65 pro. Any help will be appreciated. John
A picture would go a LONG way to getting your question answered.
I have a pretty wild imagination, and sorting through all the things that could cause your issue may take a while.
While you are getting a photo of the alleged lines…
How about a screenshot of your settings? Cuts/layers window, your preview screen.
Does this artifact appear on anything else you have engraved? Have you engraved anything else?
Because we can’t see the problem, the original image, or the LightBurn settings, it’s hard to be more specific. After you rule out differences due to the wood grain, then it’s likely a mechanical problem in the X axis drive train.
If that is the machine, then:
If those checks don’t reveal anything, upload some photos and screenshots to help us see what you see.
Hello Jim, Thanks, I will find a piece to show you and anyone who can help.
Hello Ednisley, Thanks for responding so fast. I will get a picture up in a bit as I’m in the middle of finishing a job. Thanks
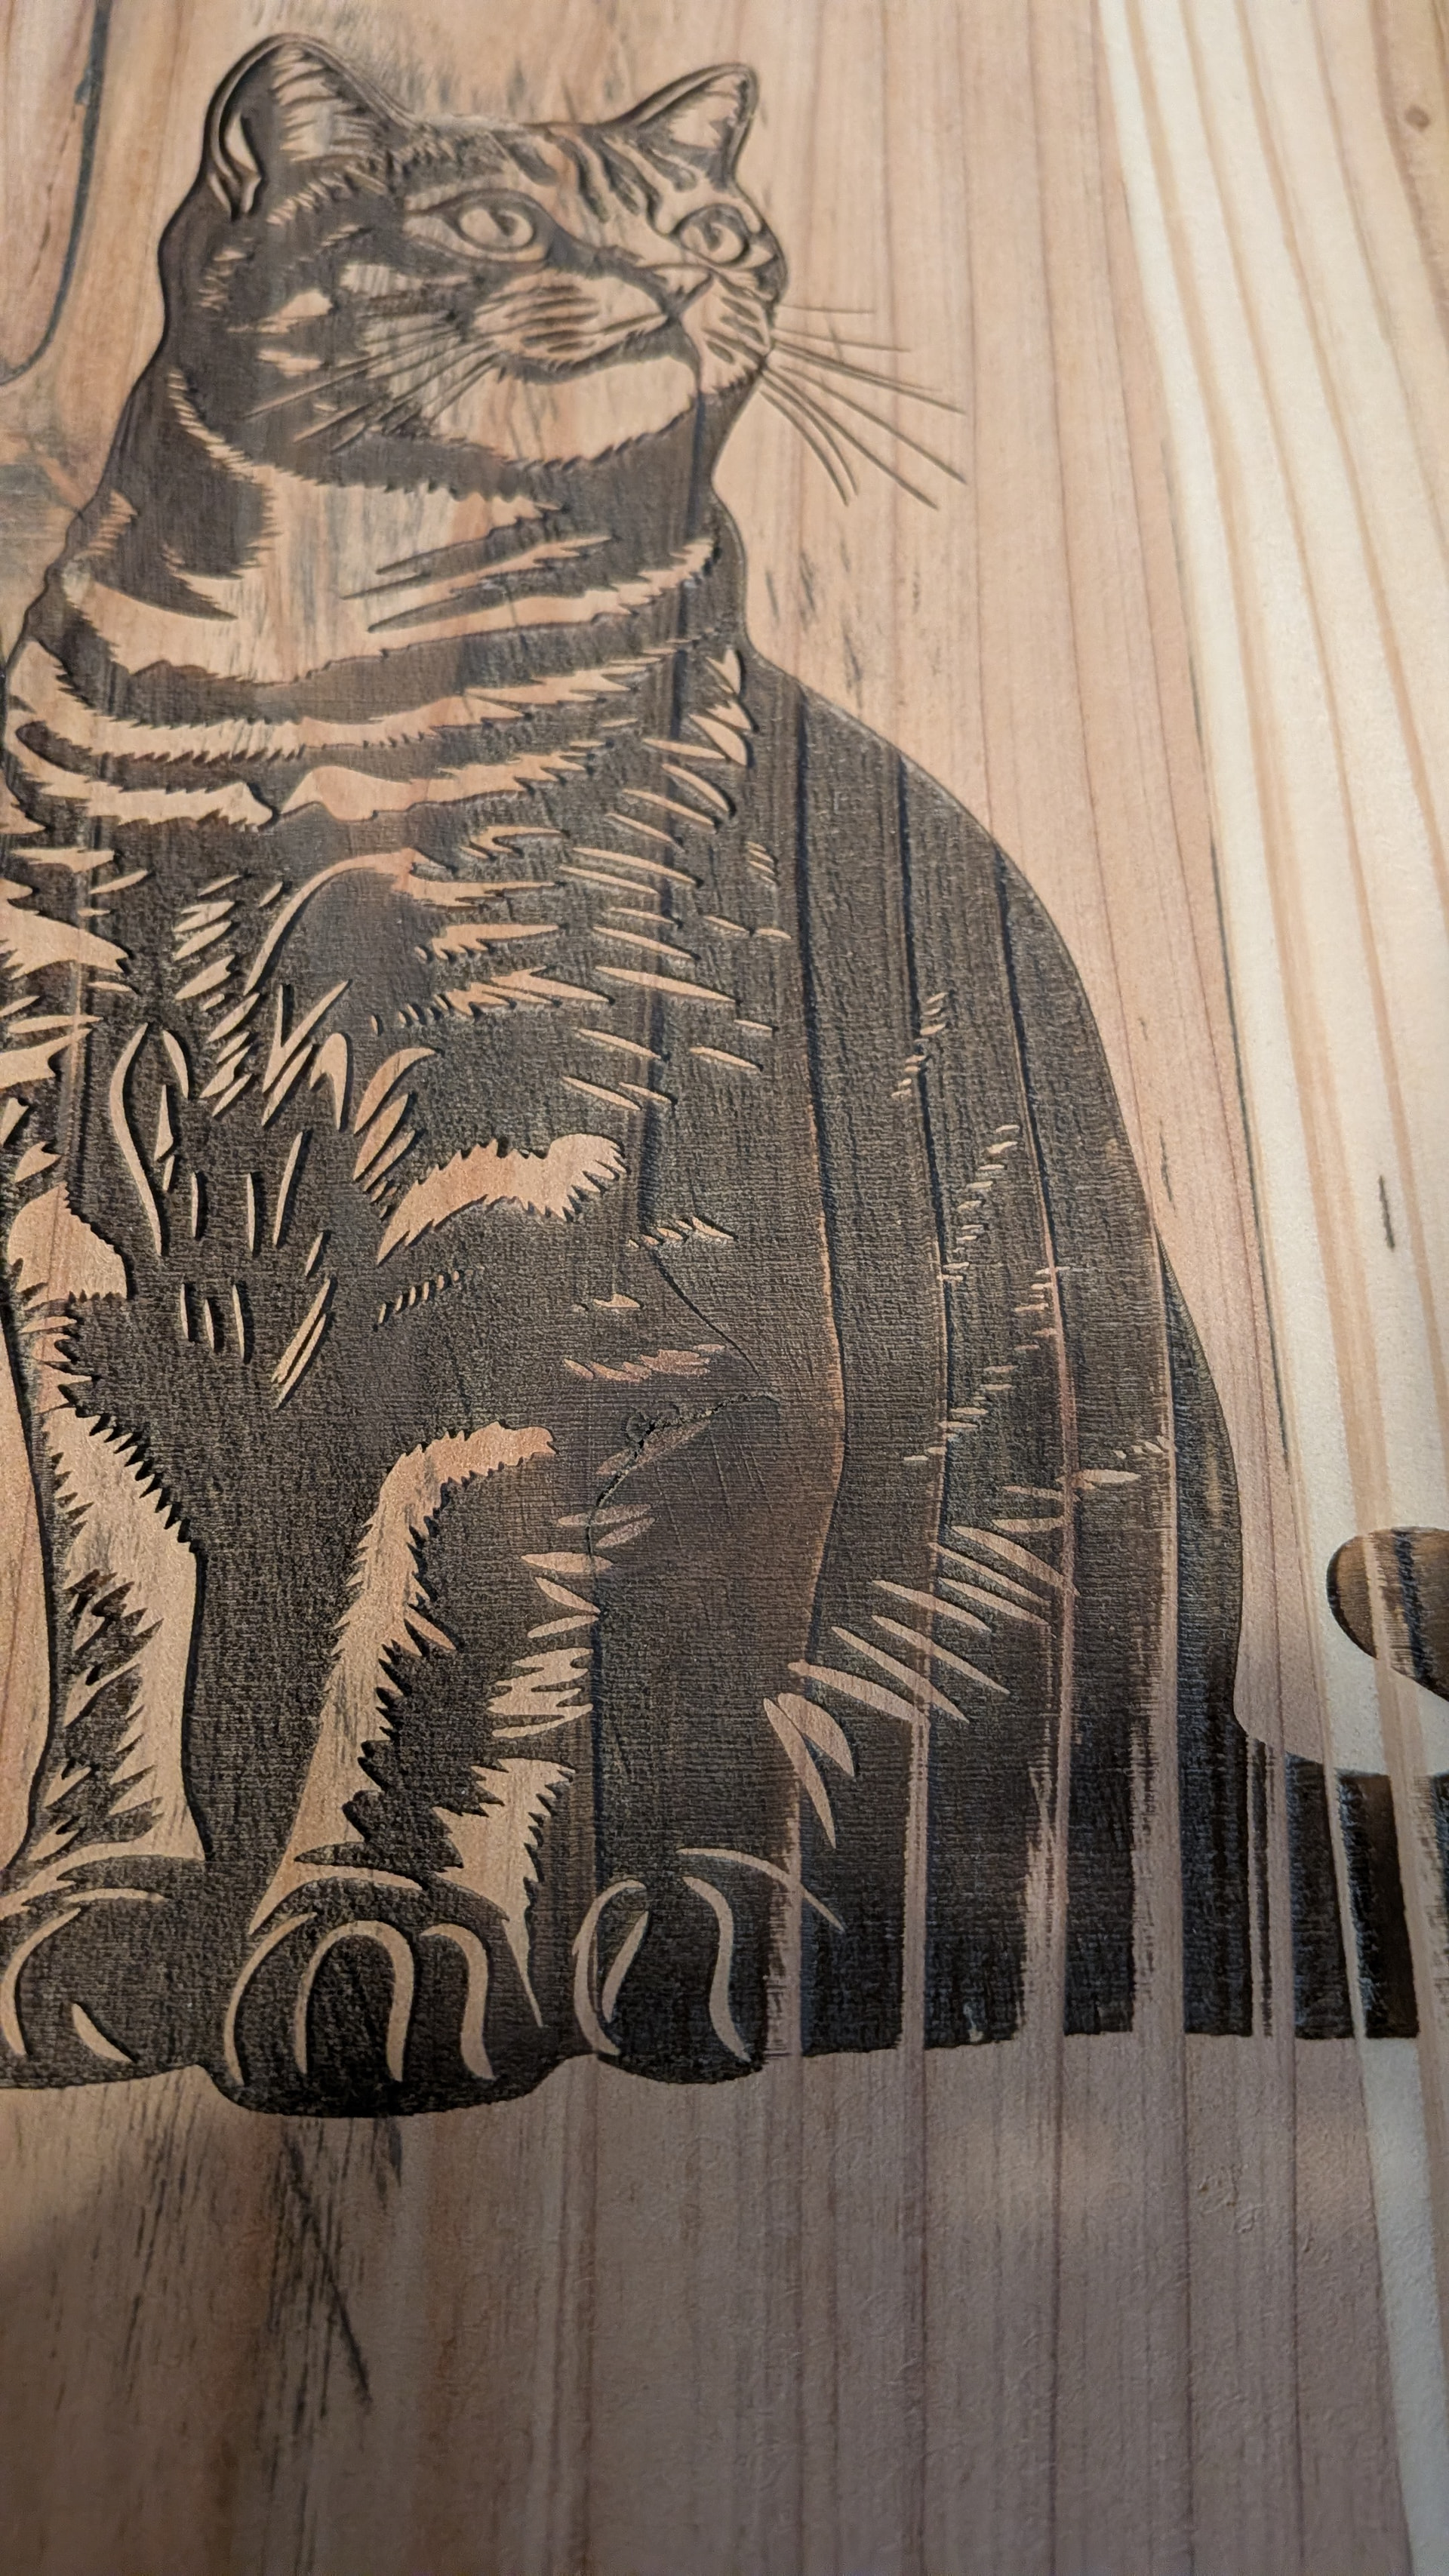
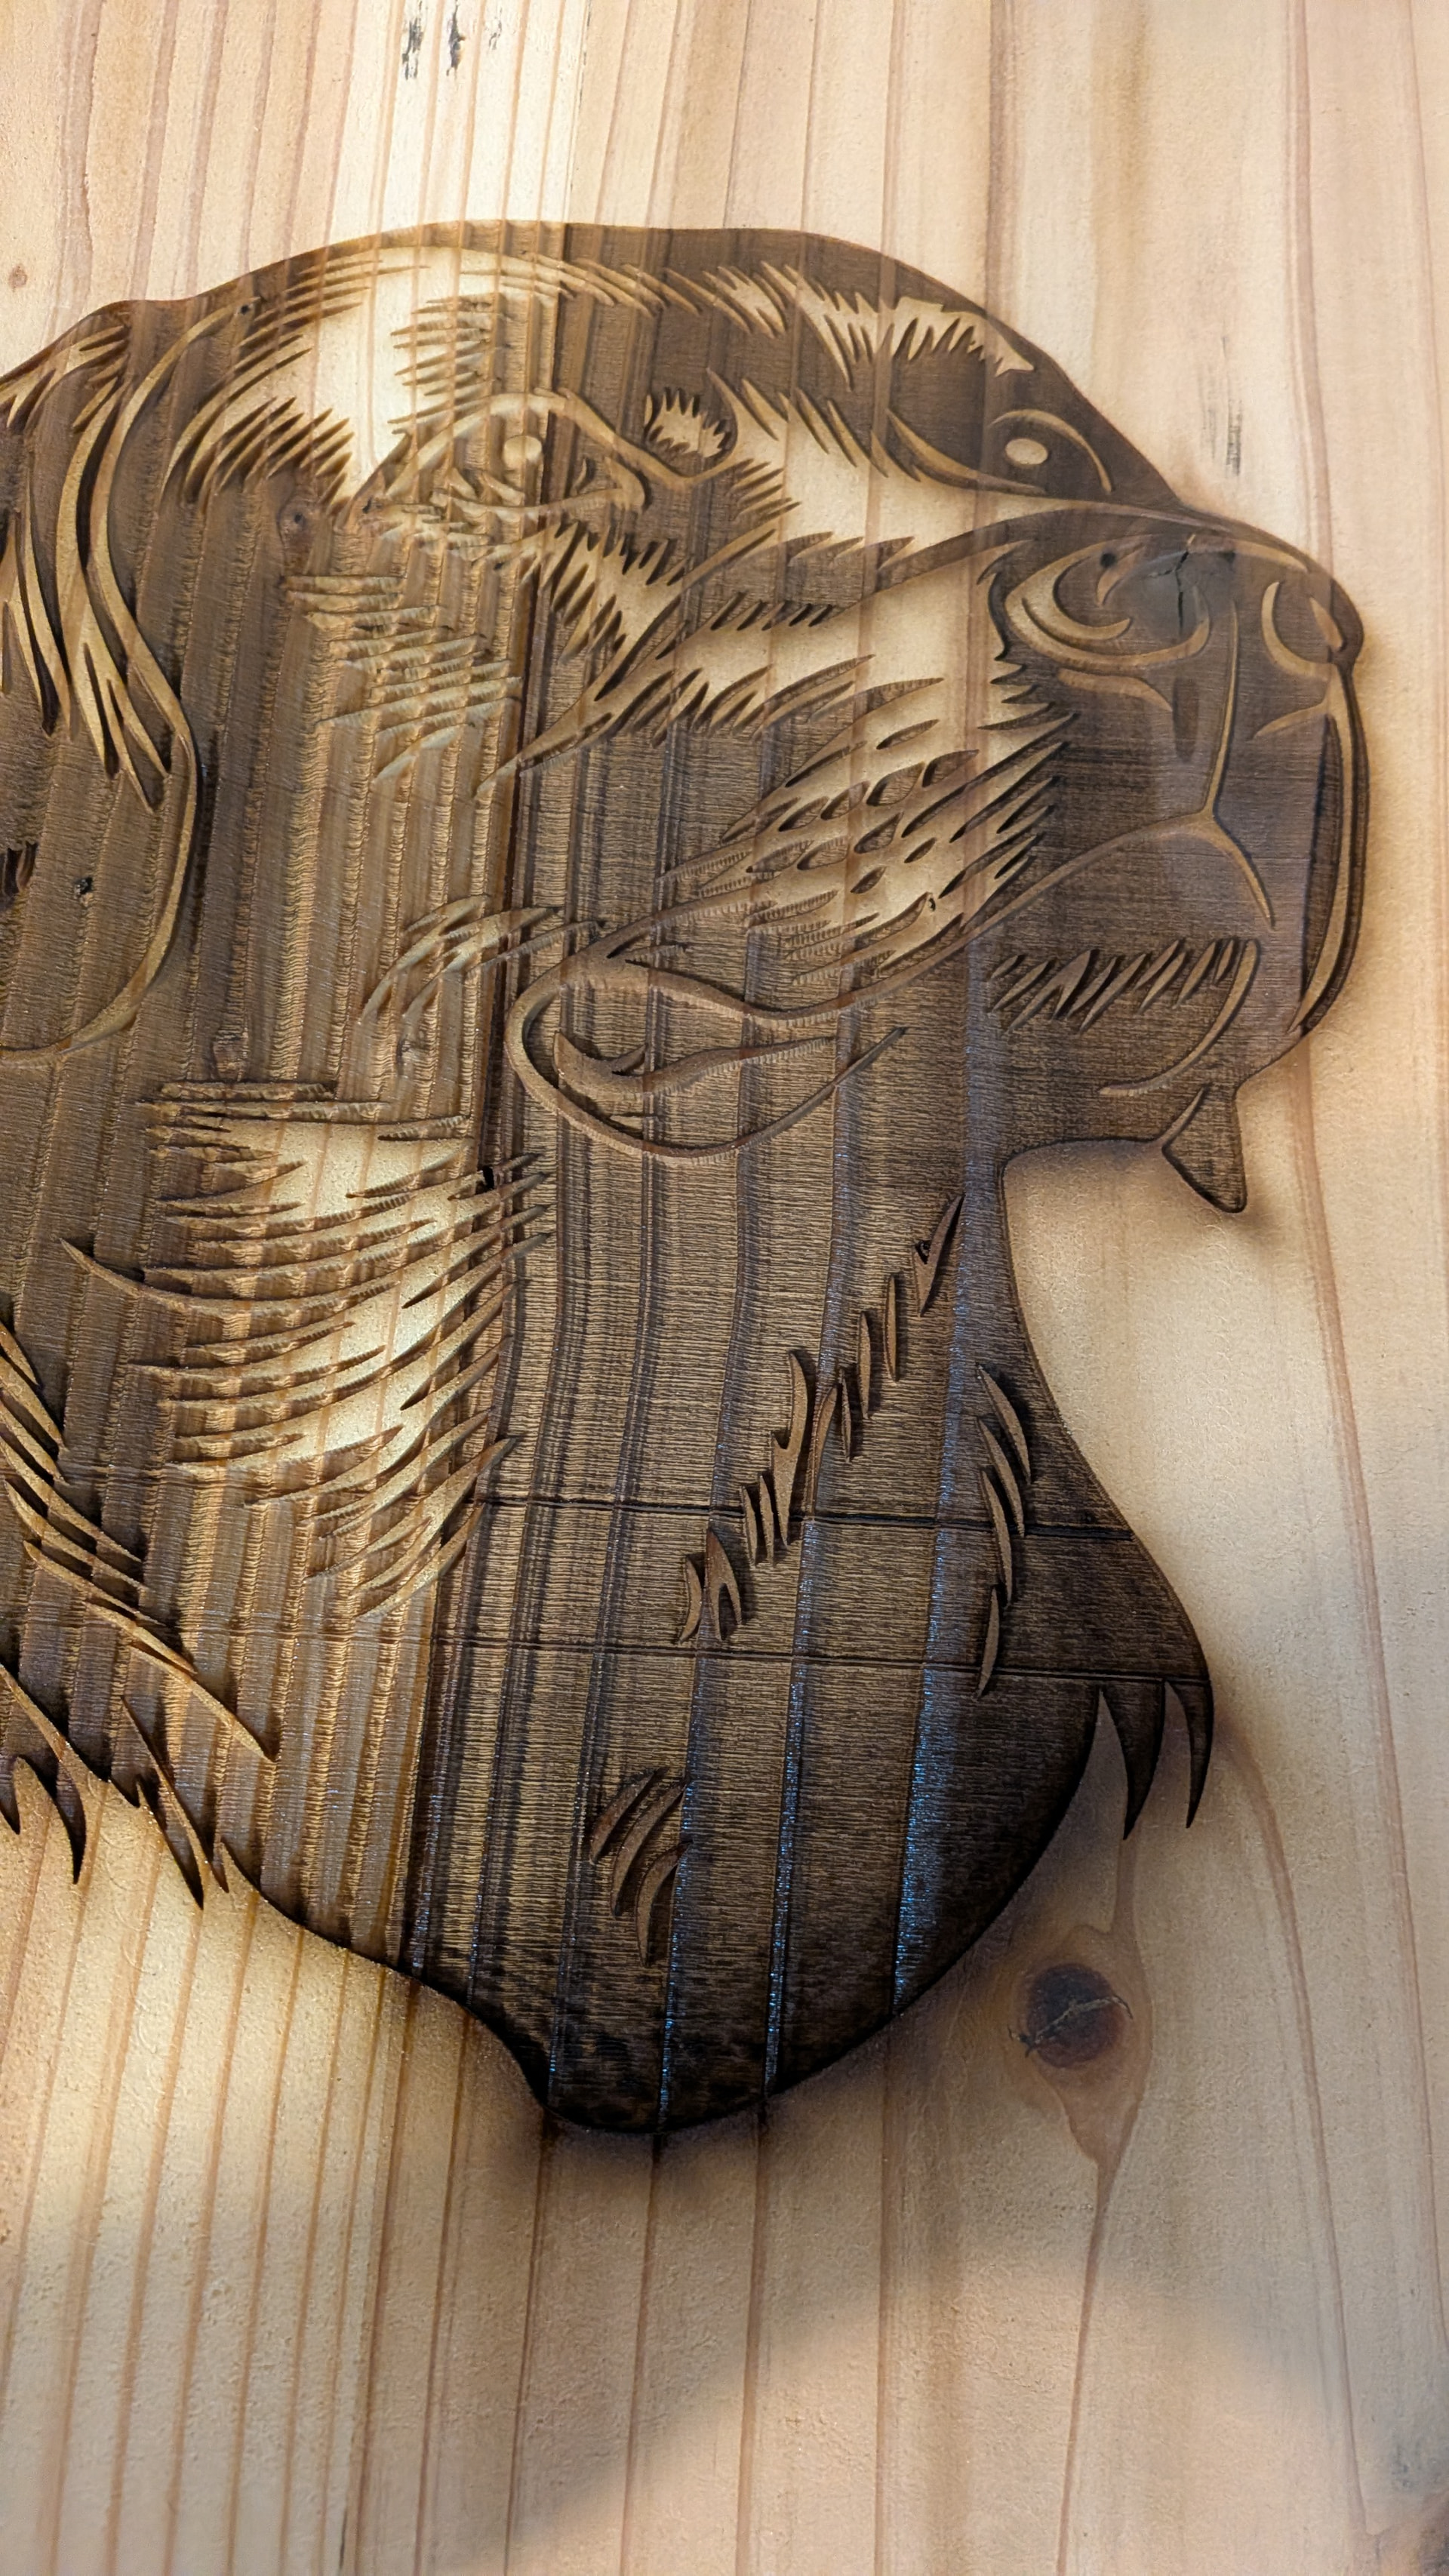
Hello again, These are part of a clock I am making. Using my Monport Reno 65 pro, I engraved the cat at 250mms, with the power at 50%, the Dog, 300mms @ 55% power. I am new to laser engraving. I have been taught via Youtube videso mostly. All help will me greatly appreciated, John
You are off to a good start! Are you using image (raster graphics) or objects (vector graphics)?
The extra dark in the burn is from the moisture content in the grain. Wood is a natural product that has variances in density and moisture resulting in color difference. The laser creates a molecular change in the media, and different media=different results.
Image processing is another level of skills.
Your graphics look to me like they are SVG vectors, btw. You can skip over my worries about the rasters.
Off to a good start! ![]()
The vertical striations come from variations in the wood: that’s the way it should look.
A Material Test will help narrow down the proper settings:
Similarly, a Line Interval test will help find the best spacing, which may reduce the job time:
Because that machine has a Topwisdom DSP controller, (I think) it will handle overscan internally, so find the best the speed / power / interval combination should improve the results all over the image.
Perusing the LightBurn doc will give you more specific information:
There’s also an official Youtube channel:
These are files I have been buying on etsy. I usally get svg,dfx files. I am not sure what graphics they are. I have made a few engraved cutting boards from Oak, walnut etc. I guess I need to start working on getting settings for my materials
Practice on cardboard while you learn the intricacies of converting “pictures” into “images”, including what effect all those LightBurn settings produce:
When you can call your shots accurately, then you can move on to spendy materials with more confidence you have control over the results.
This topic was automatically closed 30 days after the last reply. New replies are no longer allowed.