I have a pattern for a “living hinge” which is made up of multiple small parts.
Rather than having LightBurn cut them one at a time, is it possible to make it so that it groups all the pieces together to make the passes as efficient as possible? (I’m not certain that I’m describing this very well.)
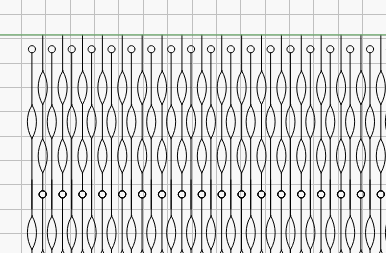
In response, I’m sending the entire file of my experimental project rather than a crop of a portion of the screenshot in my original post…
The idea is that using the pattern over a picture, I can make the wood (and the picture) display as a wave - if that makes any sense according to my description.
When printing this file, the cuts are made more or less “randomly” all over the board . . . which I believe extends the cutting time considerably. .
I had “Optimize cut path” selected for at least one of my attempts . . .
Having the file to hand is useful. Please note that all of these entries are to be construed as constructive criticism. I dislike using “you” when creating these dissertations, but it’s the editorial you, not the personal you.
You have duplicate tiny circles almost everywhere. Some of the horizontal arrays of circles are in triplicate.
You have overlapping vertical lines. Even in the first screen shot you can see that the vertical lines between the second tiny circle array are darker than the other line segments.
These two factors are probably the largest contributor to the burn time.
I’ve taken a segment of the array and culled out the troublesome portions noted above. I’ve also selected alternating parentheses for each horizontal array and grouped them, one group per horizontal array. The remaining line segments between tiny circles were then joined to create a continuous line. Probably not much of a time variance array (oops) but every little bit hurts.
The overlapping vertical segments have no interrupting tiny circles, so those were given the parentheses treatment and the remaining segments joined into a continuous line.
I set the optimization settings to cut inside portions first, which prevents the outside frame from dropping your work out of the bed/supports/focus. I also added cut by group priority, to nudge the machine to make the parentheses and tiny circles cut first. The attached file may not have these settings, as I was jumping back and forth between the original and my modded file. Check your file.
I’ve also turned off the image and possibly the frame, for my testing purposes. You have more than fifty meters of cutting in the file (ignoring the engraving) so you can expect a long burn, but I think I was able to carve more than 20 minutes off the line portion. PartiallyRepairedWallWave.lbrn2 (342.1 KB)
I took the file and played with it after what Hank changed, and was only able to shave off a tiny bit of the time.
Doing a bit of math, the file is set to run at 10mm/sec, and has 49189mm of cutting distance. If you could completely remove all travel moves, and were able to run the entire job without ever having to speed up or slow down for corners, 4918.9 seconds is the absolute best possible time you’d get. That’s 82 minutes, or 1 hour and 22 minutes.
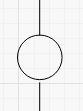
Every one of these is a start/stop point:
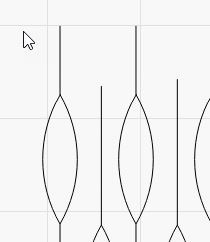
As are these:
So that’s pushing the time closer to an hour and a half, because there are lots of them. The travel / rapid moves only account for about 2 and a half minutes:
Short version - There’s probably not much left to shave off here.
Thank you very much, Fred and Oz. It looks like I’ll have to go back to the drawing board, zoom in to make sure I don’t have any stop/start points, and then use Lightburn’s handy duplicate feature.
It’s going to be a long burn in any case, but I just wanted to find the most efficient way to do so. Thanks so much for doing the math!
What I meant by start/stop points is just places where the laser starts and stops on a given shape, or sharp corners. All designs have start / stop points - they can’t be avoided.