Hi
I have just bought this file, and brought it into lightburn. But I dont understand fully what Im seeing, and How to get it right? Can anyone help me understand why im seeing and what Im missing in order to make it engrave/score and cut right? I have not bought a file before, so thought I would just import it, and thats it…clearly not the case lol
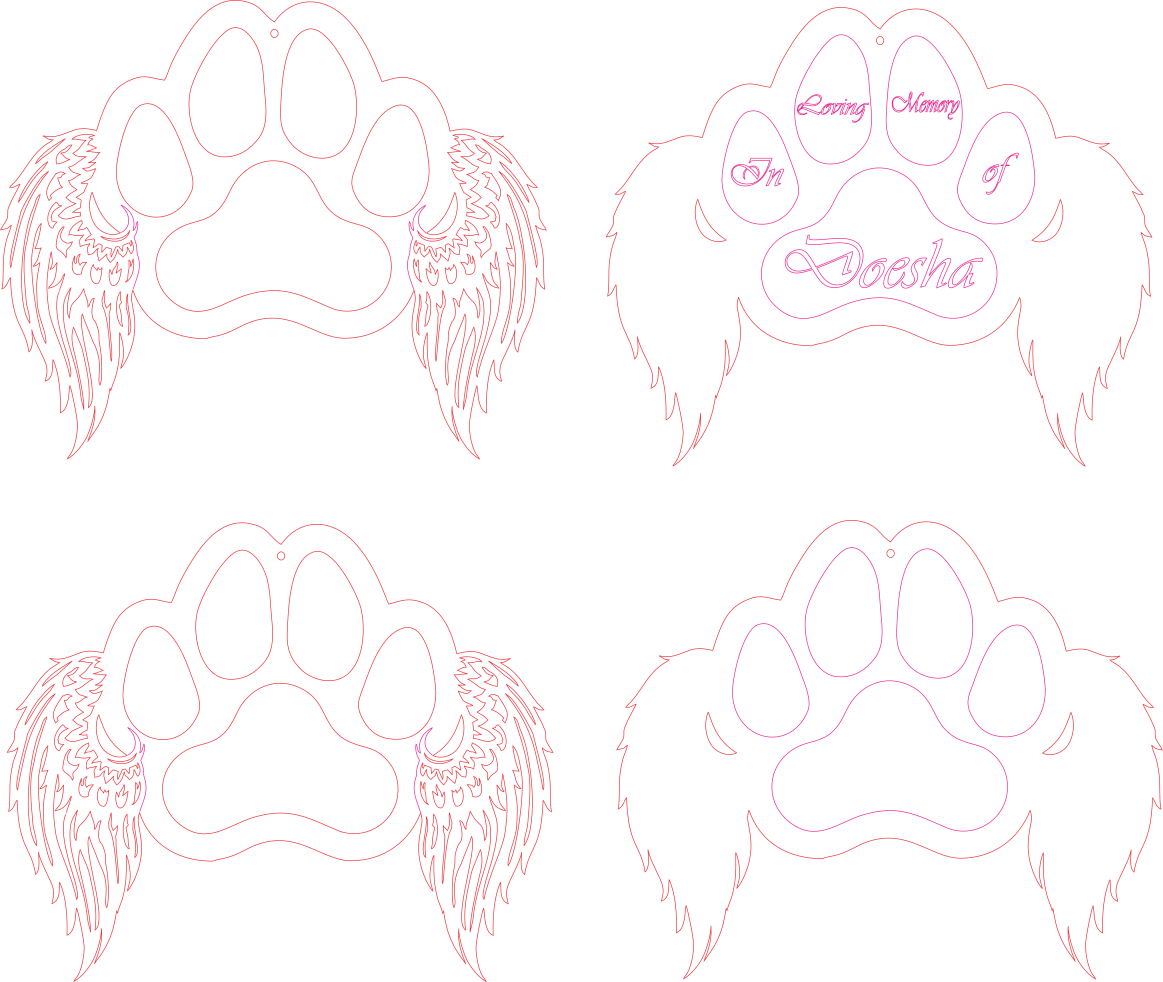
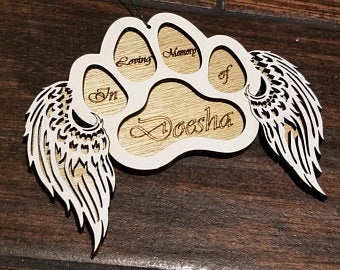
I have attached a photo of that the finished product should look like. It is two layers, the back piece and then the top piece.
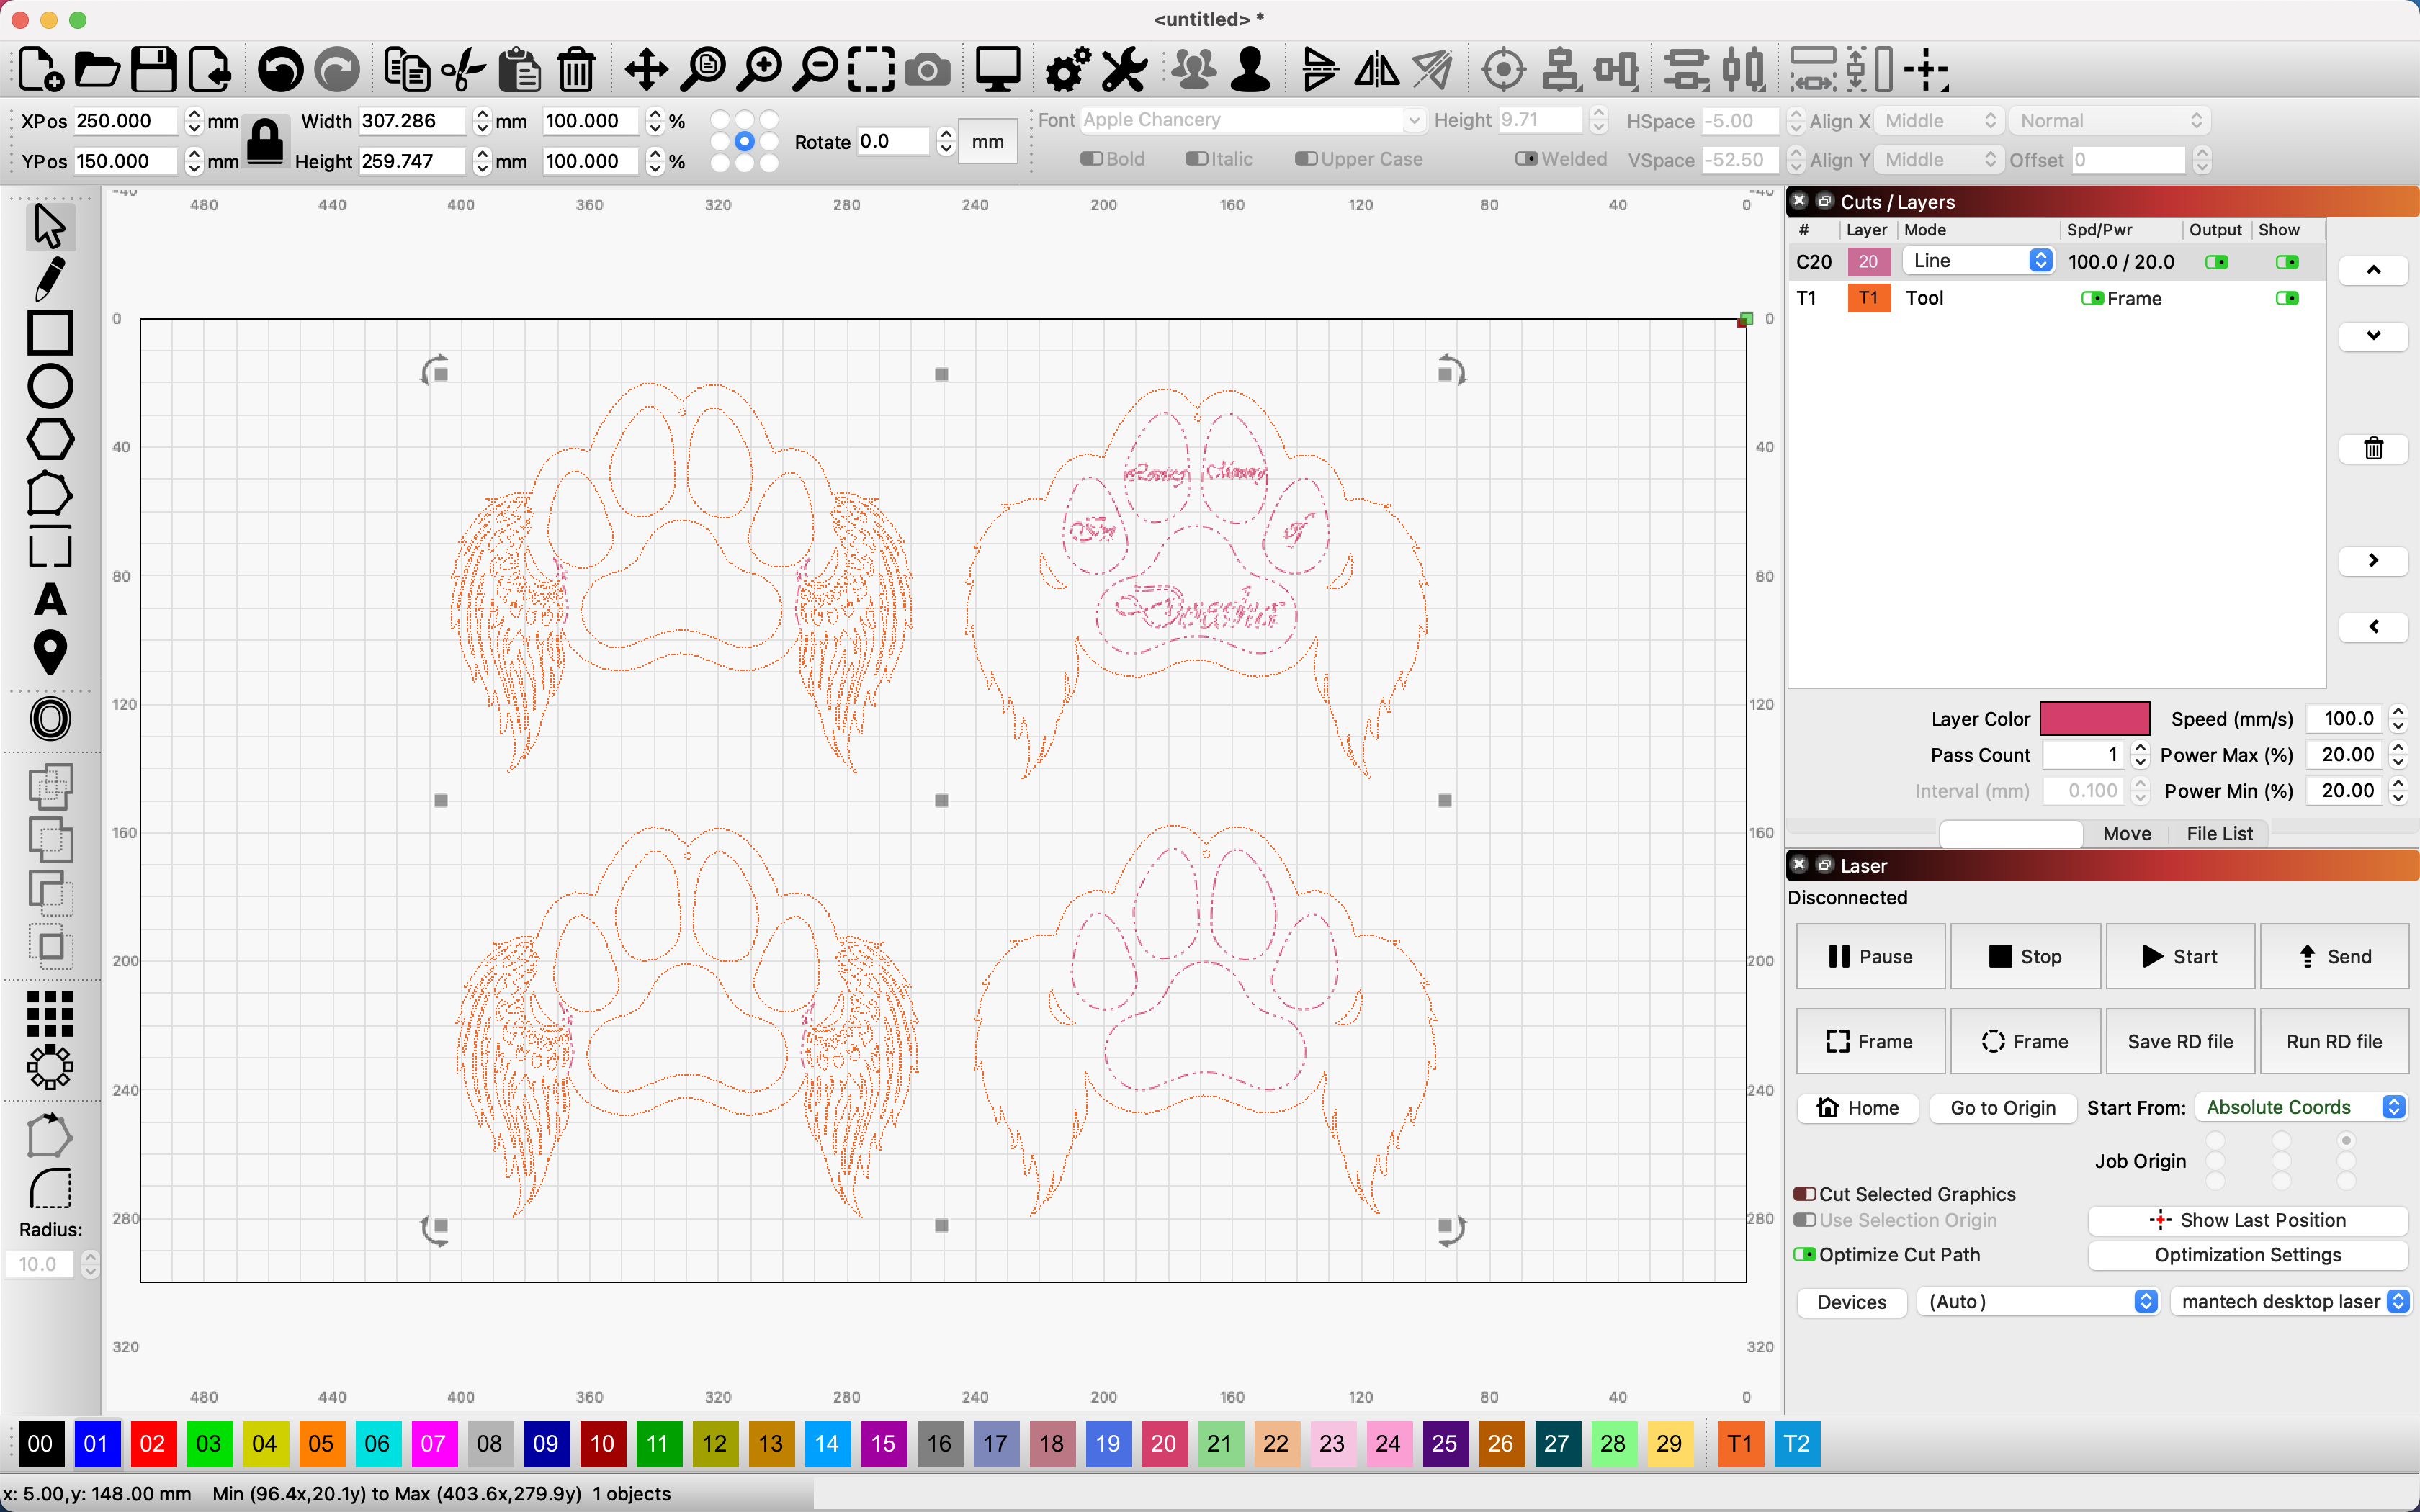
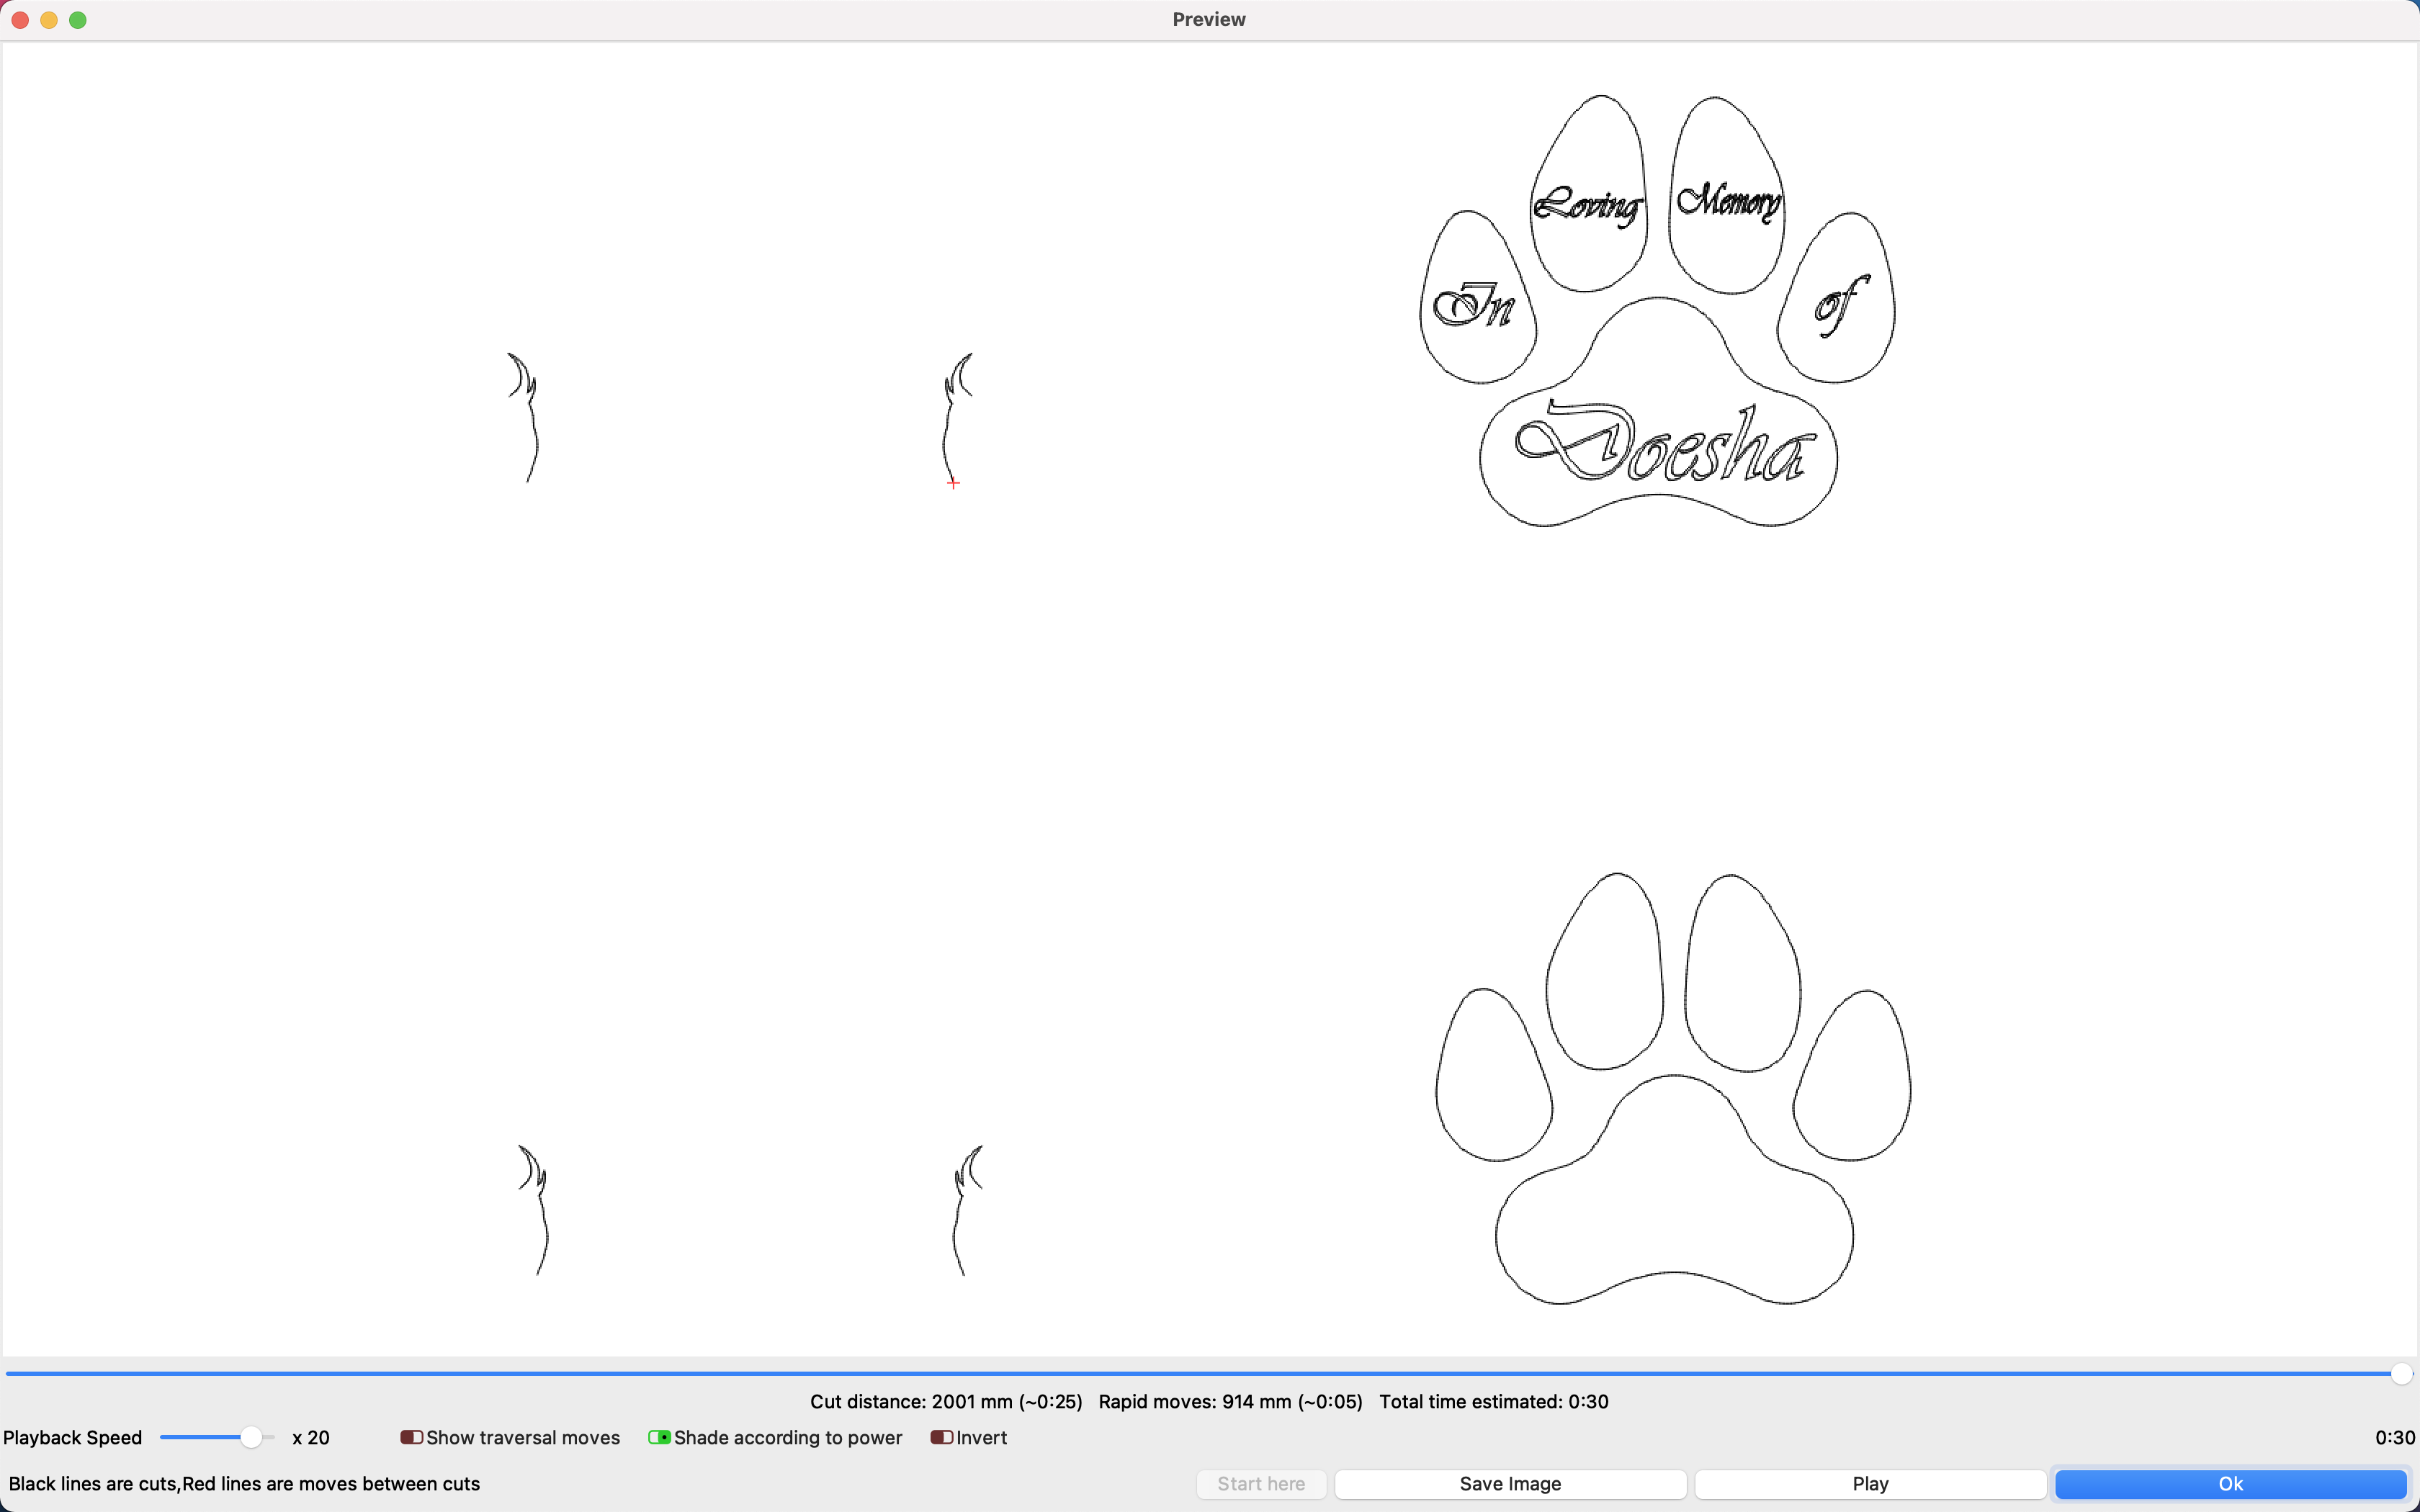
Ive added a couple of screenshots from my lightburn showing what is happening. I can see the pink lines on the preview are cutting/scoring? the names are also doing the same, but if I change that to fill so it engraves as opposed to scoring as Im assuming its doing, that doesn’t work.
I cant seem to select the actual "wings to cut etc. Im sure it will be something super simple that I am missing - brand new to lasers, dont even have my laser yet, should eb coming in the next few weeks - but playing in lightburn to practice learn
any help would be greatly appreciated - many thanks ( I’ve messaged the seller of the file, but not heard back yet )
thanks so much
Terry
Looks like you have some of the shapes set to a ‘Tools’ layer. This is why you do not see these shapes output in the ‘Preview’. Tools layers do not output anything by design. Move these shapes to a different, outputting layer to get the result you are after.
There are 2 special layers at the end of the cut palette, labeled T1 and T2. These are Tool Layers and are purely for creating non-output shapes in your designs. These layers have no cut parameters and will never be output to the laser. For example you could use them for:
Indicating pre-determined material size and position on your machine
The current public release will assign shapes in an imported file to the tool layers if the colors match. The next release excludes tool layers from import matching, so this won’t happen in the future.
Thank you… I just did alt+D and the two images on the left started flashing, but thats all, so I just cant figure out what to do. Im sure its something simple enough, ill keep trying and also hope the seller gets back to me…thanks for replying
Thank you, yeah, I realise there are tool layers. and also that tool layers are not output. I use tool layers to make reference notes for myself in a few things I have done. But if I change the pink lines to another colour, and also the names to fill, it doesn’t work wither…so, hopefully the seller will get back to me. If not, ill just have a go at creating something similar a different way - thanks for the links tho
dog paws.lbrn (817.4 KB)
Hi, been working on it for a while but think it’s what you’re after.
Play with it as much as you want as long as you ‘don’t save’ then you can just delete what’s on your screen and open the file again in lightburn.
Red are ‘cut through’ .
Kris
Thank you so much. I have been at it for literally hours trying to figure it out, but got nothing close to what you have achieved. That is just superb… thank you so much. Apparently the file I bought was for a glowforge … didnt think that would have made a difference…but…
Anyway, once again, thank you so much - it is very much appreciated
If you have time, at some point, would you let me know what you did to achieve that, so that I can hopefully learn from what you have done on this file
Hi, you’re welcome, it took a couple of hours but enjoyed it.
Fairly new to this myself, only had mine since end of December.
All i was using was the ‘group all’ and ‘ungroup’ at top of the page,
The ‘brake apart’ in ‘arrange’ drop down,
Auto-join selected shapes in ‘edit’
and the ‘duplicate’ from the menu when you select something and ‘right’ click.
oh, and the zoom.
The duplicate i used on certain parts where it was easier than to try and get rid of some of the lines where they had been doubled up.
The last part, getting it into the correct layers.
I didn’t want to mess with the text as it’s a personal thing but if you want to redo them just ‘select’ the paw where the text is and select ‘ungroup’ at the top of the page, redo the text and ‘group all’ next to the ‘ungroup’.
Well hope it all works, it’s been fun.
It’s not perfect as, if you zoom in on it you’ll see the outer lines are doubled up which i couldn’t get apart but as they are the ‘cut through’ i don’t think it will make any difference.
Please ignore the settings on the ‘cut/layers’, not sure if they downloaded with the pic or if they were with something i’de been doing…
Save it to your folder before playing with it.
It’s just a matter of playing with lightburn and getting used to all the different settings.
You keep saying, you are waiting to hear from the seller. I don’t think the issue is with their work, as much as it is the layer choice for these shapes. Look again at the,
I do not see a fill on this entire job. It looks to me like the entire job has been done with ‘Line’ set to cut some and just mark / score the names.
So, all shapes can be set to ‘Line’.
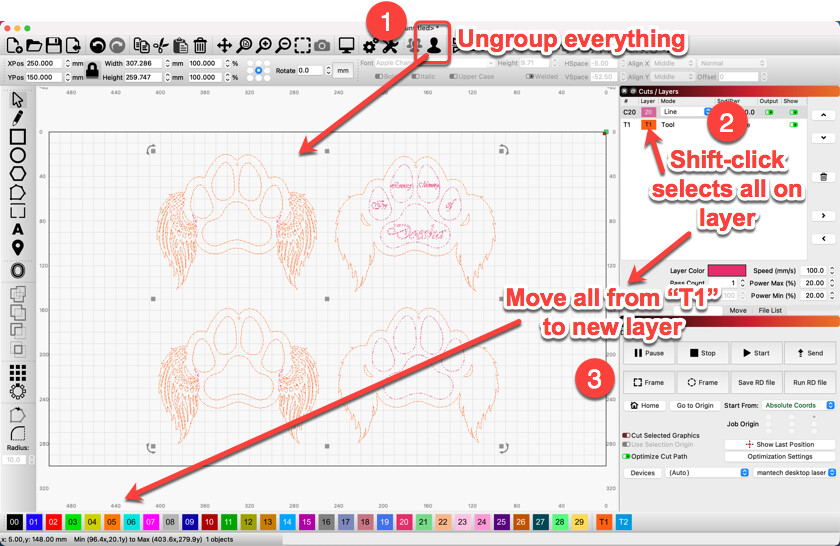
Ungroup everything, this may take several ungroups to get it all. Then Shift-click the ‘Tools’ layer color in the ‘Cuts / Layers’ window to select everything that is currently on that layer.
You can now select a different color, from the ‘Color Palette’ at the bottom of the screen, to assign those shapes to a different layer. Set that new layer to ‘Line’ and now hit ‘Preview’. You should see everything as you’d like.
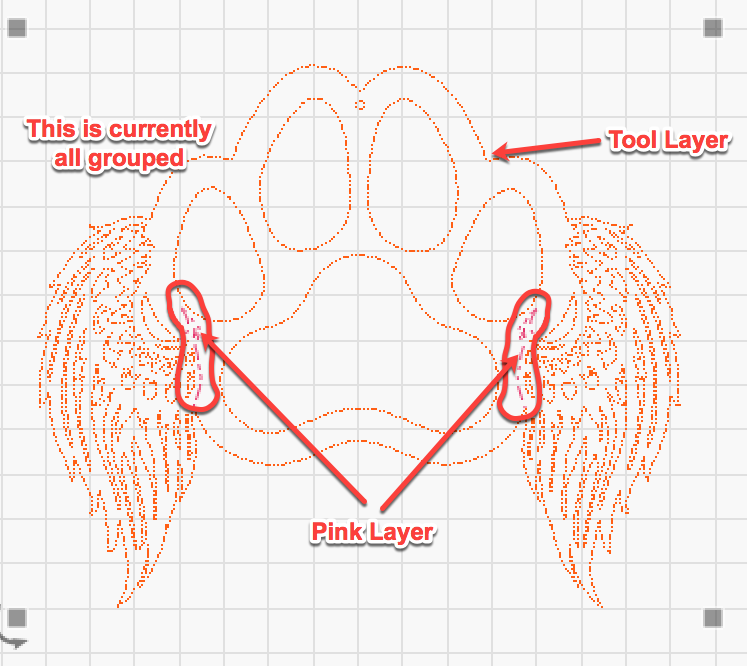
Here is an example of having a large part of the shapes currently located on the Tools Layer and a small part on the Pink layer, thus the Preview you show.
Thank you Rick.
I also dont think it is a problem with the sellers work, as the photo of the finished product actually looks great. I did say that I was waiting to hear back from the seller, this is correct. But only in terms of seeing if they could offer me any guidance - thats all - im not at all questioning their work. Most sellers invite you to contact them if you are experiencing any problems, as does this guy.
The fill I referred to, was when I changed one layer, containing the text to fill, as I assumed (wrongly) that the text needed to “engrave”. As you say, it has been done with lines to cut and score.
The examples and explanations you have given are very helpful, and again, I have learned something once again that will increase my knowledge - so thank you v much
Terry
Terry, I don’t see this as a serious problem. I could certainly work with the files as presented, but I can understand the confusion. Looking at the photo there seems to be two layers of ply involved:
The bottom layer contains the wording and an outline of the completed job. That’s pretty straight forward.
The top layer is a little more complex. It contains all the intricate cutting of the paw and the ears, but it also contains a tiny amount or marking or etching where the ear overlaps the paw.
All this is clearly shown in the patterns you received. However, if my analysis is wrong, we both have a problem!
It seems to me that the supplier has given you several patterns, some being templates if you will, so that you can place the text correctly. Lightburn will treat the job differently and do everything on two drawings with the first drawing containing the shape and the text in layers. The second drawing will contain the top shape and the small amount of etching. I could set this up for you as a lightburn file in five or ten minutes.
Unfortunately I can’t work from the file Kris 1 supplied because I see a few issues. Happy to help you if you PM me the file AI file.