Is there a way to just manually set up the camera? I’m over fighting the calibration wizard that switches at random from Pattern NOT found to .5 and back sporadically.
A good start is reading and following the guidelines here:
Does the card have to be printed at a specific size or is it relation of the dots to each other?
The size of the card doesn’t really matter. The size of it in the camera view is the important part. As long as you can get it to fill about 1/3rd of the view at the size you print it, you should be good. It also needs to be really flat - as in, glued to a piece of foam board, MDF, plywood, etc. Any curvature of the pattern will be interpreted by the software as lens curvature to correct.
1 Like
@mentaldemise not too many days ago I was searching for the proper magical spell as well but before resorting to the dark arts I tried some other options that eventually worked giving me a consistent result with great numbers every time. I am not sure what was the exact adjustment that worked but I’ll list what I tried that and what worked best for me
-
Reprinted the dots to different size from full size to 75%, 50% & 25% reduced. (The 25% rduced worked for me)
-
I tried the printed dots on different substrates from being directly burned on cardboard, glued on to different thicknesses of foam boards, i even tried just the printed paper by itself, with a boarder & without a boarder (solid black and white). For me 1/8" foam board with less then 1/8" white boarder)
-
Got my hand out of the way of the picture.
-
The angle was found by trying different heights of props to be placed under the test dots for its picture. (For me I found that the large Hawaiian fruit punch bottle cap worked best)
-
Repositioning the camera and its 3d printed mount in different positions of the center of my k40 lid and tried various heights of the lid that can be repeatedly reproduced. ( for me I found that closer to the front with the lid locked at 3/4 of its height worked the best)
However I should note that later on I discovered that the camera placement will have to be changed because when the lid is closed the laser head will knock into it when its near the camera. Also I can almost bet dollar to dollar that no 2 k40 lasers will be same due to the many variations and modifications of them. So on that note it might be helpful to know that I had also previously added rubber spacers to the hinges of every panel between the frame and its pin. I’ve also repositioned & added more brighter LEDs to the inside my increased sized cutting area. As well i have 2 2400 lumins daylight shop lamp above me lighting up my work area. Hopefully this might help.
I also vaguely remember coming across some mathematical formula someplace out here. But to be honest the easiest path has never seemed to be the first choice for me besides thats an area of the dark arts I hope to never need to turn to. 
Madison Rae
1 Like
Well, someone did the seance for me. I think the biggest thing I was missing was that the lens has to be parallel to the bed. The mount I downloaded had it tilted so that it wouldn’t hit the laser head. Anyway, with the proper sized dots, a white backdrop, and a special dance or two(along with a lid prop) I present:
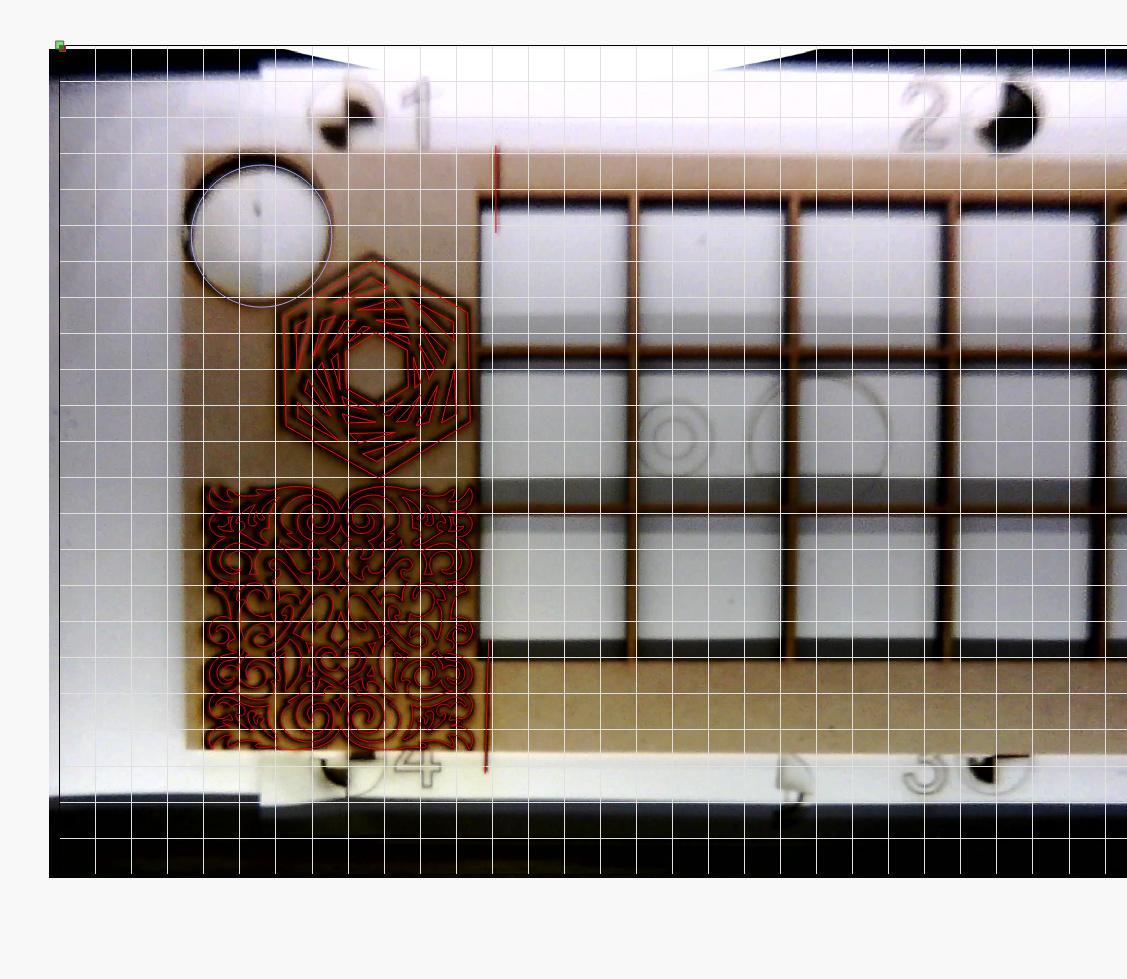
I’m going to go with close enough.  So cool!
2 Likes
So there is a seance?  actually this is a great lead into a thought ive had about the physical camera placement (sorry if this isn’t in the correct place for it).
Would it be possible to cut an opening through the existing window of the k40 and modify it so that the cutout can be slid off allowing for the camera thats mounted inside of a separate acrylic housing to slide into place like an accessory that is always at the correct distance from the bed?
My thinking on this is that it would allow me to keep the lid shut at all times should I use the camera to monitor or trace? Then when not in use I could slide the cutout back on and put the camera away.
Or am I just going to have keep the lid proped in place for the camera use?
Thanks
Madison Rae
The image looks a bit out of focus - you can manually focus the camera by twisting the focus ring around the lens. If you use the Windows Camera app full-screen it’s easy to see when the camera is focused. Turn it in small increments (1/4 to 1/8 of a turn).
Making the camera removable isn’t a good idea, because it would be hard to be sure it was put back in exactly the same place. If you can ensure that, then this would work.
1 Like
This is actually how I originally went about it. I had it on the window with mixed results. I think if you replace the orange plastic with poly-carbonate it would just be a matter of making the box with stand-offs at the right height.
1 Like
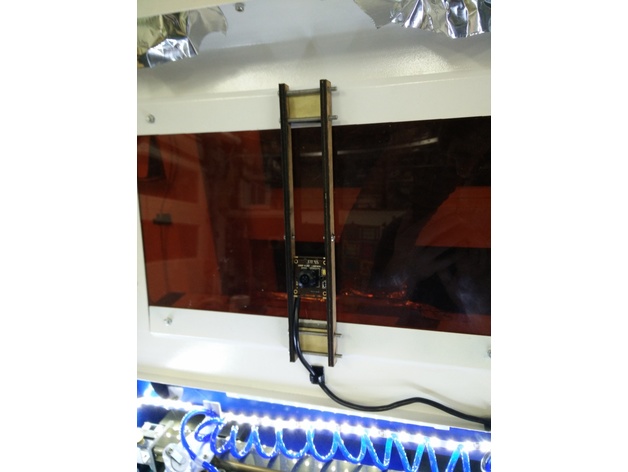
This is the mount I’m using on my K40. I want to change it to make the camera parallel and more central, but otherwise seems to work. I think a prop may need to be incorporated as well(if not just for smoke avoidance)
Of course the cap for my camera fell off and got propelled out the vent by the blower at somewhere near Mach1.
@mentaldemise thanks for the link. However i am a tad bit confused by the pictures from thingverse is the mount on the outside of the k40 lid?
No, I have it double sided taped to the inside of it.
I mis-read the camera listing description which said “auto focus”, actually unscrewed the set screw a bit and focused it now. Trace should go better I reckon.
This topic was automatically closed 30 days after the last reply. New replies are no longer allowed.