Hey CadJoe, where can I get this head mount? This looks like the way to go.
Charlie
May I ask, if Type C is intended for mounting on machines with horizontal timing belt system, what should be used for the vertical systems, such as many of the OMT machines? Or is it the same just with a different angle bracket?
The adjustable mount is on Cloudray site.
Remember its for 15mm rail and bearing. I was able to mod mine for 12mm rail
If u want the LightWeight head u have to email and order from Russ in UK. Takes 2 weeks to get it.
I love the new universal tube for lens, so many options and ways to switch out quick.
Do you have Russ’s email? If so, can you pm me the address and I will email him to be put on the list so I can purchase it. Thanks!
Charlie
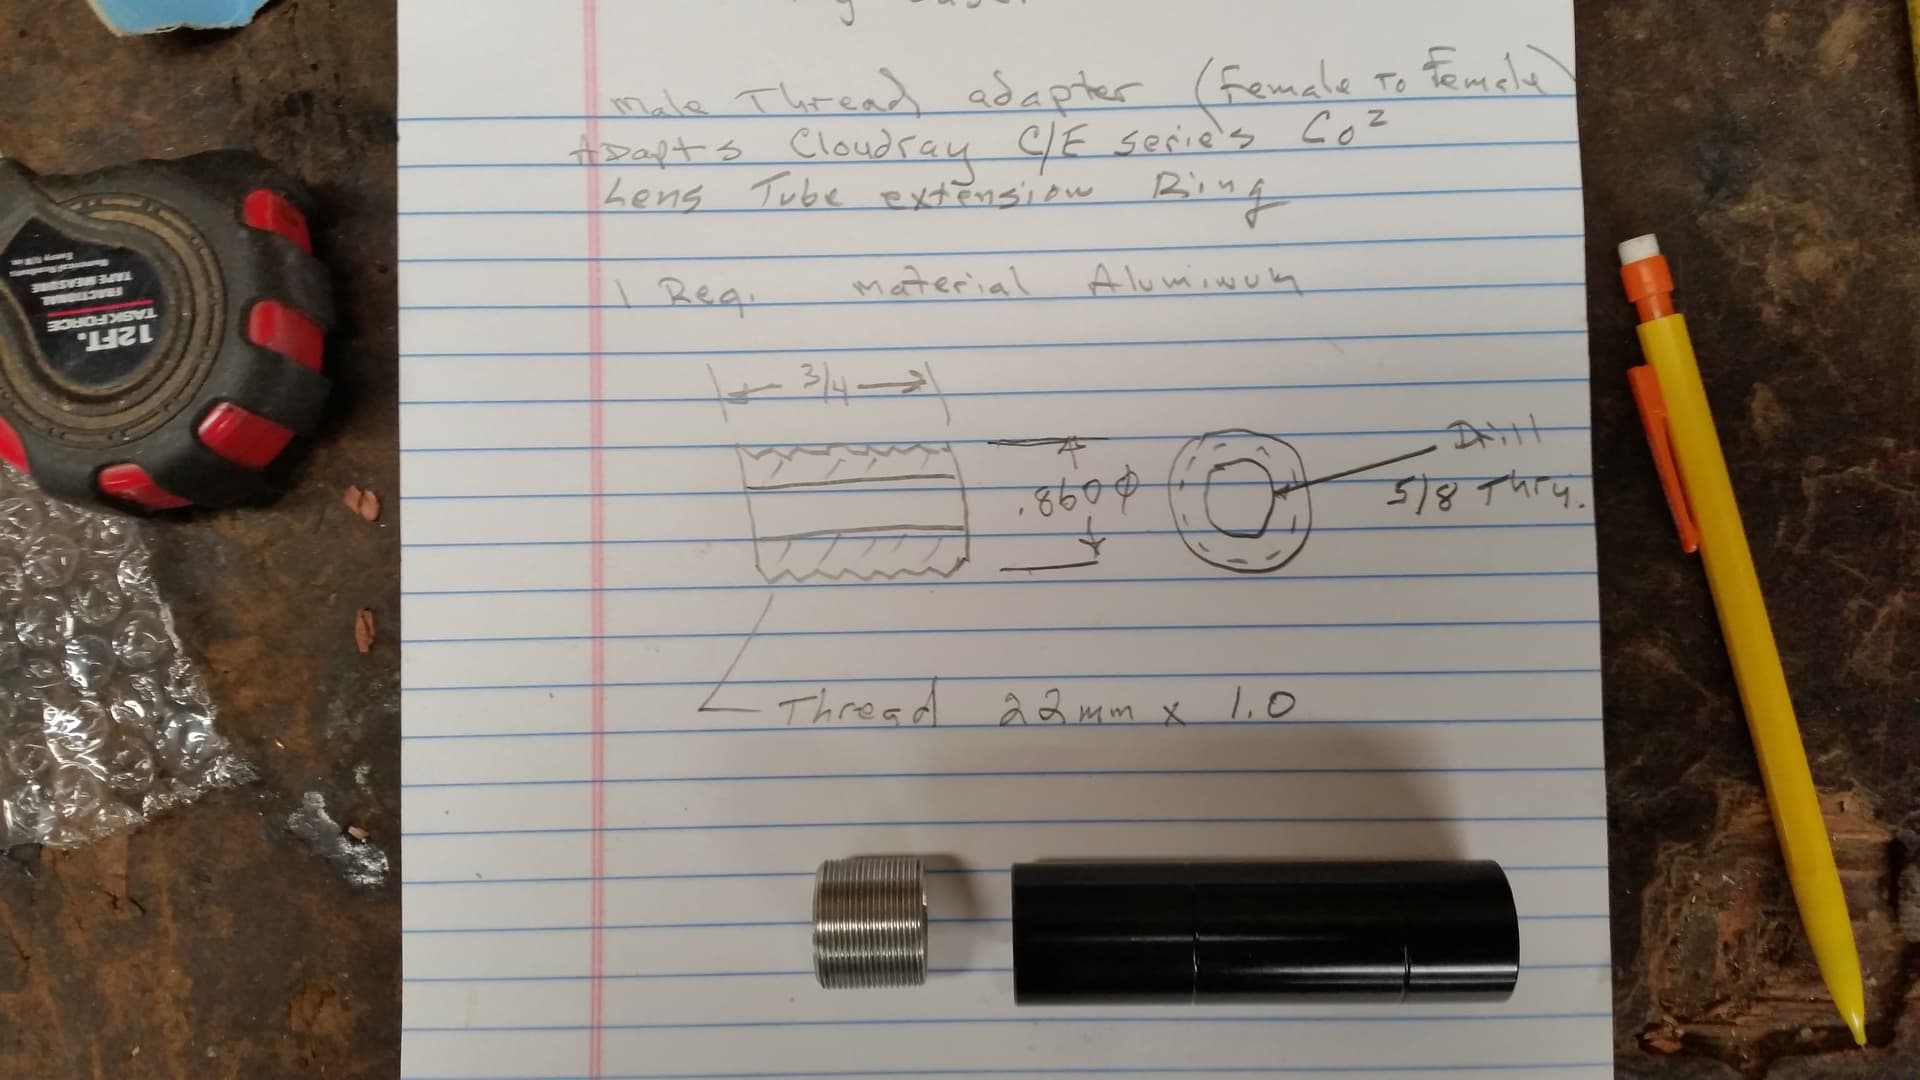
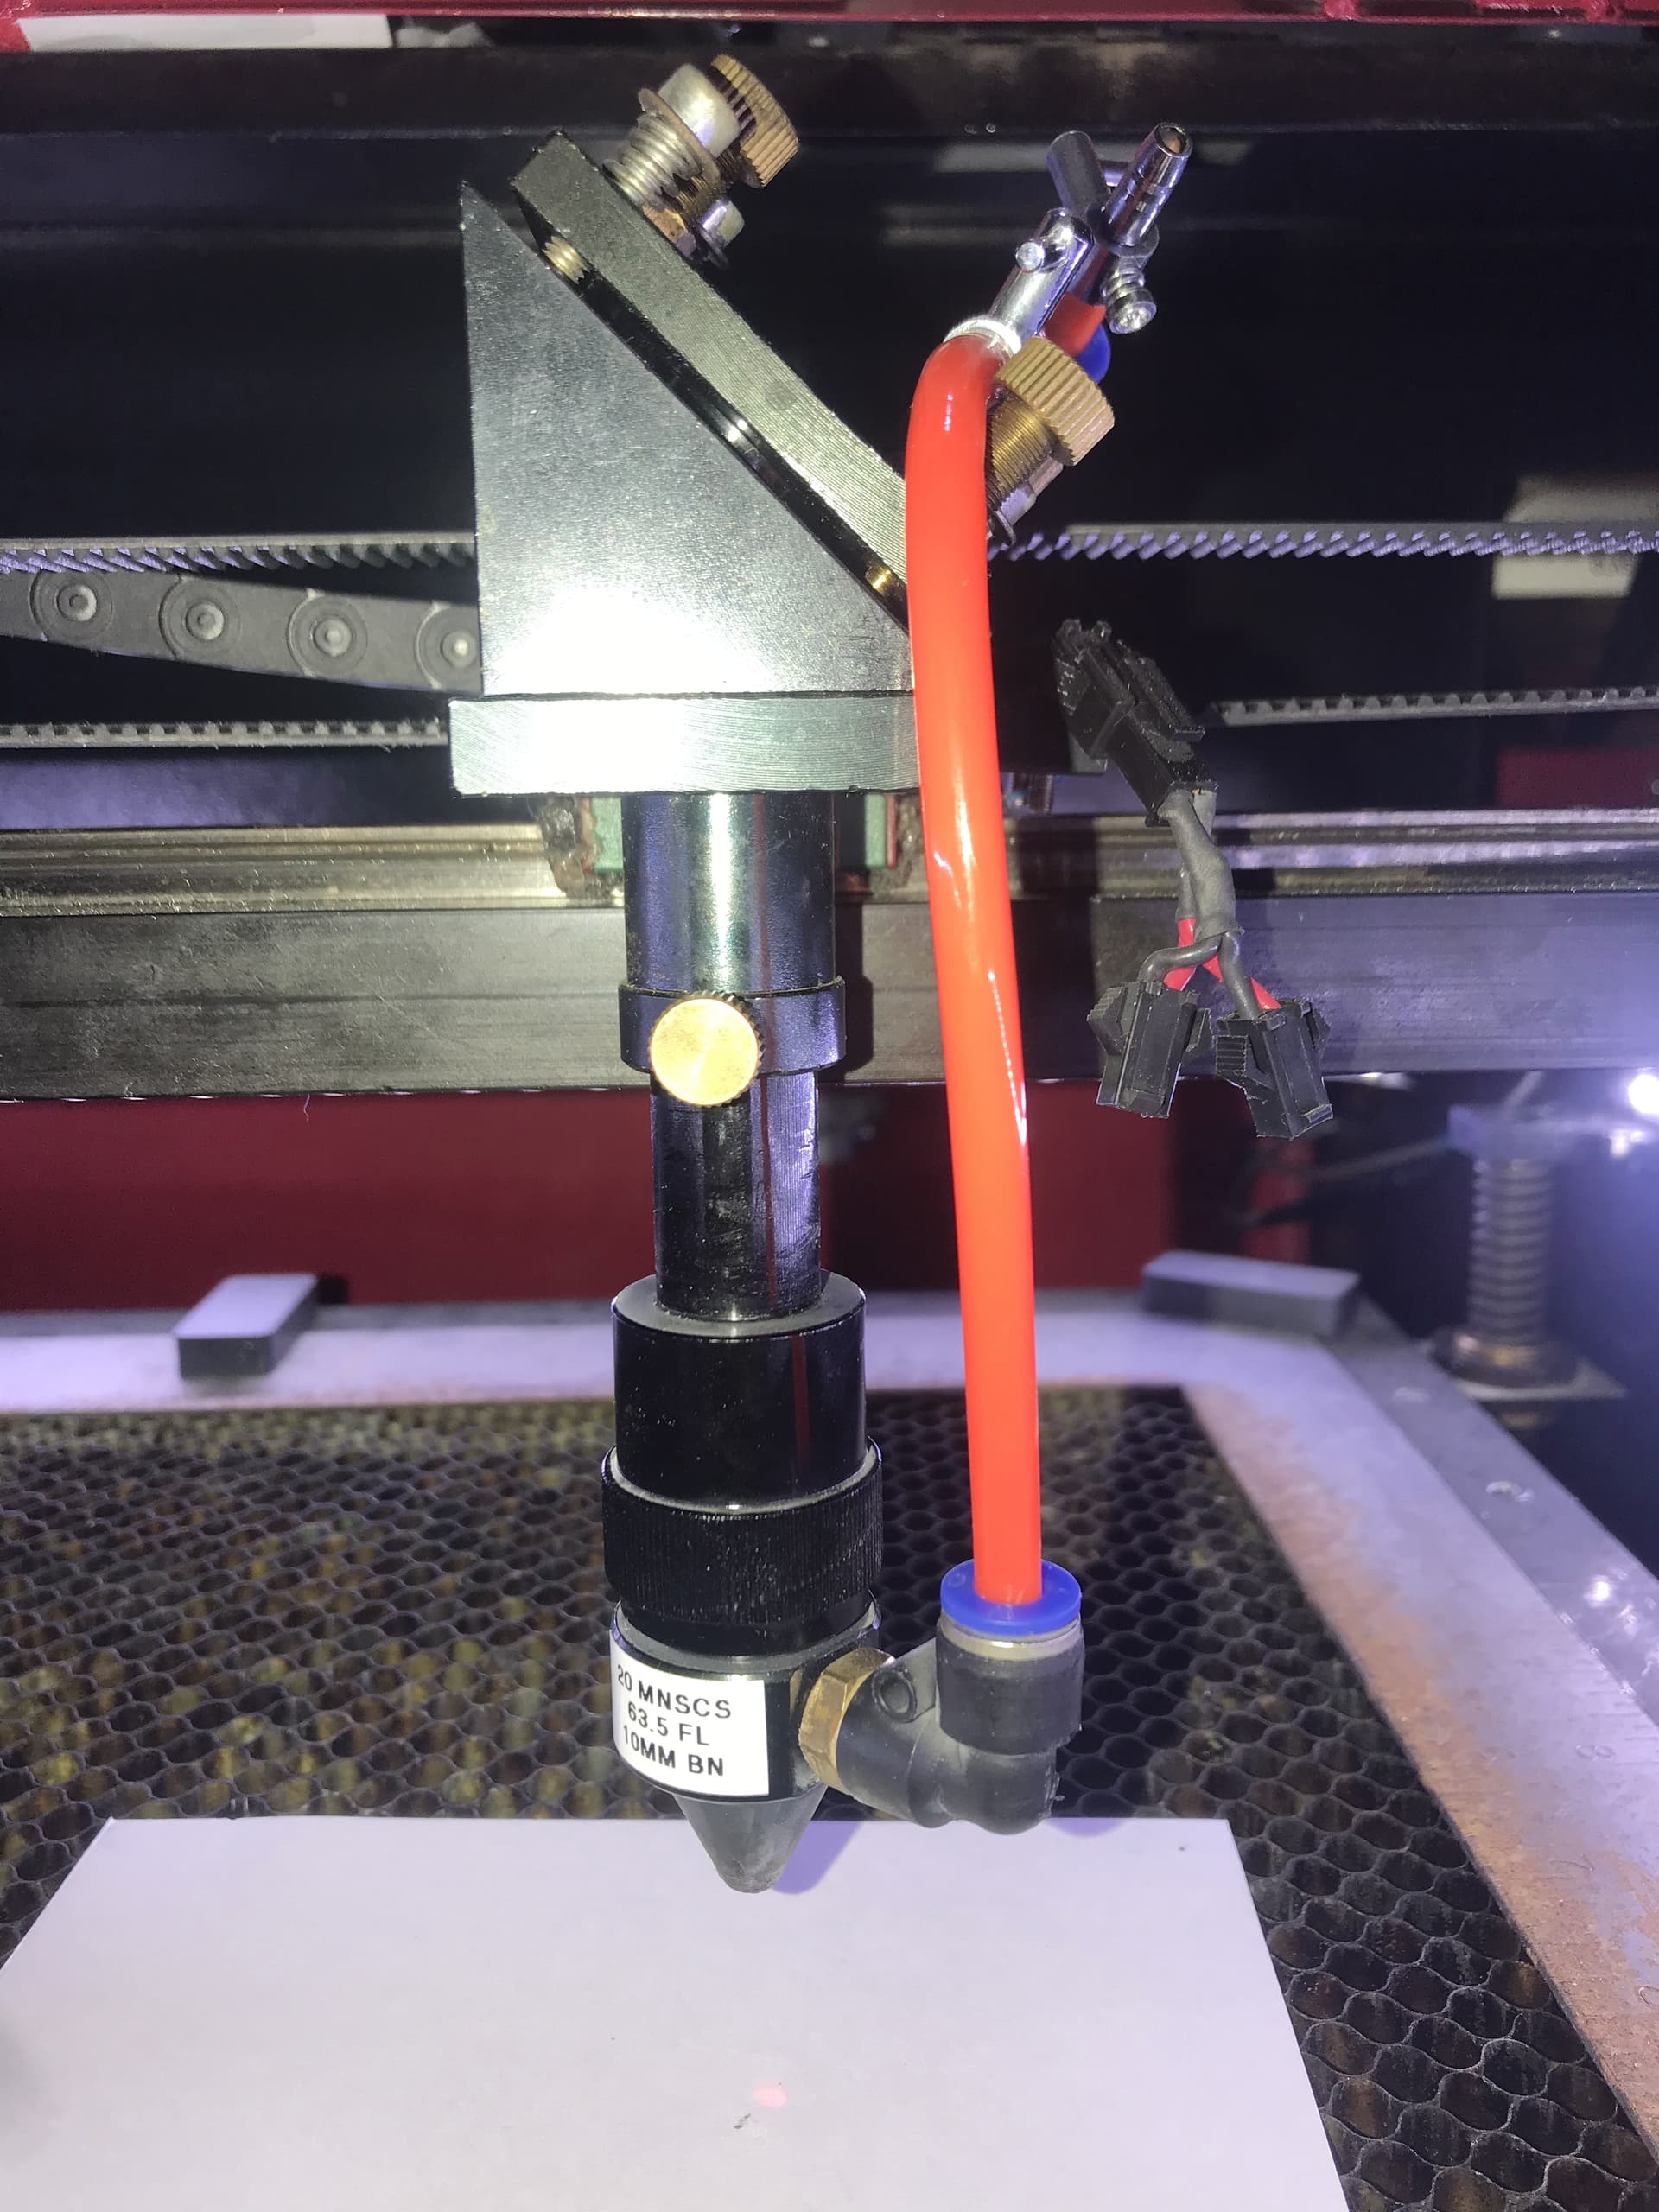
I don’t know if this will help any one. But I also wanted to have my tube closer to the cutting surface to supply more air for cutting with different focal length lenses. I purchased a 24mm tube with 22mm x 1.0 pitch threads and made an aluminum adapter. It allows me to connect 2 female threads together. Here’s
a drawing of what I made. Any machine shop should be able to make you one from this drawing.
Can you please explain what was involved in regard to the modifications to make it work on a 12 mm system? Thanks.
Hey Doug,
Russ even has a video on the problem. Russ Video
I would prefer that CloudRay mfg a diff base, and you pick the option you want to purchase, just like a 50.8 or 63.5 lens.
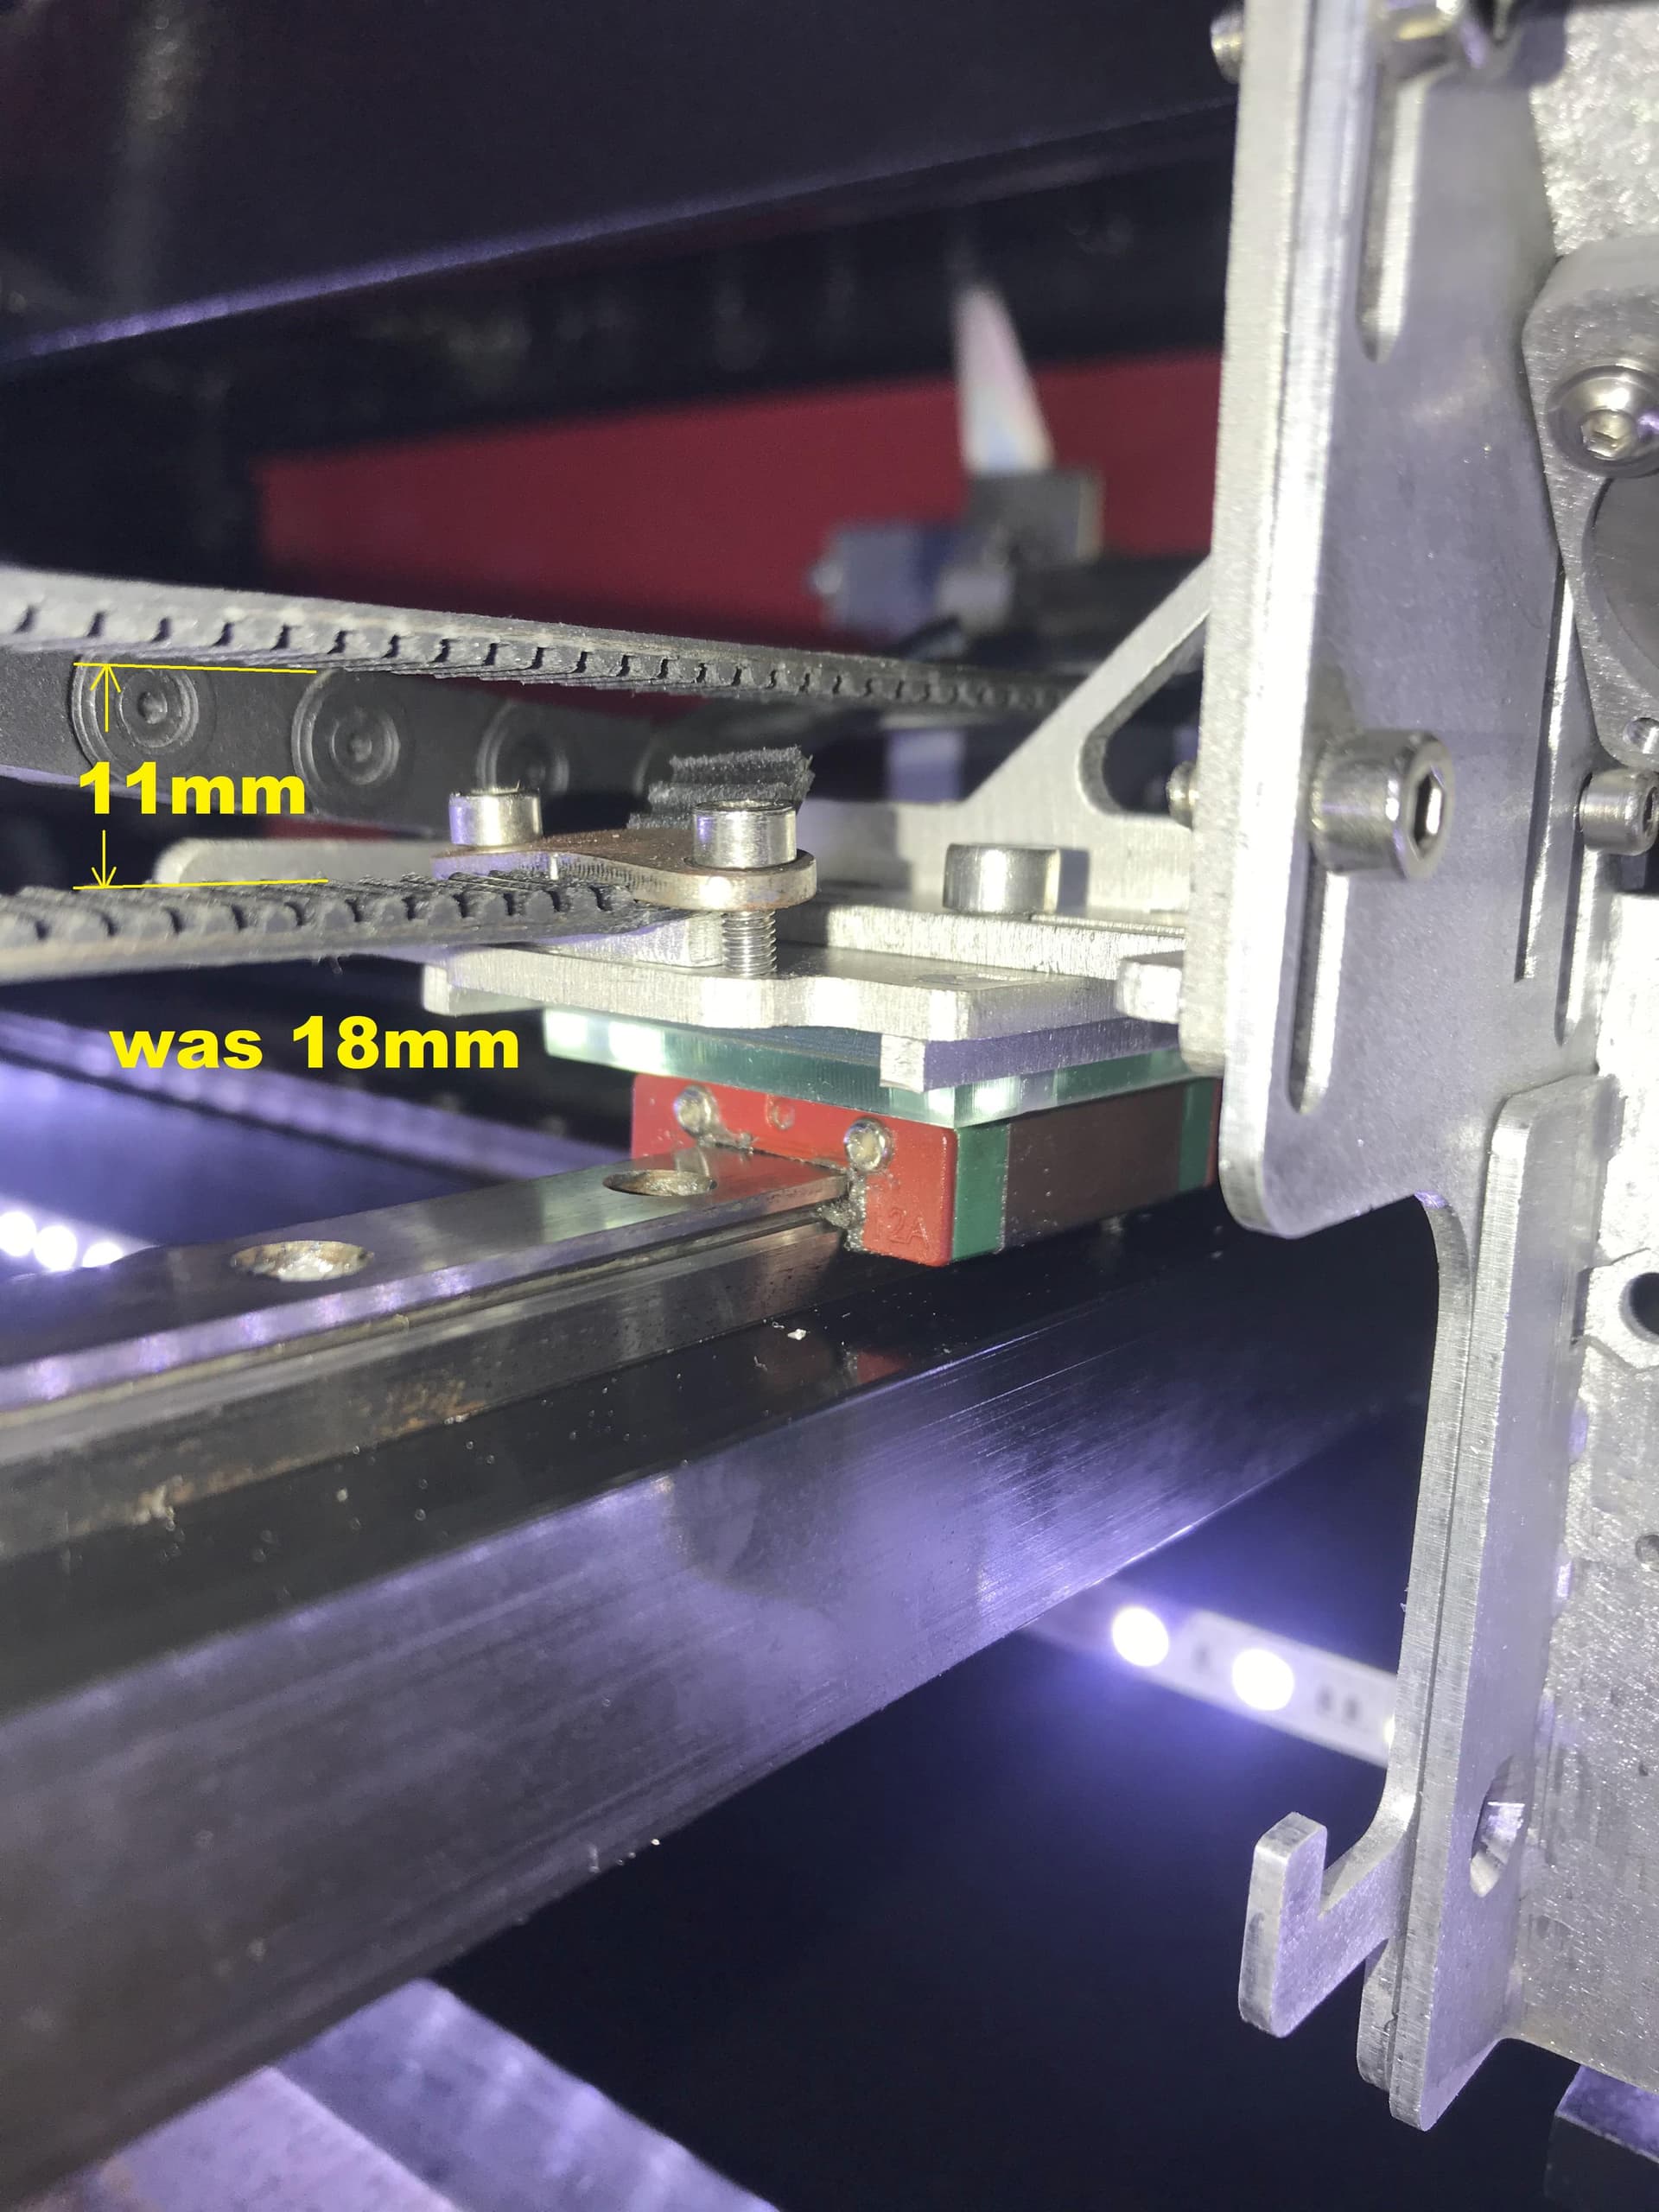
I installed the acrylic option for the 12mm rail, but didn’t like how it closed the gap between the top and bottom of my belt, plus this raised my M3 by 6mm.
I can post the LBurn file to burn your own 12mm rail adapter kit on 3mm acrylic if needed.
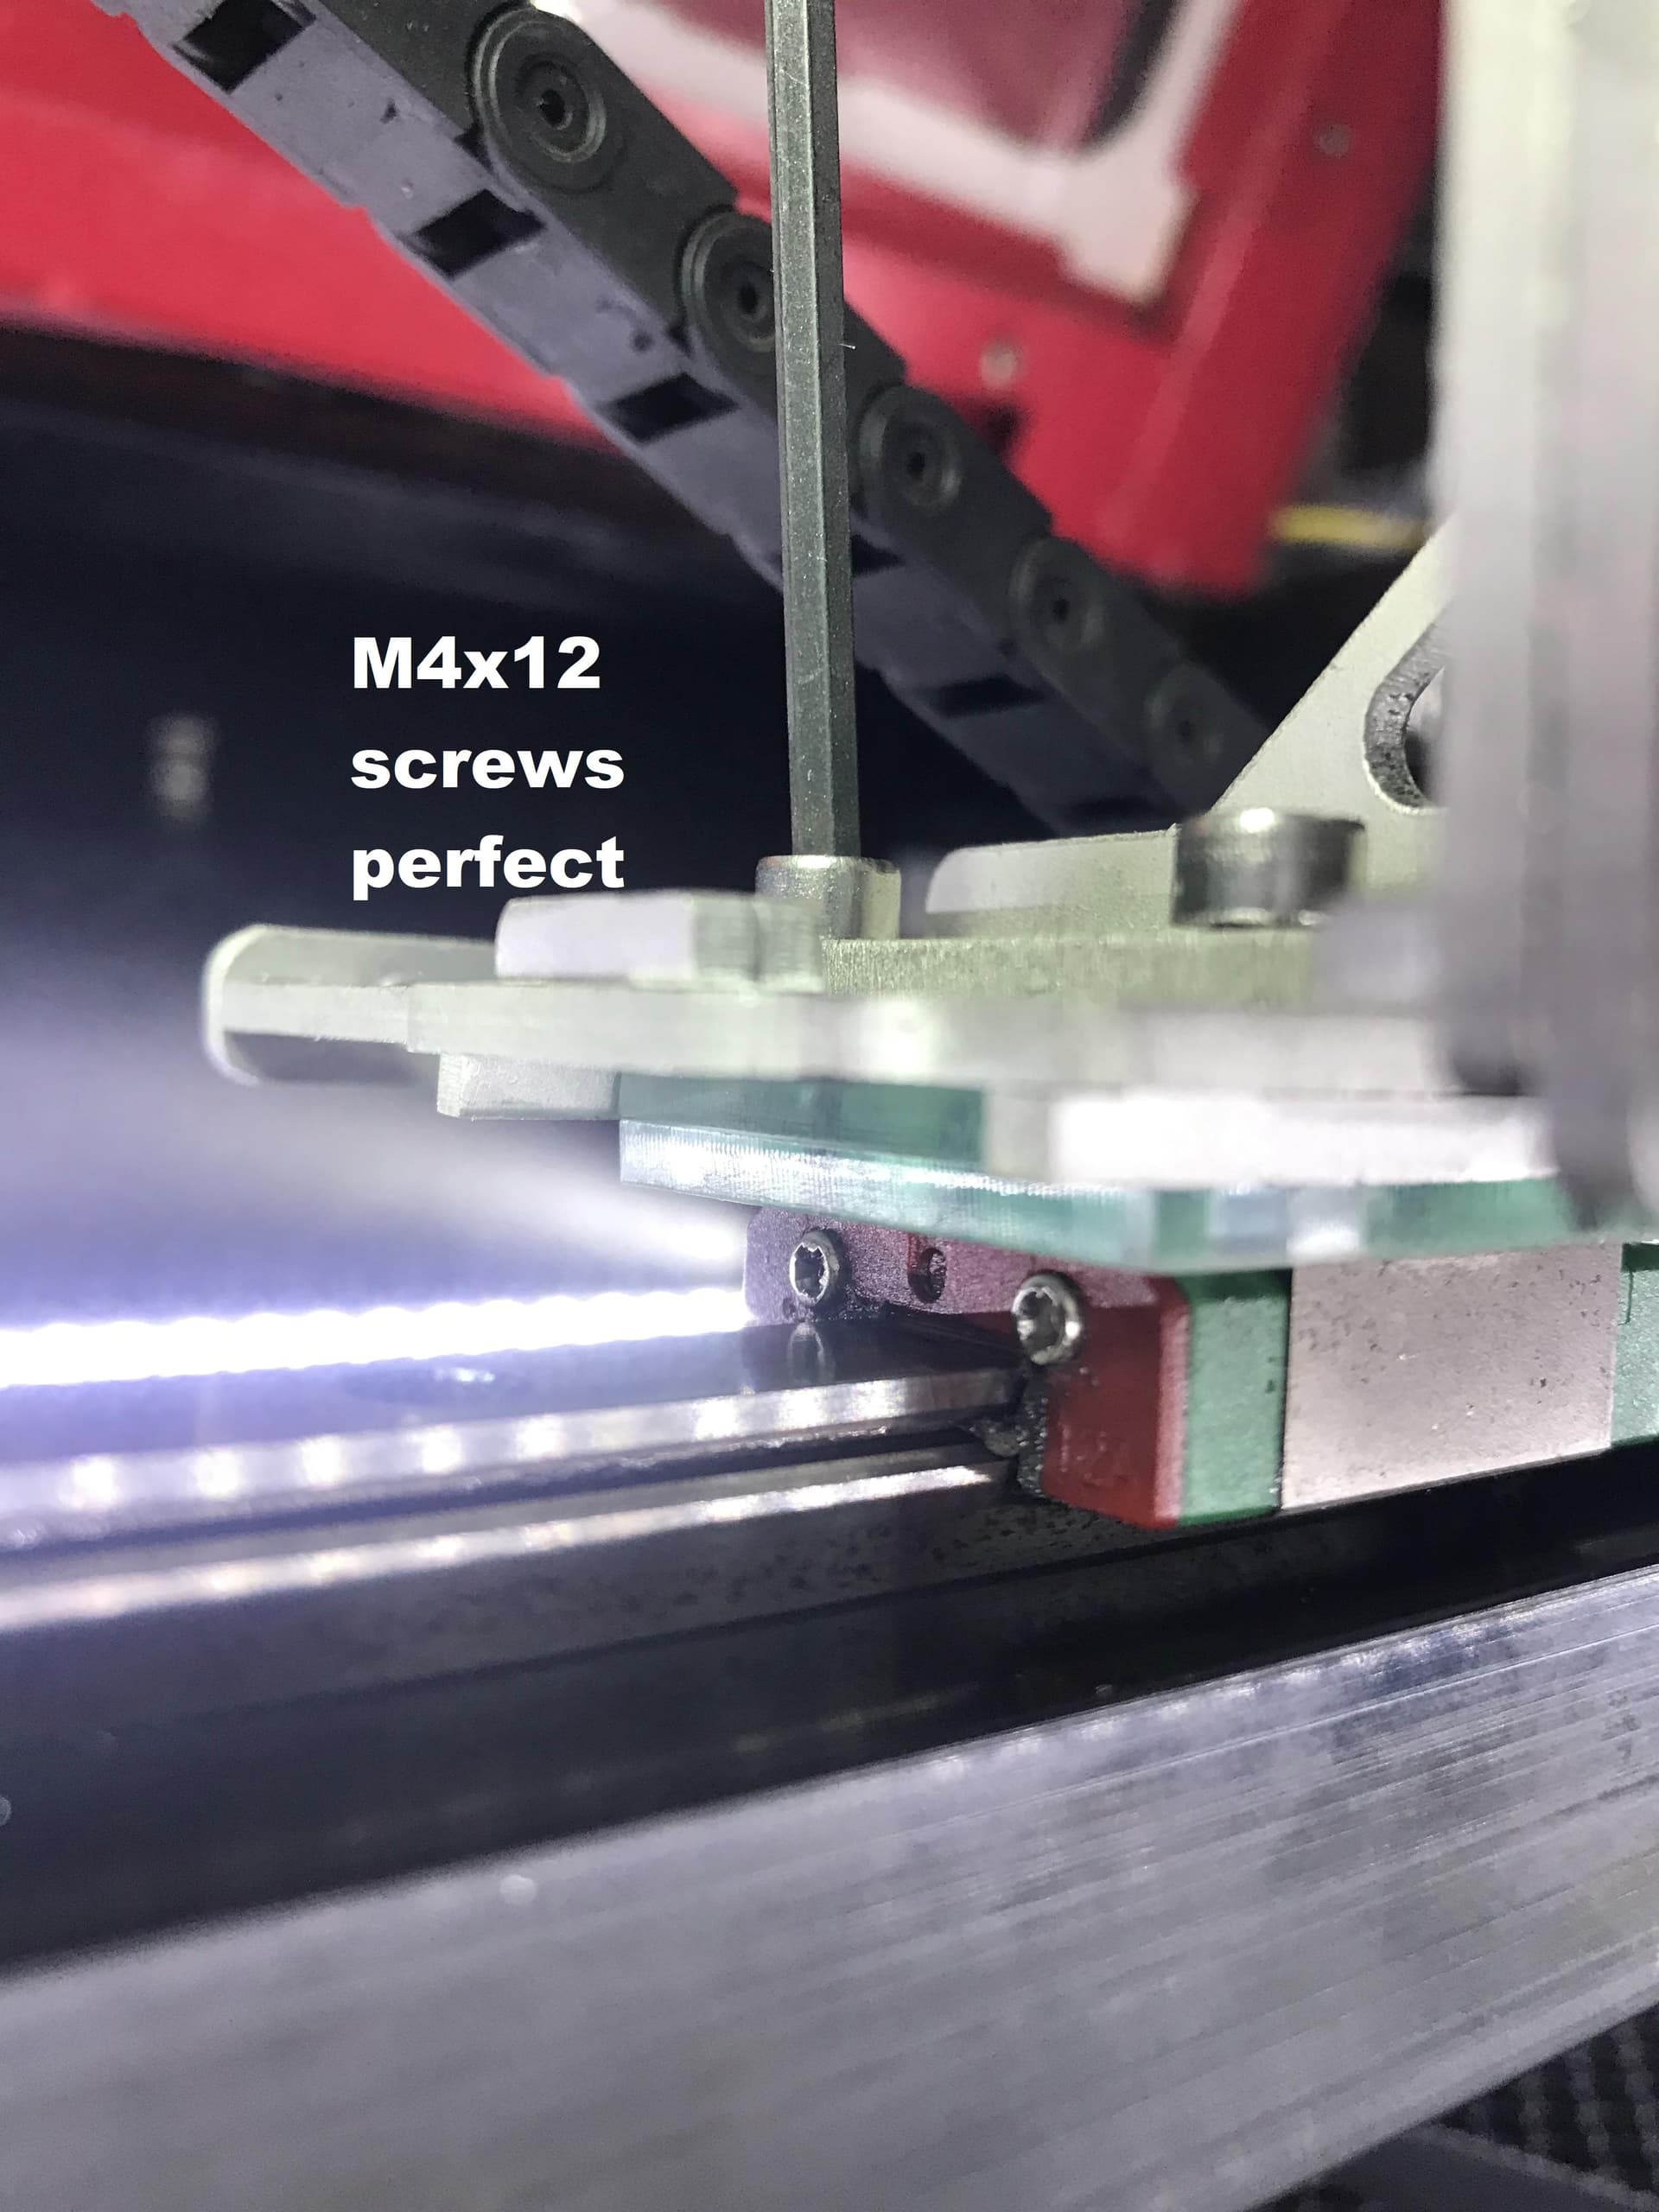
I actually used the 6mm acrylic as a template to drill new holes in the aluminum base I received from CloudRay, allowing me to mount the adjustable aluminum base directly to my rail bearing. I had to come up with some countersink screws, and then tap M5 holes into the base, so that the top can slide in the Y direction for adjustments, instead of using the original M4 thru holes into the rail bearing.
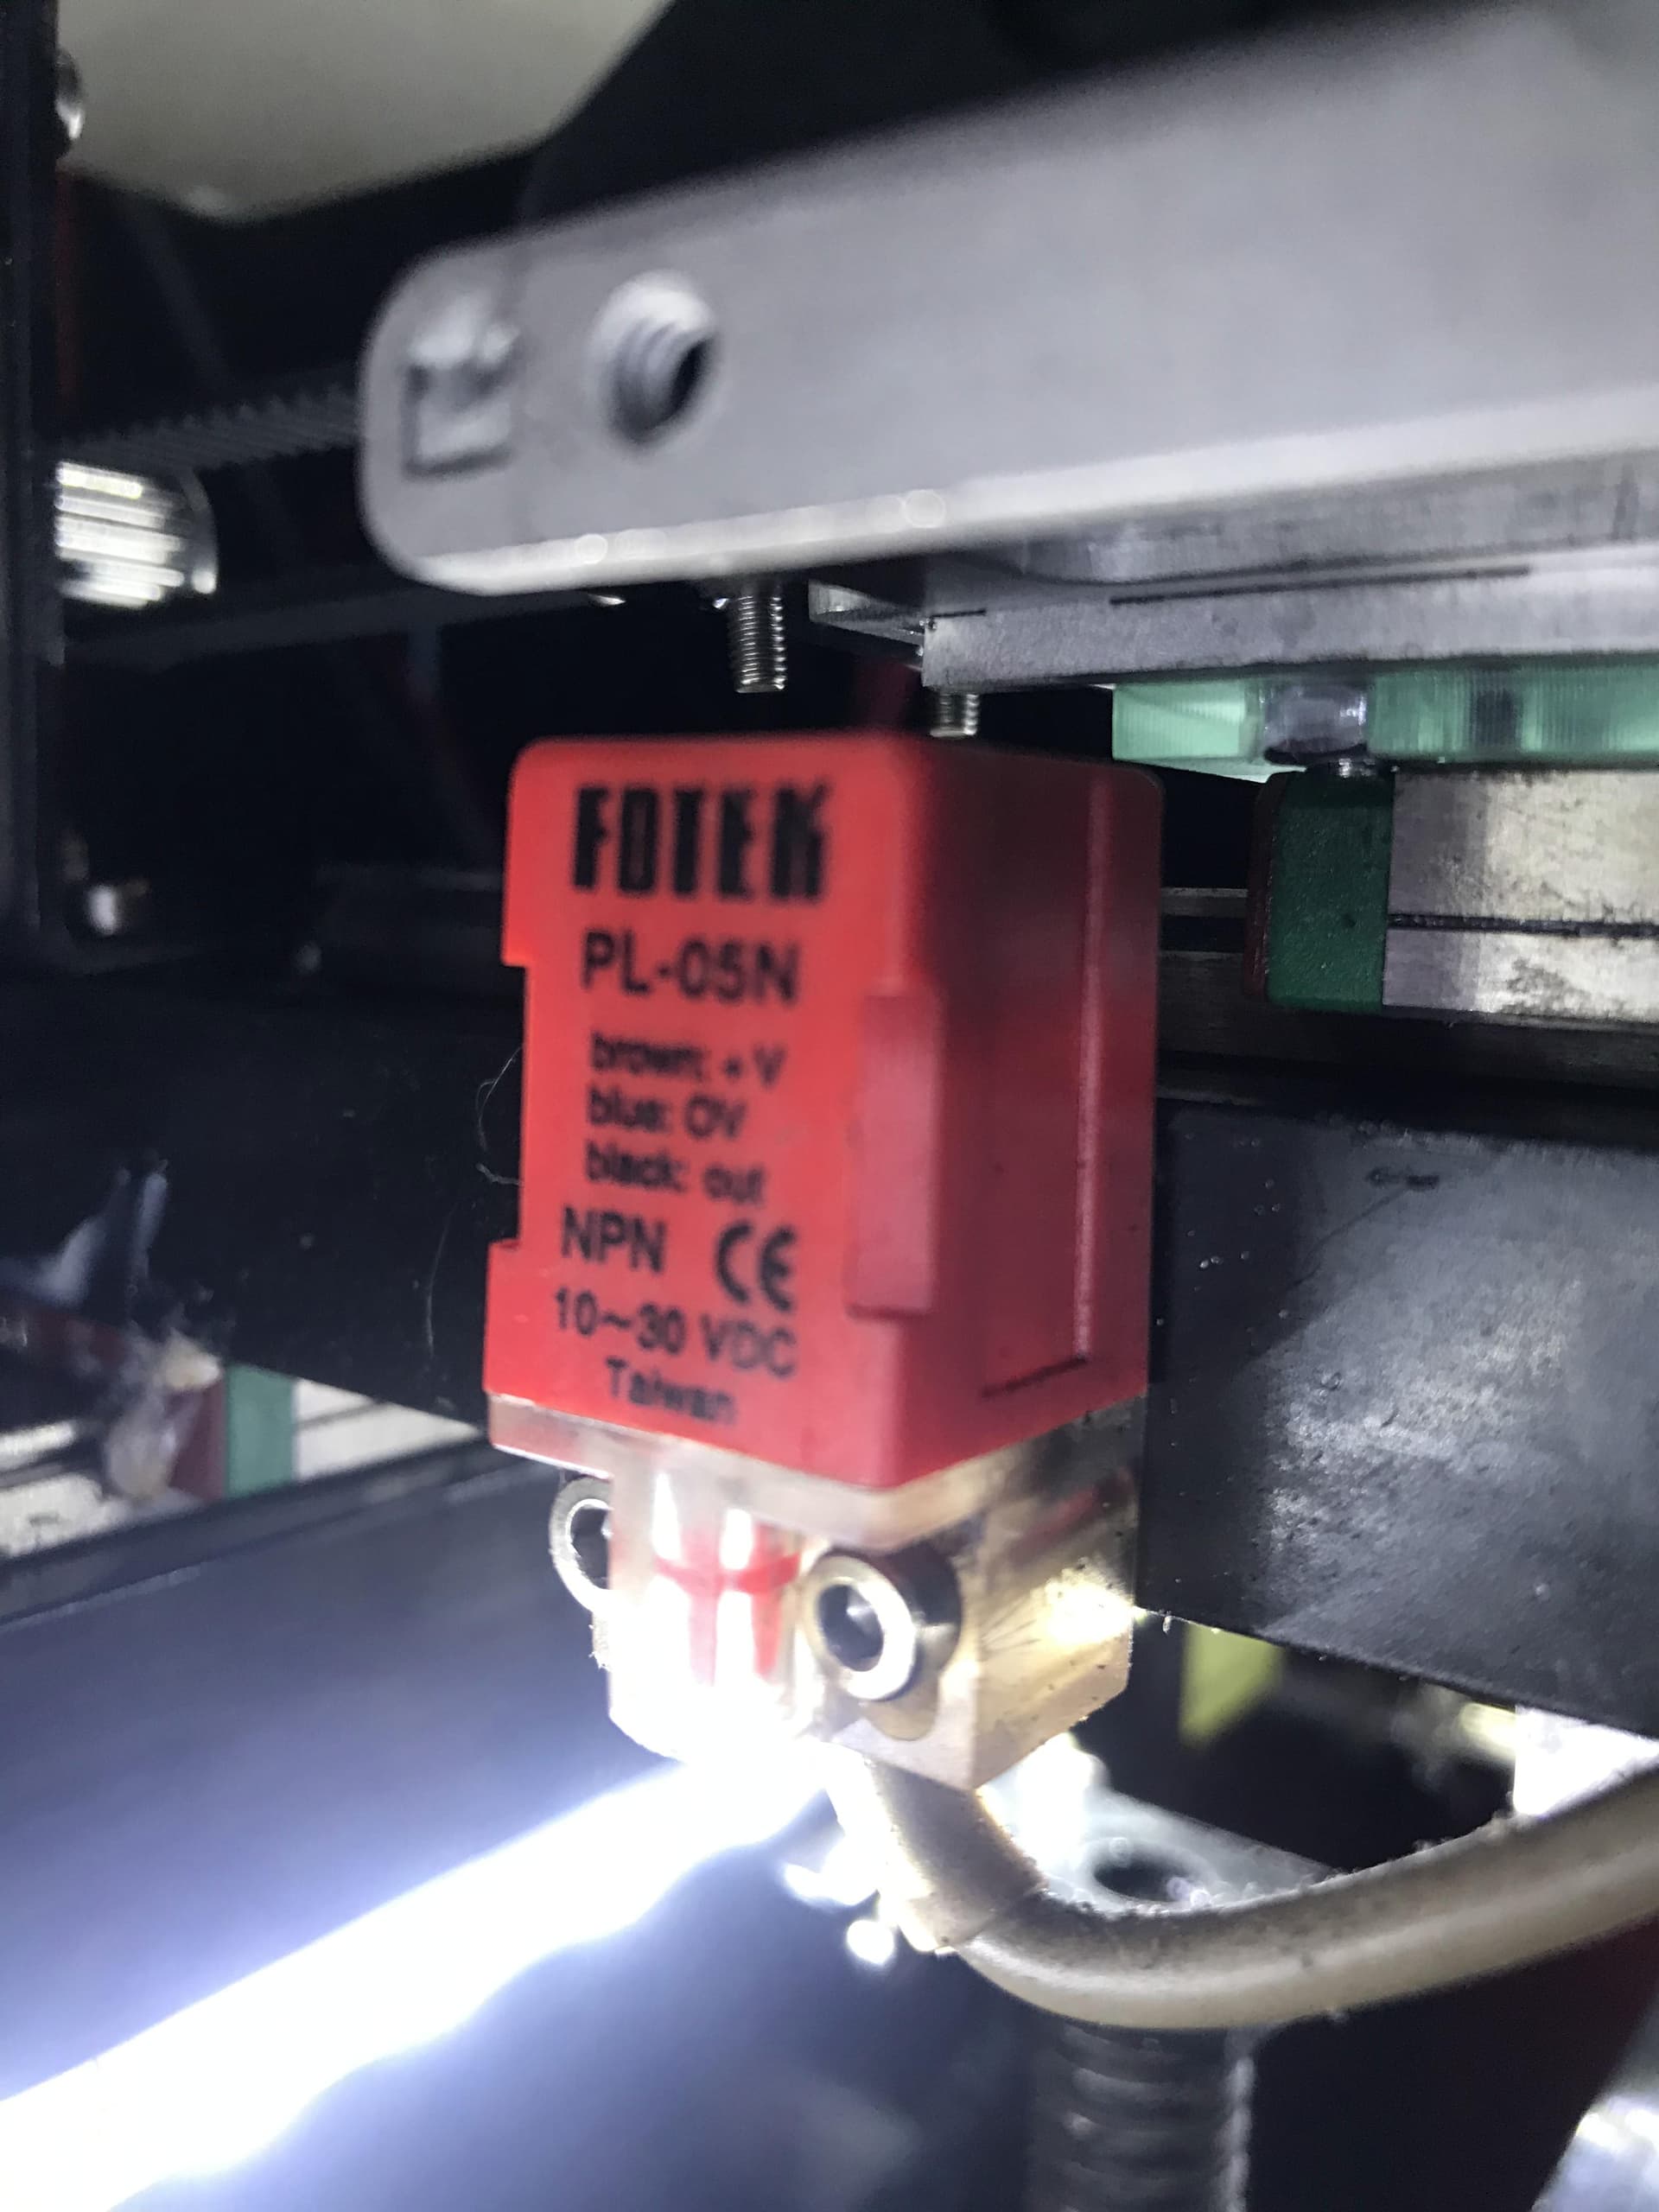
It also raised the base above my E-Stop sensor, so I would have needed some type of bracket hanging down, or adj the sensor up.
It took some doing, but worked out better for my setup than the acrylic option.
Joe
Just to note the rewards.
I originally had a very short 18mm Lens tube that didn’t allow me to even use my Pass Thru. So I purchased this L series tube Link, which allowed me to use my existing Head, and upgrade to 20mm lens and have much more flexibility on Focal Length and vertical adjustments for pass thru ability.
I have about 6 of these L series tubes if anyone wants to buy them.
However, I was still very limited on adjusting the parallel laser beam, and it kept hitting the hole for M3 resulting in beam clipping, and didn’t have a choice to have a non parallel X beam to make it work.
So I went from THIS
To This:
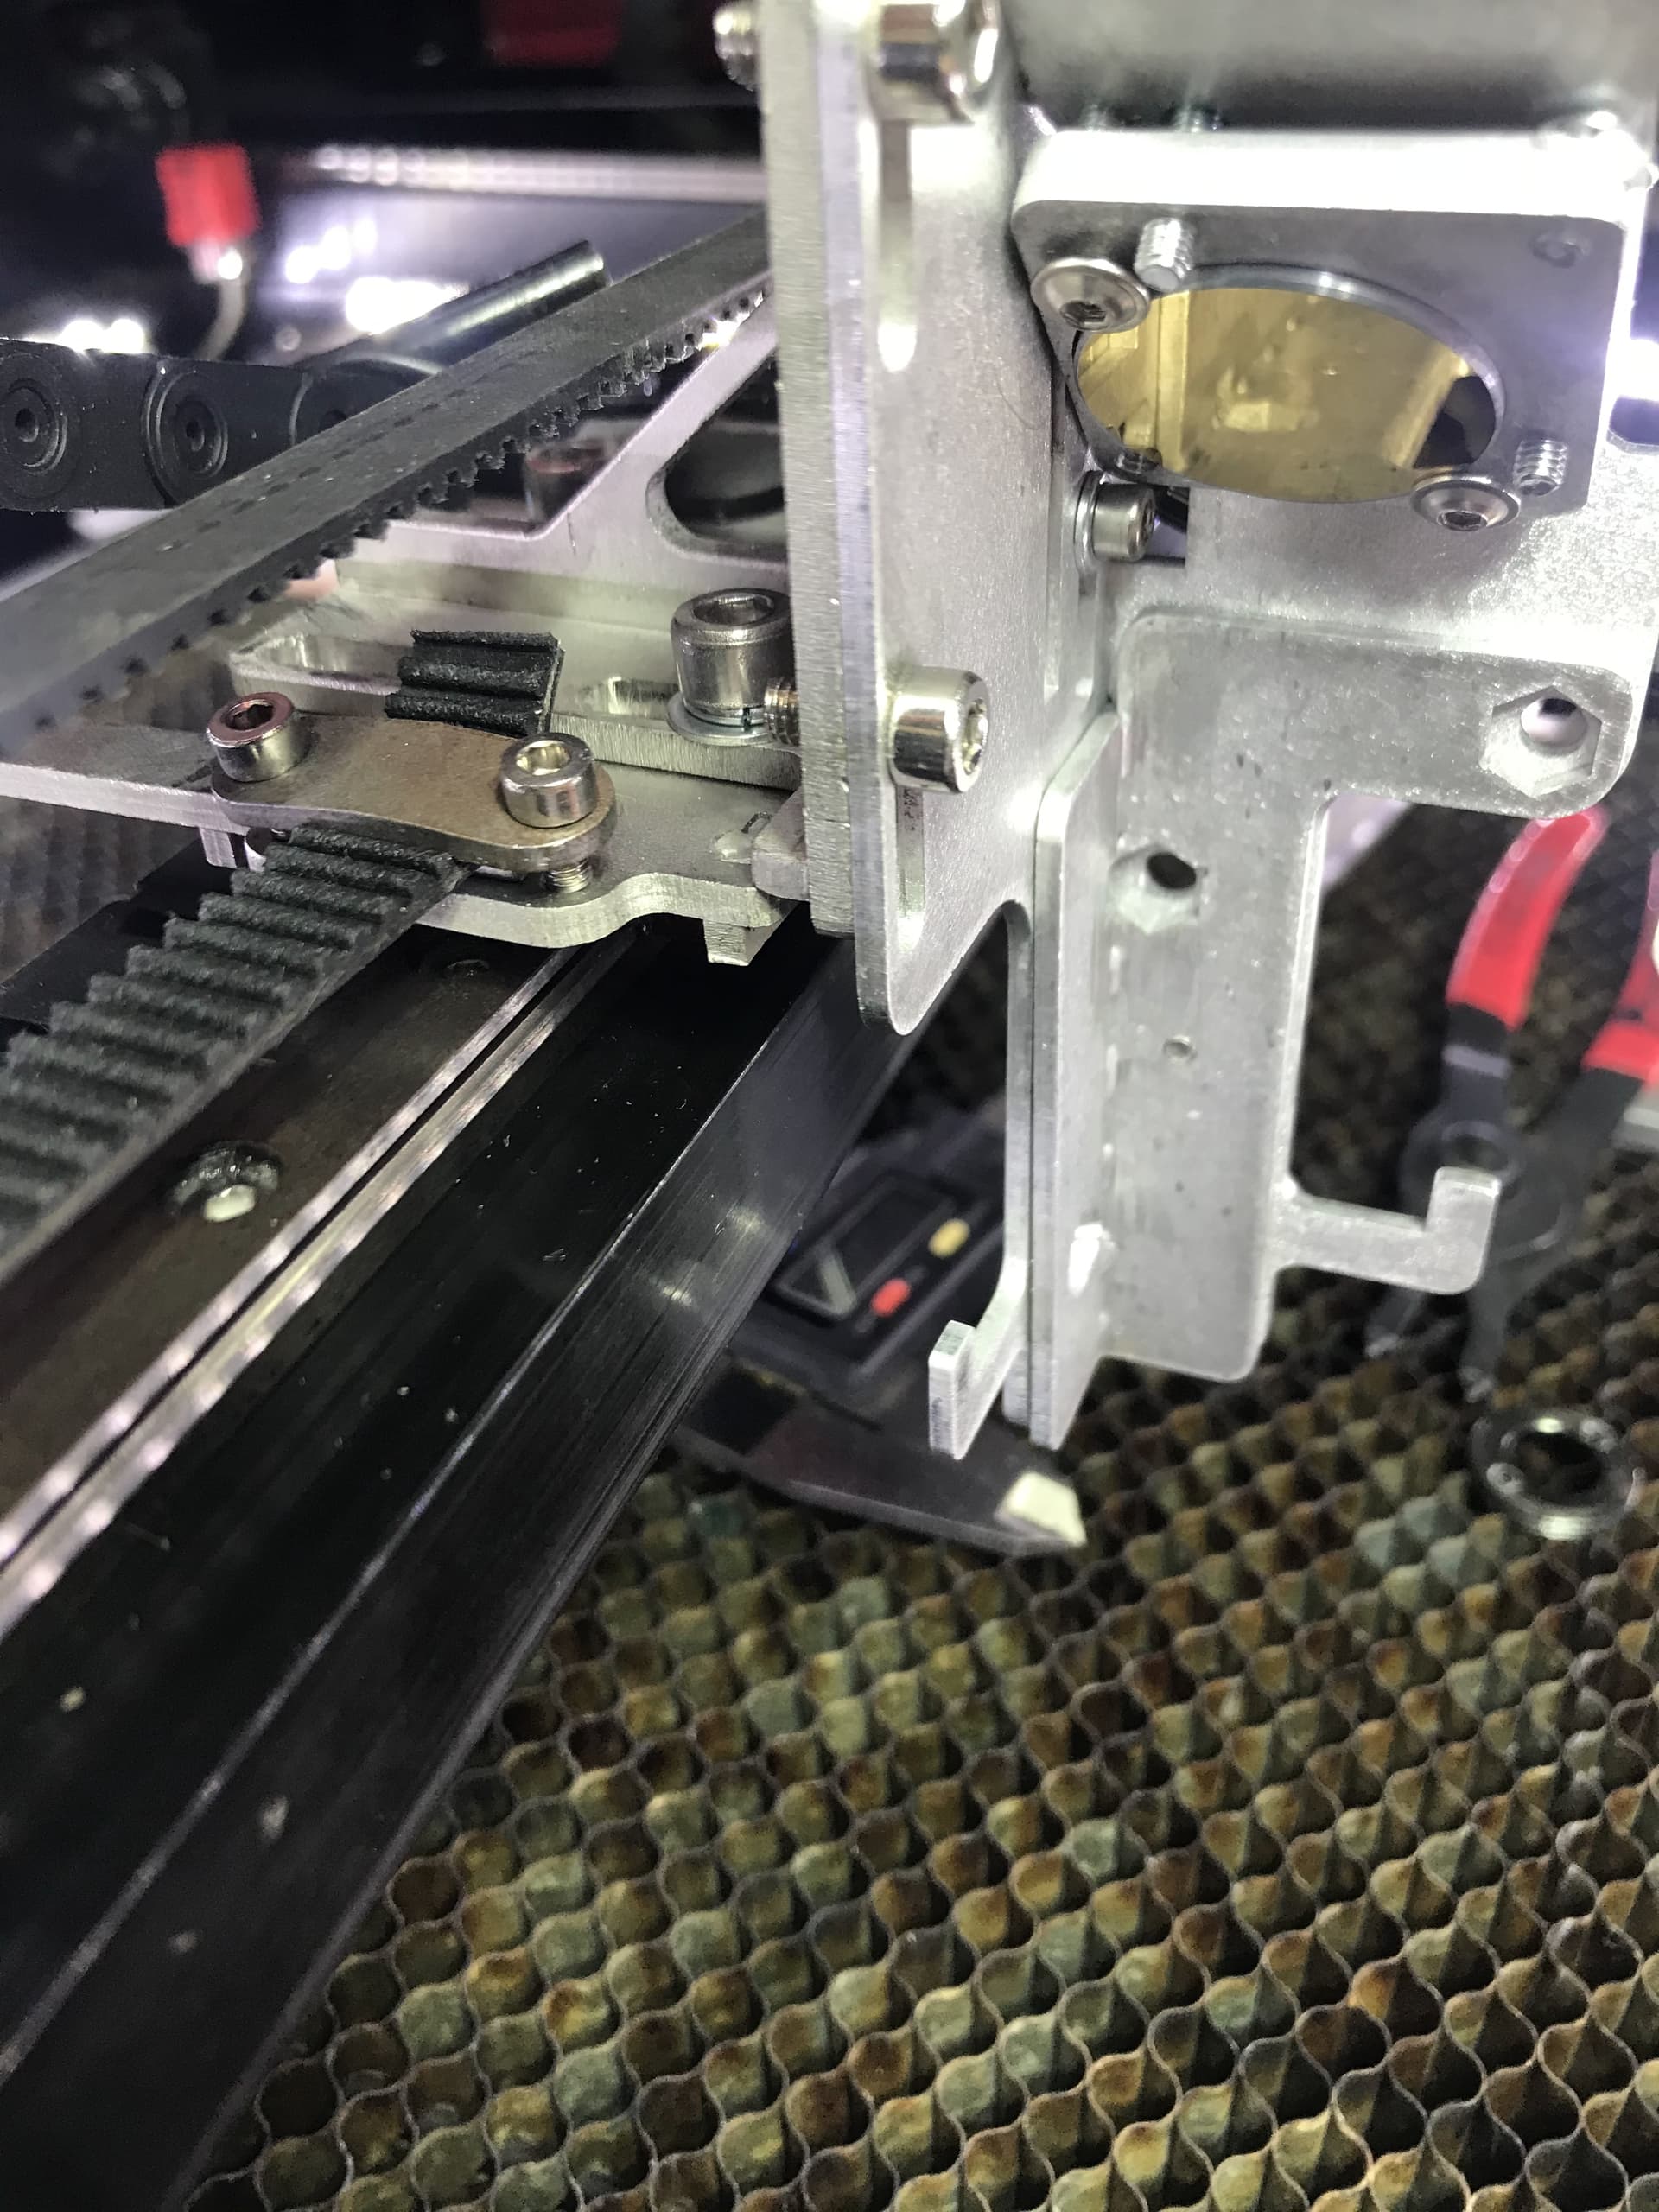
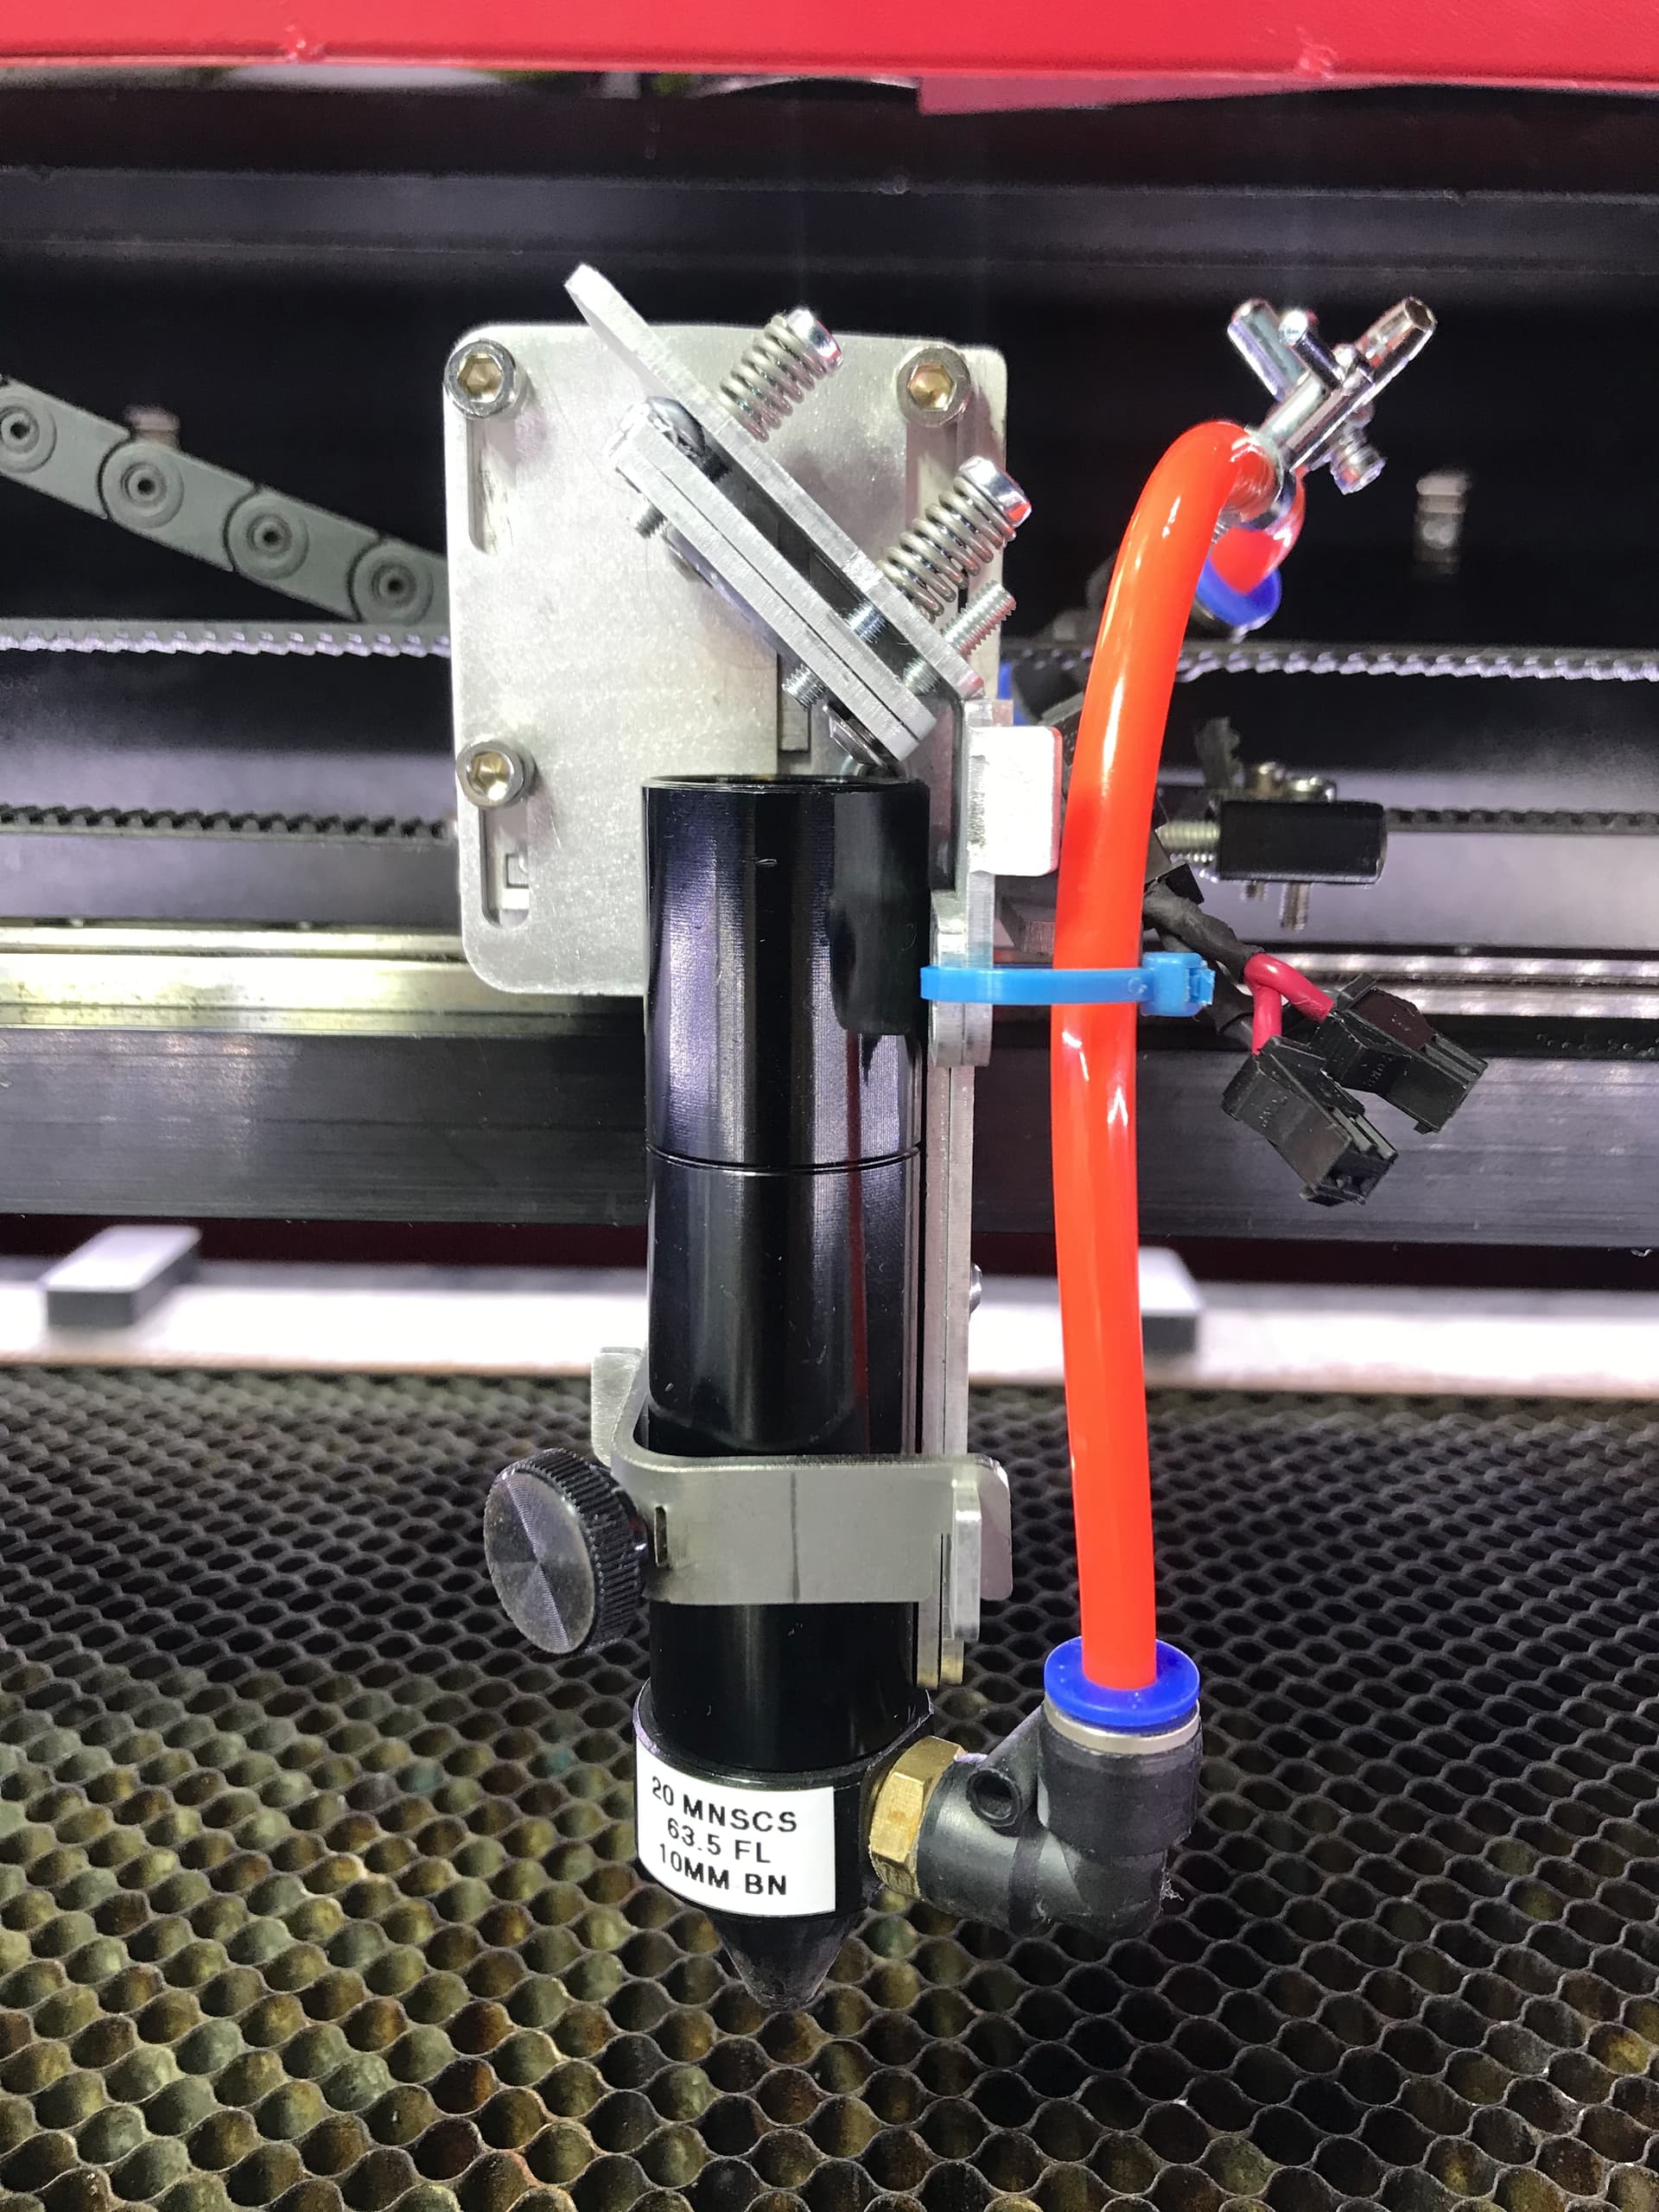
This NEW adjustable bracket allowed me to purchase Russ’s LW head, and now I have FULL beam adjustment in X, Y, and Z, and also have TONS of Lens options, abilities, added speed, etc.
I was able to purchase a 4" (101.6) lens from CloudRay, and easily cut thru 3/4" (19mm) wood stake.
Thanks so much for taking the time to explain things and provide the pictures, Joe. It helps us all have a better understanding in regard to what is involved with this conversion.
No problem Doug.
Russ couldn’t make his CloudRay design work for EVERY laser out there, but he did an amazing job making it as universal as he could.
If CloudRay would add these 4 countersink holes, like I did, it would work for both 12 and 15.
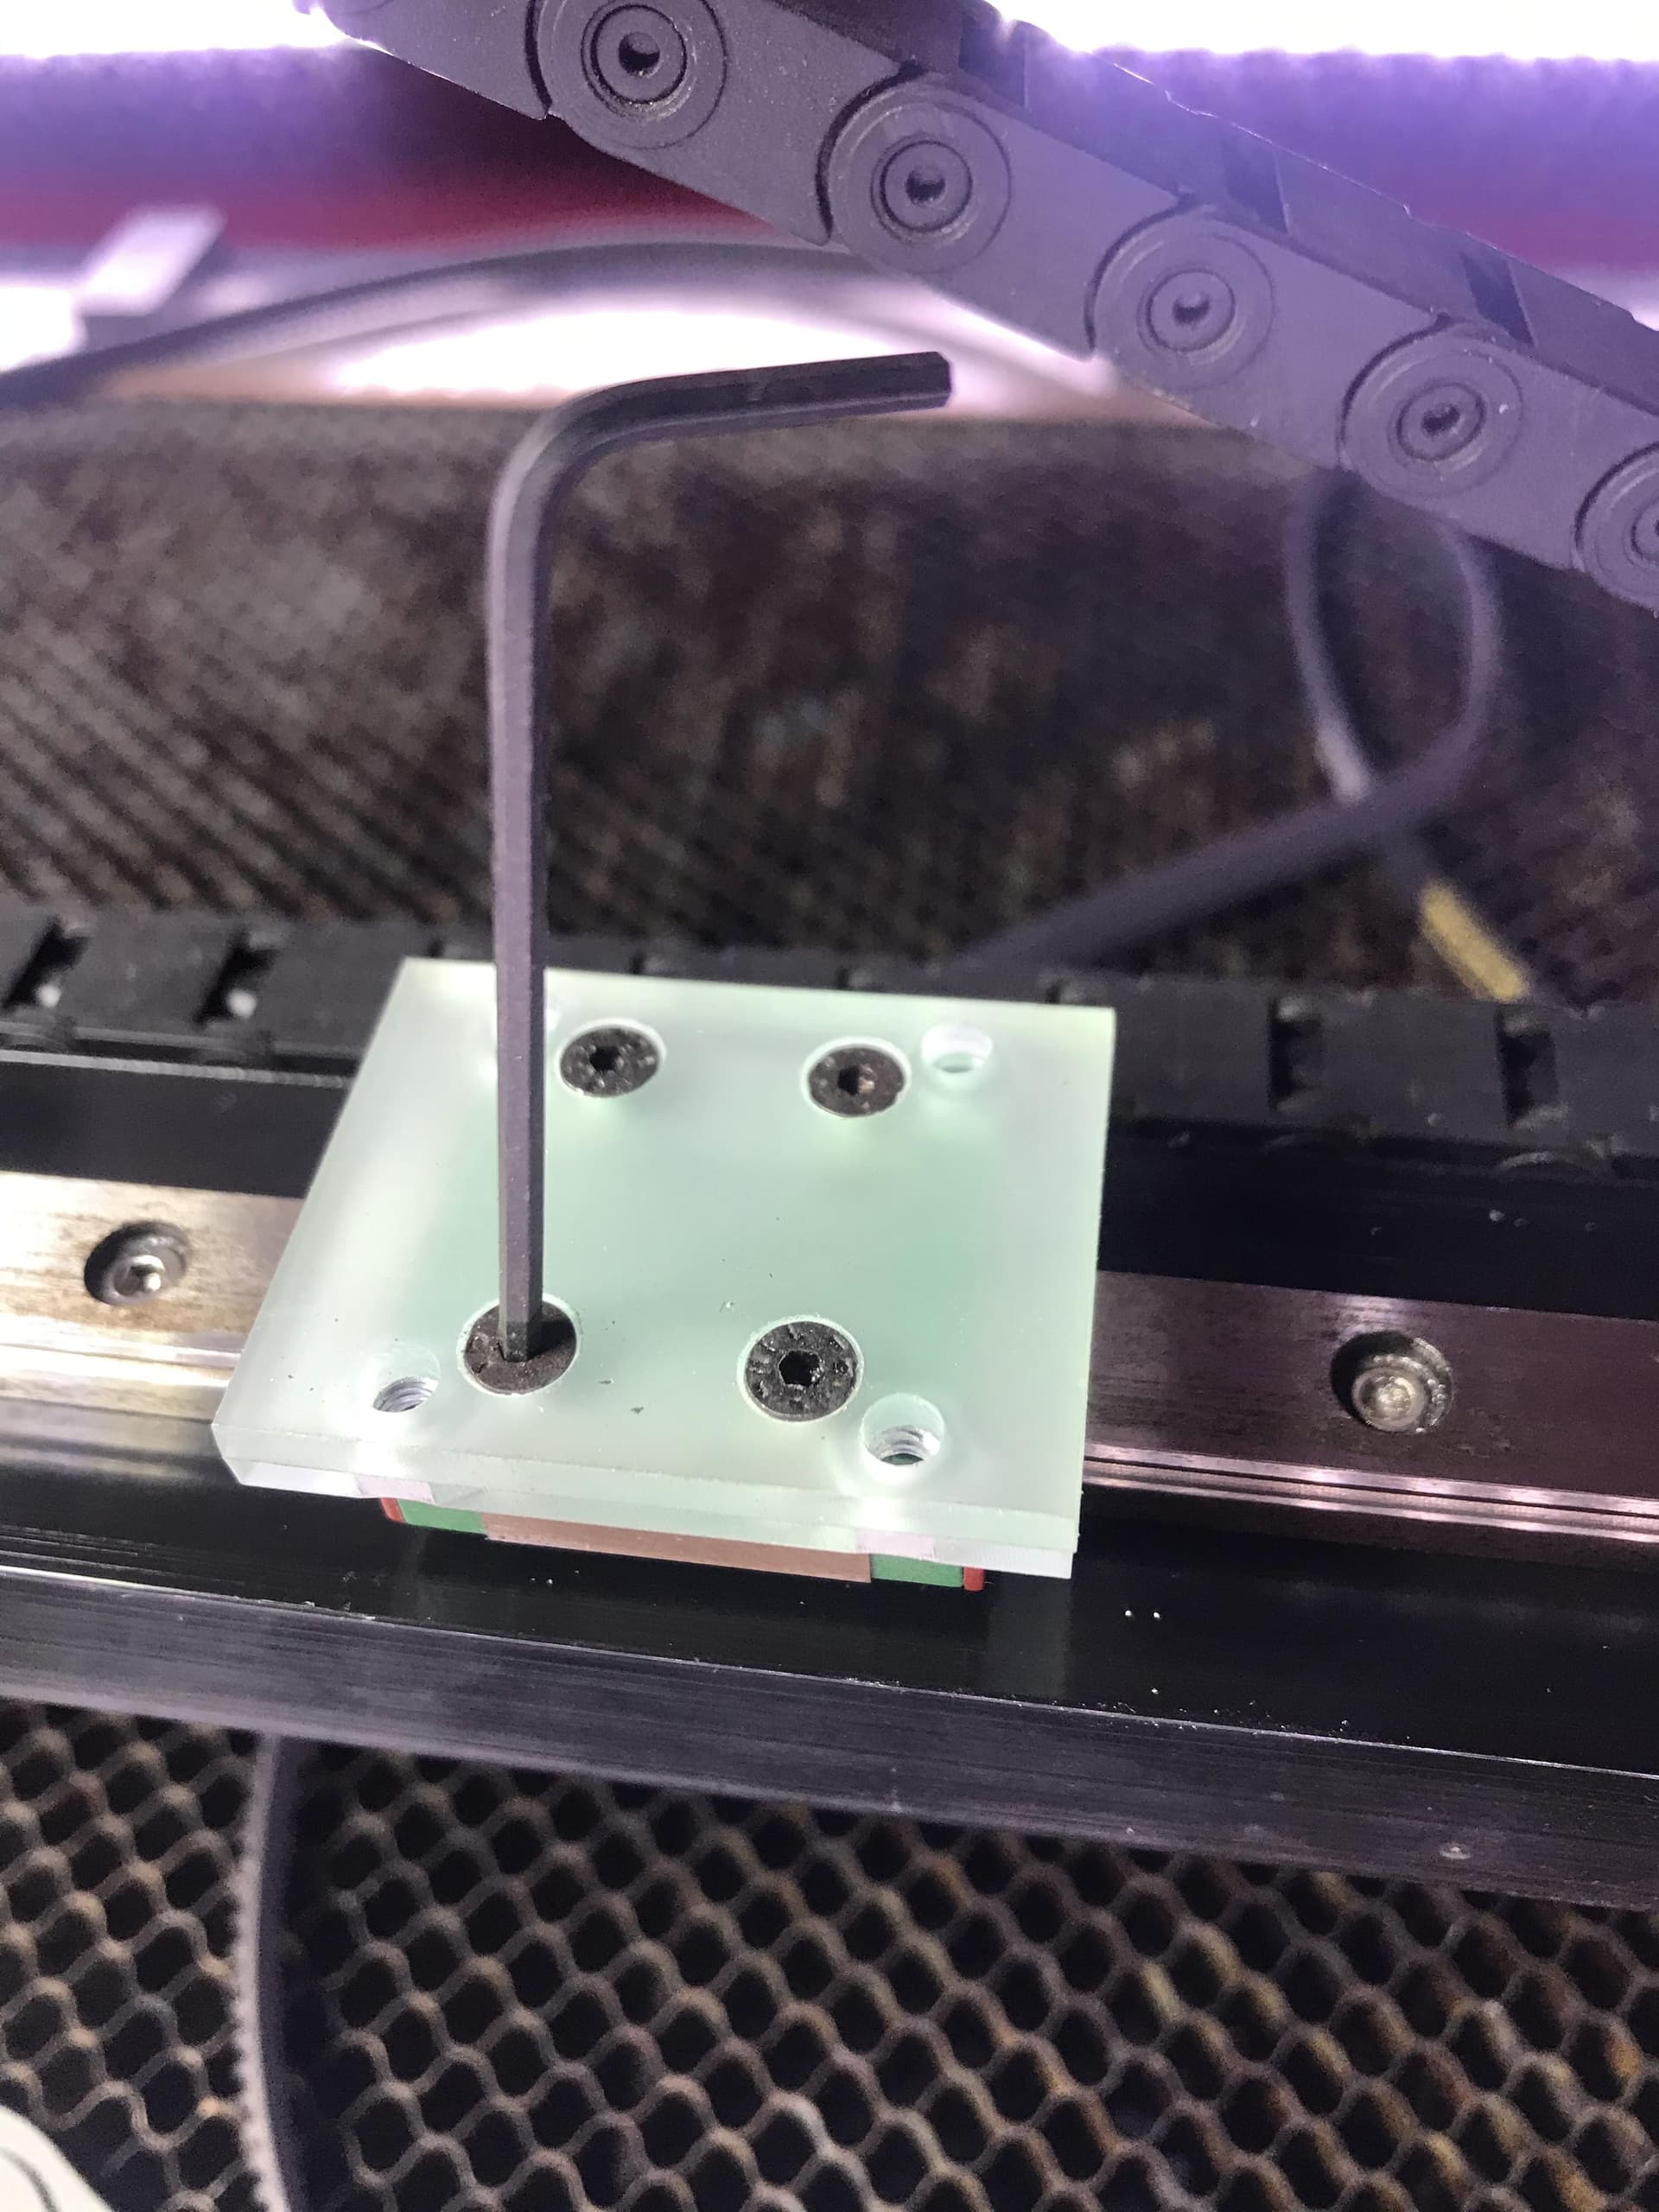
I bolted adapter to plate, then drilled holes.
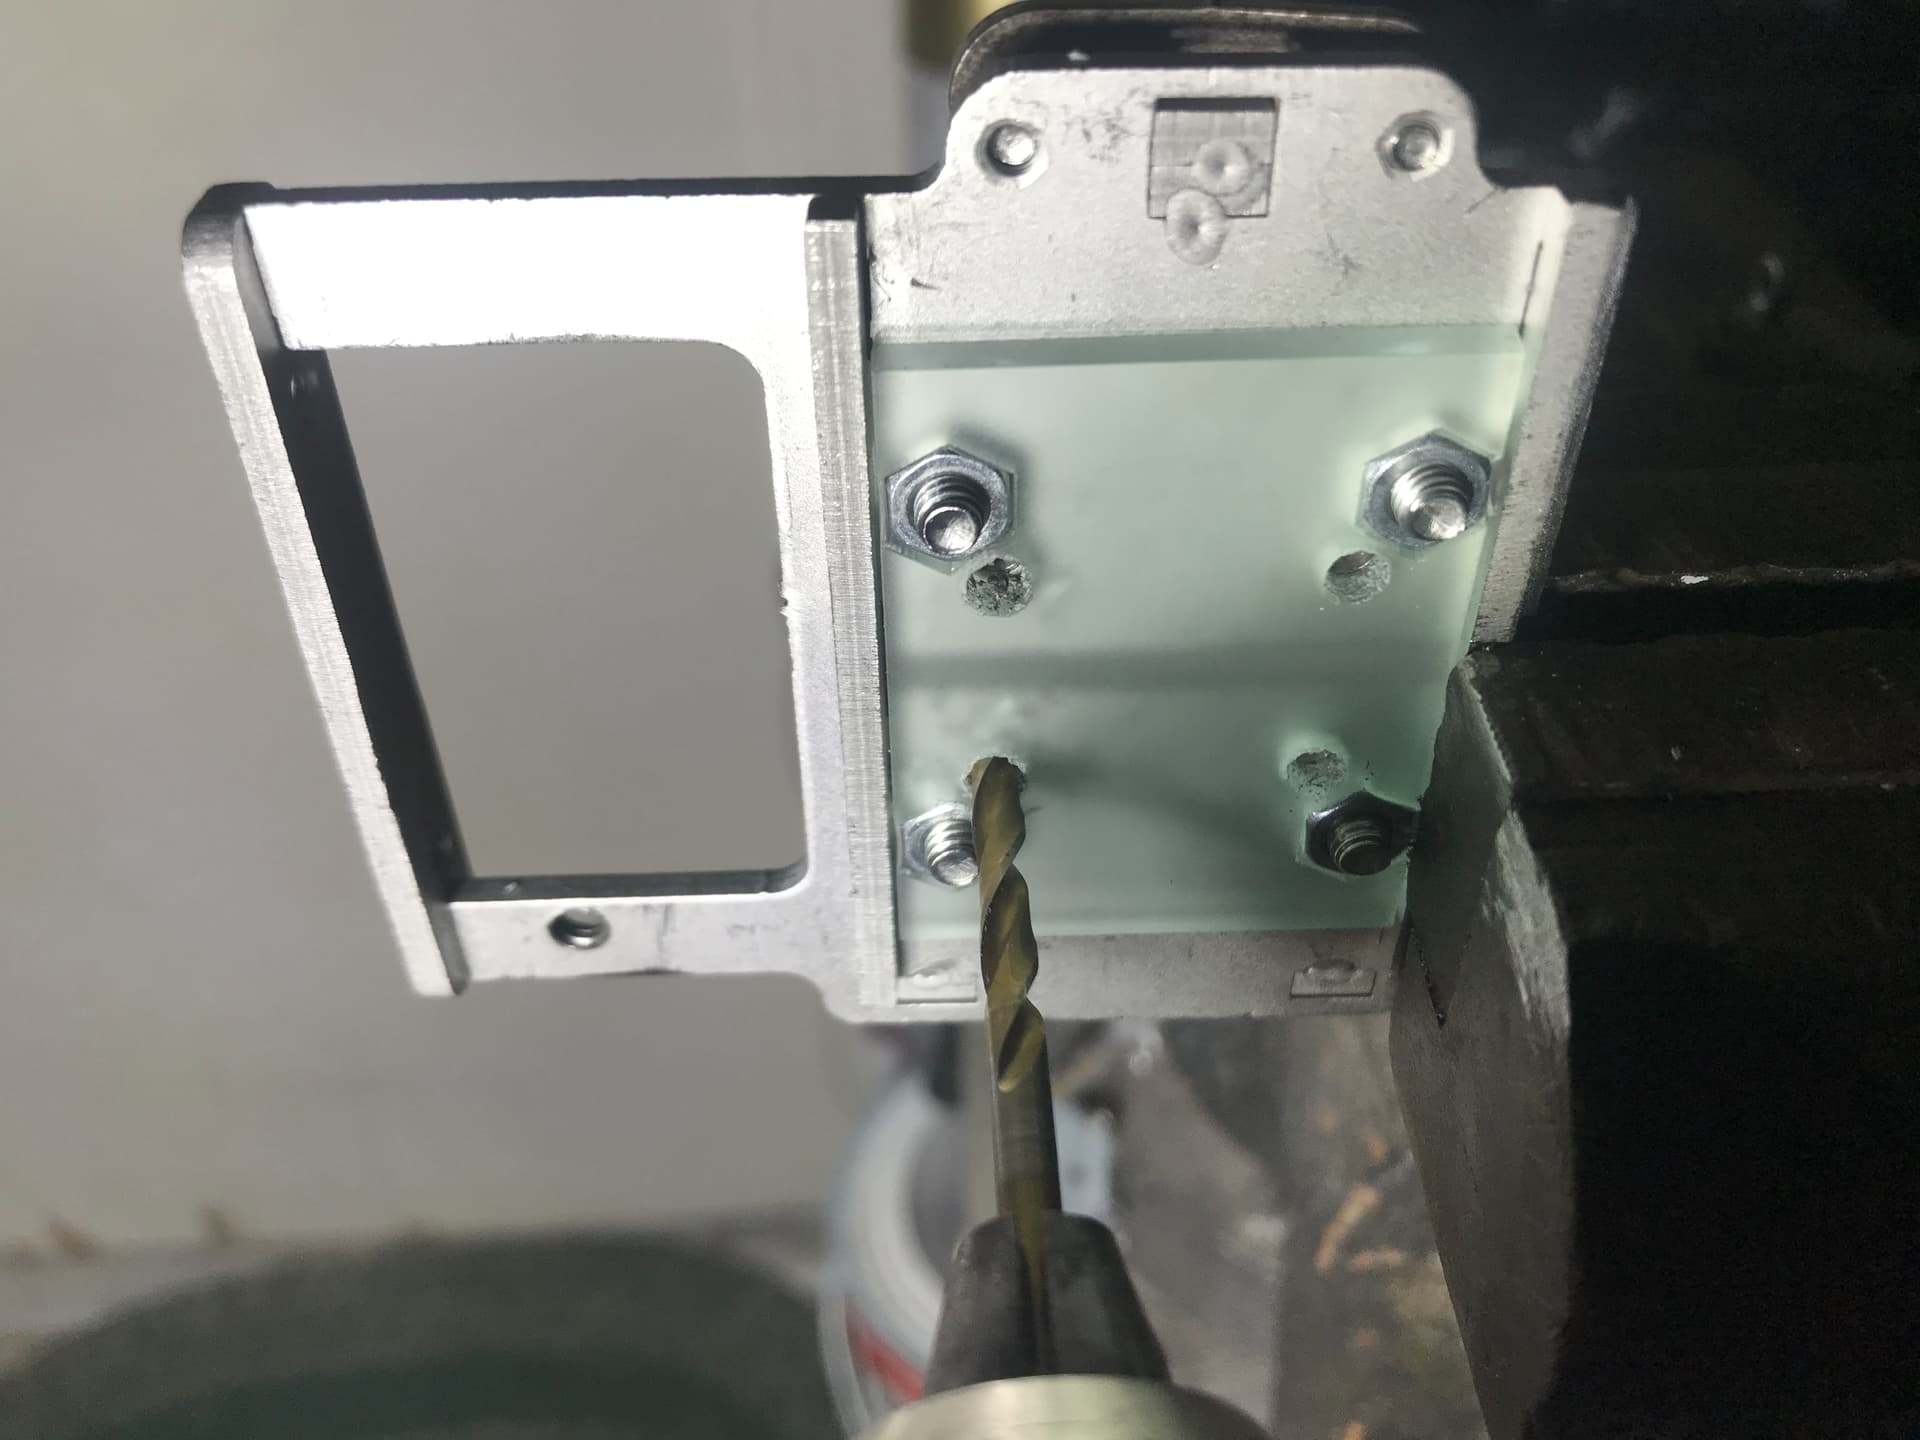
Then took a little larger bit, and drilled the countersink. It must be FLAT so the top aluminum bracket can slide in the Y direction for moving the entire head to the beam.
This lines up with the tapped holes in my Bearing.

Did I do it perfectly, no, I’m not a machinist, but it worked great.
Doing this allowed me to mount the C series adjustable head bracket directly to my 12mm rail bearing, and not raise everything up 6mm.
Keep in mind you do NOT have to use Russ’s LW Head with this adjustable bracket, you can mount the black head you have now to this C series adjustable bracket as well.
Joe