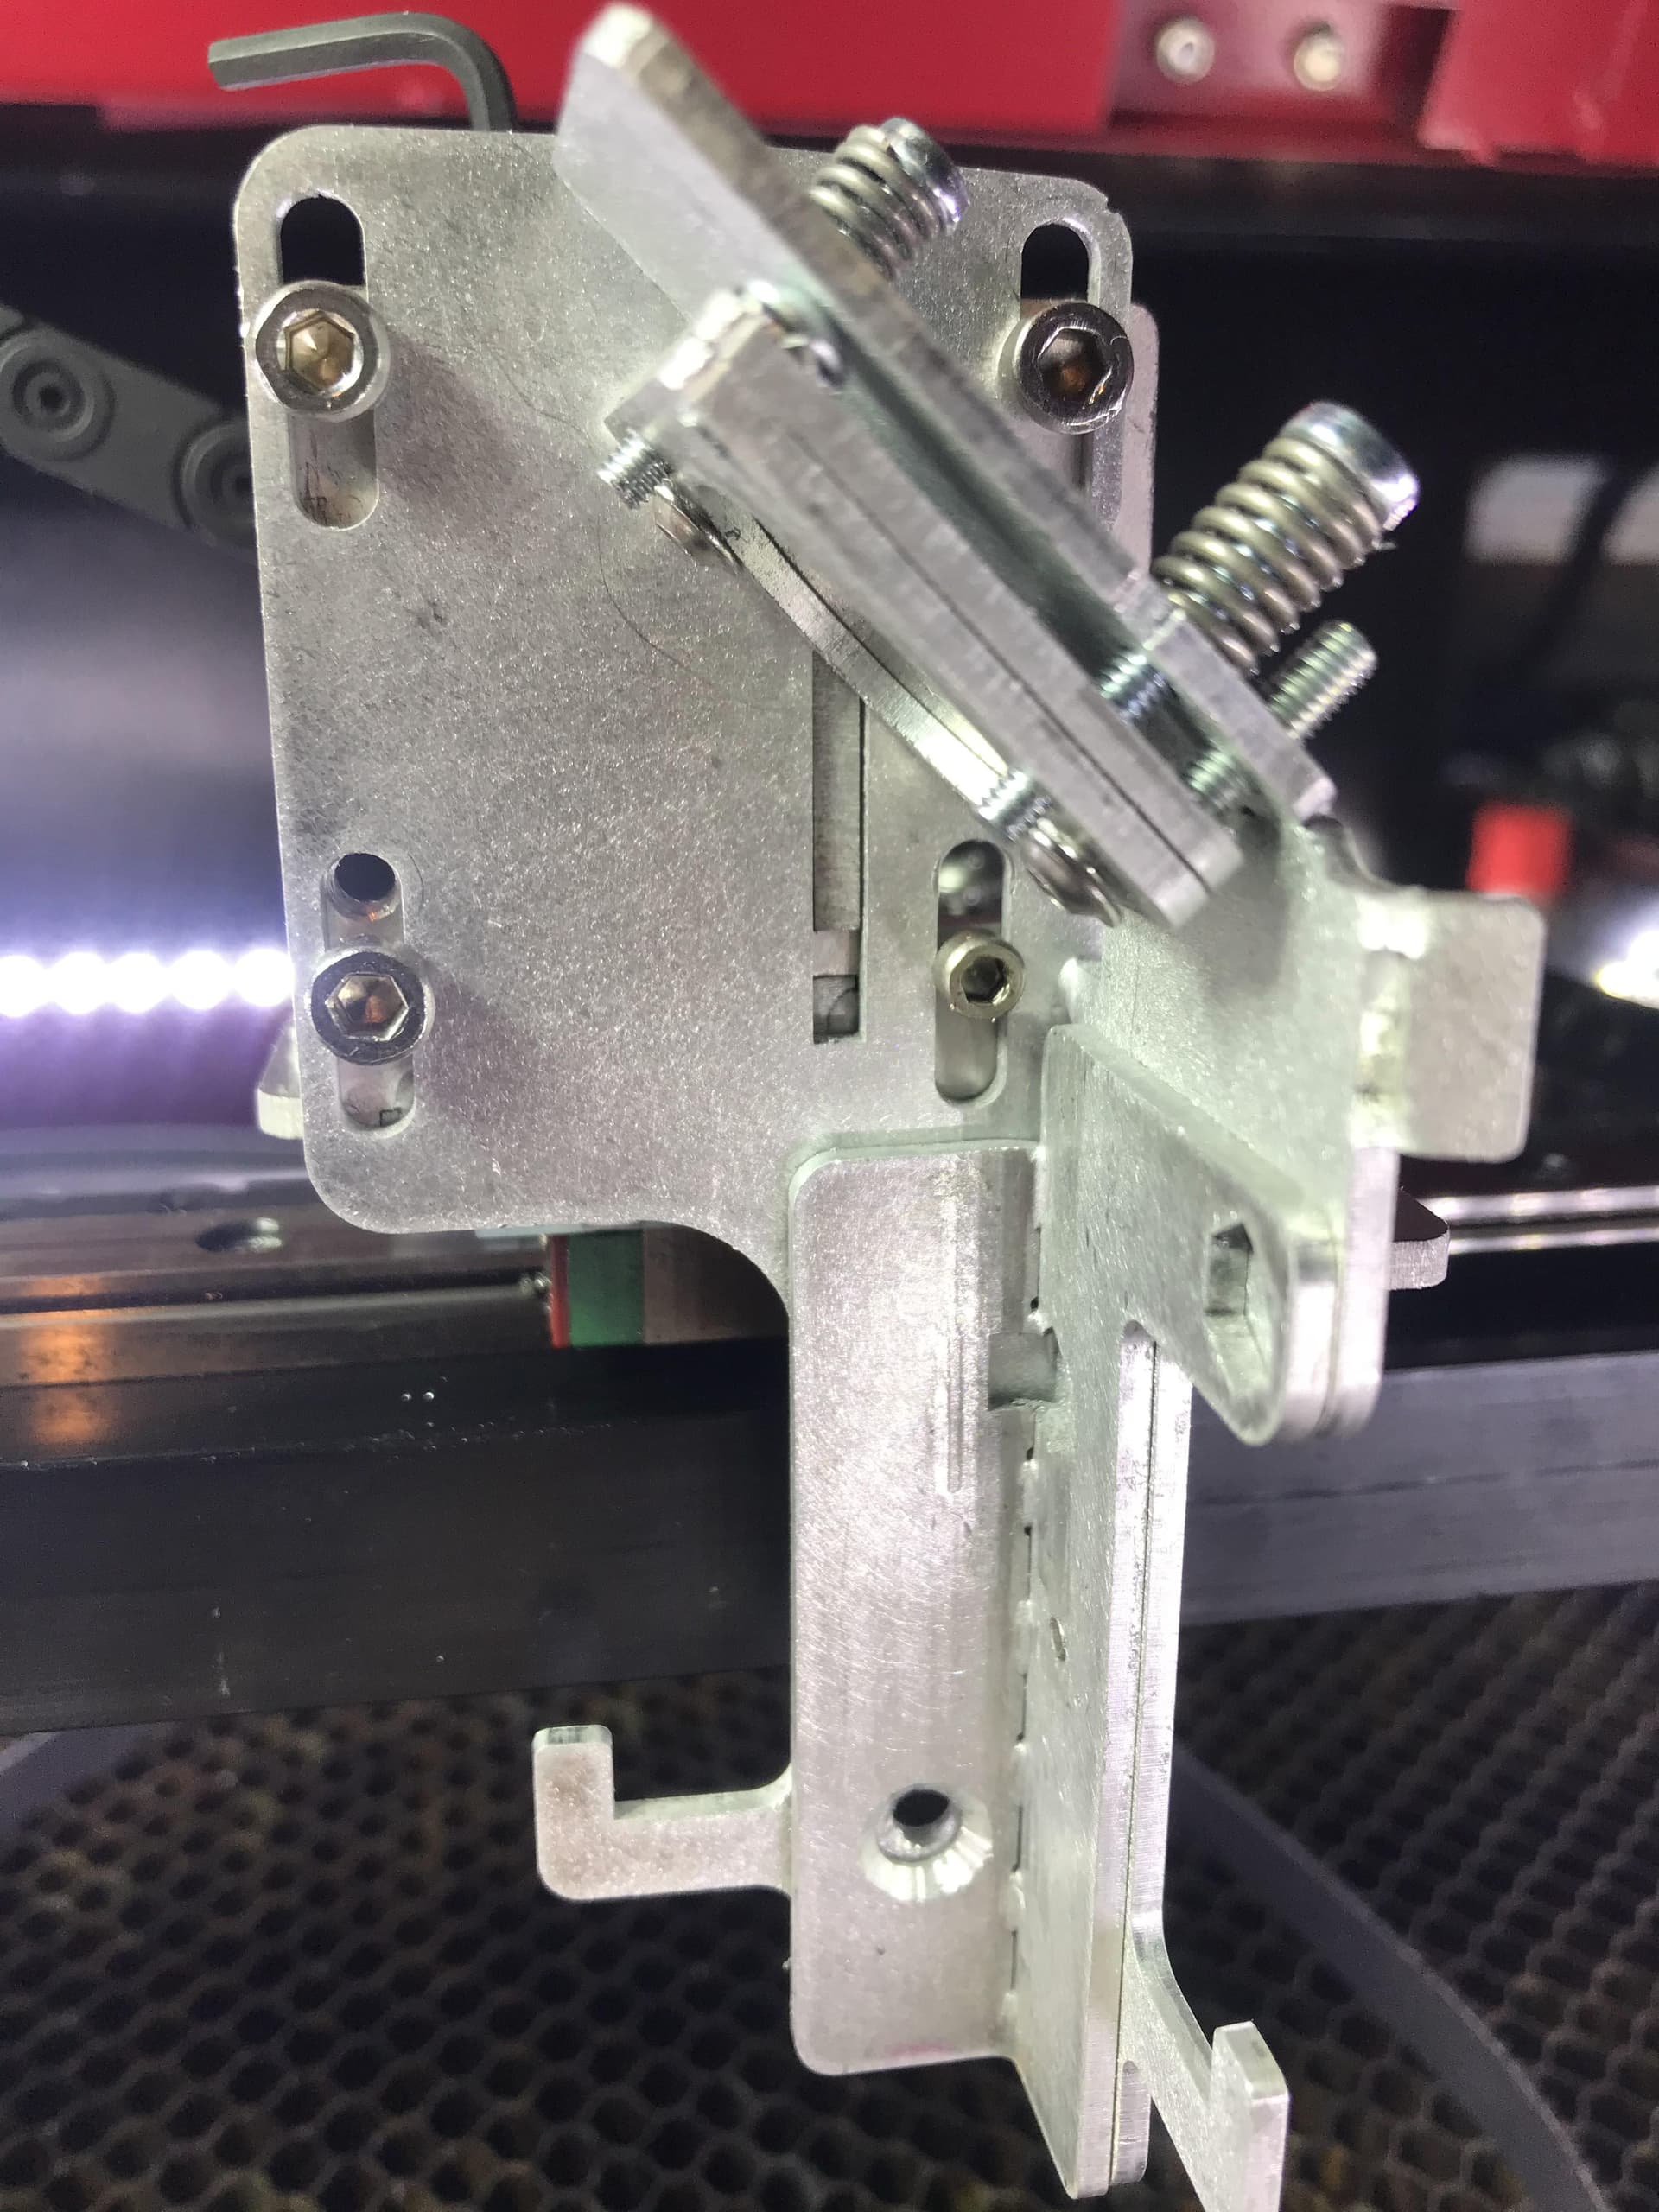
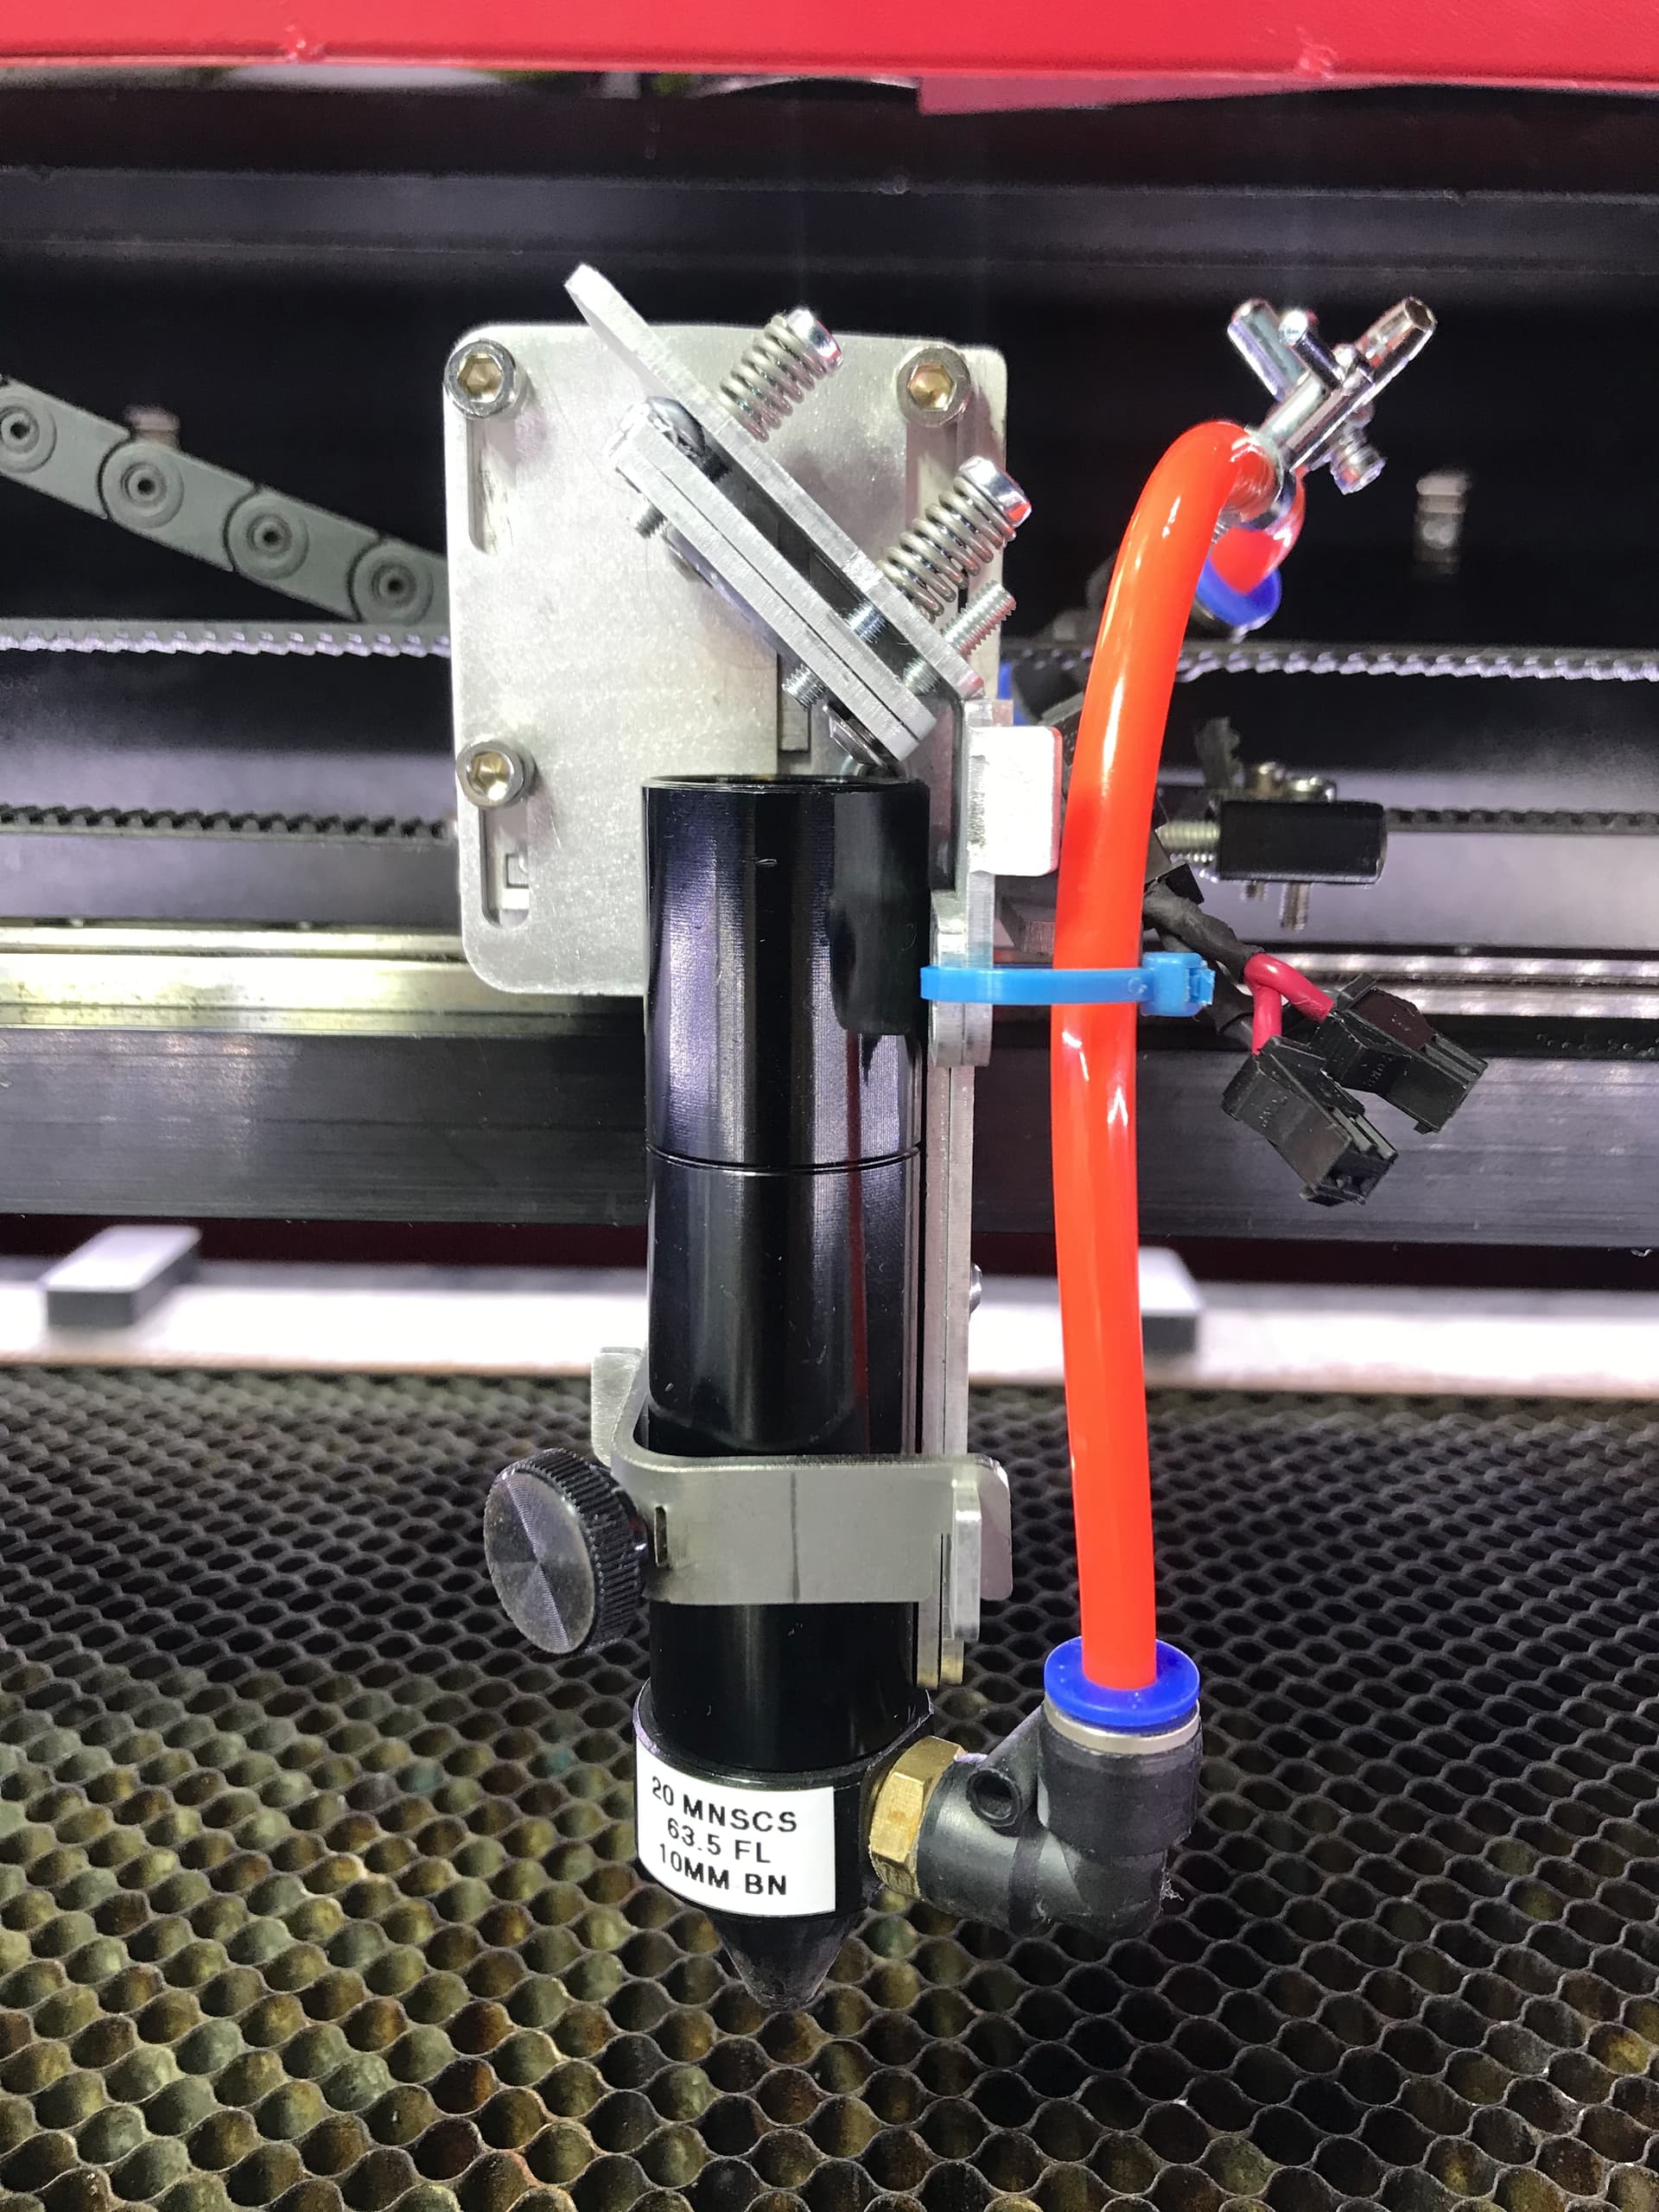
I’m looking on eBay at the laser heads and not sure which one I need. I am thinking that the type C head might be correct, but not sure. Here is a photo of my head currently.

1 Like
The reason I am asking the forum, is that Cloudray can’t tell me which one I need. They said that I would have to measure my head, but not sure which replacement head measurements I can compare it to.Has anyone used the Cloudray laser heads in a Chinese 60 watt red and black 800x500mm Ruida controller laser engraver? Thanks!
Charlie
1 Like
I have a 700 x 500 Black & Red Ebay laser that is working great with the head that came installed. I’m not sure I can help with your choice of head, but am curious as to why you feel you need to change. Is there an advantage to changing the head?
I bought a type C head to fit on my red&black that looks just like yours.
It will not fit without making some kind of custom bracket. (I knew that when I bought it.)
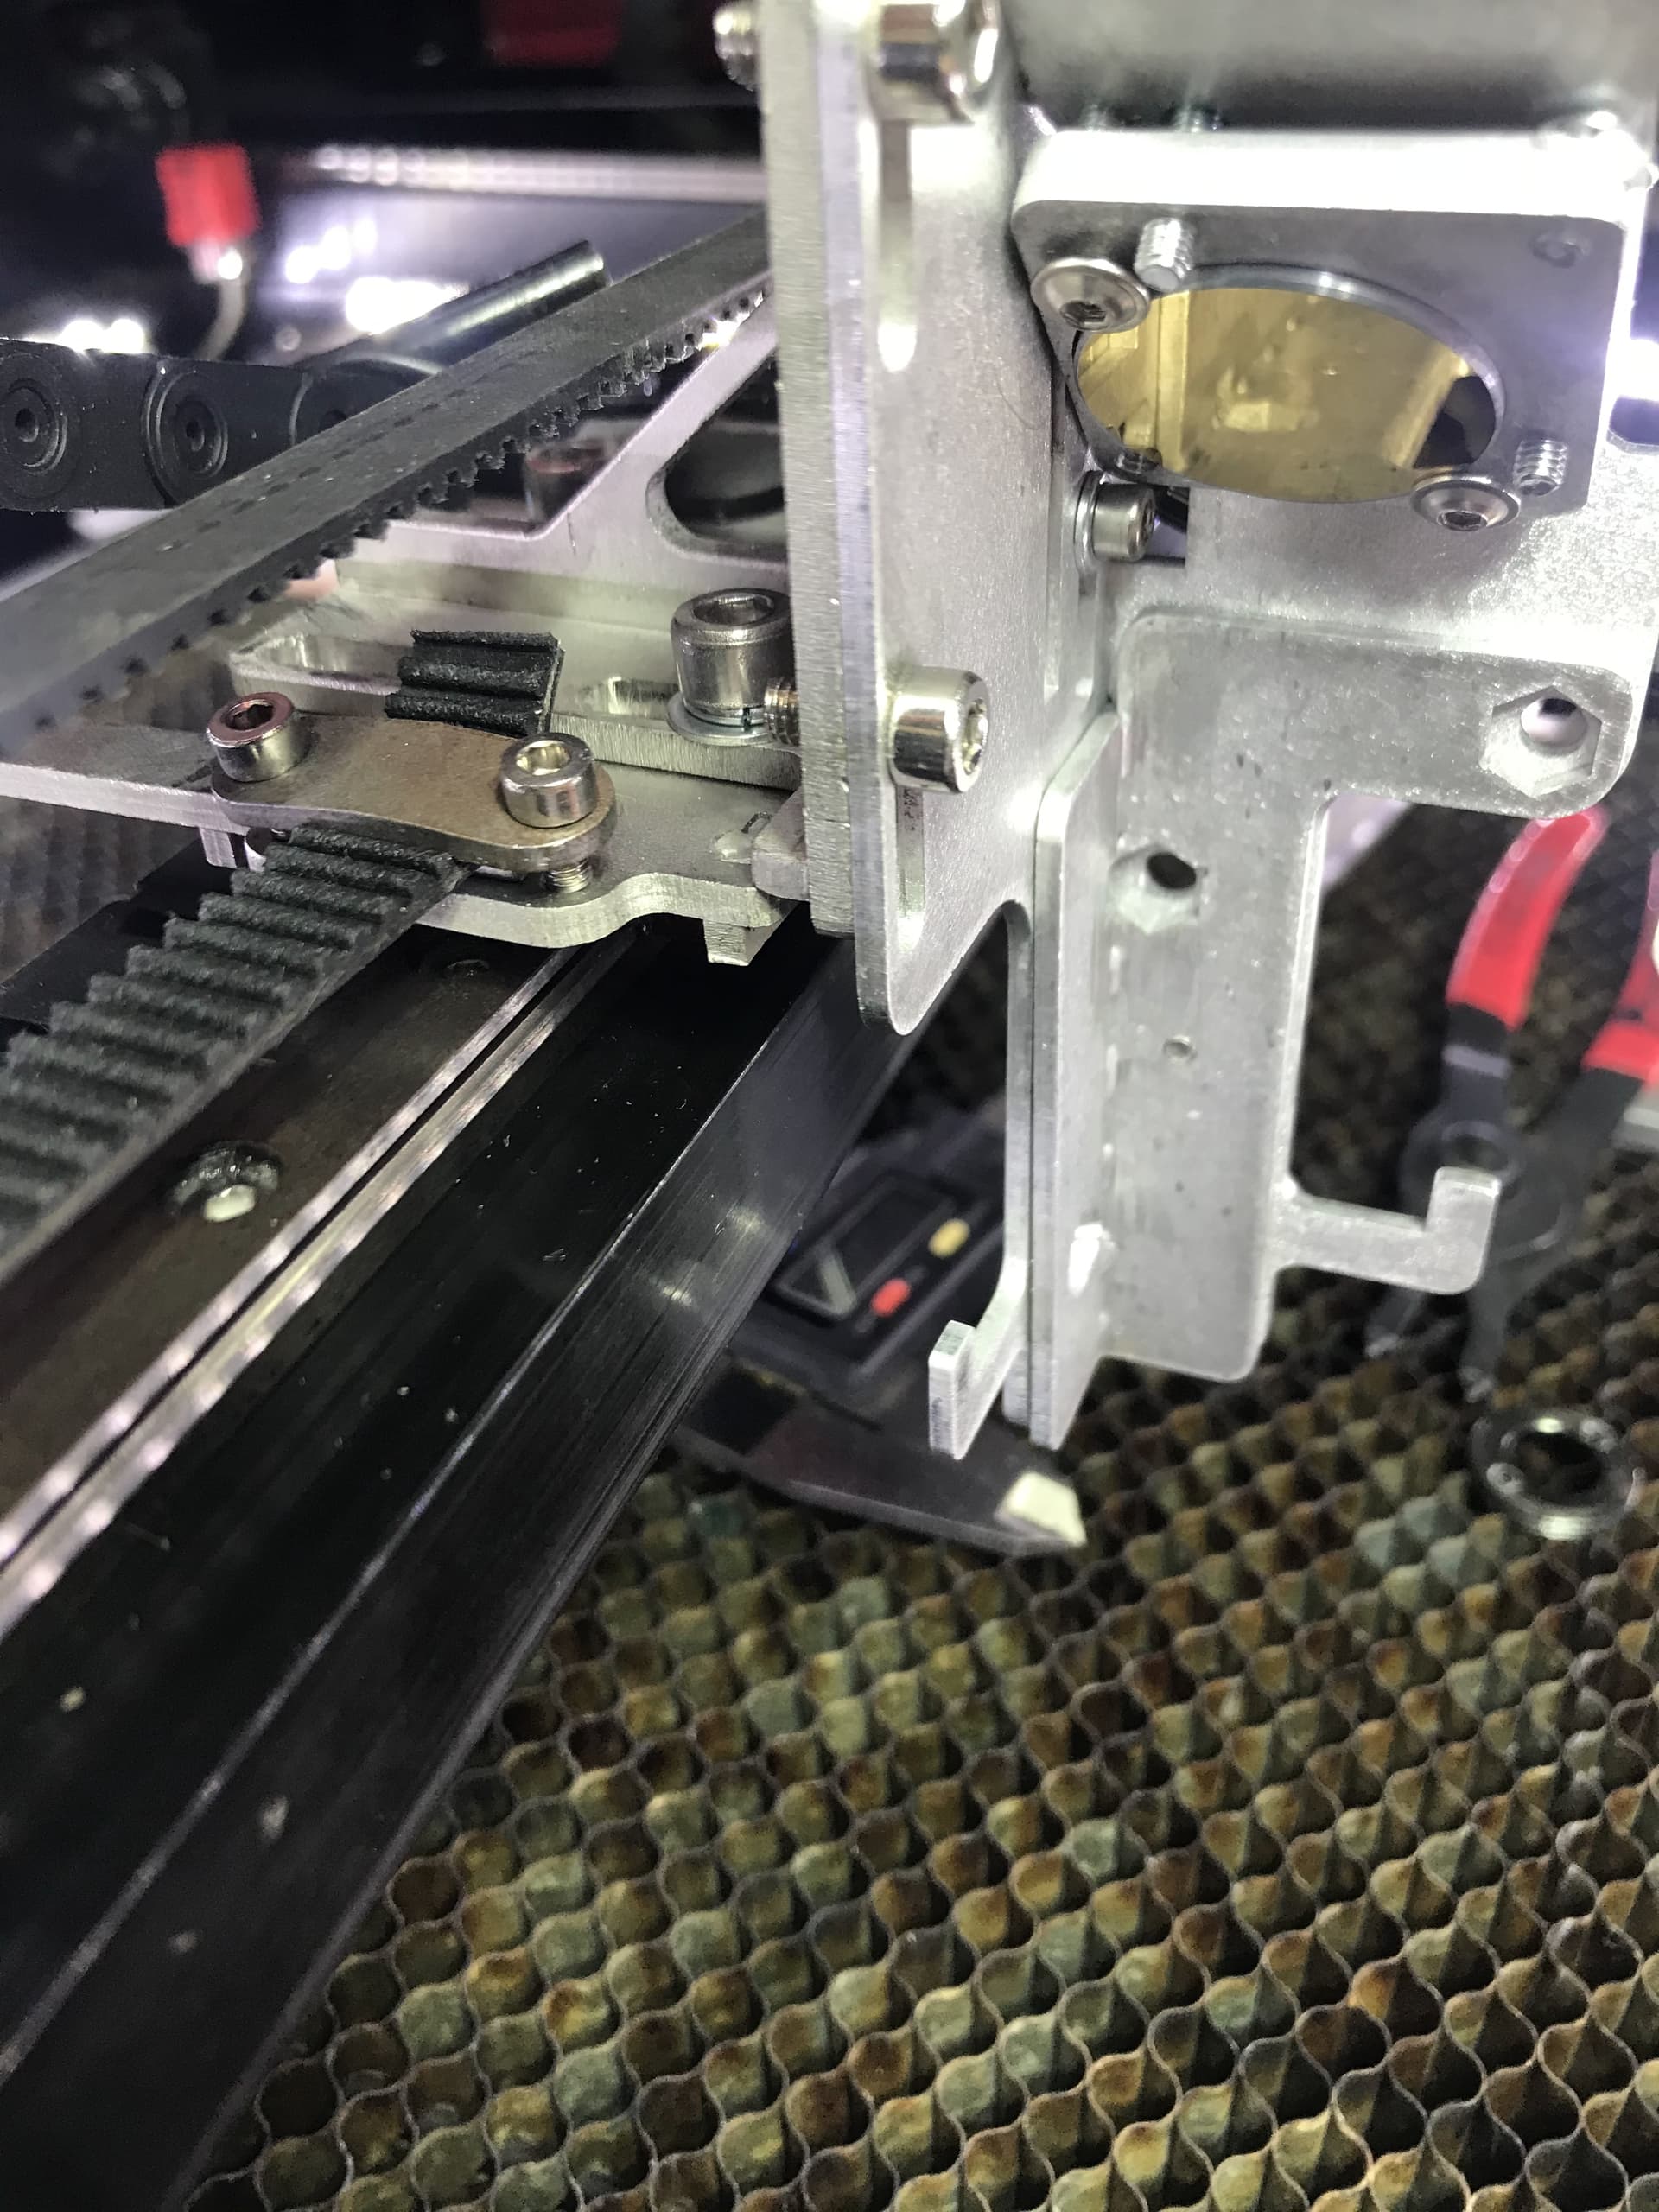
Note that the belt on your machine (and mine) has the face of the belt in a vertical position. Some red&blacks have the belt and motors rotated 90° so the face of the belt is horizontal (parallel with the work surface). Supposedly the type C head and its supplied bracket does bolt up to those machines.
It’s on my list of things to do soon to get an appropriate bracket made and put the C head on my machine, but it’s a long list and may be several more weeks.
@PWC: The stock head is fine for engraving, but very poor for cutting thick materials because with longer focal length lenses it puts the nozzle (and air assist) way too far above the work, and it also doesn’t work with long lenses because the lens mounts too close to the nozzle.
Thanks Hank, I appreciate the reply! The bracket on the type C head won’t work, when you make the new bracket, will you remove the offset ‘S’ bracket and then bolt the new bracket, or just adapt a new bracket to what is already in the type C head? I would be very interested in checking out your finished adapter.
And yes, Hank gave the answer to your question as to why I want another head. I want to be able to cut better and also engrave.
Charlie
Hey Charlie,
I’m sorry I didn’t answer this sooner, but at the time I still didn’t have a clue what I was going to do and figured I’d wait a few days until I had a plan. Then other projects came up and this one sank to the bottom of the “to do” list for a while.
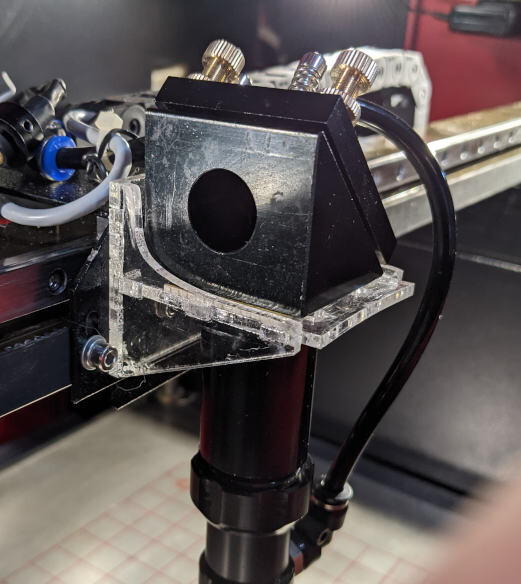
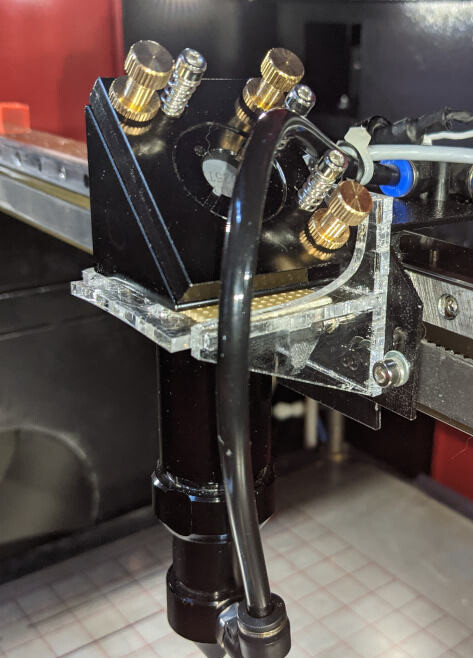
I ended up cutting the front part (that the head attaches to) off of the original metal bracket and left the part that points rearward and attaches the wire loom, the air hose, and also trips the X axis limit switch.
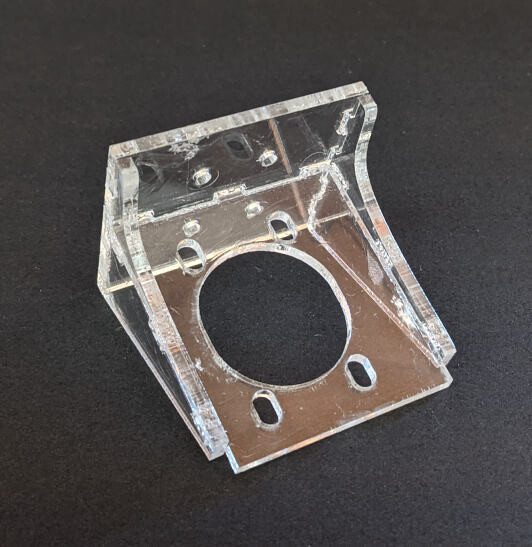
Then I made an acrylic bracket that attaches the new C-type head to the trolley.
It’s all back together now, I’ve got it aligned and have done a couple of jobs with it and it seems to work well.
Photos…
Hank, thanks for the update, it looks good! I hesitate to cut the original bracket, but that looks like a good solution. Do you notice an improvement in the cutting performance on any material, and have you done any engraving with it yet? Thanks!
Yeah, i was hesitant to cut the original bracket in case “something bad” happened and I had to revert the stock arrangement. But after thinking about it a lot it simply seemed like The Easy Way Out so I went with cutting it.
It worked out fine, no regrets.
I really haven’t done anything yet to test if it’s much improved or not. I’ve engraved and cut some 1/8" plywood with a 2" lens and it seems the same which is no surprise. I engraved some glass with same 2" lens and that was the same also, no surprise.
I haven’t tried cutting anything that would test it’s abilities yet, but I did put a 4" lens in to engrave some bricks and I very much like a 4" lens for bricks. The slightly larger spot of a 4" is appropriate for brick and the depth of focus is HUGE and is a happy thing for the uneven/unlevel surface of bricks.
I wasn’t able to use a 4" with the old setup, so that much for sure is an improvement.
Hello,
First of all, well done with the acrylic L bracket. I was considering getting one done from aluminum for fitting a different type of head for my machine but I didn’t dare and couldn’t find time to focus on that yet.
I have a related question to you and others who are reading.
Did you notice any strain or loss of accuracy after changing the head to that supposedly C-type Cloudray?
My machine has the slider rail facing up and the belt facing towards the user, to the front, as yours. The machine is using typical Chinese 60x40 stepper motors and the belt is MXL 9.5.
I was hesitant to replace the head (Cloudray K series long version with 20mm lens diameter) by making the L bracket or by purchasing another head that’s so called ‘Outer-Rail’ or ‘Outer Slider’ version - which has the fixtures for front facing timing belts but these heads are heavier and much larger than K-Series.
Temporarily, I ended up getting a short lens tube done from aluminum on lathe which has a female M20 on one side (to be attached to the K-Series tube [before the regular long K-Series nozzle]) and then a female M22 on the other end to be able to attach the short Cloudray nozzle for the 1.5" lens.
The lens is now fixed inside on the M22 end and with the short Cloudray nozzle it works great.
However… For the future, I ideally would like to keep my different FL lenses in different tubes, such as these C-Series tubes which can be purchased seperately, to hold them ready to be used for various materials and material thicknesses.
So the main question is about the timing belt & stepper motor suitability for different head types. Also of course the sliders and slider cars being able to hold different head sizes…
Thank you for reading and your opinion is much appreciated in advance. 
Hi @Hank , do you have the LightBurn file yet for this acrylic mount? I am going to get the type C lens holder from Cloudray soon, and I want to cut this mount from Lexan for strength. Let me know, and thanks!!
Charlie
1 Like
I’m also interested in this bracket. It would save some design time for sure. Just wondering if my crappy little diode laser will cut it out…
Well, I did it, I bit the bullet and ordered the Cloudray type C head for my laser engraver. Hopefully, it will accept the mirror and lens from the stock head. If not, back to eBay!!
I got it for $35 + tax, and free shipping. I had tried to purchase it direct from Cloudray, as they had it listed on their Website for $25, but shipping was $30, so I canceled the order and got it from eBay.
Charlie.
1 Like
Cloudray have an AliExpress shop and the prices are usually cheaper there than on their main site.
1 Like
Their prices were cheaper, but shipping was more than the head lol
I just checked aliexpress, and yes they are cheaper. There is a sale starting November 11th and the type C head is $22, and they say free shipping, delivery in December. Thanks for the info!
Charlie
Well, I have made a bracket to hold the type C head, and also a new metal piece for the limit switch and track mount that this bracket attaches to. I didn’t want to cut the original bracket as @Hank did, so I Bent up a new piece of sheet metal and drilled it to mount on the gantry bracket. Hope to get this mounted soon! It was a good exercise in LightBurn to cut acrylic and get everything to snap together, and then glue it.
Charlie

I was able to successfully upgrade to the Cloudray LW Head for C Series.
I can now use 5 different 24mm tubes, with 2", 3", and 4" lens, with different nozzles for Cut / Engrave/ and a stubby one for more Rotary clearance.
The main reason was, no matter what I did, I couldn’t keep the beam parallel to the X axis, without having to adjust M2 mirror down to hit the M3 mirror. So the LW head is fully adjustable, Up and Down on the Z axis, and In and Out on the Y axis, allowing perfect parallel beam alignment. Having the longer universal tube allows for unlimited lens options, in either 20mm or 18mm options. I can also now easily do pass thru by lowering the longer tube down below the front bar on the Red/Blk design.
What helped me the most was how I modified the stepper gear pulley to completely eliminate belt climb causing Banding or Curtains. Also the M2 side belt gear pulley should be Smooth with no teeth.
I recommend the LW head, but keep in mind it is specifically designed for TOP mount onto a 15mm rail, not a 12mm rail to work best.
Hope this helps,
Joe
Joe, is your belt like mine with it being vertical instead of horizontal orientation? I am going to install the brackets I made, and if they aren’t sufficient, then I will make stronger ones. I agree that the type C head is much better. About the pulley you refer to, can you post photos of you setup and installation of both the type C head and bracket, and also this smooth pulley? I appreciate your help and input.
Charlie
Hey Charlie,
I have top mount head, not front, so the belt is flat on top, not vert on the front.
Take a caliper and measure the rail the bearing is sliding on. Mine was 12mm, so I had to modify the C series Adjustable head to mount to the smaller bearing. It was designed for the 15mm rail bearing.
This is Russ’s design Russ LW Head he gave to CloudRay to sell, so he has lots of videos on his design. However, there are SO many variations of Chinese laser, it might require some tweaks to fit your style. Russ originally tried the acrylic approach, but isn’t sturdy enough when you get going really fast. This design solves a LOT of problems, and gives enhances your abilities.
- Allows adjustable head for perfect parallel beam alignment. Remember, move the mirror to the beam, not move the beam to the mirror.
- Allows universal CloudRay 24mm C series tube that accepts 3 lens lengths. However, with 2 locking rings, you can slide any lens up or down to custom Focal Lengths. I think I have come up with about 20 different variations of lens installs I could use, cause you can flip the tube over, and have even more options, with diff nozzles.
- Its 1/3 of the weight, aka LightWeight head. This allows you to increase your engraving speeds. This is where the acrylic just couldn’t handle the G forces, and requires alum strength.
- There is NO enclosed M3 mirror, so you don’t have to worry about hitting the “hole” prior to the mirror, so NO beam clipping.
- Use of standard 20mm lens diameter, however, the compound nozzle still accepts 18mm as well. You also get a longer tube to allow for pass thru abilities.