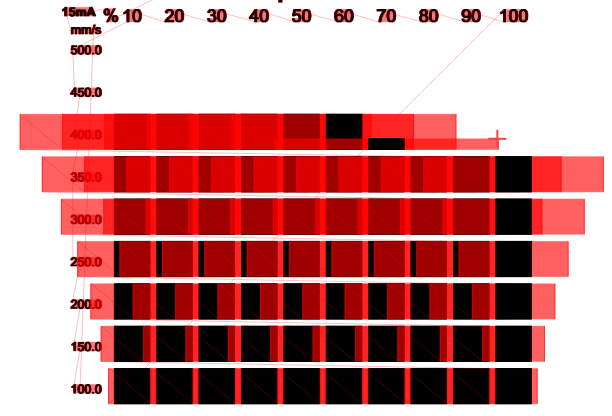
Today, I did an engraving material test. I had the same speed each line and same power each column. I was wondering why lightburn engraved each square seperately? Wouldn’t it be clever to run through each line at the same speed and only change power for each square in the columns? It would be by far more time efficient!
Some reasons I can see:
- Aesthetics. It is nicer this way…
 (Taste might vary.)
 - Practical? If the laser takes some time to change power, the interval allows it to change.
- If you are in line mode, cutting the material, you wouldn’t be able to distinguish the squares…
- Not sure the time gain is so important.
Note: there are a few material test files (.lbrn / .lbrn2) on the Internet, including on this forum. And a couple of online material test sites. You can generate one, and adjust it to your liking. Would be easier if LB allowed to save those it generates, but there are alternatives.
Well, from my point of view, the time advantage is significant, as it is roughly the factor of the number of columns. So if you do it with 10 columns, the way it goes now, takes almost ten (10!) times longer.
Do you know how to adjust premade parameter tests, so that it engraves a complete line with the same speed all squares at once? I didn’t manage to do it so far ![]()
My math is different… ![]()
If the interval was the same size than the columns, it would double the length of the line, so it takes twice longer. But actually, they are much smaller by default. And AFAIK, LB is able to go to max speed in the parts where the laser is off.
I am sorry, but I didn’t understand your question. The speed is set per line (by default), so it has the same speed on all squares, no?
Speed is the same on all squares in one line. That’s why I’m asking myself, why LB engraves square by square instead of doing the whole line at once. I’ve added an example. One can see that LB just started a new square when it could’ve gone for the whole line as it is all the same speed of 400mm/s.
Oh, I see it now.
Well, I think this optimization would work only for this kind of test (granted, that’s the default), ie. with speed on lines, and in fill mode.
The current mode is more flexible, as it works in cut mode, with speed on columns, or even no speed test at all. Making an exception for this particular set of settings might not be worth the time of coding, even less as people don’t spend lot of time doing this kind of test.
That said, if you make your own test, with the proper optimizations, it might work as you want.
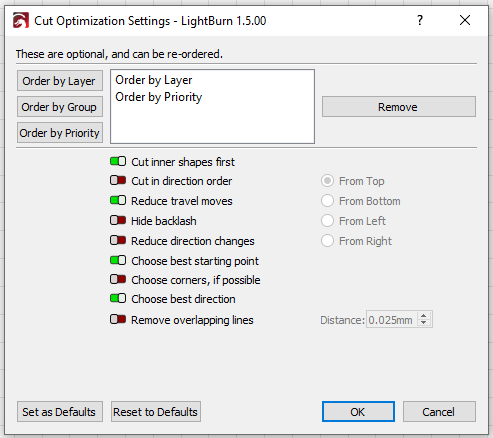
(Example of optimizations I currently have.)
I usually cut down on rows and columns and make width about 3mm to speed things up.
This quirk is one of the reasons I prefer to make my own tests.
This helped me in the beginning…

This topic was automatically closed 30 days after the last reply. New replies are no longer allowed.