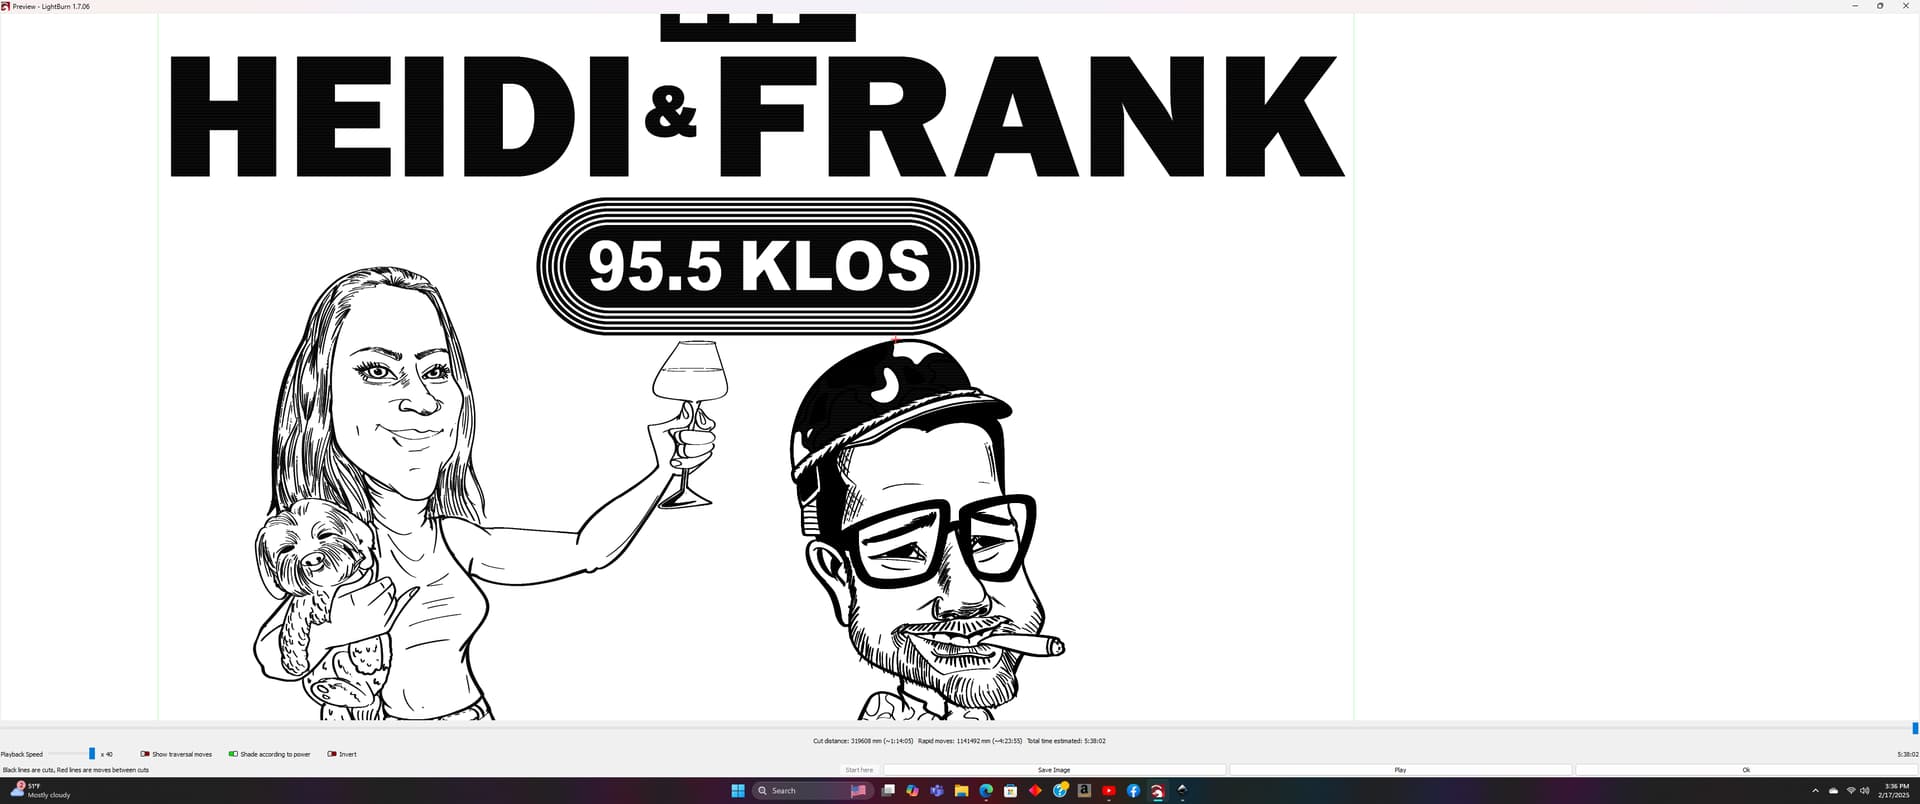
Hello. I am making a design to engrave onto some wood. This is my first time ever using a laser engraver along with lightburn. The design includes two caricature drawings along with a logo. I was able to get the vector images for the logo and the drawing of the female. For some reason, when I made the vector image using inkscape for the male, upon loading it to lightburn, he came out in a lighter color and not bold like the others.
He’s the only drawing that has different shades of grey in it (the military helmet he’s wearing). When I click preview, he is shaded with darker red color than the others. Will this engrave well? How do I make sure the laser will engrave the different shades of grey in his helmet?
I am attaching some links to the screenshots of the vector image in lightburn along with the preview mode.
You are seeing the red in the preview window because you have the “Show Traversal Moves” checked. That is showing the path your laser had will take to run this file including any overscanning require.
Your design is going over the bounds of your laser. You see wheere the red lines go past the green line? The green line is the laser work area. You will need to shrink your design until all the red fits within the green.
Thank you for the reply! I don’t get the message that my design is over the bounds when I go to preview though. All the drawings are within the green line. Does that matter still? Even if my drawings are within the boundary, does the red in the preview mode need to be in as well?
If you are doing an image/fill the X axis has to accelerate/decelerate to get to the right speed. That requires extra room to get moving. The red is where the acceleration area is beyond the machine limits. It looks like the K, H, and right foot are just slightly over the machine limits.
You can try changing the axis acceleration, reduce speed, or make the image slightly smaller.
Also, the red line to the right of the glasses is probably a leftover object that you want to delete. Too small to easily see, but the preview shows the laser has to move to get to it.
The design itself is not over the edge and depending on what error messages you have enabled, it might not give an error until the program stops running. The traversal moves show how far the laser head needs to move in order to slow down and reverse direction.
Try running the design on cardboard and see what happens, cardboard from an amazon box is free.
Edit: Also, you can just drag and drop images into the message body, you don’t have to upload elsewhere. It’s only videos that need to be hosted off site.
Gotcha. Fixed it so all the red is inside the green square. When it comes to the certain shades of grey in the helmet, in the preview, it shows the helmet is all black. But when zoomed in, you can see the shades of grey. Is that good to go or do I need to make sure certain settings are set so it does that? Sorry for the 21 questions, trying to get a hang of this program.
The different areas will require different settings to produce different shades. The fact that it shows on the preview when zoomed in is good. You will probably go through a few iterations of settings before you get the exact results.
Yea when I clicked “play” I saw the reason that the tank drawing is darker red than the others. The laser will go over it 3 times doing different shading on it.
That’s a great point. I was wondering that; how do I control it so it can do that? Been looking for a video that explains it but to no avail. Is it even possible to have the laser get to a certain small part of the helmet (part of the camo) and slow down/lower power to shade it lighter? I appreciate all of the replies by the way. You’re of great help.
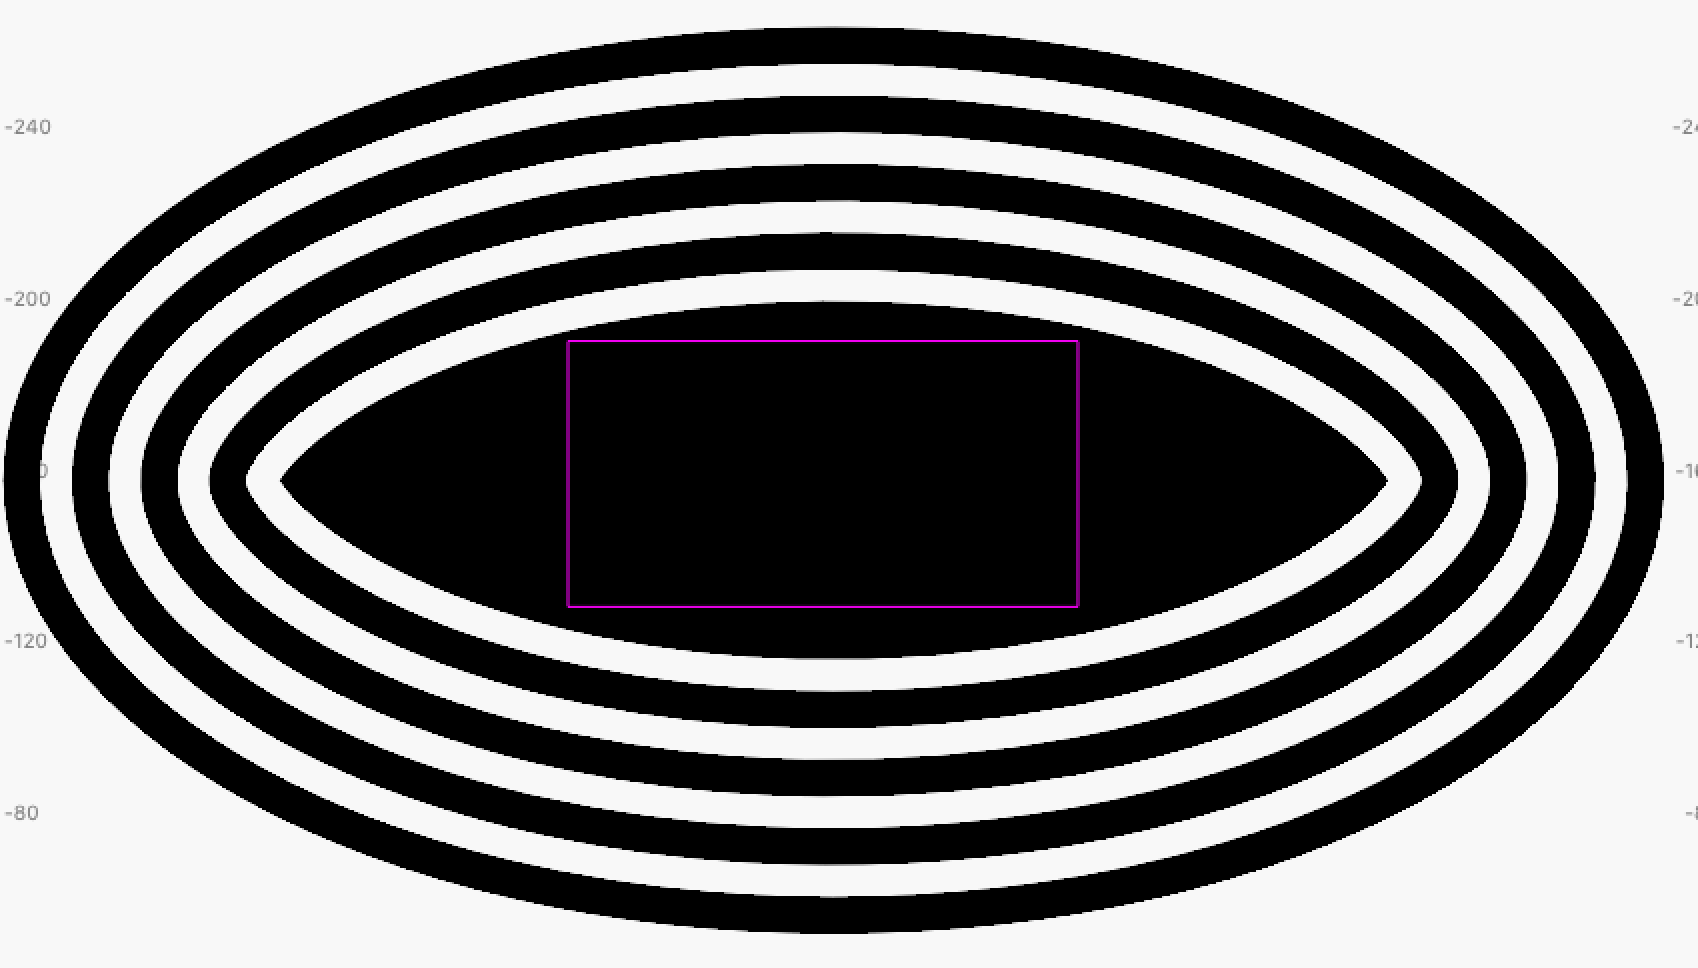
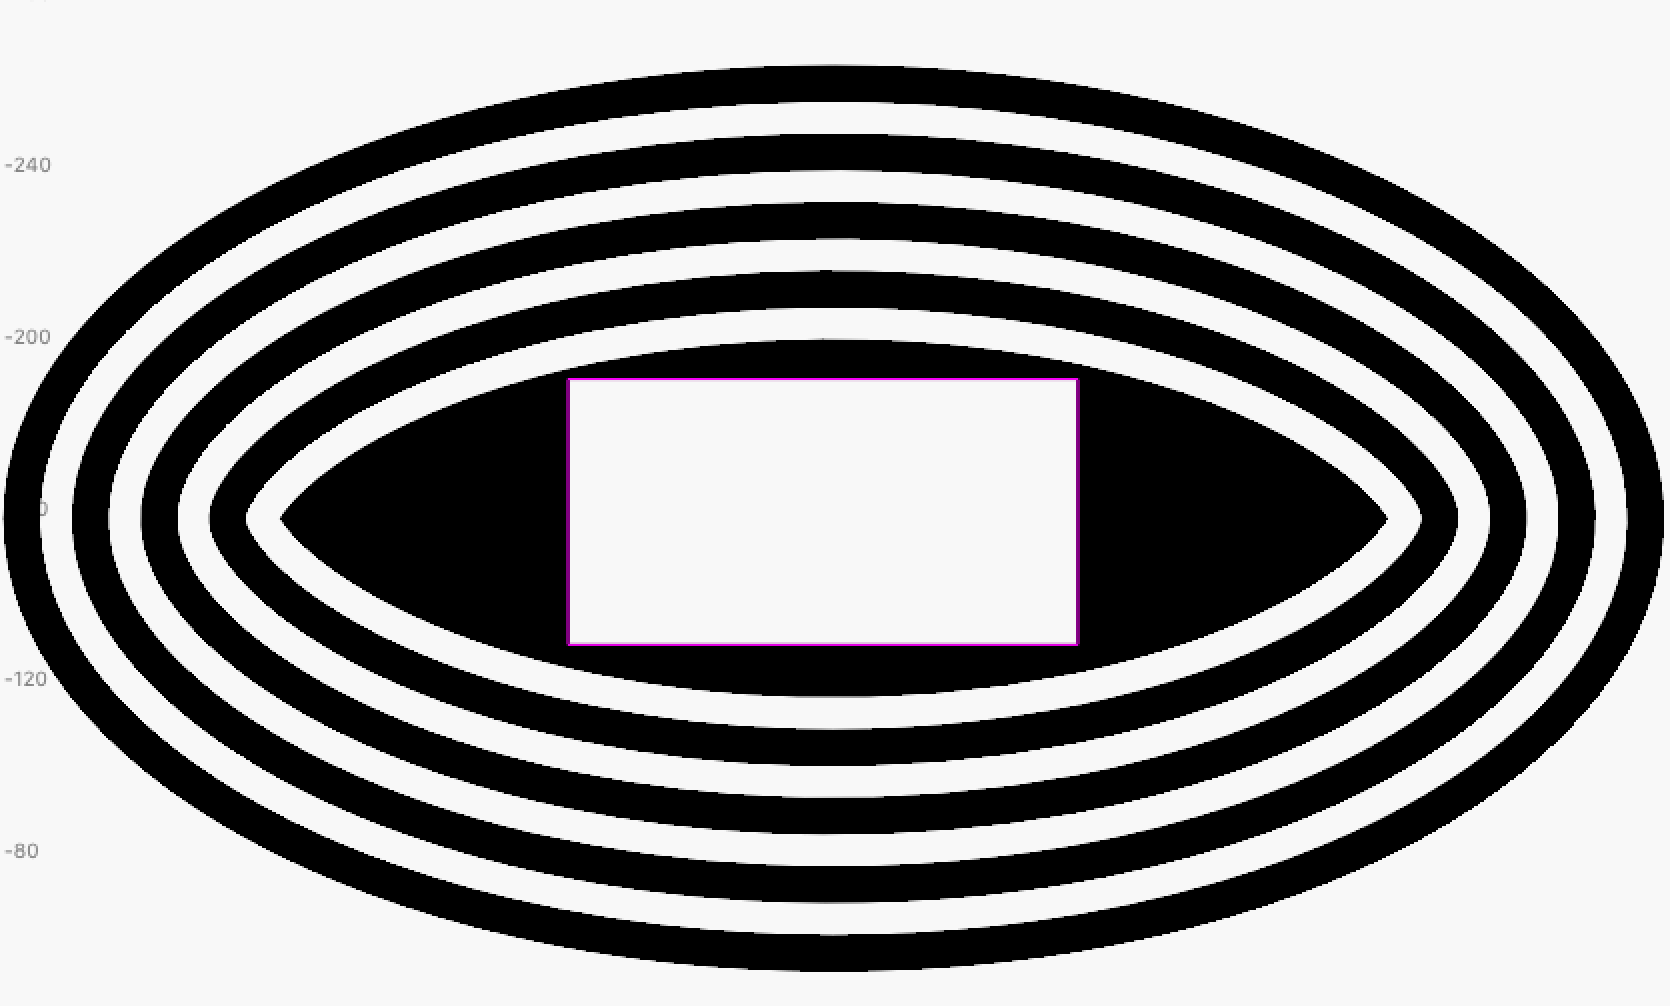
The way the fill layers work is, starting from the outside of. closed shape, every time it encounters a new line on the same layer it inverts. This is a set of offset lines.
When you place another layer color inside of / on top of the fill layer it still fills behind the new layer. If it’s a fill layer, the same area will get engraved twice. Here I put a line layer in the middle, notice how the fill continues behind it.
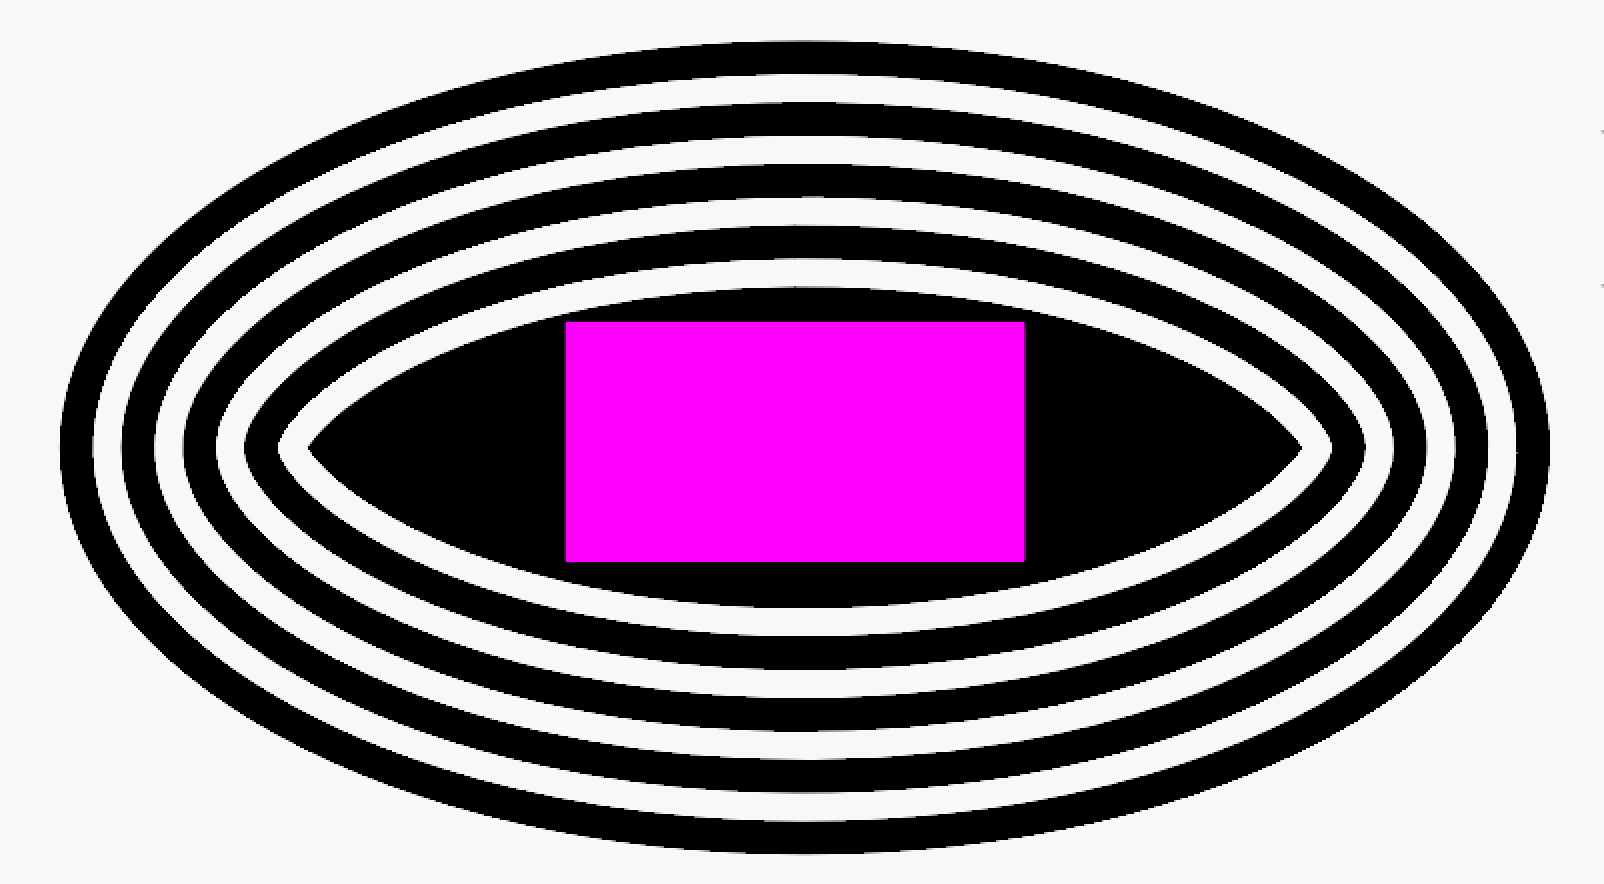
You need to make a hole for the second layer to occupy. To do that, duplicate the new shape then change the duplicate to the fill layer color. You can then have the different layer be a fill as well and set different settings for that layer. I duplicated the fuscia rectangle and changed the duplicate to black and now there’s a hole that will not fill on the black layer. You could change the fuscia to fill and have completely different settings for that layer giving a different look.