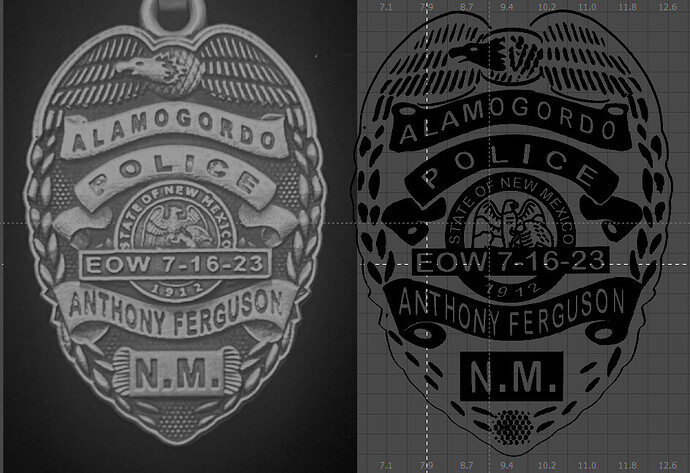
Got a request from a co-worker to adapt a memorial pendant to a SVG for engraving. The photo was pretty good compare to what I am usually given to work with. Just about done, but need to work on the “catfish” tail embellishments at the bottom on either side of the N.M. block. Some trace, some sourced from other place (the center of round seal) and some hand drawn elements. Comments wecome ![]()
Super Vectoriser Pro is pretty good at converting bitmaps to vector images Super Vectorizer - Image Vectorizer on Mac / Win or if you are familiar with Inkscape, it can do the same, but requires more manual work to simplify the paths.
That program would not run with my malware program enabled. I allowed it to bypass for a trial run. I was not impressed. But thanks for the suggestions.
There is also Wintopo freeware and Pro with a lot of options.
I´m exploring the free version of Wintopo. The SuperVectorizer bill page don´t process my payment, already created a few virtual cards with a few email accounts and in 2 PC plus mobile phone and is a no go.
Guys, a good vector is drawn by hand. Unfortunately, this is a fact. You can search, but at the moment, if the source is a natural object, then you will not be able to get a vector of more than decent quality in an automated form. Even if at first glance it looks good, then upon closer examination everything will be sad. And it will require a lot of edits. In your particular case, it is faster to draw everything. Than it is unclear in what quality to get a vector, and then edit it. But if the quality of drawing is not important, then yes, you can look for a program. I use the built-in vectorizer in coreldraw. It suits me quite well
Are you serious? If I draw something it looks like a drunk about to pass out did it.
I’d suggest you trace the original in Lightburn. Remember you can use trace multiple times to get the detail area you want.
If you can post the original, maybe some of us can help.
![]()
Have to agree with you. It takes time to redraw badges. Tracing images is OK if you have a basic silhouette, but even those - it’s not that hard to redraw them. And you can put the amount of detail in them. Here are a few badges / patches I have redrawn from scratch.
You make a great assumption about me … I can’t even draw a stick figure that recognized by anyone… ![]()
There is lots of software out there, just like any tool, I have learned to use them because I can’t draw anything…
Your badges look great.
![]()
I am willing to take that bet ![]() Thanks for the offer. The biggest problem I have is the little flourish around the N.M. box - I would be happy to hear how you can make that work. If not, it;s ok too.
Thanks for the offer. The biggest problem I have is the little flourish around the N.M. box - I would be happy to hear how you can make that work. If not, it;s ok too.
→  ←
←
The original photo is already imported into the .lbnr2 file. Have a go at it and have fun.
3milam.lbrn2 (1.6 MB)
Check if this helps. From first photo.
NM .lbrn2 (732.2 KB)
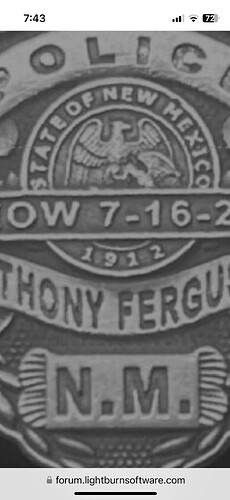
I did a quick search on New Mexico Sherrif’s badges. Those “fish tails” by the date change for different regions. Pretty sure they are made by the company that makes the badge. By this I mean that’s how each company hides the solder joint of that little plate. I zoomed your picture way in and you see better detail. Zoom in on different sections of your badge photo and try “trace image” to see if you get a better vector. Scale it down to fit what you have created.
??? Don’t know if my screen shot got attached.
James sorry only now I saw the original images in the 3milam.lbrn2.
JimNM_.lbrn2 (2.1 MB)
Thanks y’all for the volunteer processing ![]() I forget sometimes to use the power of scale - I like the idea of making the image very large to make the trace easier to work with. A couple of you guys made that suggestion - thanks to each of you.
I forget sometimes to use the power of scale - I like the idea of making the image very large to make the trace easier to work with. A couple of you guys made that suggestion - thanks to each of you.
I did not think about the solder dabs - still can’t shake the catfish fin image in my head. I watched a video of how belt buckles are made, I assume a badge is made in a similar fashion. Very interesting stuff.
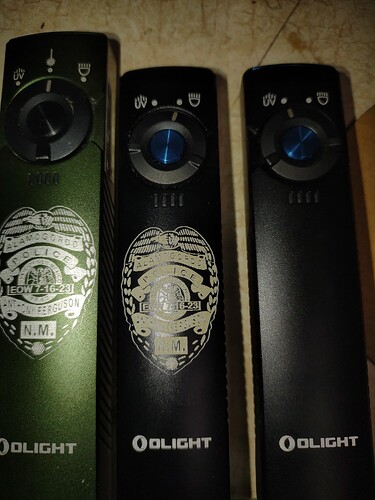
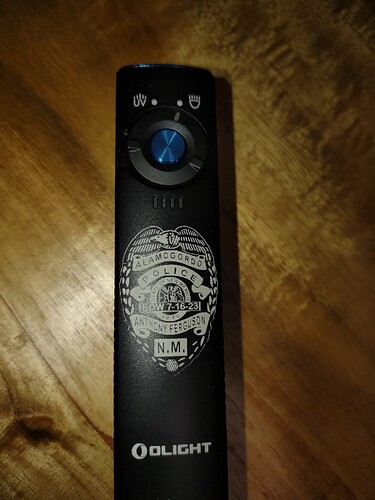
The customer had me put the image on 2 different O-light flashlights. The OD green was a good burn, but I failed badly with the black. I overexposed the part and had some bad “blossom” from the laser, which smeared the engrave. To make it right, I bought a replacement flashlight and will keep the one with the finish that I ruined. Dagum, a 30.00 job cost me 60.00 to finish - about average for me. In the end it was all good, the customer ordered a bunch of tumblers.
Thanks guys - having an outside review is always helpful.
Over exposed on the black
Upped speed and one direction engrave - much better
The last one looks very nice, good work.


