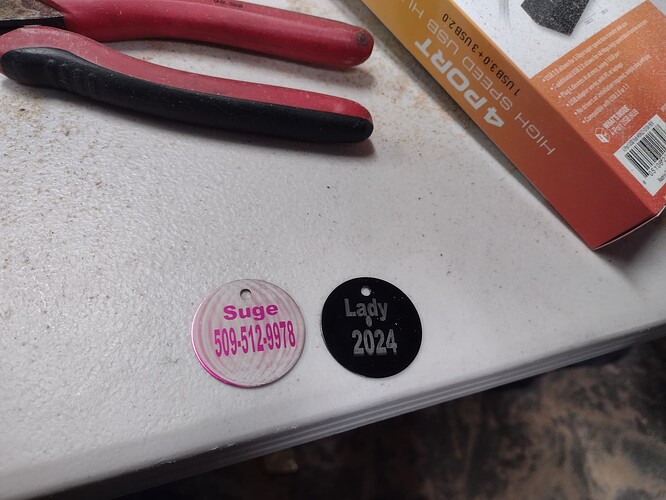
I’m new and need help. Playing with an anodized tag the other day and I cut a tag with a short name and phone number on it… don’t know how but the tag came out great (also failed to save it, duh) so I don’t have the settings. Anyway the tag came out nice for a first try, my laser outlined my text and phone number great (it left the red color on text and number just great). Anyway I have tried to cut another and I can only get lines or fill on the name a number (no anodization left in these areas). any ideas what setting I have wrong?
Upload a good and bad picture. Otherwise, we cannot see what you see.
I’m going to assume the problem is that you want the background removed and the text to remain painted.
If this is the case, you just need to add a circle slightly larger than the tag on the same layer as the text.
If this isn’t the case, I’m not sure I’m seeing what you consider a problem.
Either way, both have some symptoms that lead me believe you could increase power or reduce speed a bit and maybe tighten up your line interval slightly.
Yes, I am looking to leave the text the original color of the tag, Ok, just so I make sure… 1. put in a circle, cut setting slower and Fill circle on the cut. 2. text and number setting on Line. This is my next try. Thanks for your help, I really appreciate it… got a whole garage full of tests ![]()
I think what he was saying is to increase the Lines Per mm in the Cut Settings window. This will decrease the line interval. It appears you are getting no-burn spaces between your passes across the disc.
And yes, put it in a circle and use Fill mode. To get the burn pattern on the pink one, I think you already did this.
