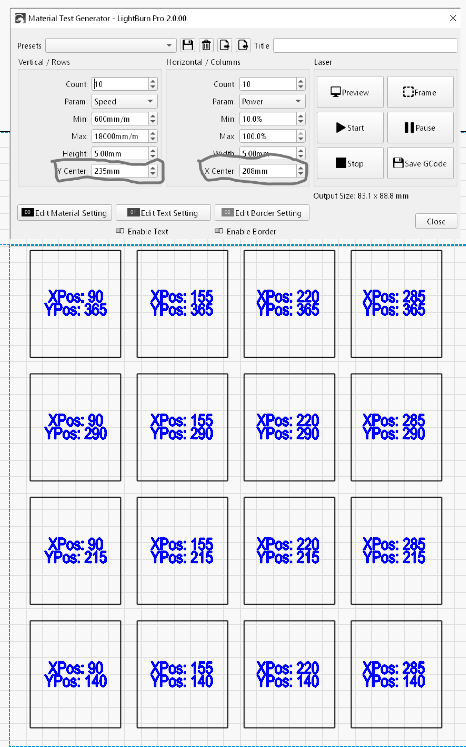
The Material Test feature is a great one to use, recommended by many, but when I use it, I always hate the fact that it centers the test right smack dab in the middle of a nice piece of material.
So, I ran a 5 x 5 material test, measured the space about it, and then created a rectangle in the lower left of my workspace, and manually set the XPos and YPos coordinates for that rectangle to whole numbers (i.e. no decimals).
Then I created an array of rectangles across the workspace, using those dimensions and spaced evenly apart.
Then I found the XPos and YPos for each rectangle and labeled each rectangle with those coordinates.
(I could go into greater detail about how I did this, but I’m thinking this is probably too long already and most people can get the gist.)
LASTLY, whenever I want to do a Material Test, especially if I care to do more than one on a single piece of material, I just enter the coordinates for my array into the coordinate fields of the Material Test window.
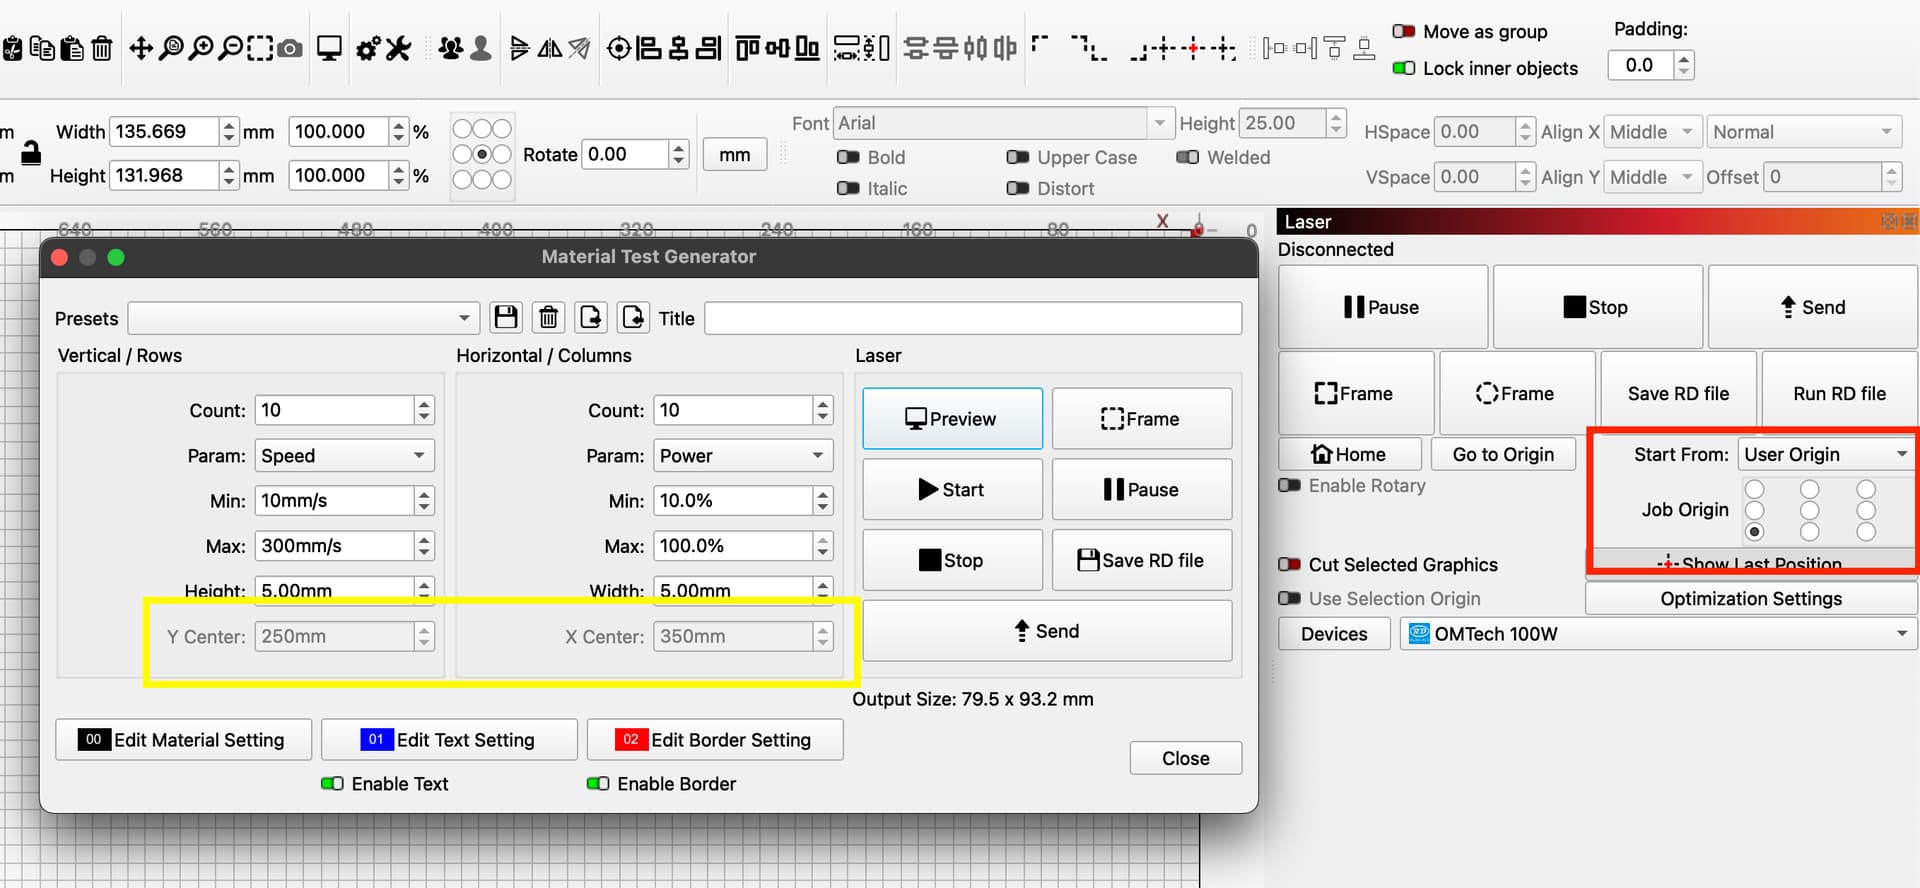
I’m not sure why the Lightburn software engineers put the fields in the Material Test window for the YPos on the left and the XPos on the right, because the hobgoblins of my simple mind always thinks of coordinates in the order of “X,Y” - so my dyslexic brain always has to remember which goes where. ![]()