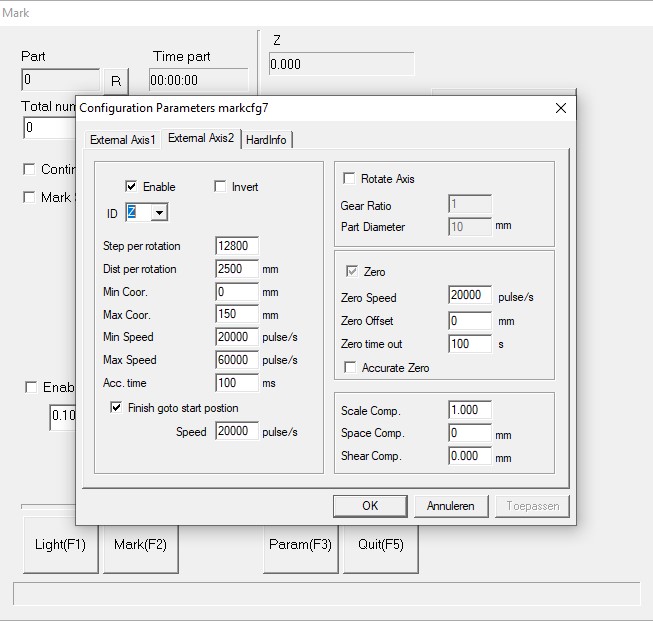
This evening I had time to make a video of it working in EzCad2. My supplier has set the parameters for the Splitmark2 settings:
For the test I created 3 text shapes showing the height they are marked at (0/30/50mm). I assigned the correct Z values for each of them:
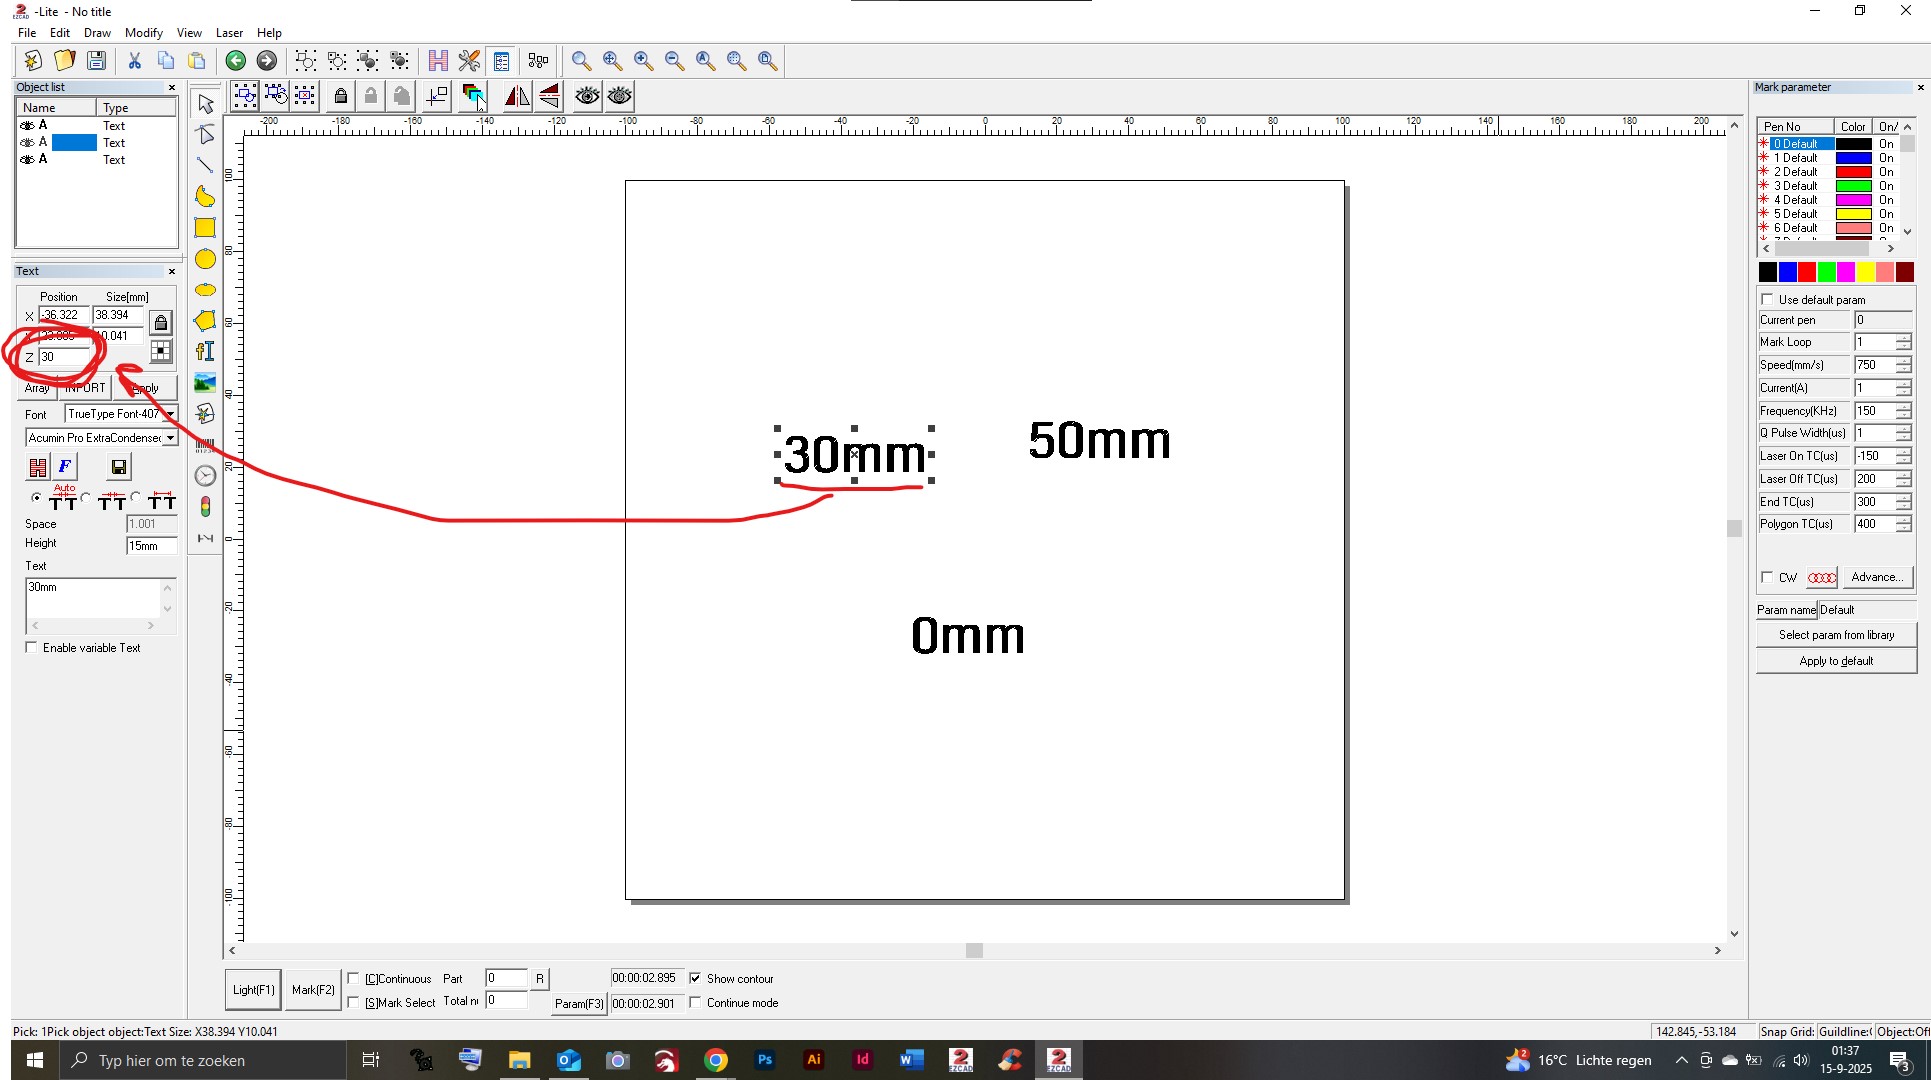
After that I selected all of them and opened the SplitMark2 menu again and hit ‘Mark’ to start the job, et voilá:

Some notes
- Positioning the shapes with the red light is difficult. When using the ‘Light’ function in SplitMark, the positioning is a few millimeters off compared to when using the 'Light function in the EzCad homescreen. Also; when selecting seperate shapes for the positioning preview the red light is all over the place. Maybe some EzCad bug?
- If I select ‘Mark selected’, all shapes are marked on the same X height (all next to each other in line) so it only works without ‘Mark selected’.
- The shapes are marked in order as seen in the ‘layers window’
So… in EzCad it is not without it’s quirks, but assigning the Z value for the seperate shapes works very well!
Somewhere in the coming days I will do some testing in LightBurn. I’ll keep you updated.