Sorry again, here’s photo. Again, I have zero up adjustment available. Screw is backed out completely.

Your mirror looks like this from the beam view…

Put this ellipse that’s 20mm tall and 14mm wide over over your burn and see how close you are…
It’s only 14mm wide… keep that in mind along with the fact that you are not seeing the whole beam on the target. If your beam is 6mm, then 14 - 6 is 7… divide that by 2 and it leaves you only about 3mm, so you have 3mm on each side of the beam for error in alignment.
If you are burning a hole through the target you’ve lost that visual location and are not helping yourself see the center of the beam or it’s power distribution. I suggest you back off the power/time to create only a slightly brown spot.
I have mine set very low, pulse time wise, if I need to, I use multiple pulses…
![]()
1 Like
![]() actually, 14-6=8.:
actually, 14-6=8.:
I dialed down the power. Attached is M2 to M3. Pulses taken in back left and front right. I also verified the opposite corners and I’m right on. I think I’m now good, I was finally able to cut through the 1/4 inch. I used a speed of 6mm/sec, power at 35%. I had to push the cutout, so maybe speed of 37 or 38.
Jack and Bernd, I can’t thank you enough for your very patient assistance!!!
Don’t take this the wrong way but I hope I won’t need to call on you again.
Dale


… If it’s the same material then it’s a great development !! - Congratulations.
Your spot also looks nice.
I’m happy if I could contribute something to solve your problem.
2 Likes
You and Jack both contributed greatly!
Have a great day, I’m all smiles!
Dale
Sorry, that’s why I usually use a calculator ![]() As long as you get the drift…
As long as you get the drift…
The spot looks much better and very good…
We are all glad you’ve got a working machine…
Have fun
![]()
Thumbs up!
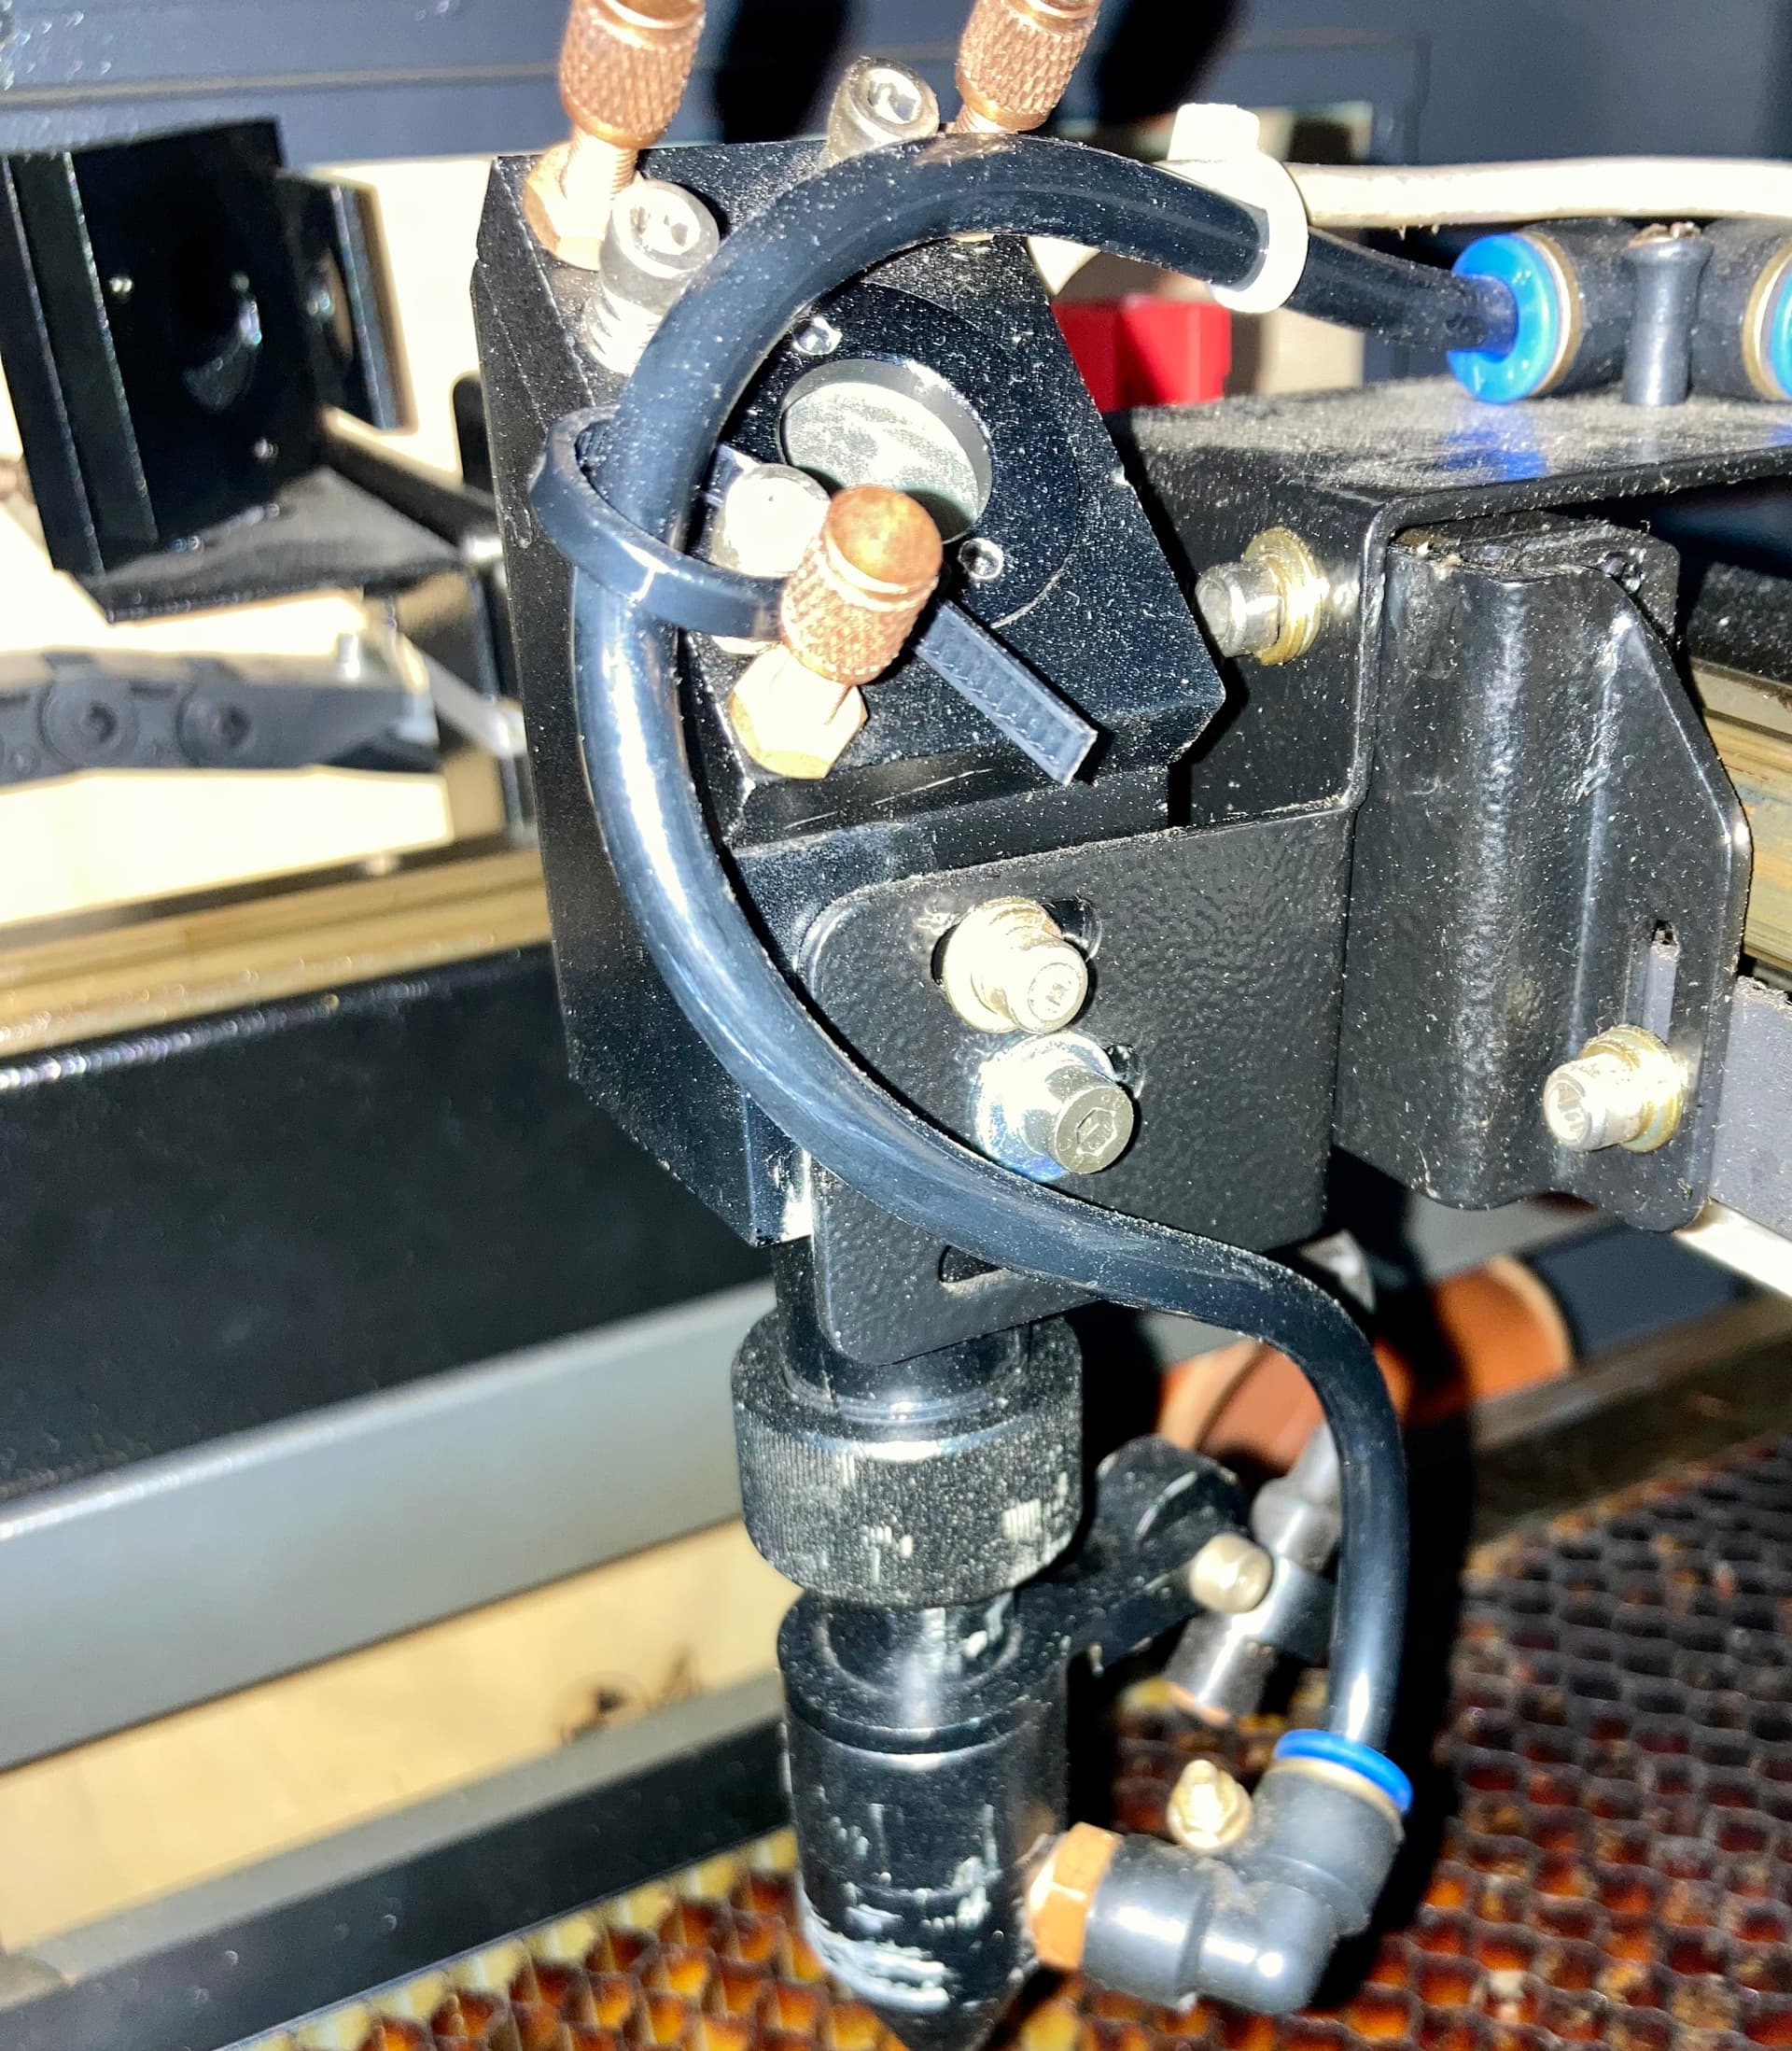
Now that this situation is resolved, I need to mention what I had to do regarding the mirrors. Both 1 and 2 did not have the ability to adjust the beam up, pretty close to the same for the left adjustment. On M2 to M3, I had to turn the diagonal to the top left of the M3 mirror opening then I could adjust down and to the right. Pretty much the same for M1 to M2 but not as much.
The pulse coming from the laser head nozzle is a bit off center. Can I use the adjustment screws on M3 to adjust this?
Dale
If I have understand you right about what you ask, then the answer is no.
If the beam does not come out right from the nozzle hole, the angle of nozzle head is not ok, then you also get cuts that are not vertical in x and/or y.
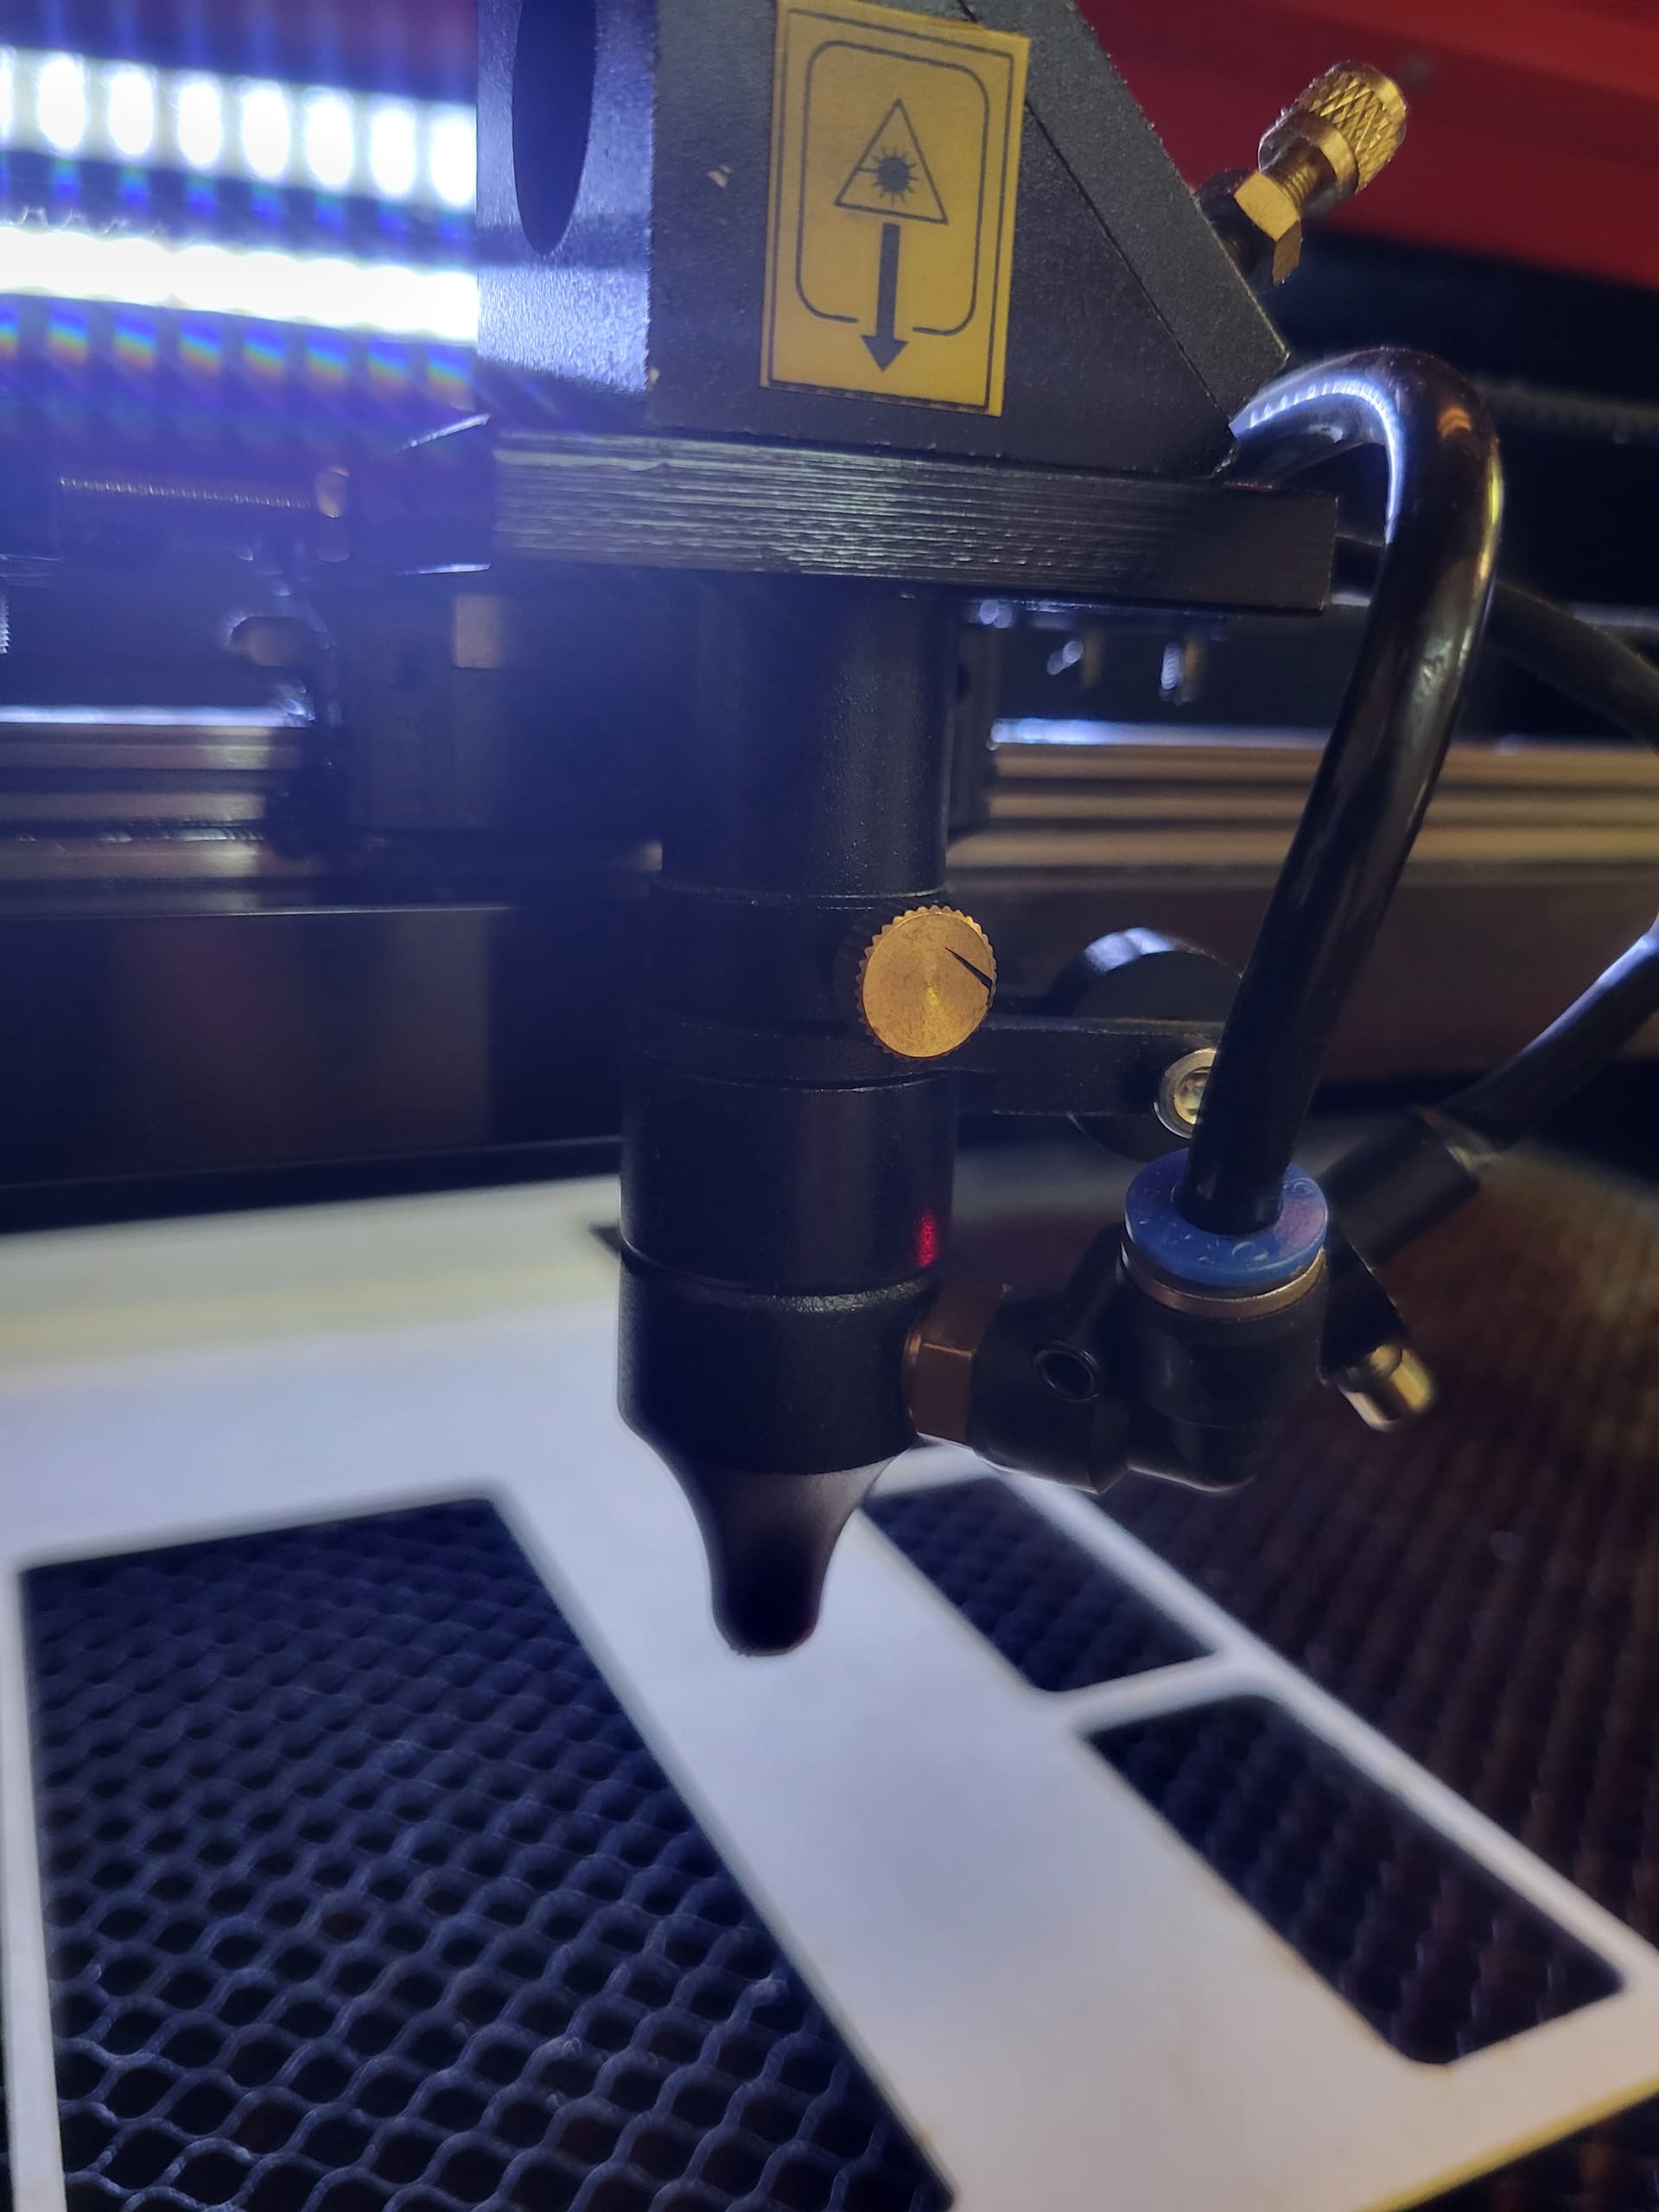
Here the “distance test” is used. Run the machine bed all the way up. 2-4 mm under nozzle head and make your first shot, do not touch the material you have shot on but move machine bed down a nice distance, approx. 100 mm or so, cheat again and see the result. If the 2 shots do not hit each other, loosen the nozzle head gently and adjust it until it fits.
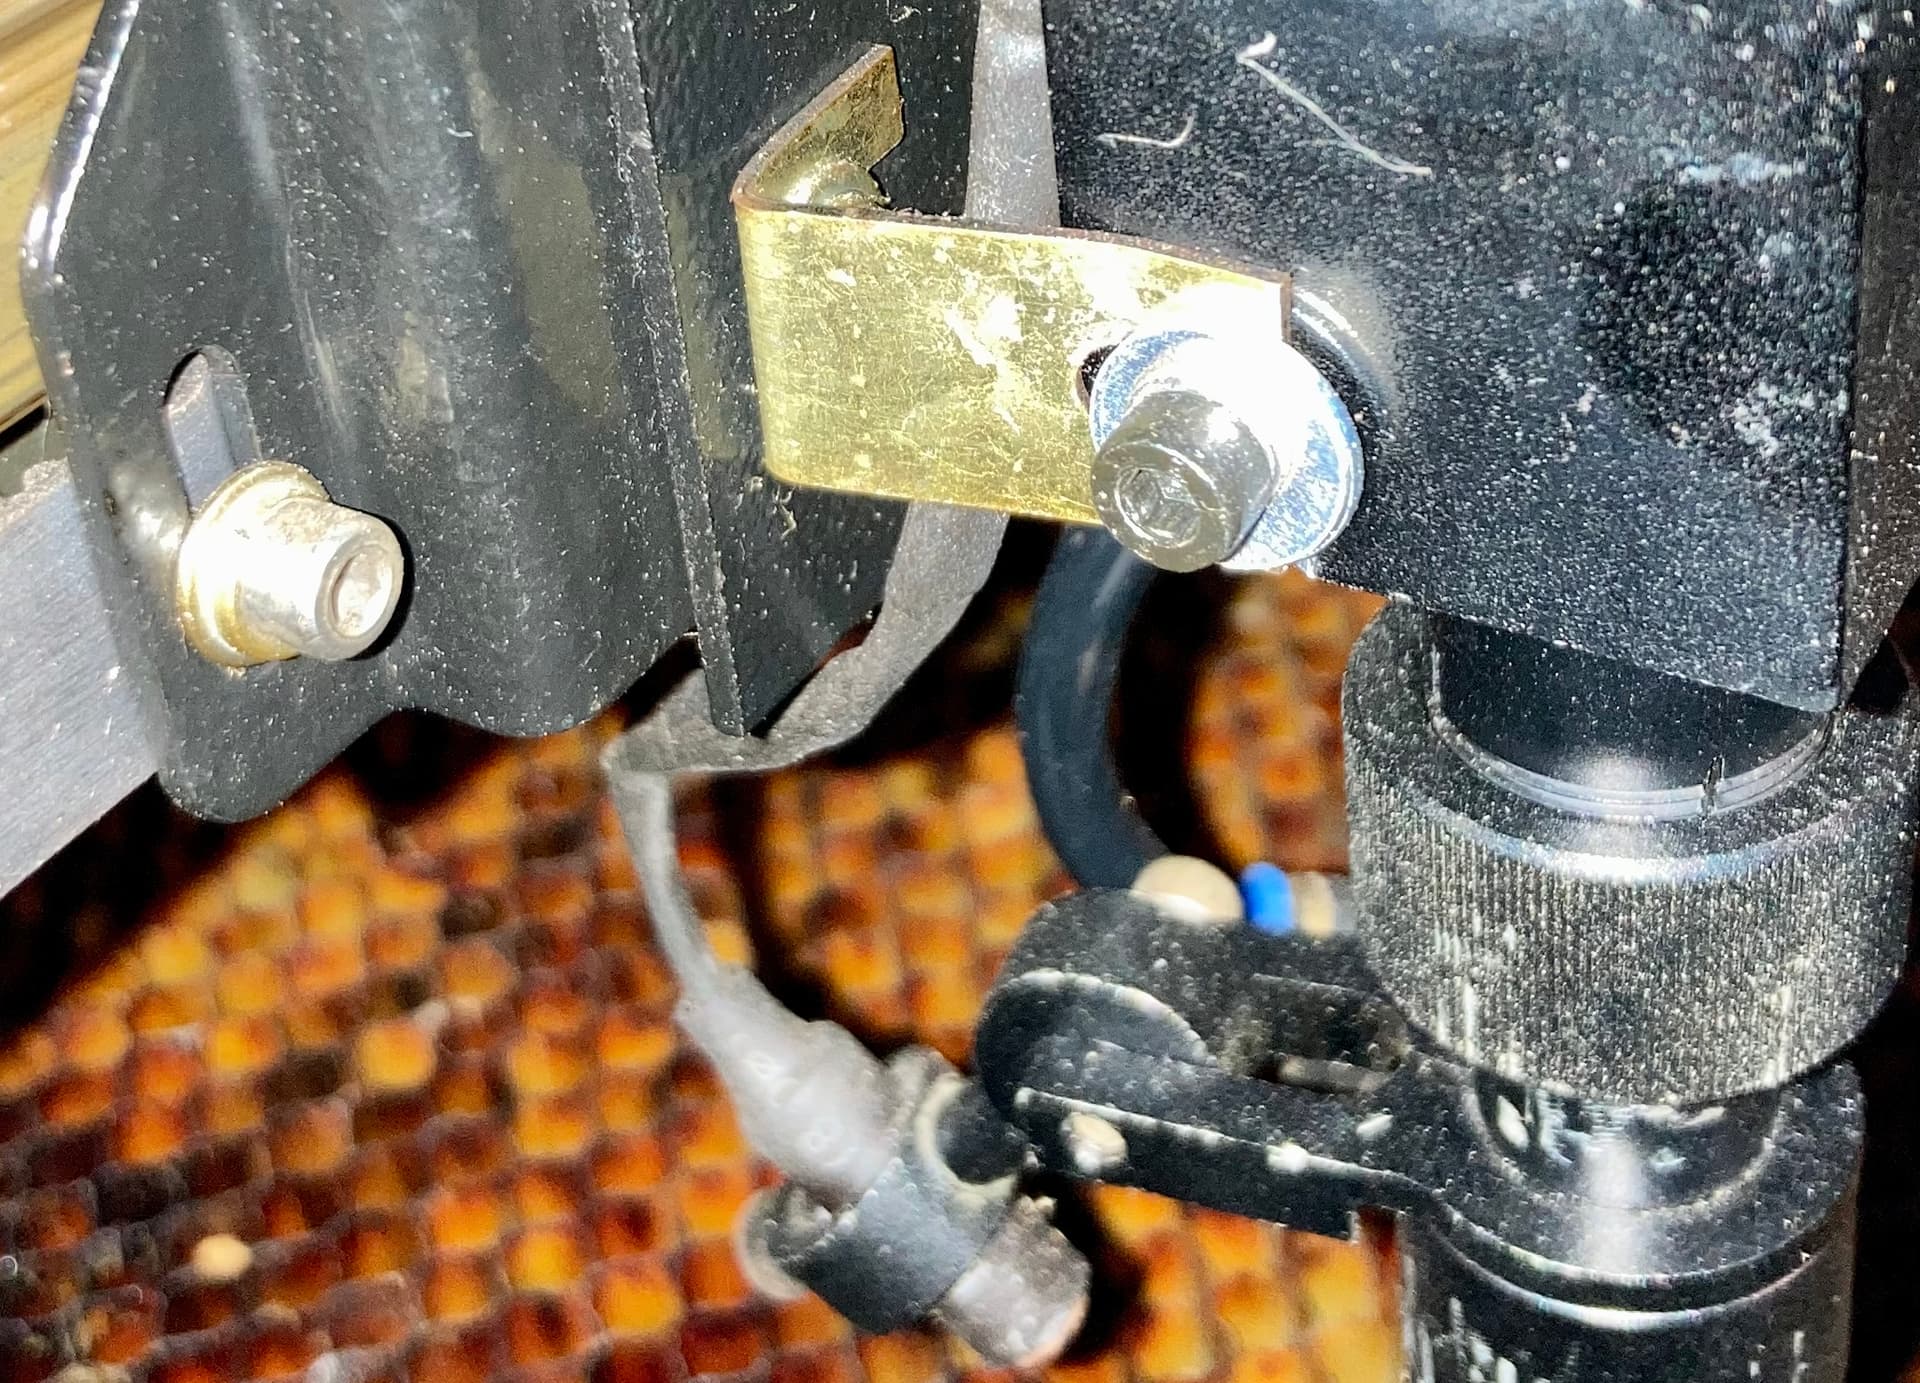
To be clear, are you talking about the laser head tube? If so, I can’t see any adjustability except for sliding the tube up-down or twisting it.
… that is one of the problems this design unfortunately has. You may be “lucky” that your nozzle “only” is on the x axis out of angle. Here you probably have the opportunity to turn the nozzle the few degrees-minutes needed, if it is out of angle.
In y the direction only the one screw should be loosened slightly and the nozzle must be pressed either forward or back, very few tenth, held firmly and tightened while holding. It’s definitely not a smart way to do it but unfortunately the only option. (as I know)
Thanks Bernd,
I think I am OK, I did pulse for 5he laser head, 2mm to around 90 (give or take) and the pulses hit the same spot, exactly.
Attached is my head
Dale
You probably have a slightly newer nozzle, are there no screws at all? how is the nozzle fixed?
ps, it’s good that there are no problems with the angle ![]()
Just the brass set screw shown. I tried to "wiggle " the tube a little but the tolerance is pretty close. I think I have as good as I can get it. I’ve run a couple of projects and it works a lot better than ever. And, most importantly I learned a lot about my machine!
Are the adjustment screws on M3 ever used?
Dale
It’s actually a nice page that explains it nicely.
The nozzle itself is just like part of the frame, the adjustment options themselves with the 3 screws, can only be used to direct the laser beam down to the lens if it is mounted 90 degrees, correctly and in this case to the machine bed.
we have to open a new thread if we want to continue the topic because it is officially solved.
Thanks Bernd. I’ll look over the article again, and I may open another thread.
Thanks again!
Dale
Thanks again Bernt,
This is the same document I’ve been using. But, I think the YouTube video by Bearded Builds filled in some of the blanks for me.
Dale
I’m going to ask that this thread be reopened.
As you know, I’ve recently readjusted my mirror alignment, I have a 60 watt CO2 Omtech machine. Everything was working fine until yesterday. I was doing a 4 layer project using 3mm baltic birch. Because the size allowed, I ran all 4 at the same time. The first 2 went fine, cut through without the problem. the 3rd had a few spots that didn’t cut through and the 4th was worse. Last week, I did 2, 1/4 inch projects that went fine.
I stopped and cleaned the lens which was not all that dirty and re-ran the 2 layers. It was worse, absolutely no burn marks on the back.
The mirrors are clean and aligned, the focus is correct, the lens is clean. My machine has been in operation since last November. I can’t believe it’s the tube. Could it be the power supply?
Dale
Well, given the previous hundred posts, I’d say you have a good basis for ruling out pretty nearly everything else.
In round numbers, that’s 20 hours / week × 10 weeks = 2000 hours, which probably qualifies as commercial use.
Given:
- OMTech’s “60 W” machines have over-driven 50 W laser tubes inside
- They don’t say much about the expected lifetime
- They offer a 6 month warranty on the tube & power supply
I’d say it’s the tube … ![]()
You have a reasonable basis for a warranty claim, so get started on the obligatory hoop-jumping right now. Maybe you’ll get a replacement power supply first, but at least you’ll be on your way.