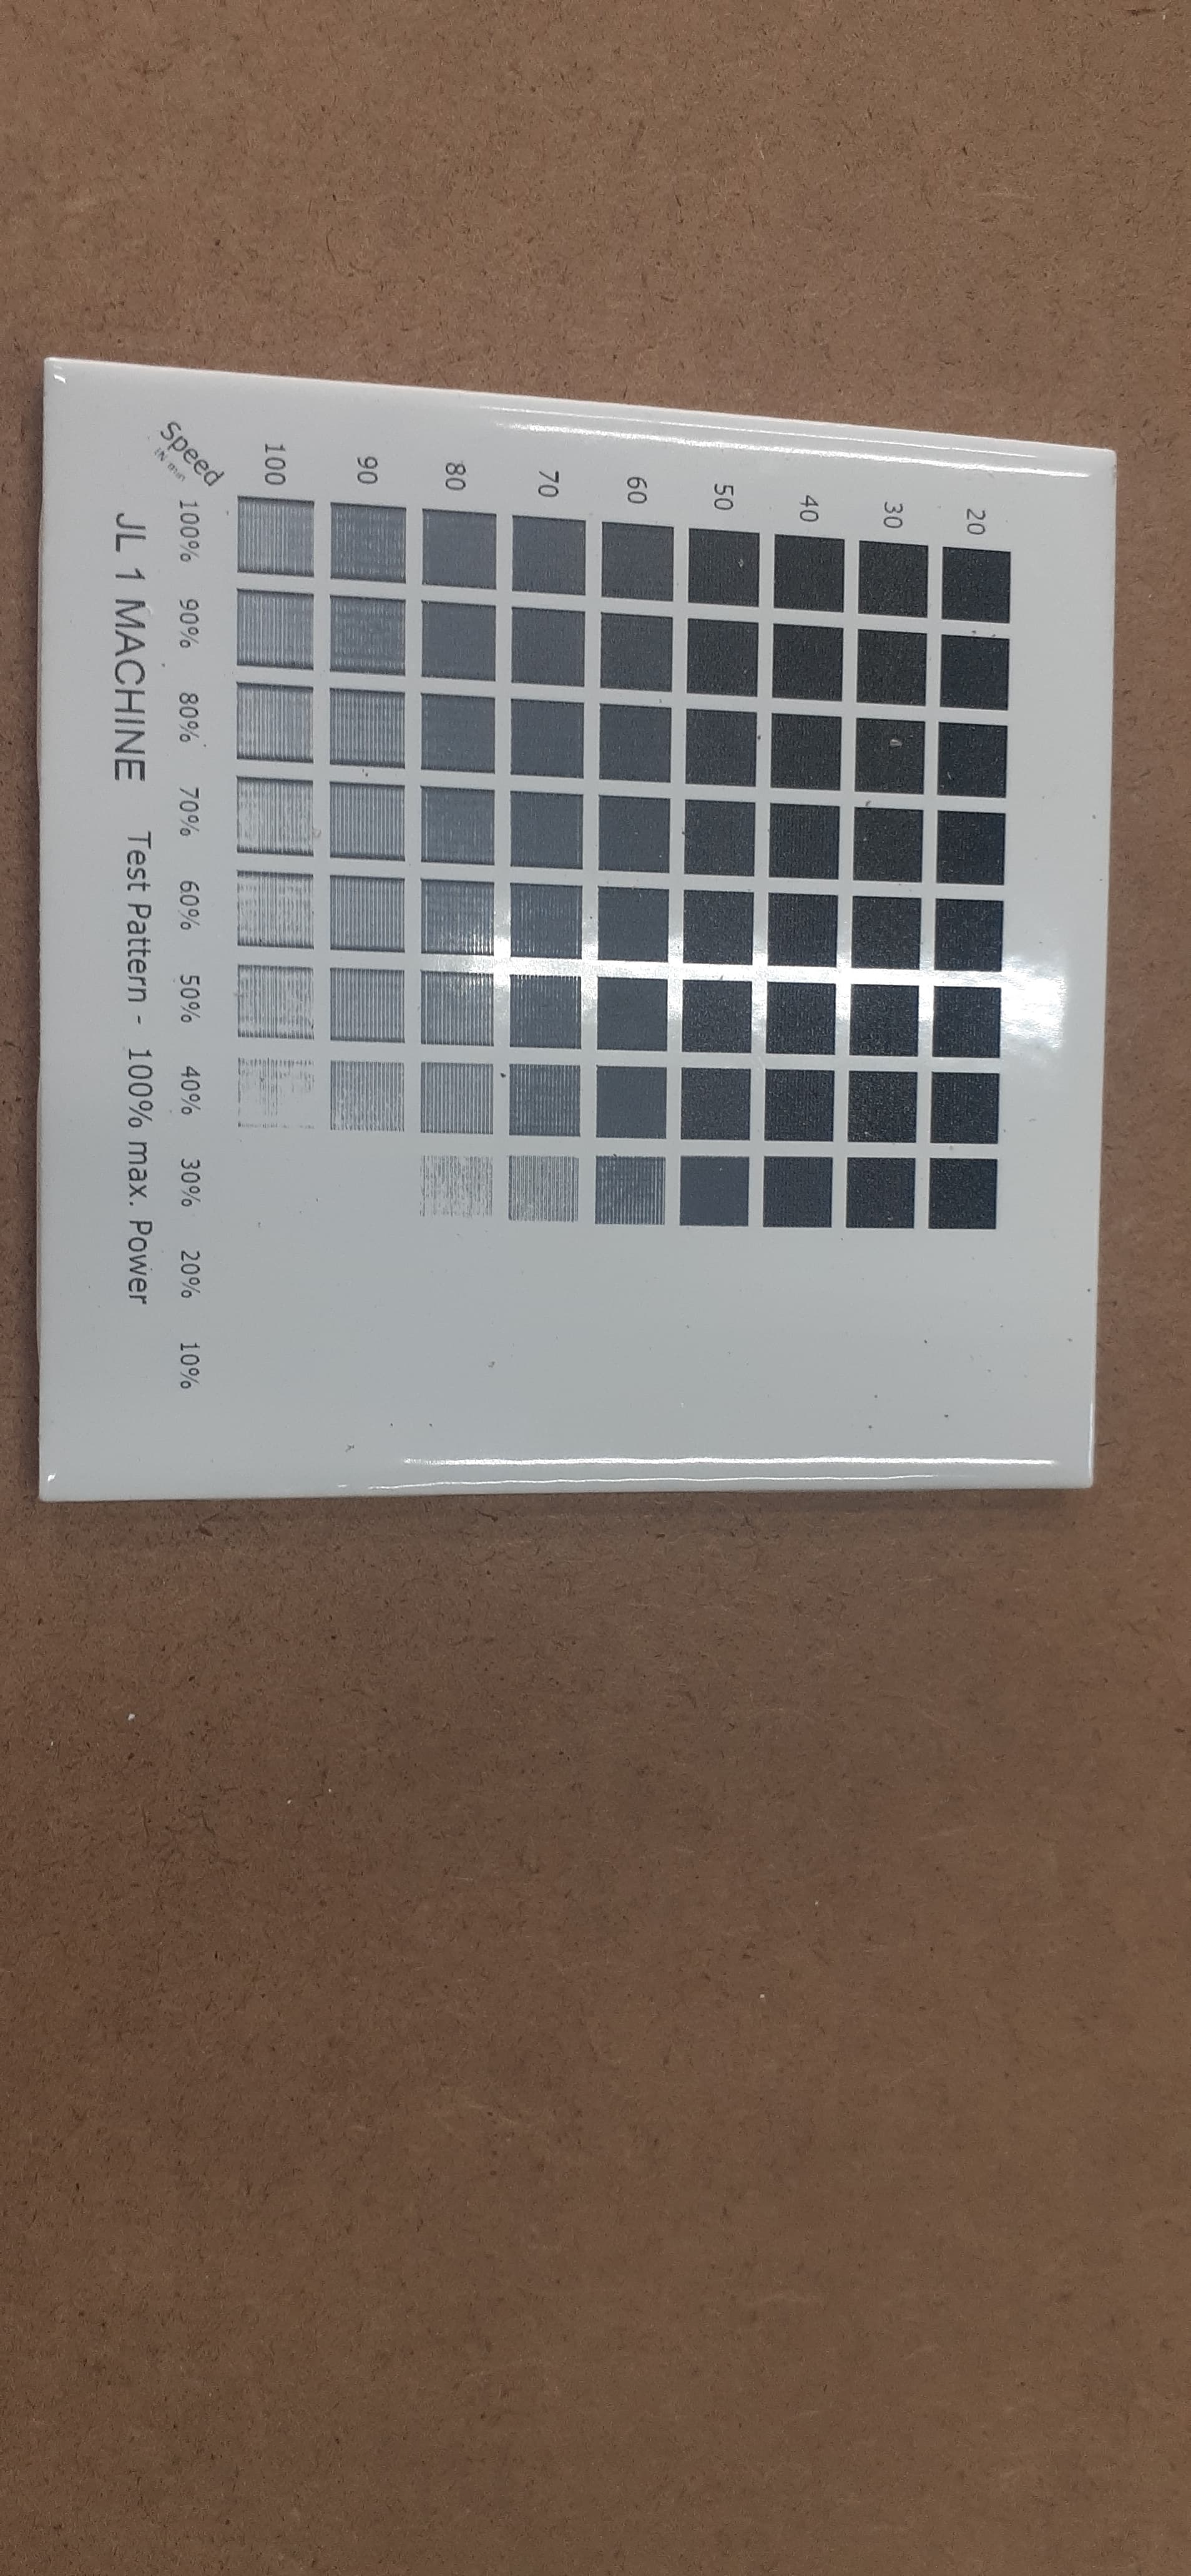
This thread has much detail about the NWT I’m using… paint is Krylon ColorMaxx flat-white.
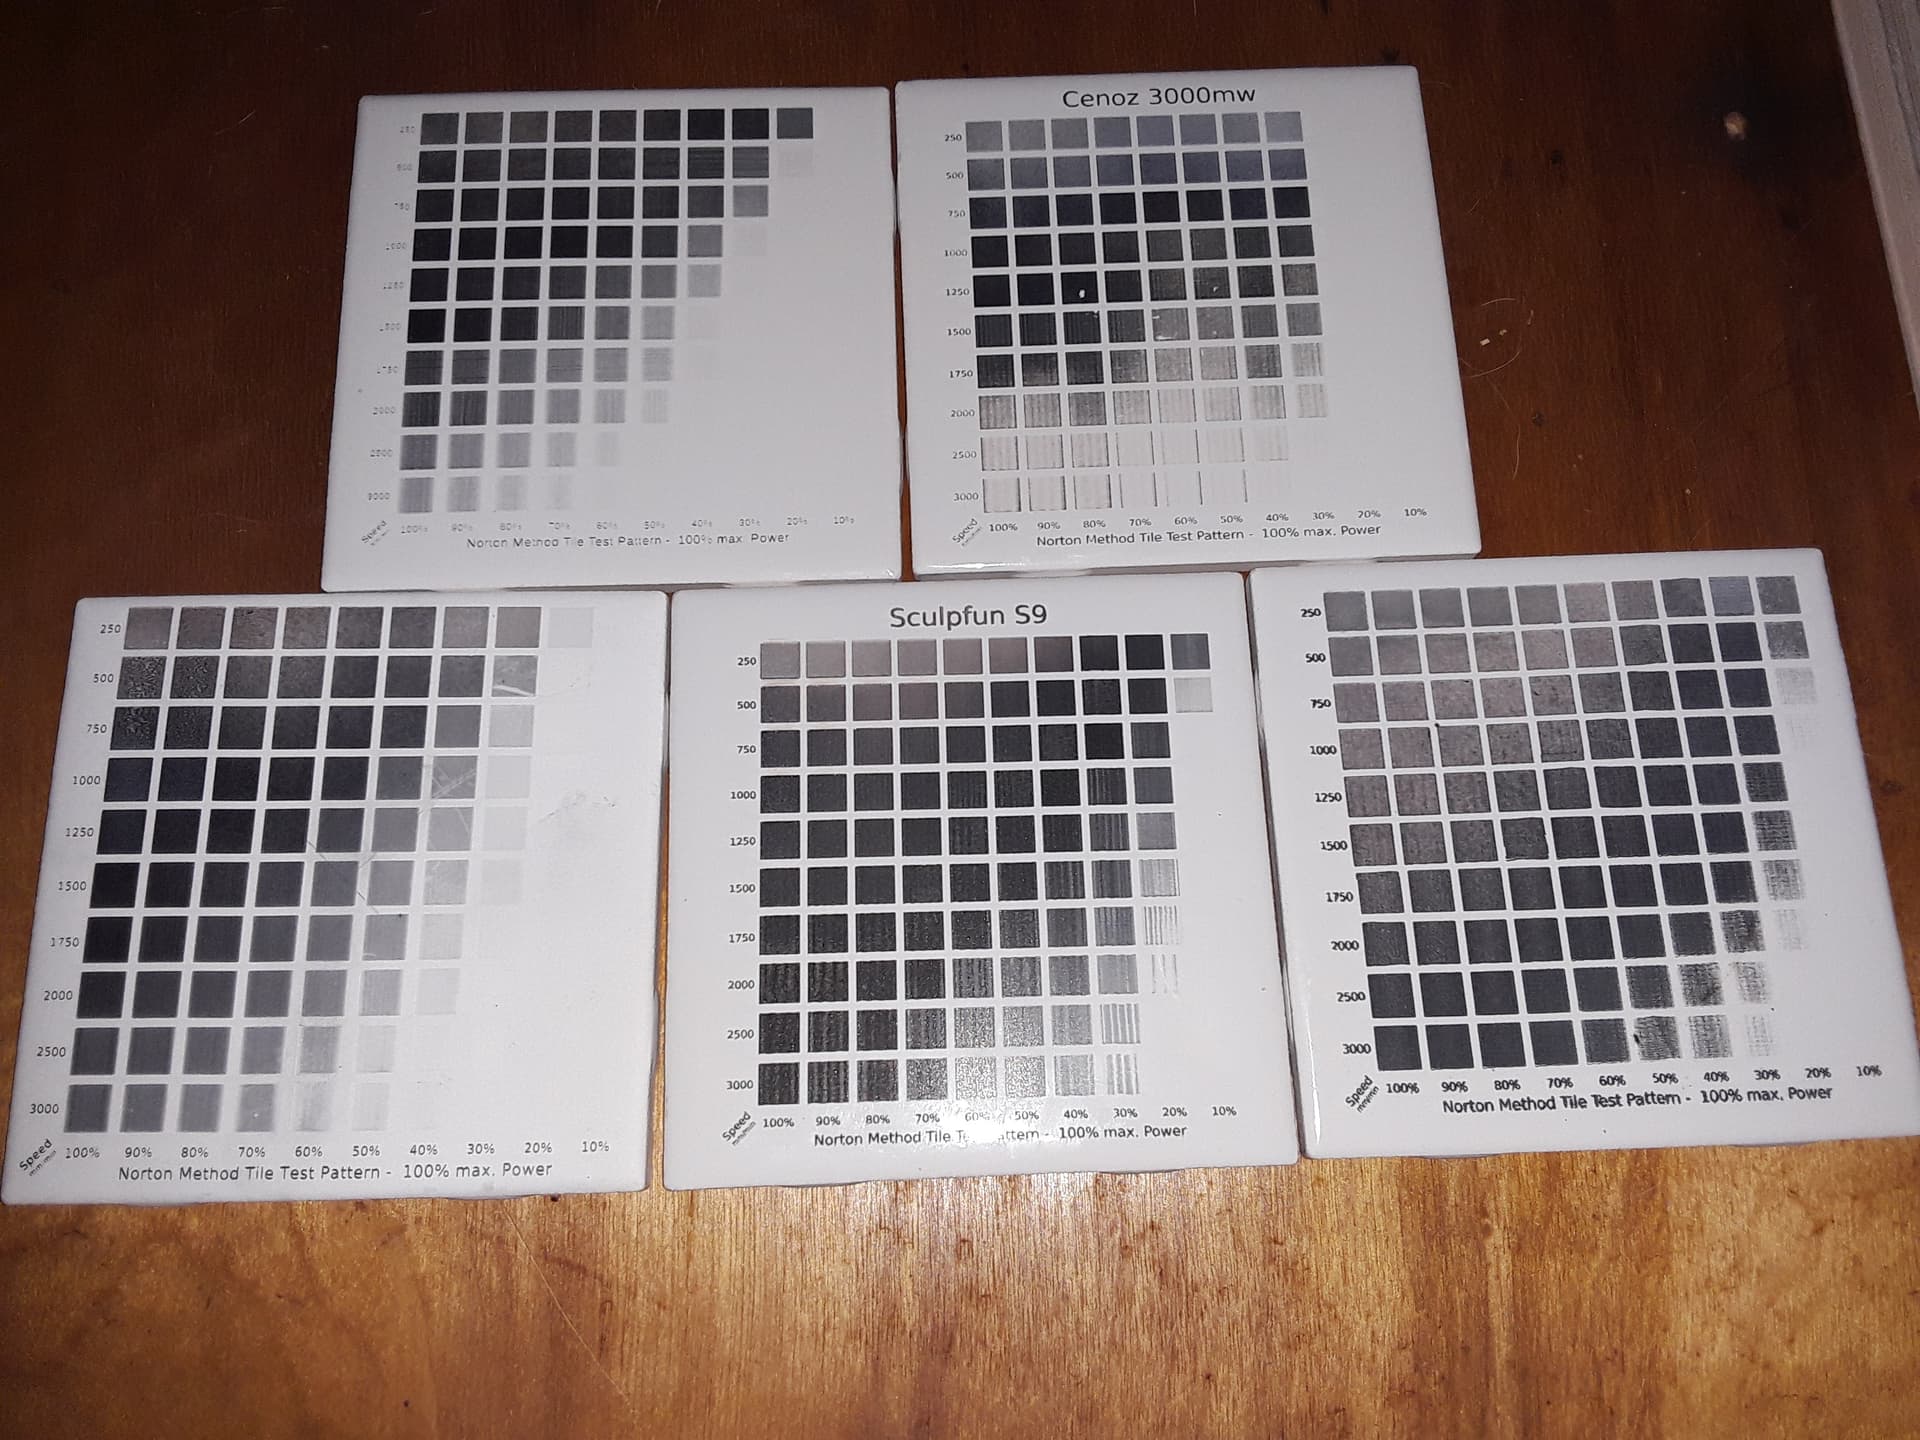
I’ve used lasers from 2.3W up to Neje dual-diode laser (10W-12W)… they all will do ceramic tiles but each has its own best settings. I do a NWT grid tile for each one. Here are 5 different lasers test tiles… all using the same Krylon ColorMaxx flat-whte paint
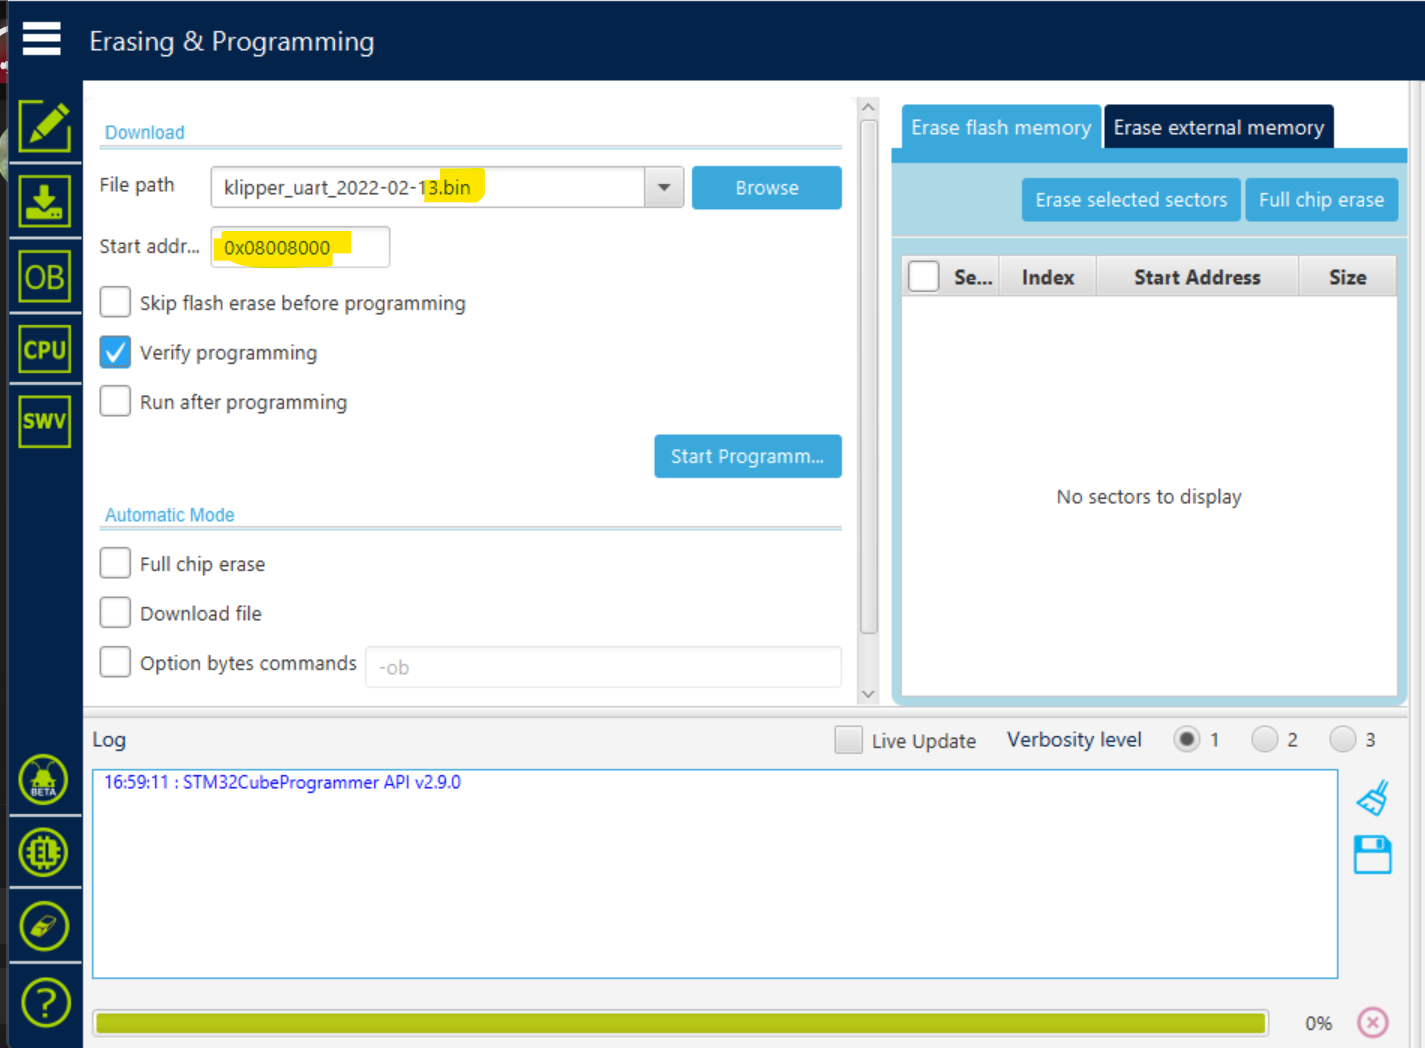
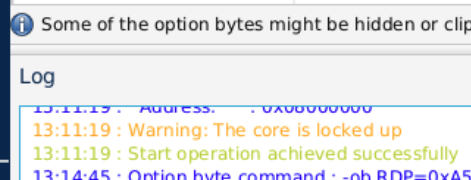
Just tried again to load it using Cube: not running for me. It did report that upload completed and verified successfully, but core is locked up, meaning not able to execute the code. I’ve tried various option bits. Also should be “Run after programming”.
This is consistent with my previous experience.
I know zero about the stm32, I was just trying to save the board. I didn’t try to set anything and I read the start address (I guess) when I loaded the binary.
Have a hard time with the ‘locked core’, mine would talk over the serial port, how could that happen if the core was ‘locked’. That means unless you tell it to ‘run after programming’ it wouldn’t work at all? That seems illogical…who would want to load something and not execute it at some point?
My assumption is, I’m not following you…
Since my last load of the ROM.bin, I get no communications either… starting to wonder if I got the right binary… bummer it won’t talk anymore.
This thread is so large, I can’t find anything in it and I think I’ll try and start a new one on firmware upgrading these and let this one die…
Hi Jack, I also recommend a thread on building GRBL and uploading via STM32 ST-Link interface.
So one thread on using their update.exe to load a guessed at ROM.bin and another on compiling and loading GRBL specifically setup for this stm32 board.
The “guessed at ROM.bin” does indeed seem to be a valid GRBL 1.1f image… a couple of us are using it without issue now.
That “update.exe” is a very minimalist program… no status/messages and only a labeled button and progresss bar. It does what it’s supposed to do but I think the last screen update of the progress bar is so fast that folks are thinking it’s crashing at 80% completion… when it’s not. It completes and returns to the exact look it had at the beginning so you have no clue what it did. I proceeded as if it did complete (it had functioned “normally” to 80%… so why crash now?) and was rewarded with a functioning GRBL machine.
Since the discussion has drifted beyond the OT, I agree it should probably have its own thread.
I applied the ‘run’ option and got the ‘core is locked’ but when I try to follow the steps I find on Google, they interface is different from mine to theirs. I’m sure it’s an update and the same information is there, but as far as I can tell, it’s open from the status…
Don’t even really know what ‘core is locked’ means…
It also states in the ‘cube’ manual that only the binary files need to have a start address specified in the programmer. Notice that the ROM.bin when loaded leaves the load address empty.
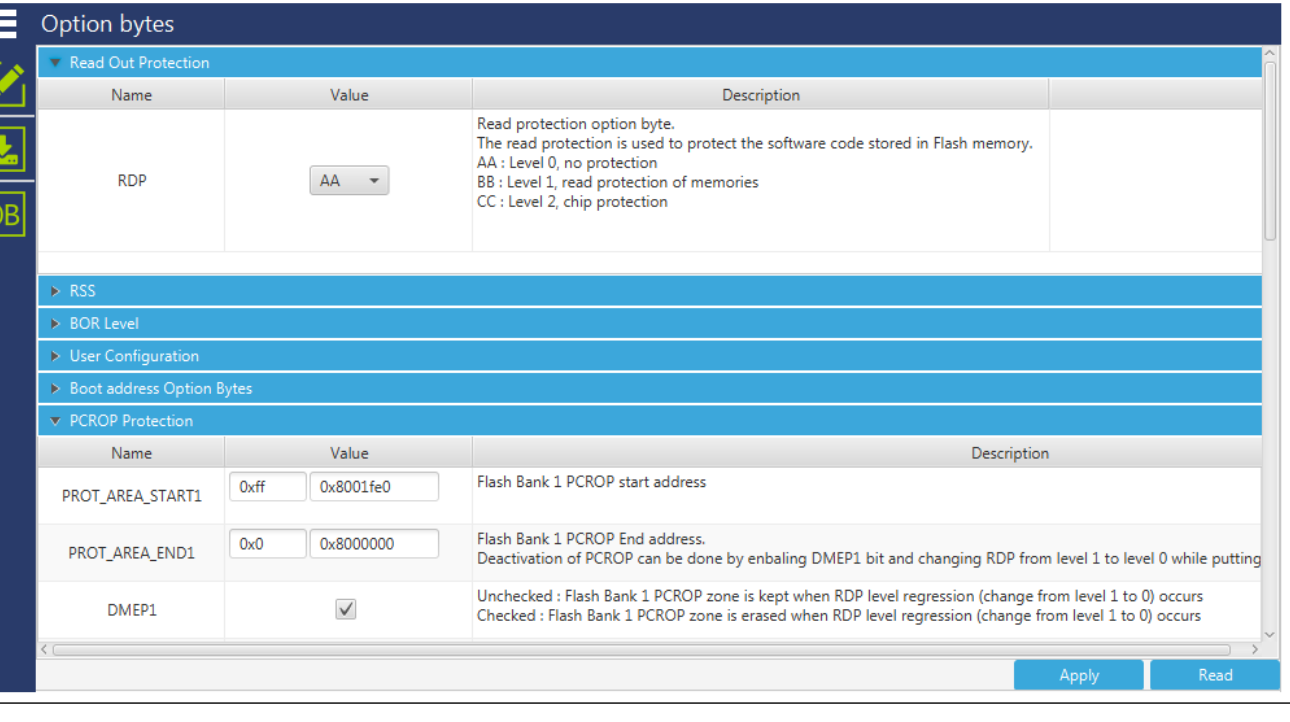
With the WRP0… they are all read as being ‘checked’ indicating ‘write protection not active on this sector.’
Did you manage to unlock the core…? Haven’t found a description of a ‘locked core’ yet.
I thought so, but when I loaded the software, then went to the programming tab and loaded the ROM.bin, it did not fill in the ‘start address’. I don’t know how it got in there before.
I also don’t know how or why the core is still locked.
STM32 has memory address space where flash started at 0x8000000.
With default boot pins strapped (both low on this board) this is also execution address. Different boot pins configuration will give you different start address, for starting from RAM or external flash (which this board has).
It is obvious that there was a boot loader. That boot loader then jumped to specific, depending on button state, to GRBL or to flasher. Application similar to GitHub - viktorvano/STM32-Bootloader: STM32 bootloader example that can jump to 2 apps..
We can try to guess actual starting address of the GRBL and write boot loader to jump to that address. As some address values can be hard coded - execution from wrong address appeared not possible.
A lot of work to guess actual running address for this BIN. I guess it can be automated, only about 64(flash size)-39(firmware)=25K addresses to try, but this is beyond my intent.
I would like to get homing to work properly with default hardware and also to support red laser pointer. So adapting one of working sources is more practical.
“RUN AFTER FLASHING” is not necessary normal option. Often other parts also have to be programmed, therefore should not execute immediately after flashing some section or external flash. When executed - normally running app will not lockup. So when enabled - this is immediate indication that application is messed up.
Hi David,
I find it interesting that your test tile and min are so different.
Do you think it could be because your speed is in mm and mine is in inches?