Jack,
If you’re replying to my post, then you’ve gone waaay over my head.
I don’t have half a clue what you’re talking about.
Sorry, yes it was your post… I’ve used large and small systems since the mid 70’s, if I’ve learned anything it’s don’t do it manually, it’s time consuming and error prone. This isn’t so much of a problem as the entries are rather minor.
Read this through the write, read, load and save descriptions. This writes the current configuration out as a machine readable format, I think it’s xml… Instead of 5 minutes cut/paste, I click load, get the data and write it to the controller… not even a minute and accurate.
We’re always leaning about Lightburns capabilities, but this seems like a no brainer and few seem to use it…
I have multiple ones, one for a ‘fast/slow’ rotary, fast/slow ‘no rotary’ for engraving … and test configurations. I can’t keep track of all that junk…
Made the changes…
I believe the long axes is x and makes the machine wide … either left or right arrow move the head in one direction, increasing the X values. It thinks it moves back, as X will decrease if I click the other direction arrow, but the head always moves in one direction away from the front/right, home or where the controller/switches are.
Identical operation with the Y axes.
Not sure where to look to correct the single direction issue… The connectors have never been removed, so they are not the problem.
IMHO, I think this topic is becoming a megalith ‘thread’ and we should split these out to something more specific and easier for the user (like me) to find. It’s confused me many times… this is post 162 ![]()
Thanks for the time and assistance.
![]()
Jack,
I’m still not sure that I understand.
But if this helps you out, these are the only 2 file that I used.
(Sal provided both of them.)
JL1 GRBL Settings.txt (1.1 KB)
upgrade.zip.txt (38.4 KB)
First run the exe file then turn on Lightburn and make the changes to the configuration.
It runs perfectly other than it doesn’t have homing, that’s ok because I don’t need or want homing. Also the red laser cross hair pointer doesn’t work, again, I don’t know what its supposed to be for and don’t need it.
This machine is now doing everything I want it to.
2 Likes
While watching the FedEx golf tournament, put my new Cenoz to work doing its first tiles. I installed my new Z-lift and first did a NWT grid pattern tile with this new 3W(claimed) laser… with Grbl 1.1f firmware on the original JL1 controller and under Lightburn control
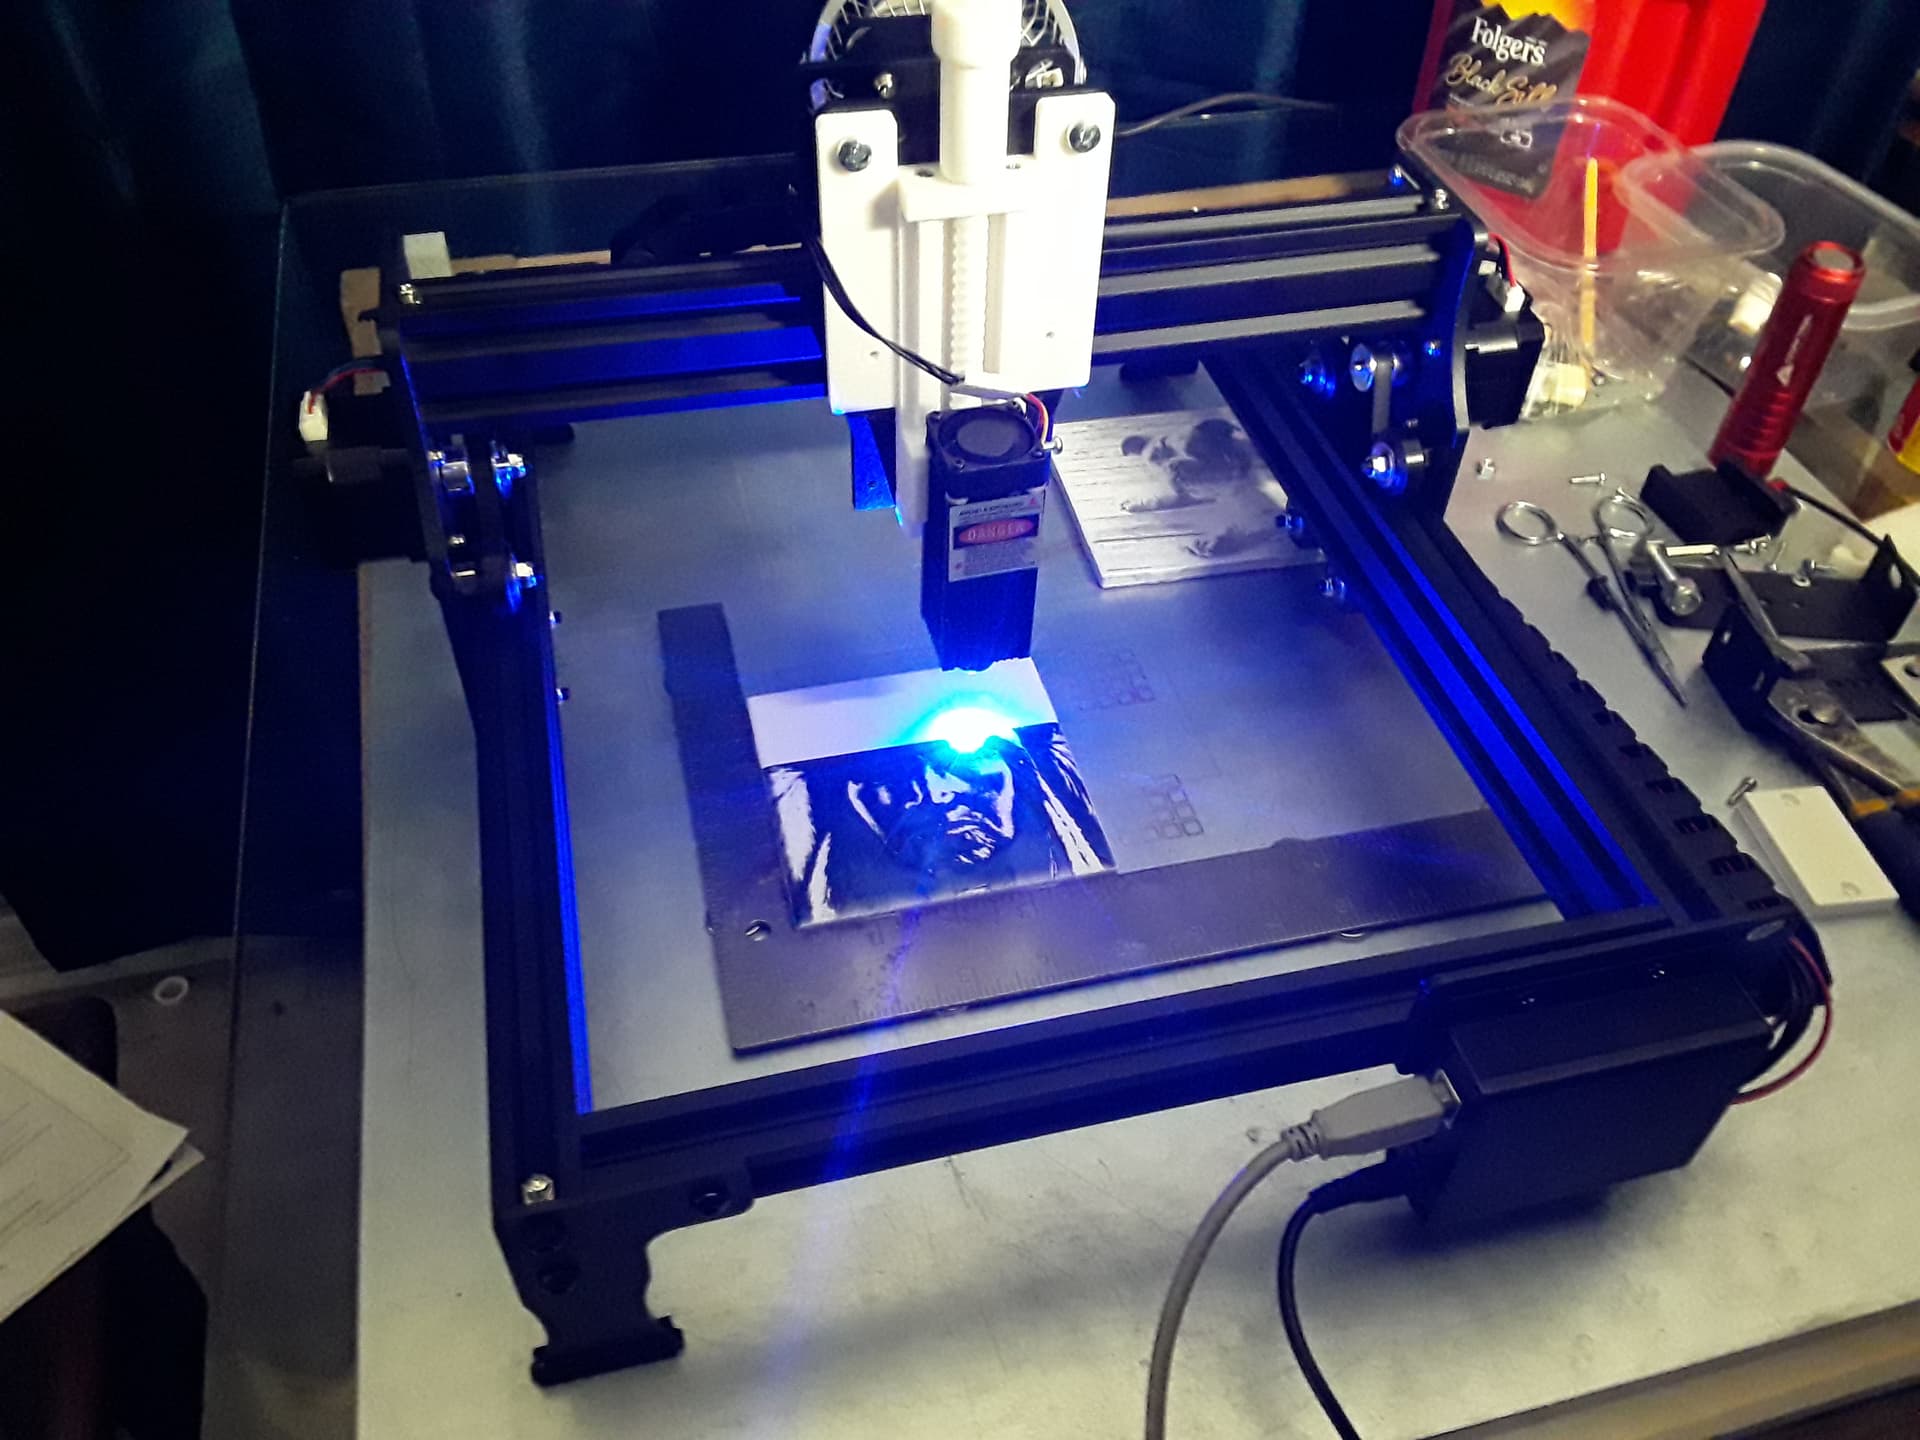
Using the test tile, I determined 1250mm/min and 100% power to give the “best black”…
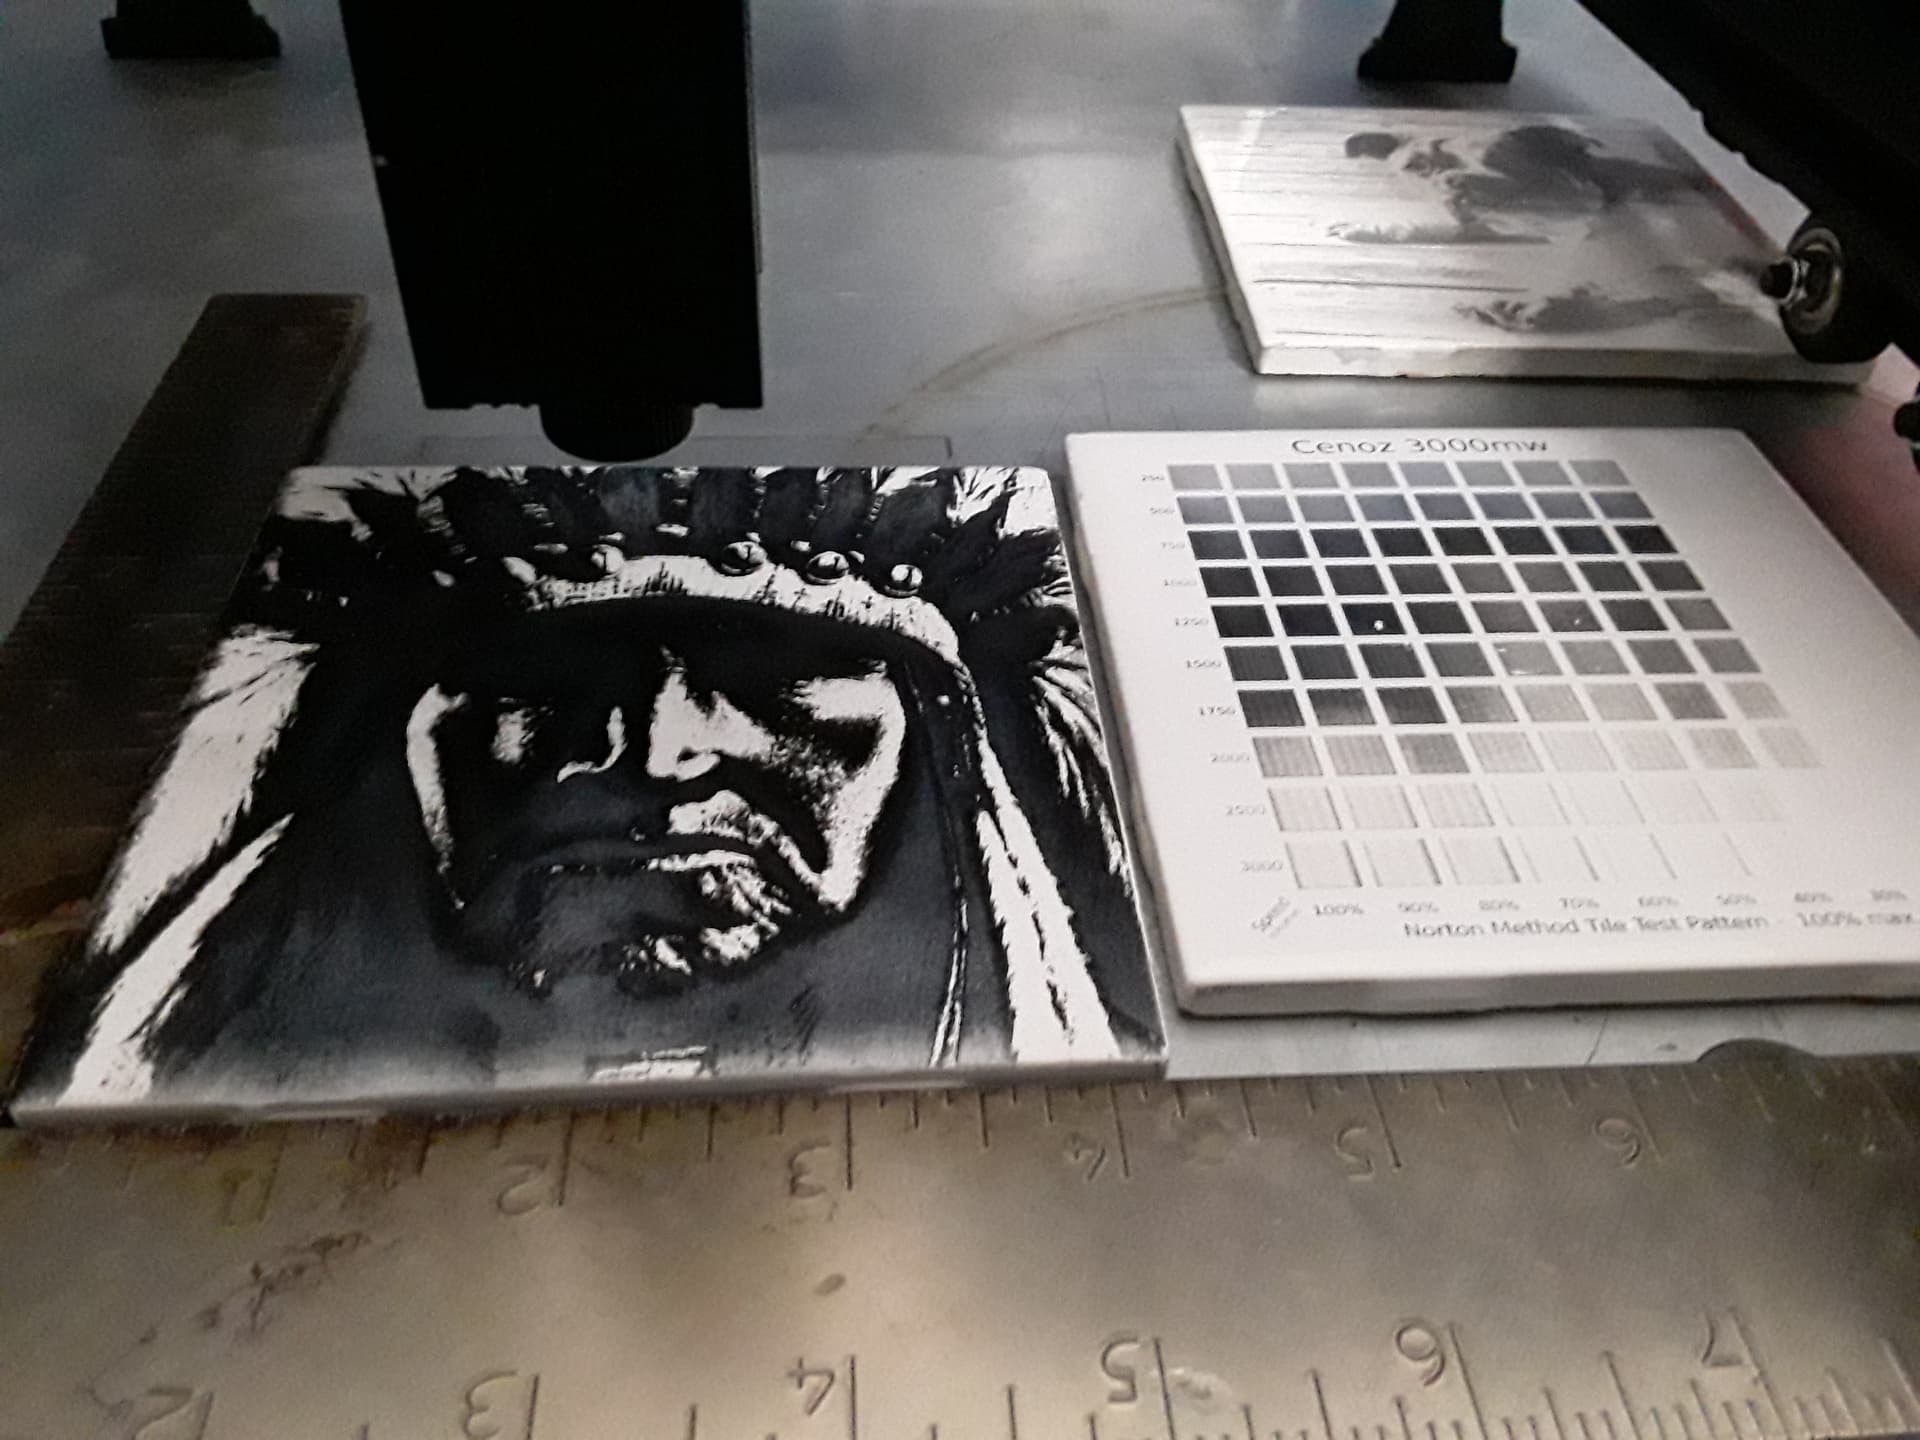
image lasered and before paint removal…
Paint removed with acetone… “best black” block is far left (100%) and 5 down (1250mm/min)
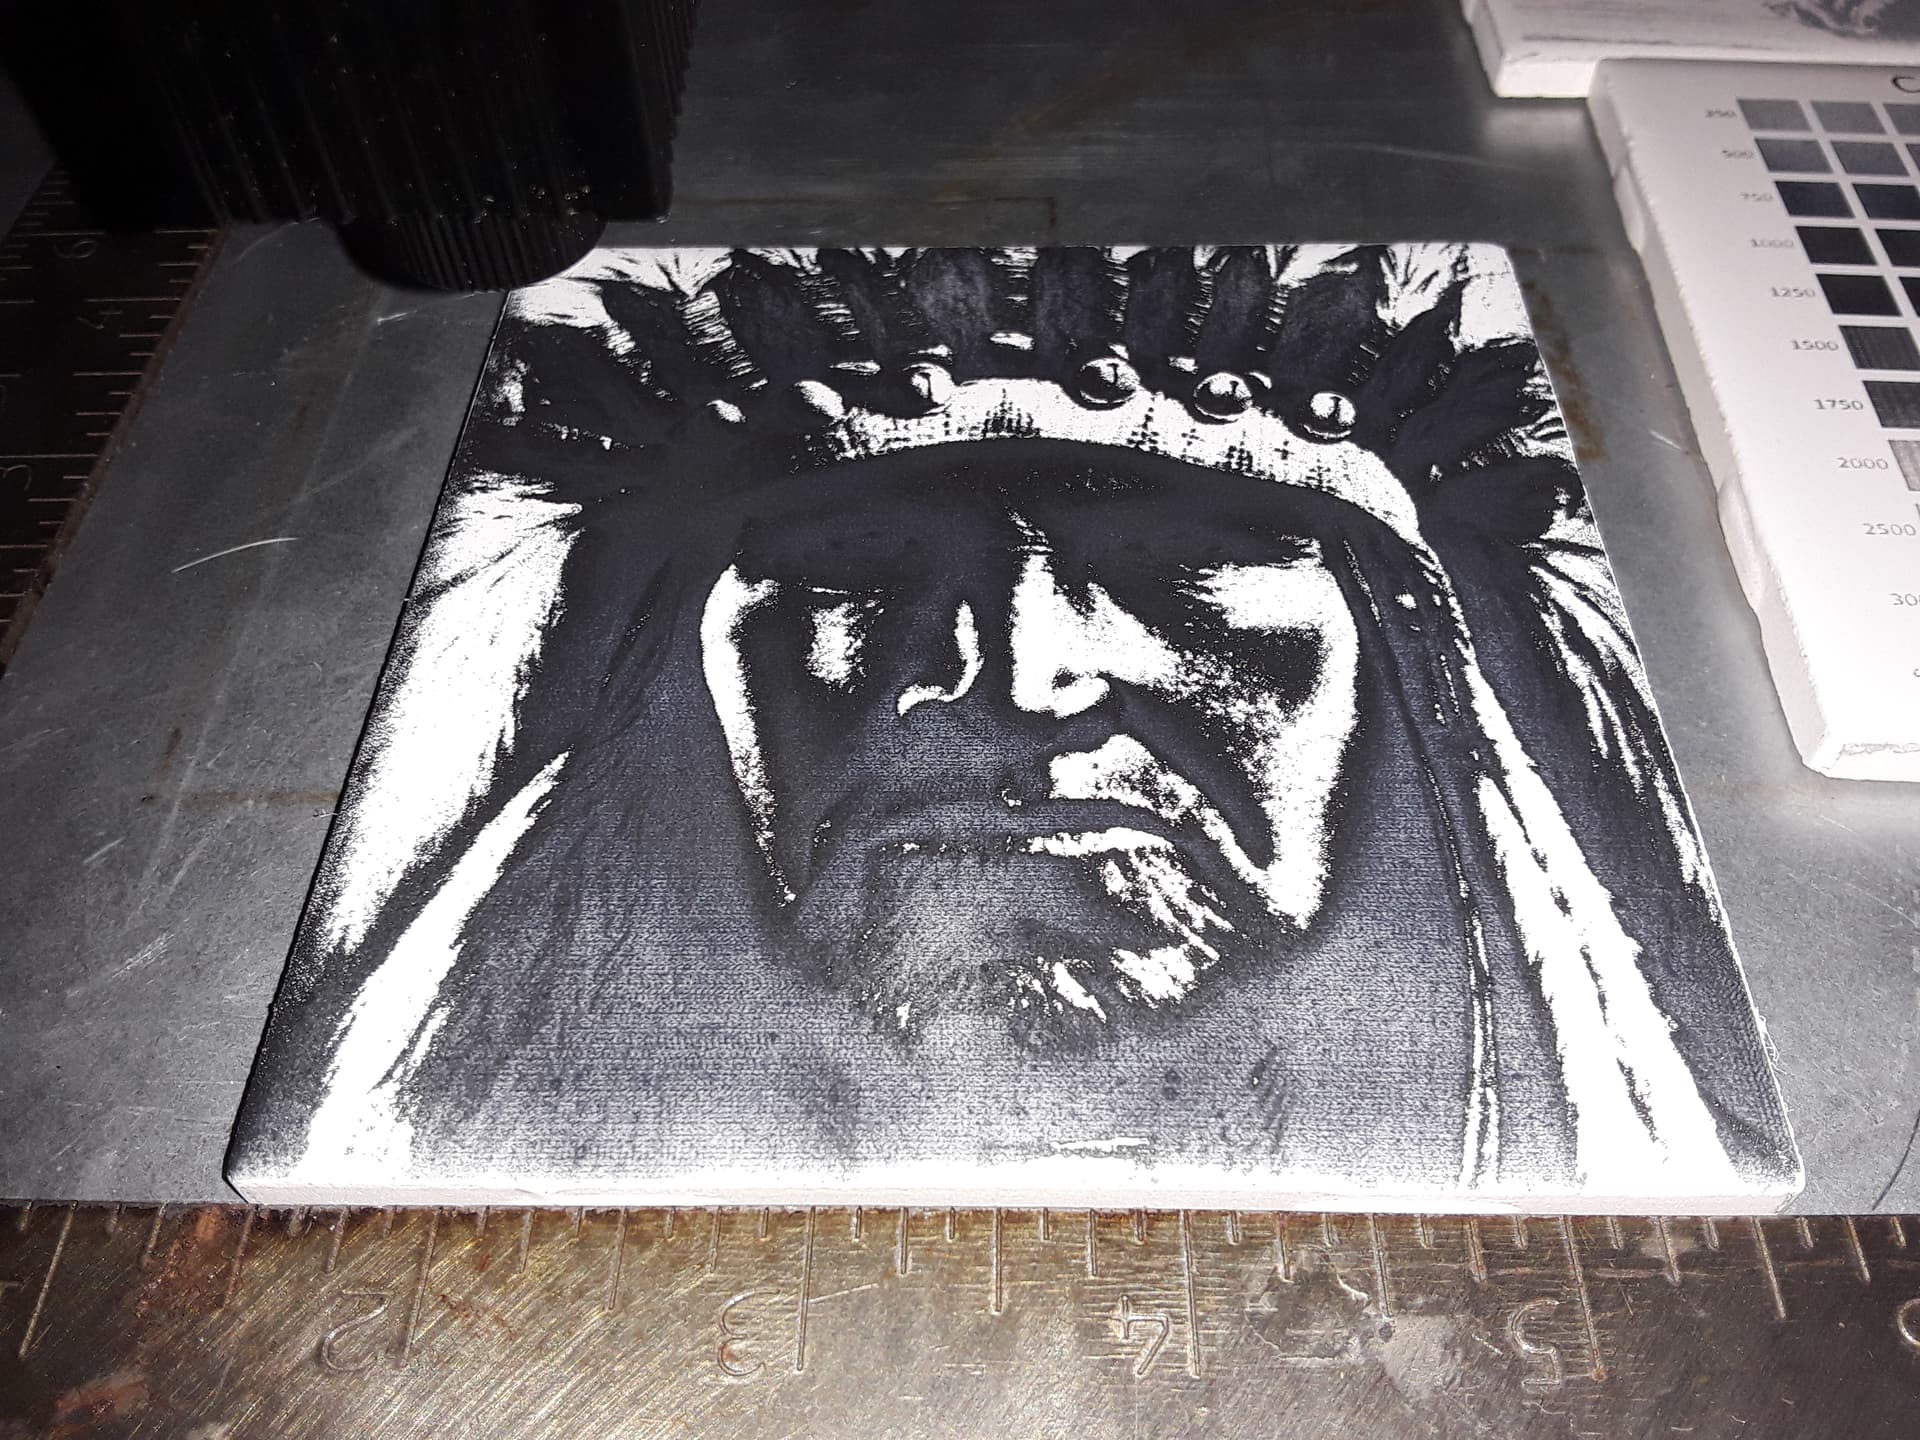
and finished image (w/o flash). Stern look is to scare away daughter’s suitors…

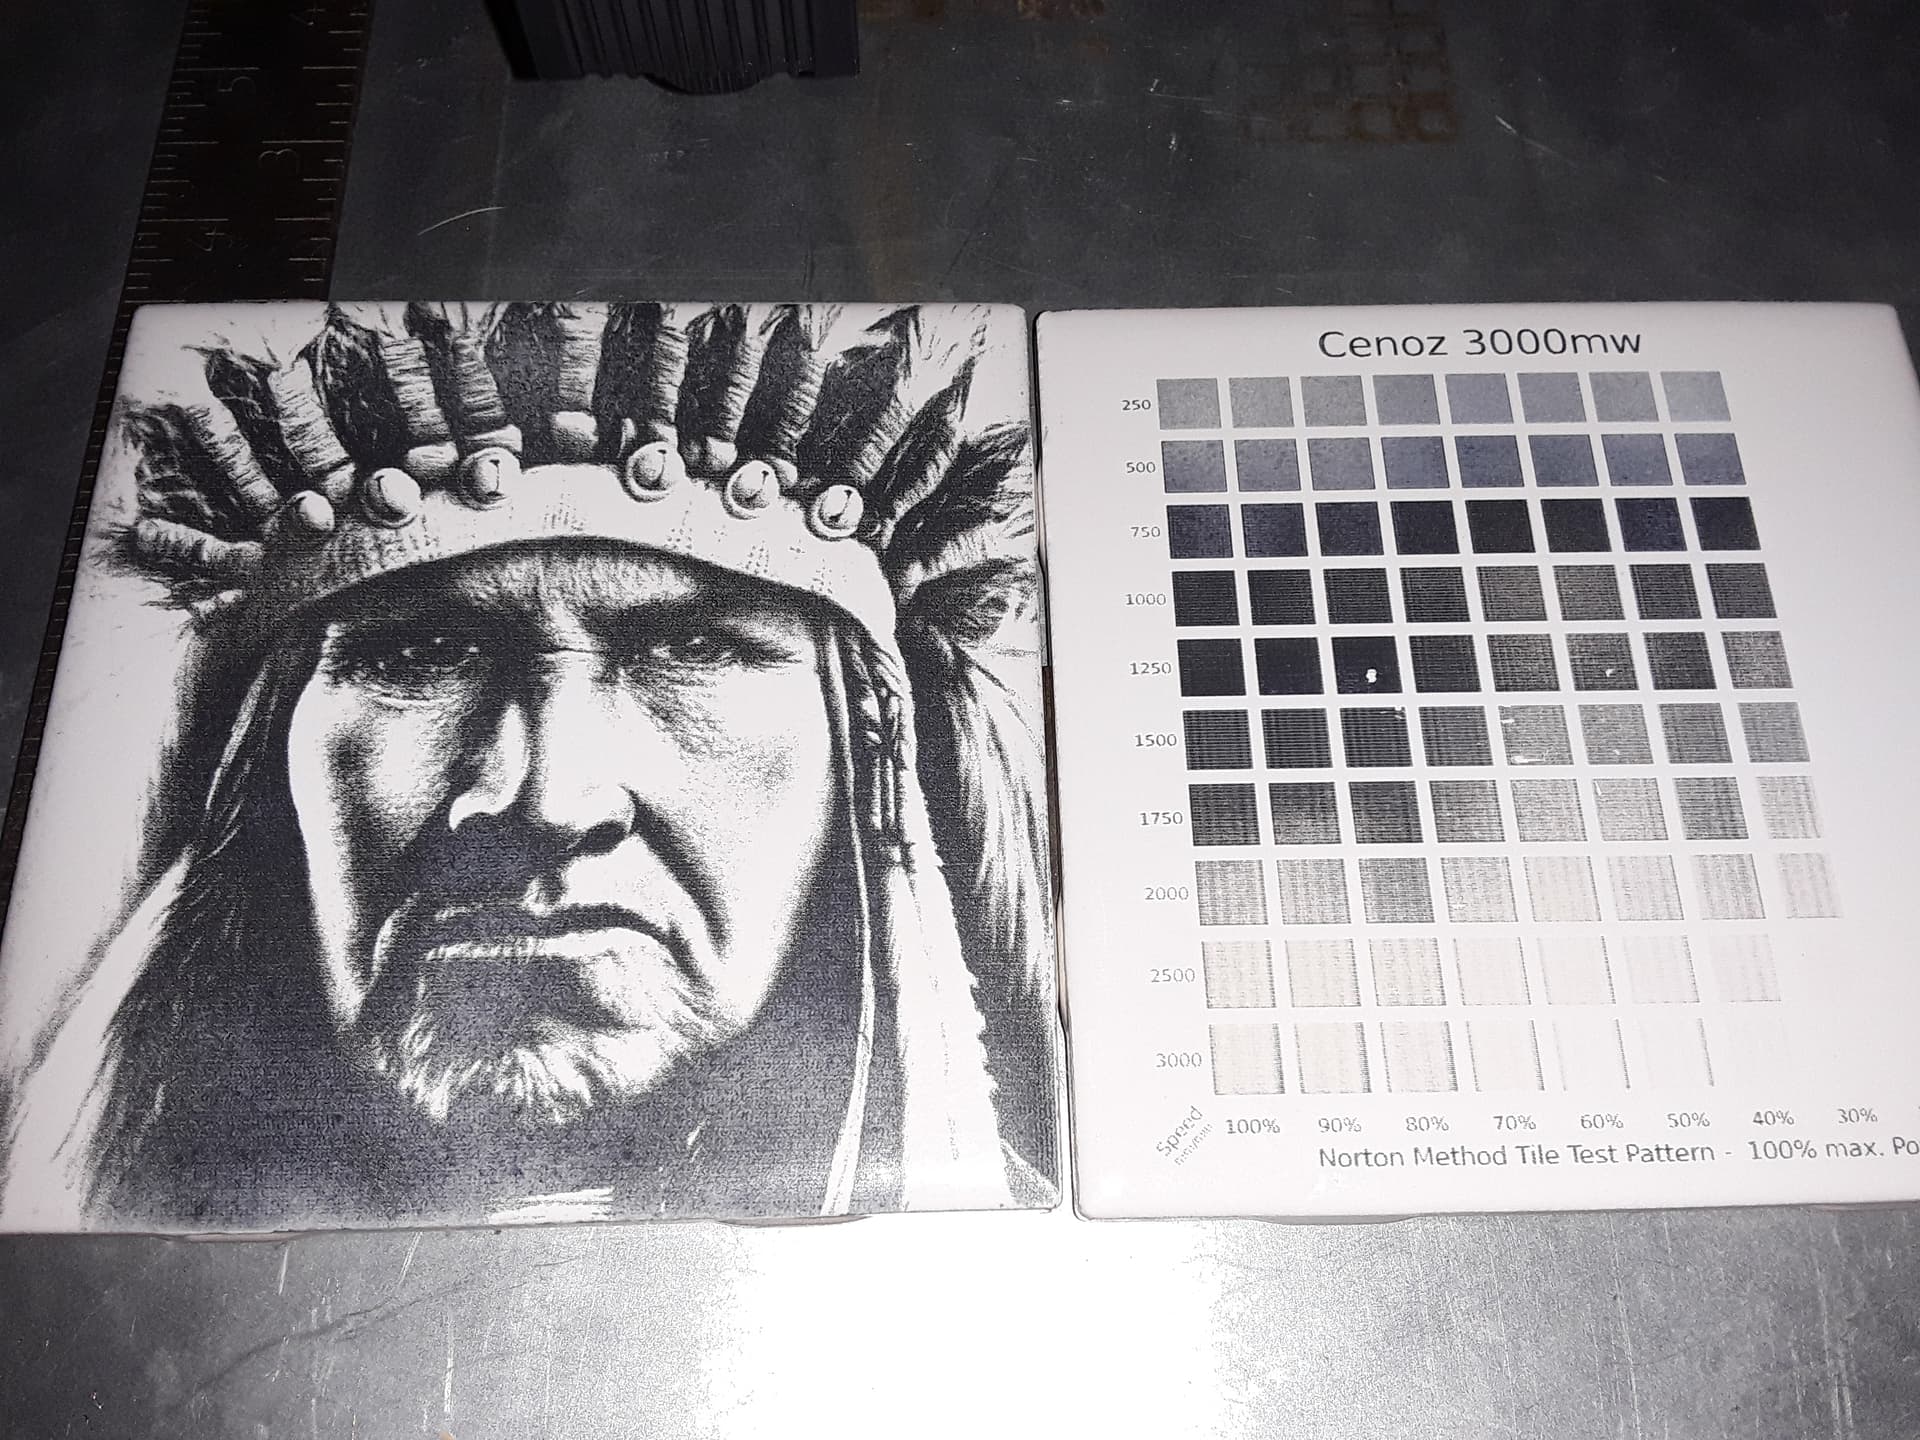
Finished image with flash… LB processing - Jarvis dither, 339 dpi, all else defaults

– David
2 Likes
Looks good. Mine still has issues. Both axes have the problem, the motors drive it one direction. The X value will show the correct move, but the motor doesn’t reverse.
Don’t have a clue what is going on with it.
![]()
The firmware that @LsrSal provided you is a WIP. I believe he mentioned that laser PWM as well as motion was not functioning correctly. Only that you should get a reliable serial connection.
I used the ROM.bin that came with the upgrade.exe program, so it should be the same as @JVL and @dkj4linux are using… I hope. The only difference is theirs was loaded via the ‘upgrade.exe’ program and mine was loaded via st-link.
I have no clue what kind of setting would cause the motors to travel in only one direction.
I’ll try a reload of the ROM.bin, although I’m not optimistic…
It’s odd, I can change the direction bits and it will change the direction, but it will only go one direction…
![]()
Oh. I was under the impression that the one you had tested was based on @LsrSal’s build.
So you’re saying that the standard ROM.bin loads to 0x08000000? I wonder if that means that everyone’s bootloader is wiped.
Did you try loading @Lsrsal’s GRBL configuration?
If you can change Grbl settings, you might disable soft and hard limits for now. A motor will not go in a direction where it thinks it’s at its limit?
I did not try @LsrSal configuration. Not sure where it is now… I did check/change it based on @jvl post 162, that zip is also contains the ROM.bin.
That’s what shows up when I load ROM.bin and write it. I don’t enter anything for addresses. I hope it’s in the bin file, usually is.
I can’t image it running at all if it’s not loaded at the right offset.
This is odd, and I haven’t mentioned it. With the controller box front right as shown. I expected the right and left arrow to move the laser head, but it moves the Y gantry instead of the X laser head.
When I click the right arrow (X) it moves the Y gantry and vice versa… mean anything special…?

![]()
Jack,
Are you saying that you did load original BIN that came with stock upgrade EXE and able to load it into JL1!?!
I was not able to do it, it never run for me. What have you used to load it? Cube? What settings?
I bet you did load upgrade first time with Windows and never with STLink. To load with STLink it also required to unlock that you never mentioned you did. So I’m 99% certain that you succeeded on original upgrade and firmware lock prevented you from messing it up with STLink,
I’ve seeing this board going only one direction on each axis, this is when homing cycle enabled but not completed. It will cause any motion command to try to home first. But it is never complete properly and usually end up in safety lock. You should copy my GRBL settings, homing will be disabled and JL1 should work as expected.
$130=220.000 (X-axis maximum travel)
$131=295.000 (Y-axis maximum travel)
These settings always enforced, even if soft limits are disabled. You might be able to squeeze a few more mm, but I think this range is sufficient.
I still recommend to home by hand. Short axis is X and long is Y. You move gantry to close left before power up, then you will be able to cover whole frame and without hard stops.
Go inside the box and swap 4 pin cables at diver chips. U2 is X and plain cable. U3 is Y and is rainbow.
David,
What paint are you using?
I’ve bought small can of Cermark spray, expecting to bake it to perfection , but so far it just burnt and flakes off from any surface I’ve tried. Maybe my 4W optical not hot enough?
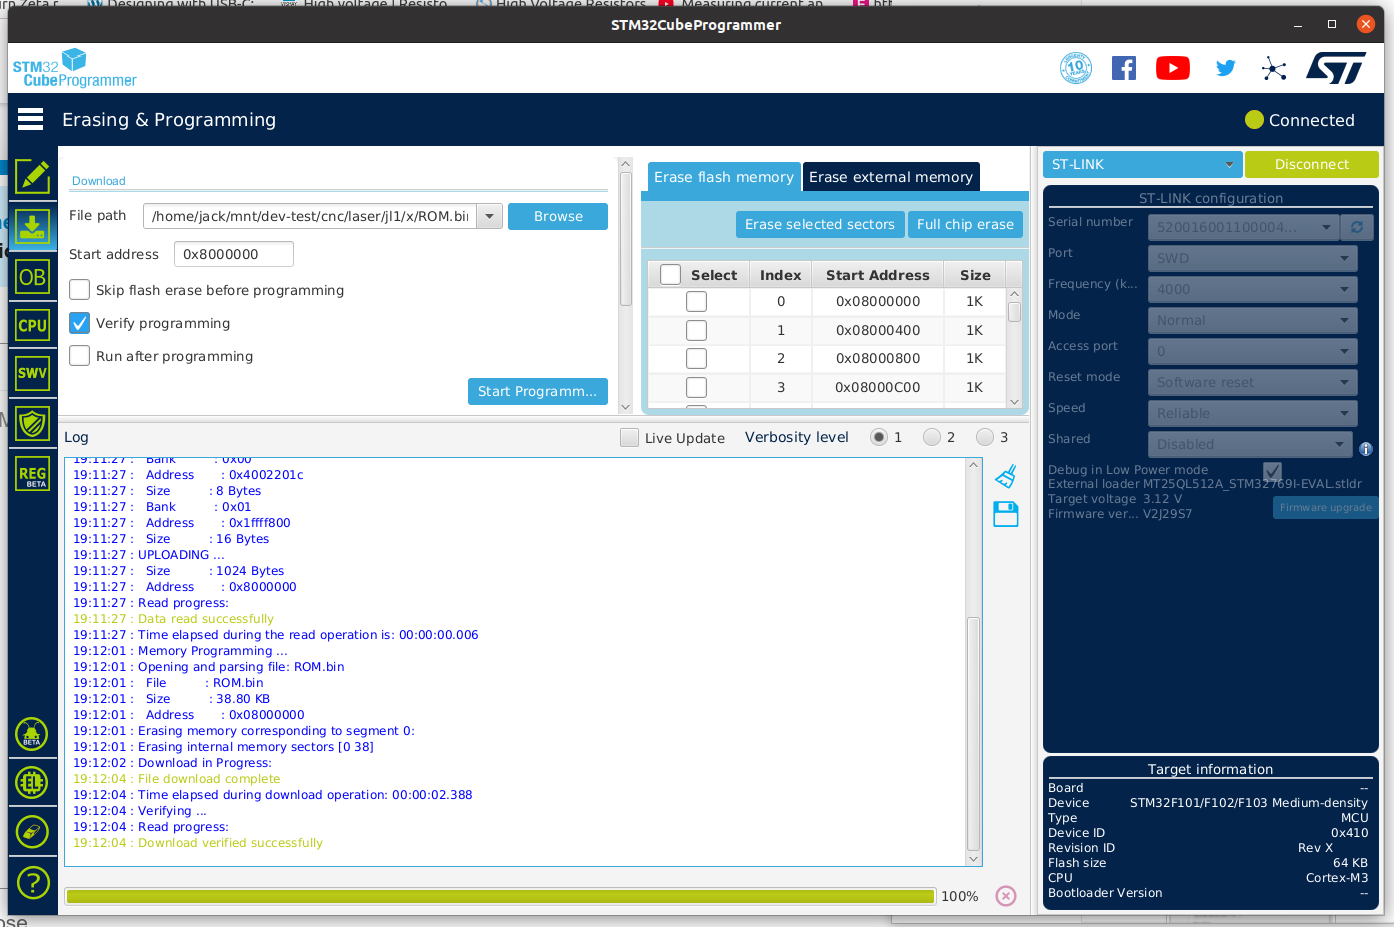
As you can see it loaded it and verified it… So yes, I am using the ROM.bin file. Yes, I had to reset it, which wiped the flash, chip security ya’know…
My firmware update didn’t move hardware around, so I’m not moving hardware around either.
![]()
Jack, try a copy and paste of the command into minicom. IIRC, GRBL times out if typed in with keyboard.
Ex: copy
"$$
"
Or “$$”
And paste into minicom. Heck, I think I might have had to use the ‘screen’ terminal emulator app.
Ya, that part has been a PIA for me also. Ie using Linux terminal emulator to talk to GRBL.
I bite my tongue and go to try to load it again. If it work and looks like nobody really struggle without homing cycle or cross pointer - why would I need to rewrite this firmware? I may still work on it just to learn about this darn TIM1 hardware in STM32.
I already got my DLC32 setup and running. Today I got set of 2209 drivers. Oh it is so silent! No buzz at all!
Good reason!
![]()
They are duplicates of @JVL post 162.
Lightburn connects, the machine just isn’t responding as expected.
![]()
Did the machine come pre-assembled? If X and Y are swapped this is either a firmware issue where pins are swapped or possibly stuck in homing mode like @LsrSal is indicating.
You may want to review the cables in case it was assembled incorrectly.
Can you run these commands in Console and return results?
$I
$$
$#
?
Can’t now… tried to reload the firmware ROM.bin and now it won’t talk… guess I’m too tired to be doing this… I’m shutting down till tomorrow…
Catch y’all tomorrow… thanks
![]()