Got the 30 watt Neje mounted and running ramp test…
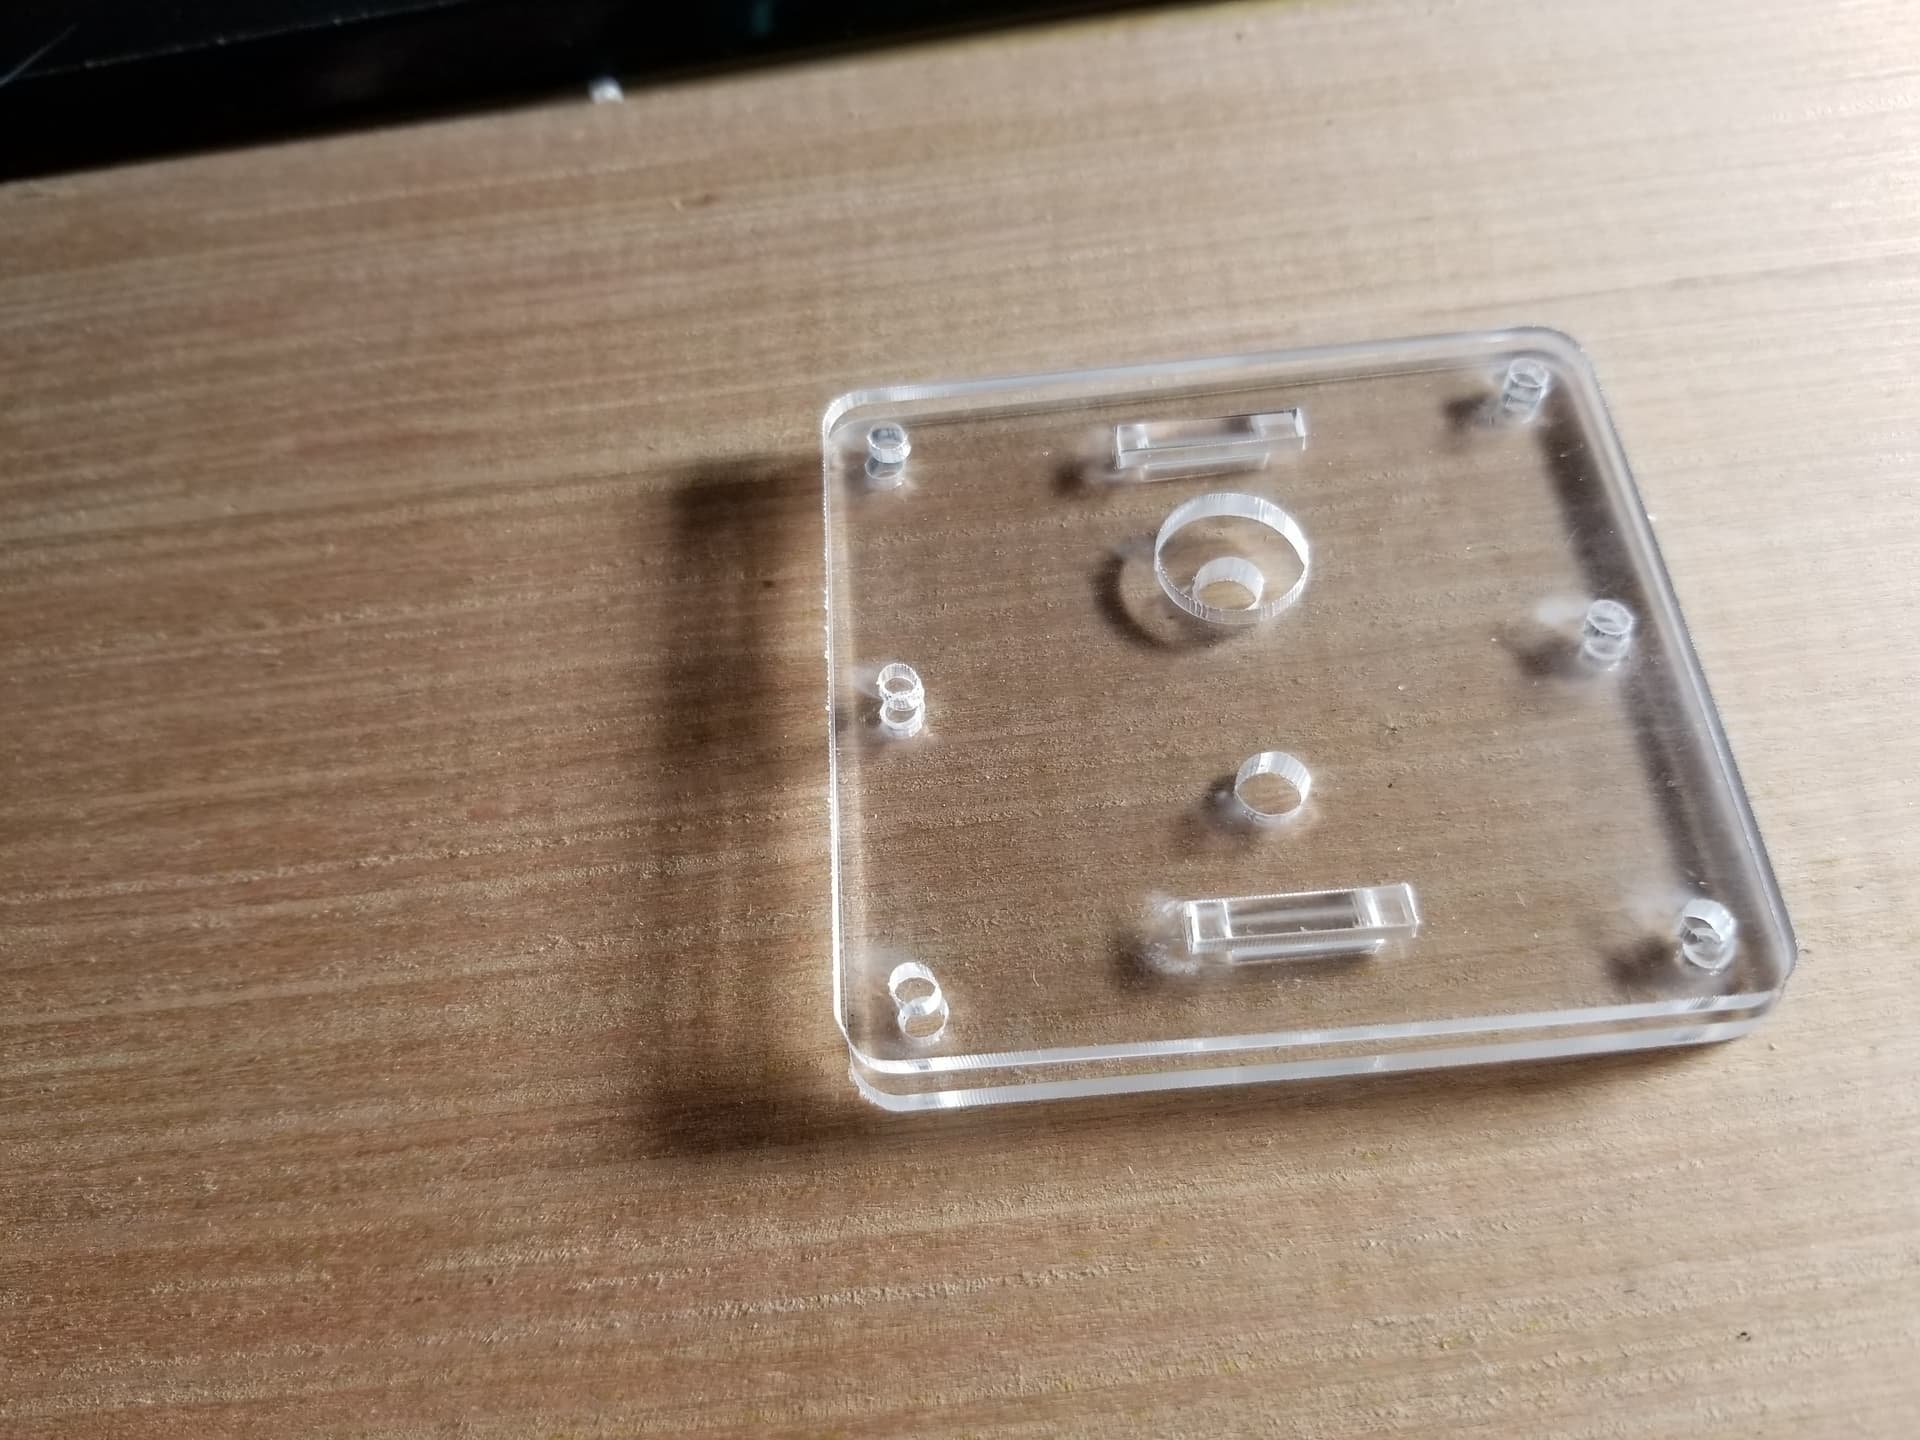
Acrylic mounting plate…

Kind of hacked into operation… High tech board mount — double sided tape on the motor…

Sandwiched pair of acrylic plates…

![]()
Got the 30 watt Neje mounted and running ramp test…
Acrylic mounting plate…
Kind of hacked into operation… High tech board mount — double sided tape on the motor…
Sandwiched pair of acrylic plates…
![]()
I have that same Neje head and I’ve found the optimal height is about 20mm off the work surface to the bottom of the aluminum housing.
You’ll notice, it’s built up… Lower the legs or raise the floor…
Thanks for the measurement, seems about like what I’ve got…
![]()
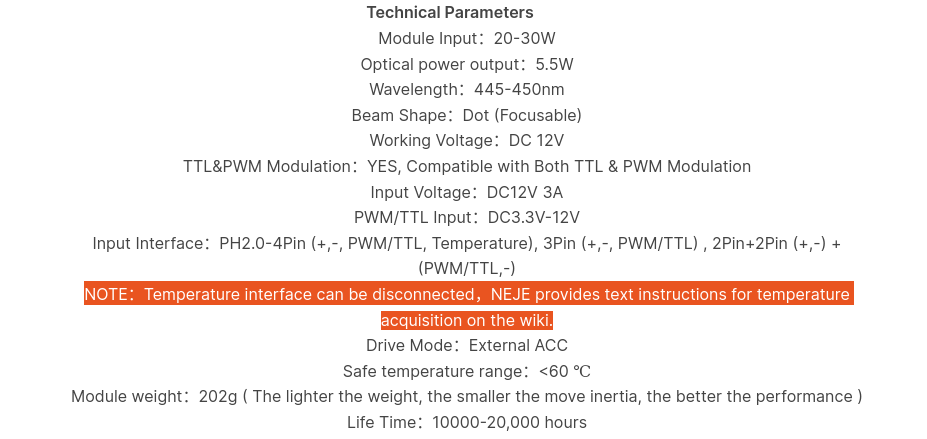
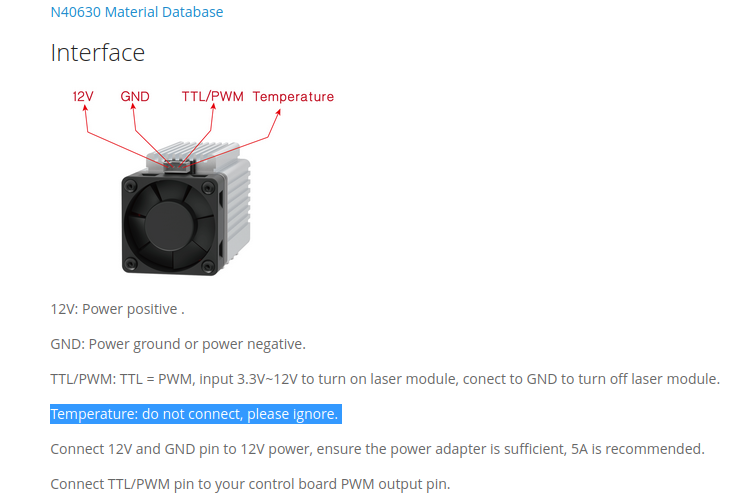
Found the technical data for the 30 watt module… Has a temperature output and the Neje site states the information is on the wiki…
Here’s the wiki…
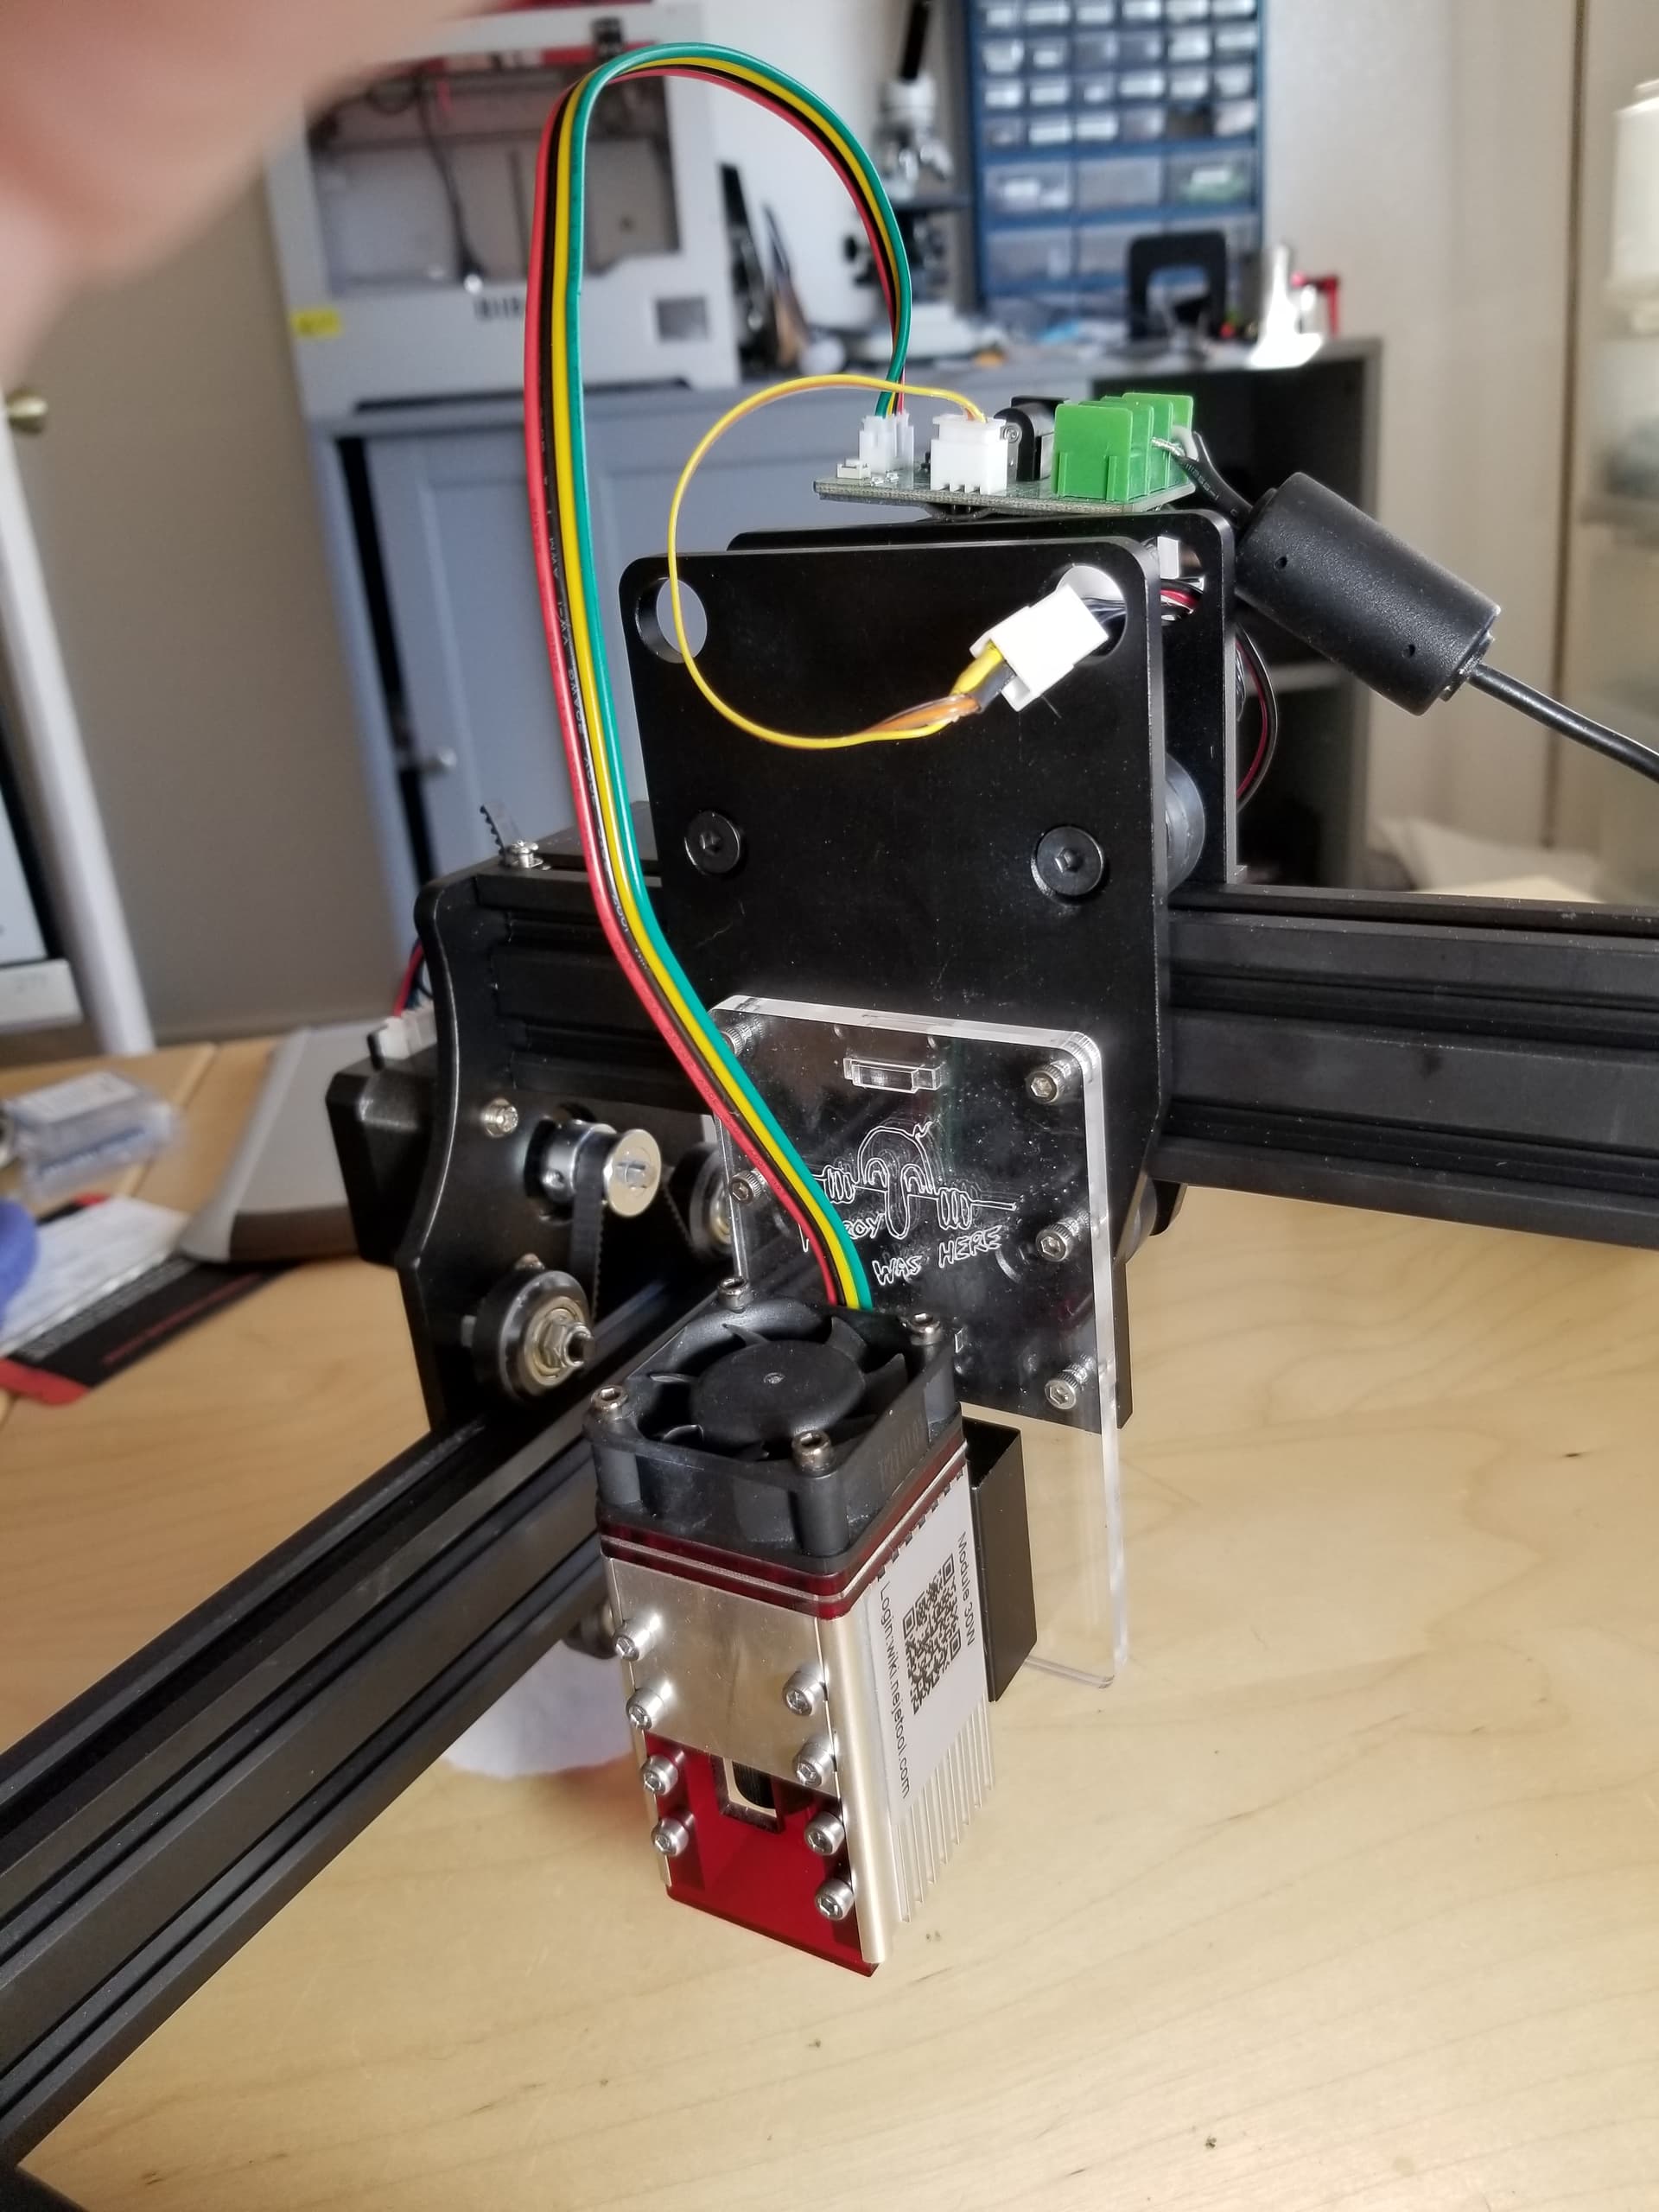
Managed to ‘extend’ the plate by 55mm and it’s working… Have no idea if I’ve created “the great pendulum.”
![]()
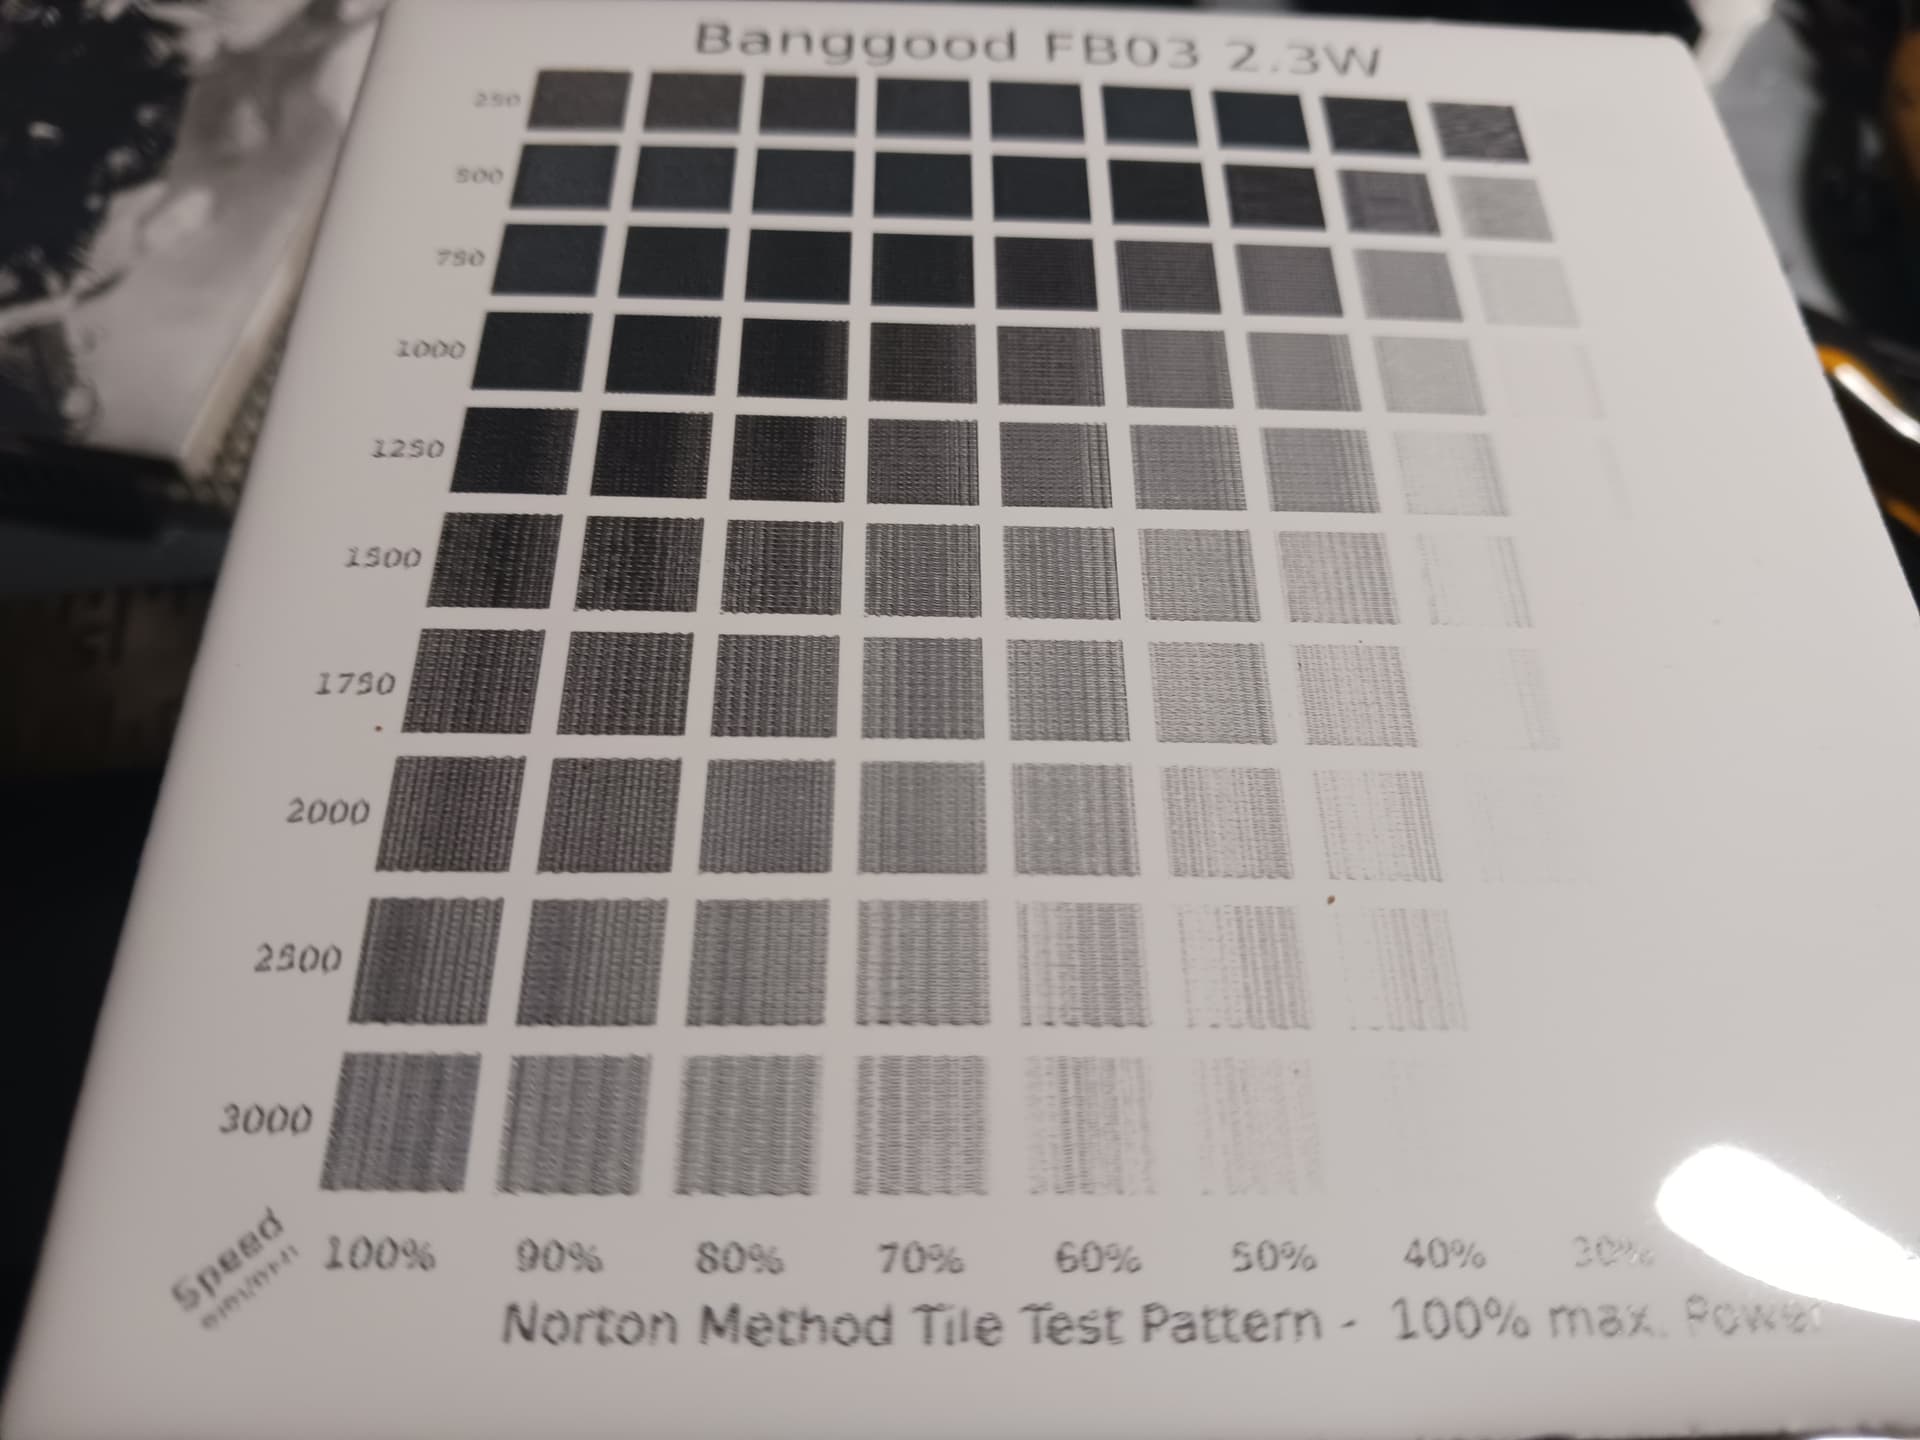
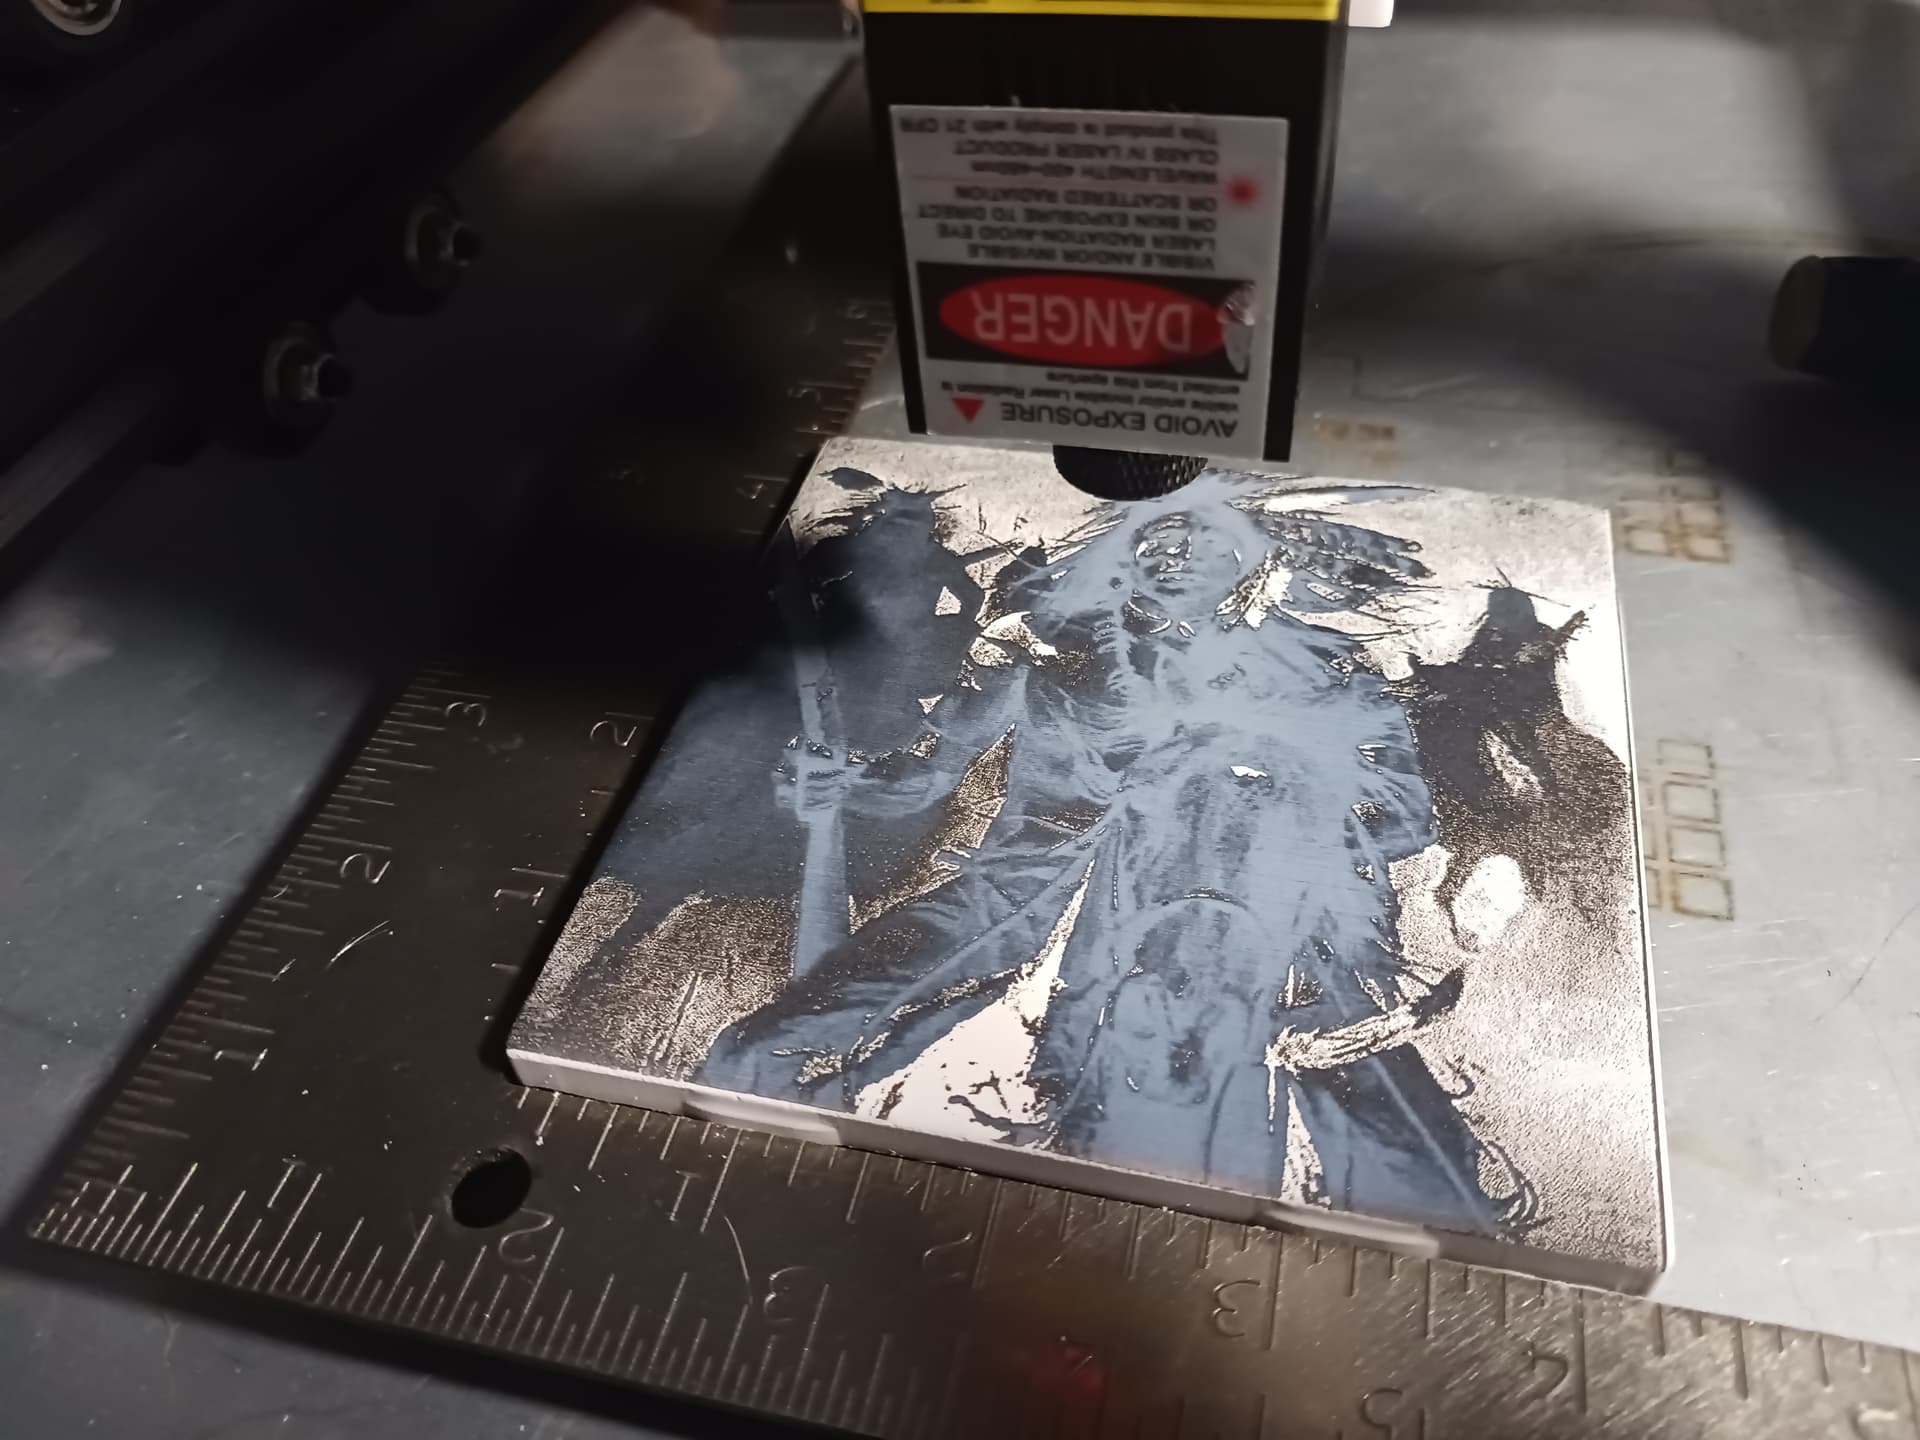
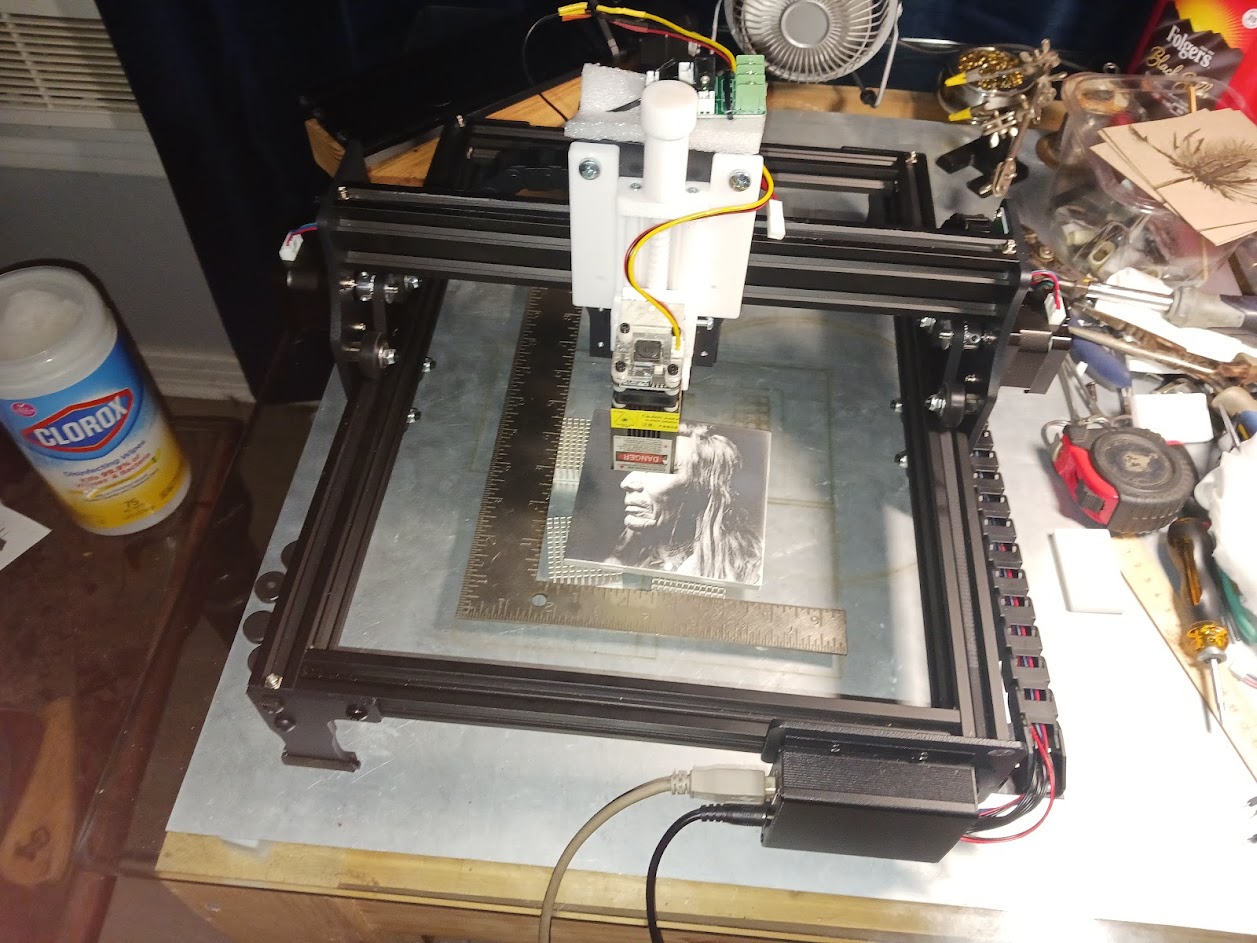
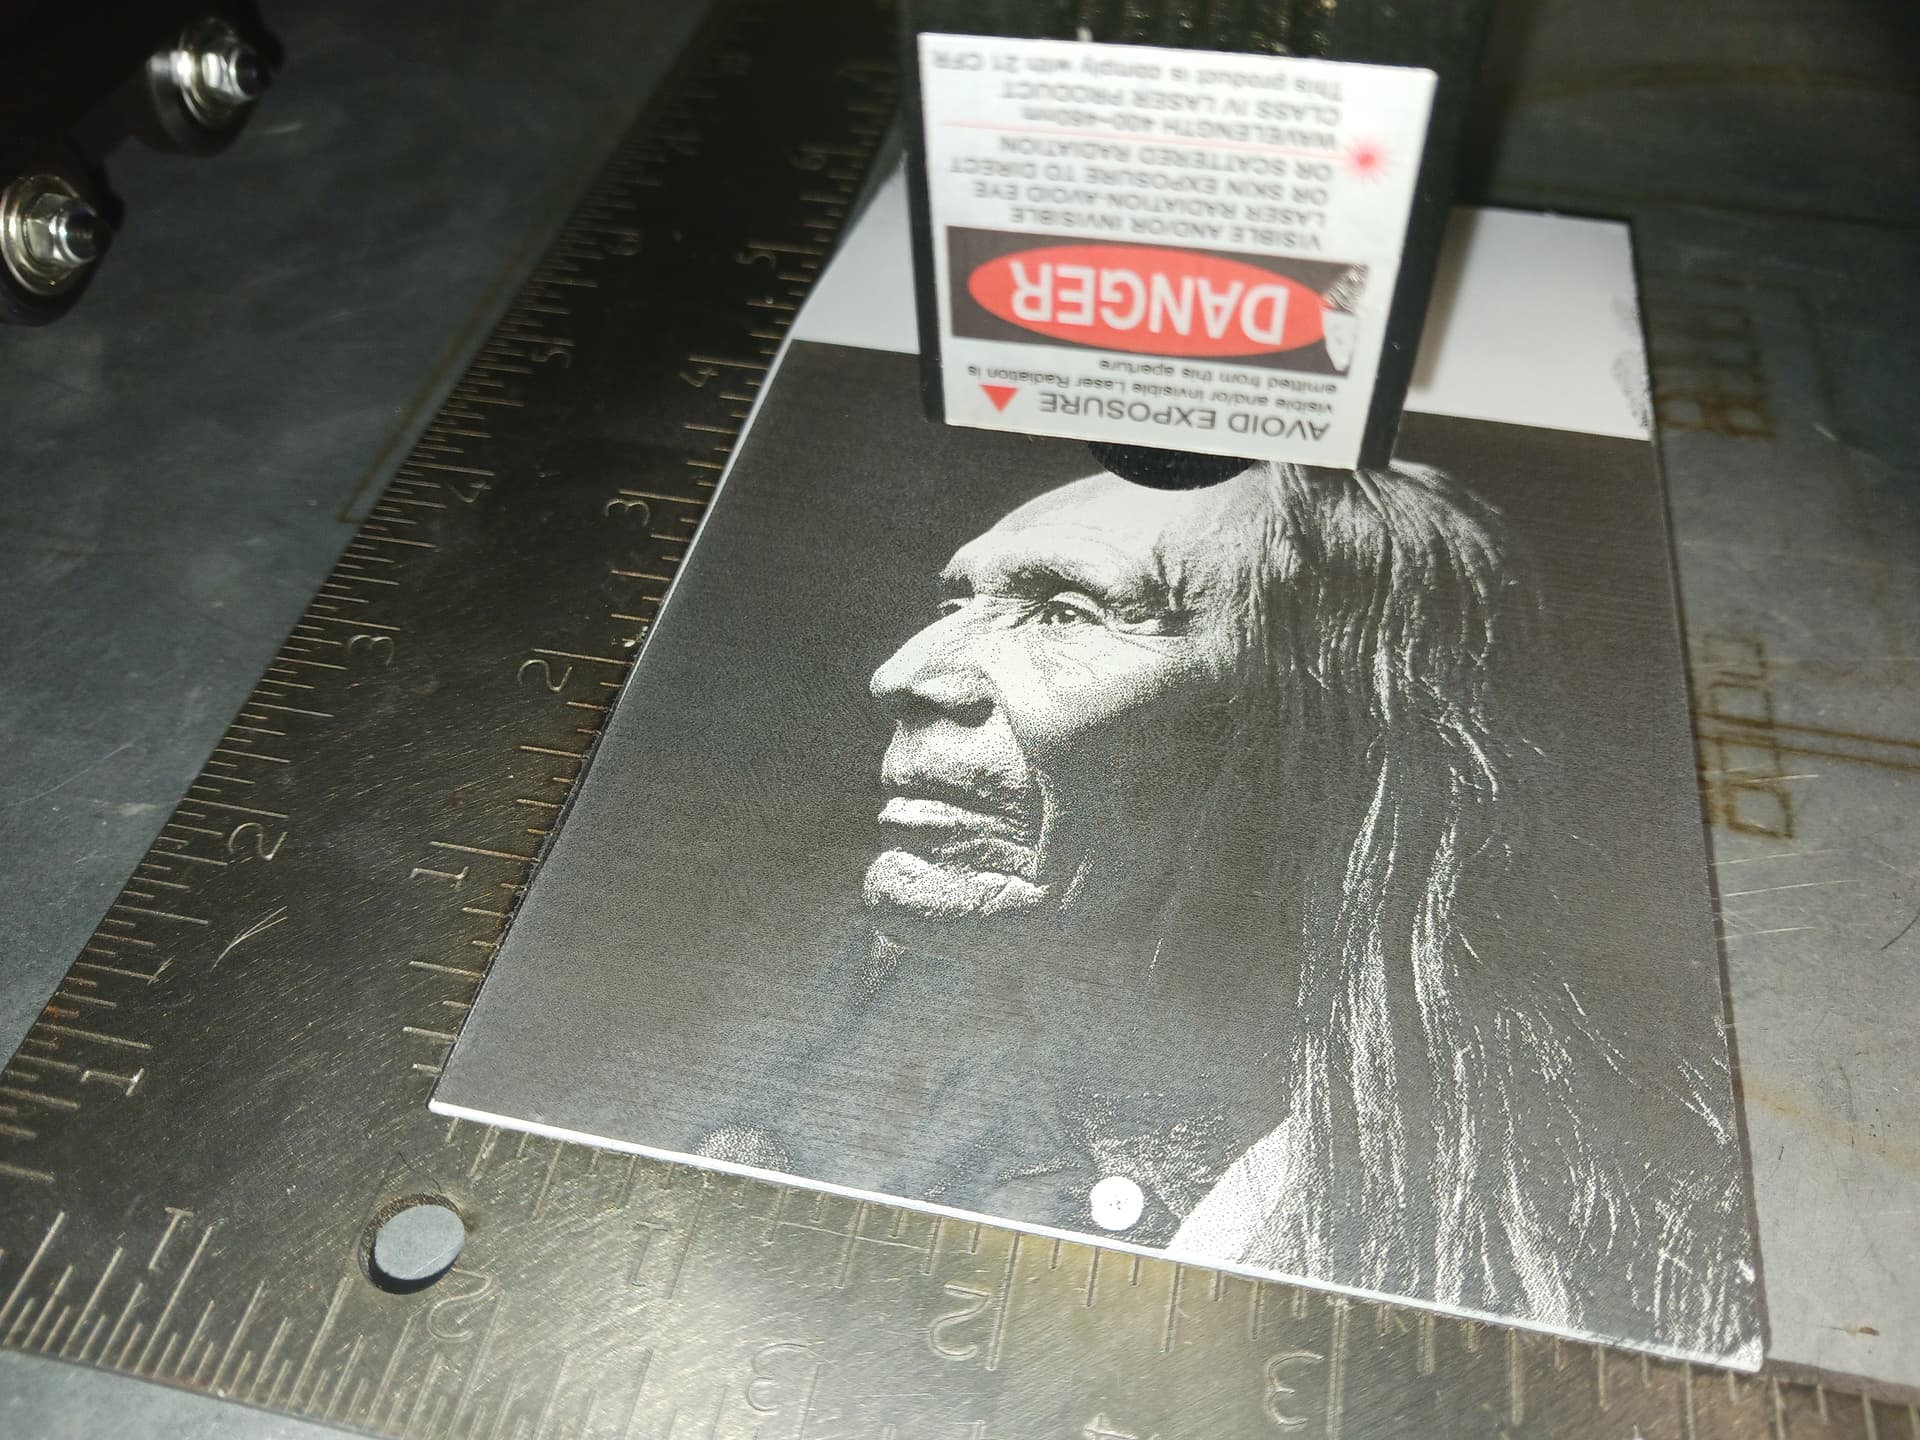
I’ve also been playing with different laser modules on our $79 machine. Here I’m using a little Banggood 2.3W laser to do a test tile and image… lasered and before paint (I’m using Krylon Colormaxx flat-white) removal
Paint removed… best black seems to be 1000mm/min and 100%…
Image lasered leaves dark, muddy/sooty, image before paint removal. I have a small personal fan blowing gently across the work surface to clear smoke/soot away from the laser lens to avoid fouling…
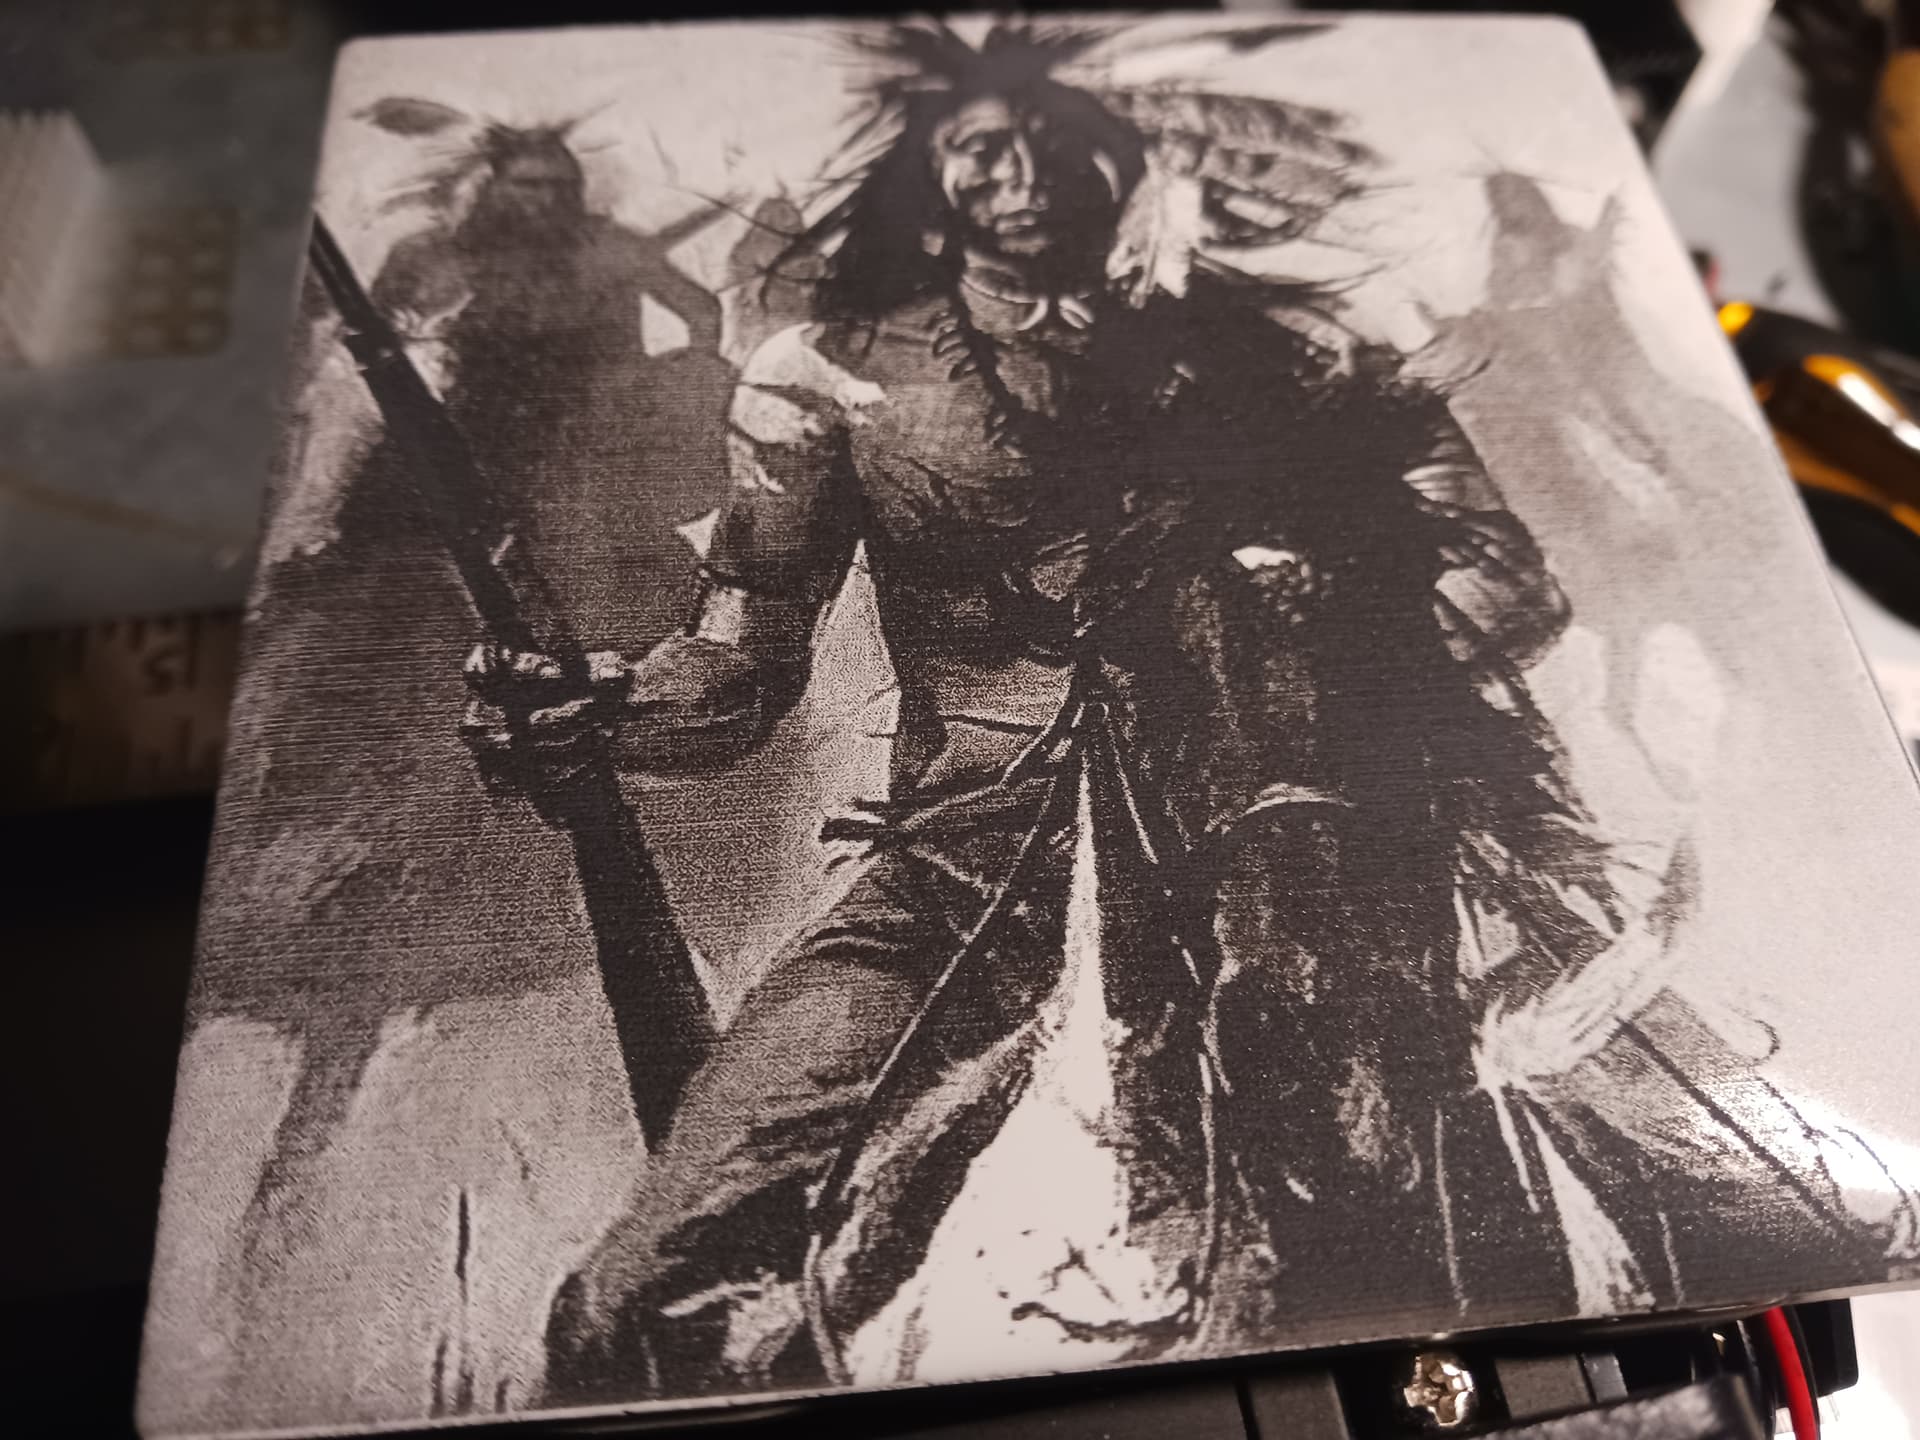
Paint/soot removed with acetone leaves pretty good image of my “warrior buddy” on horseback…
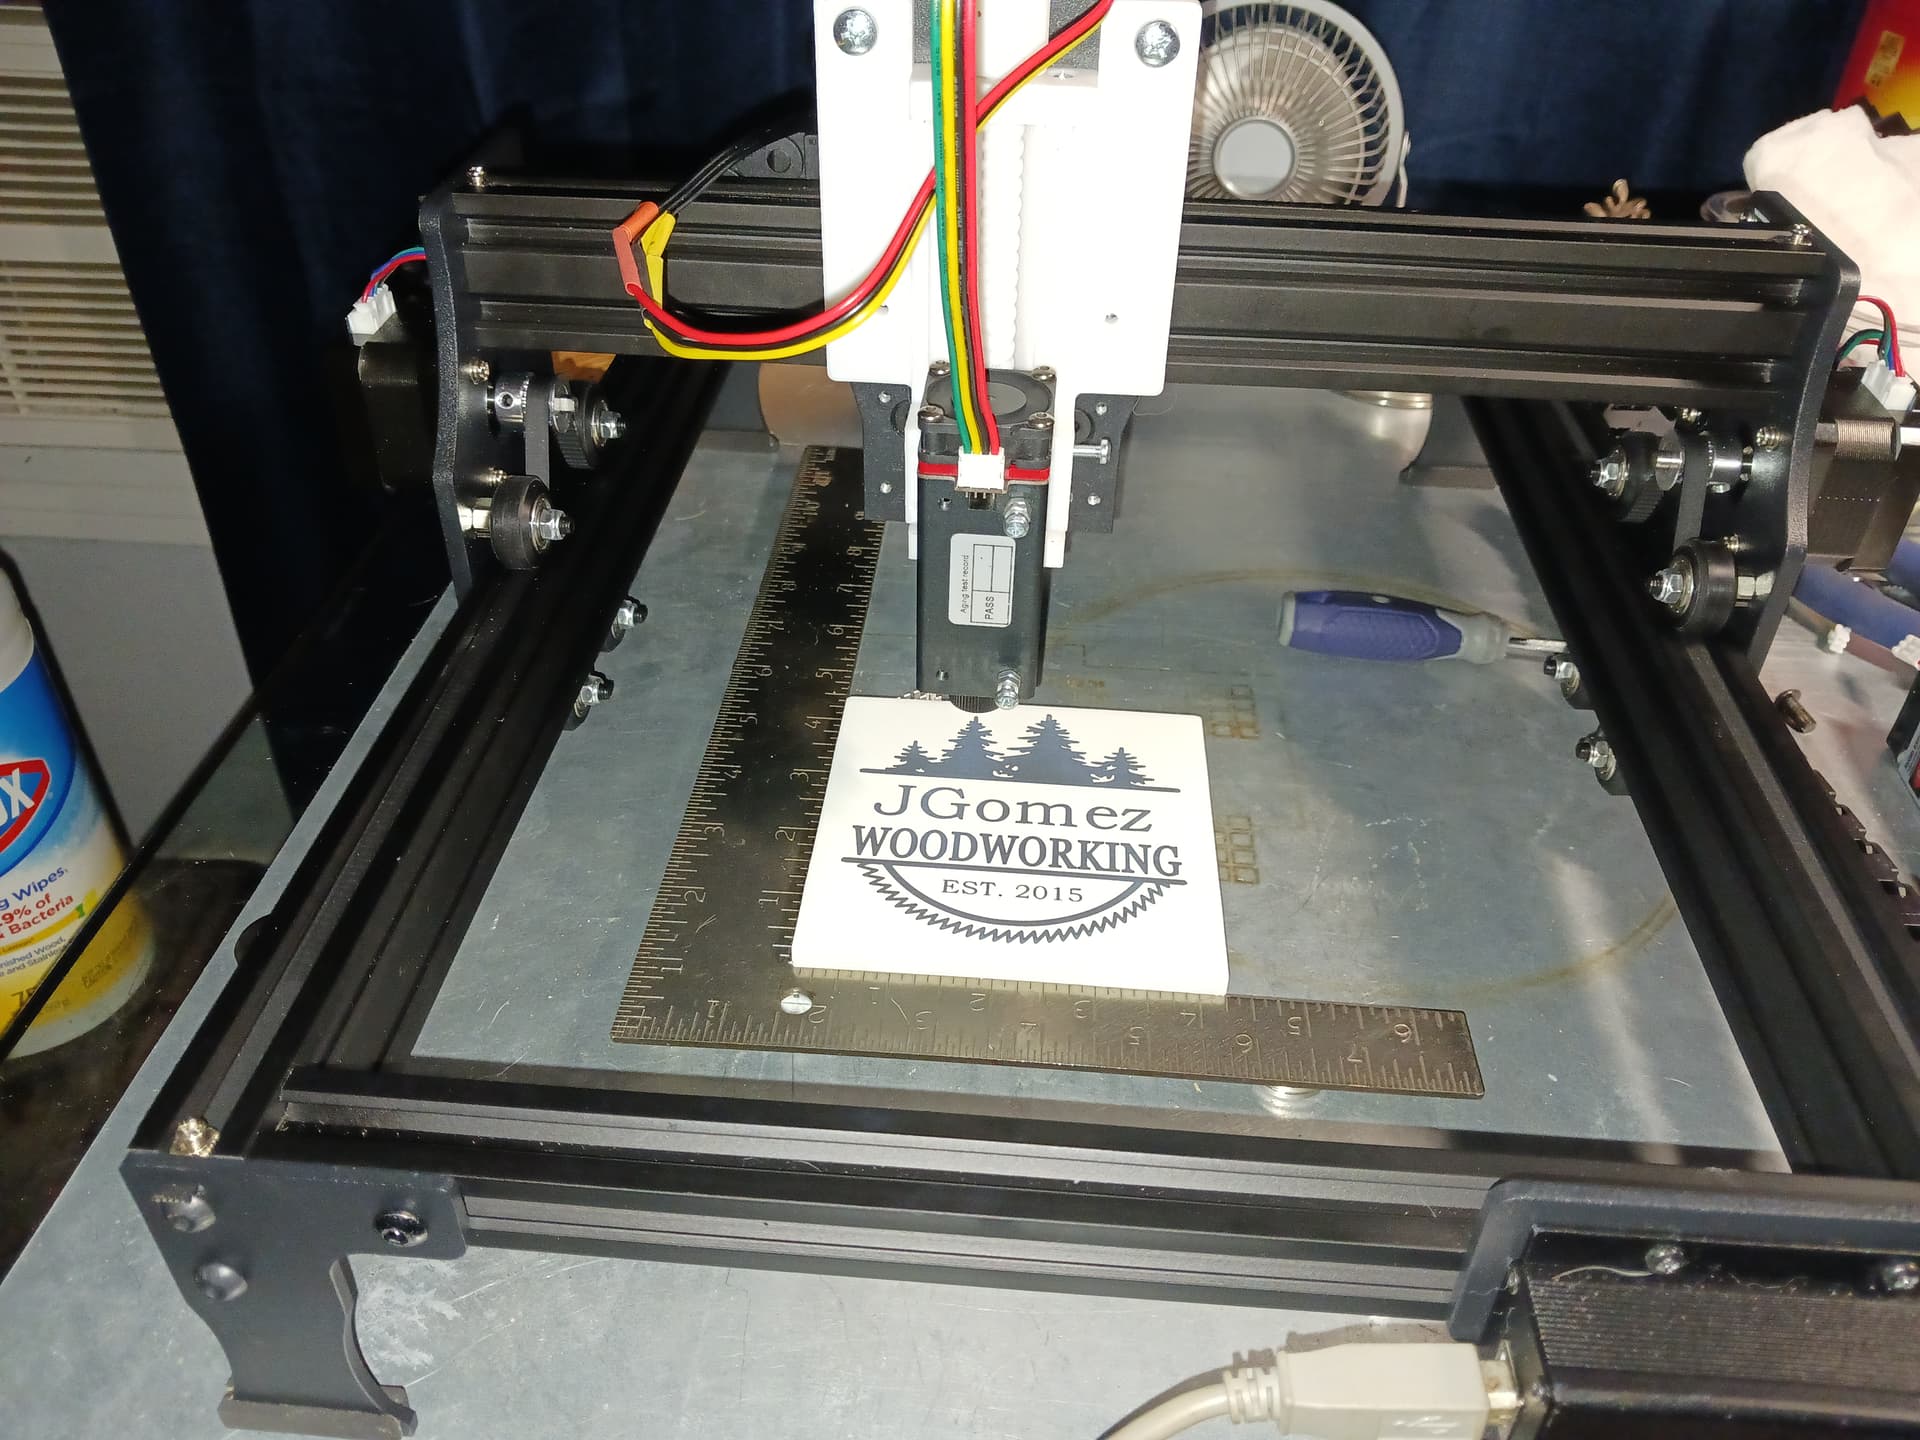
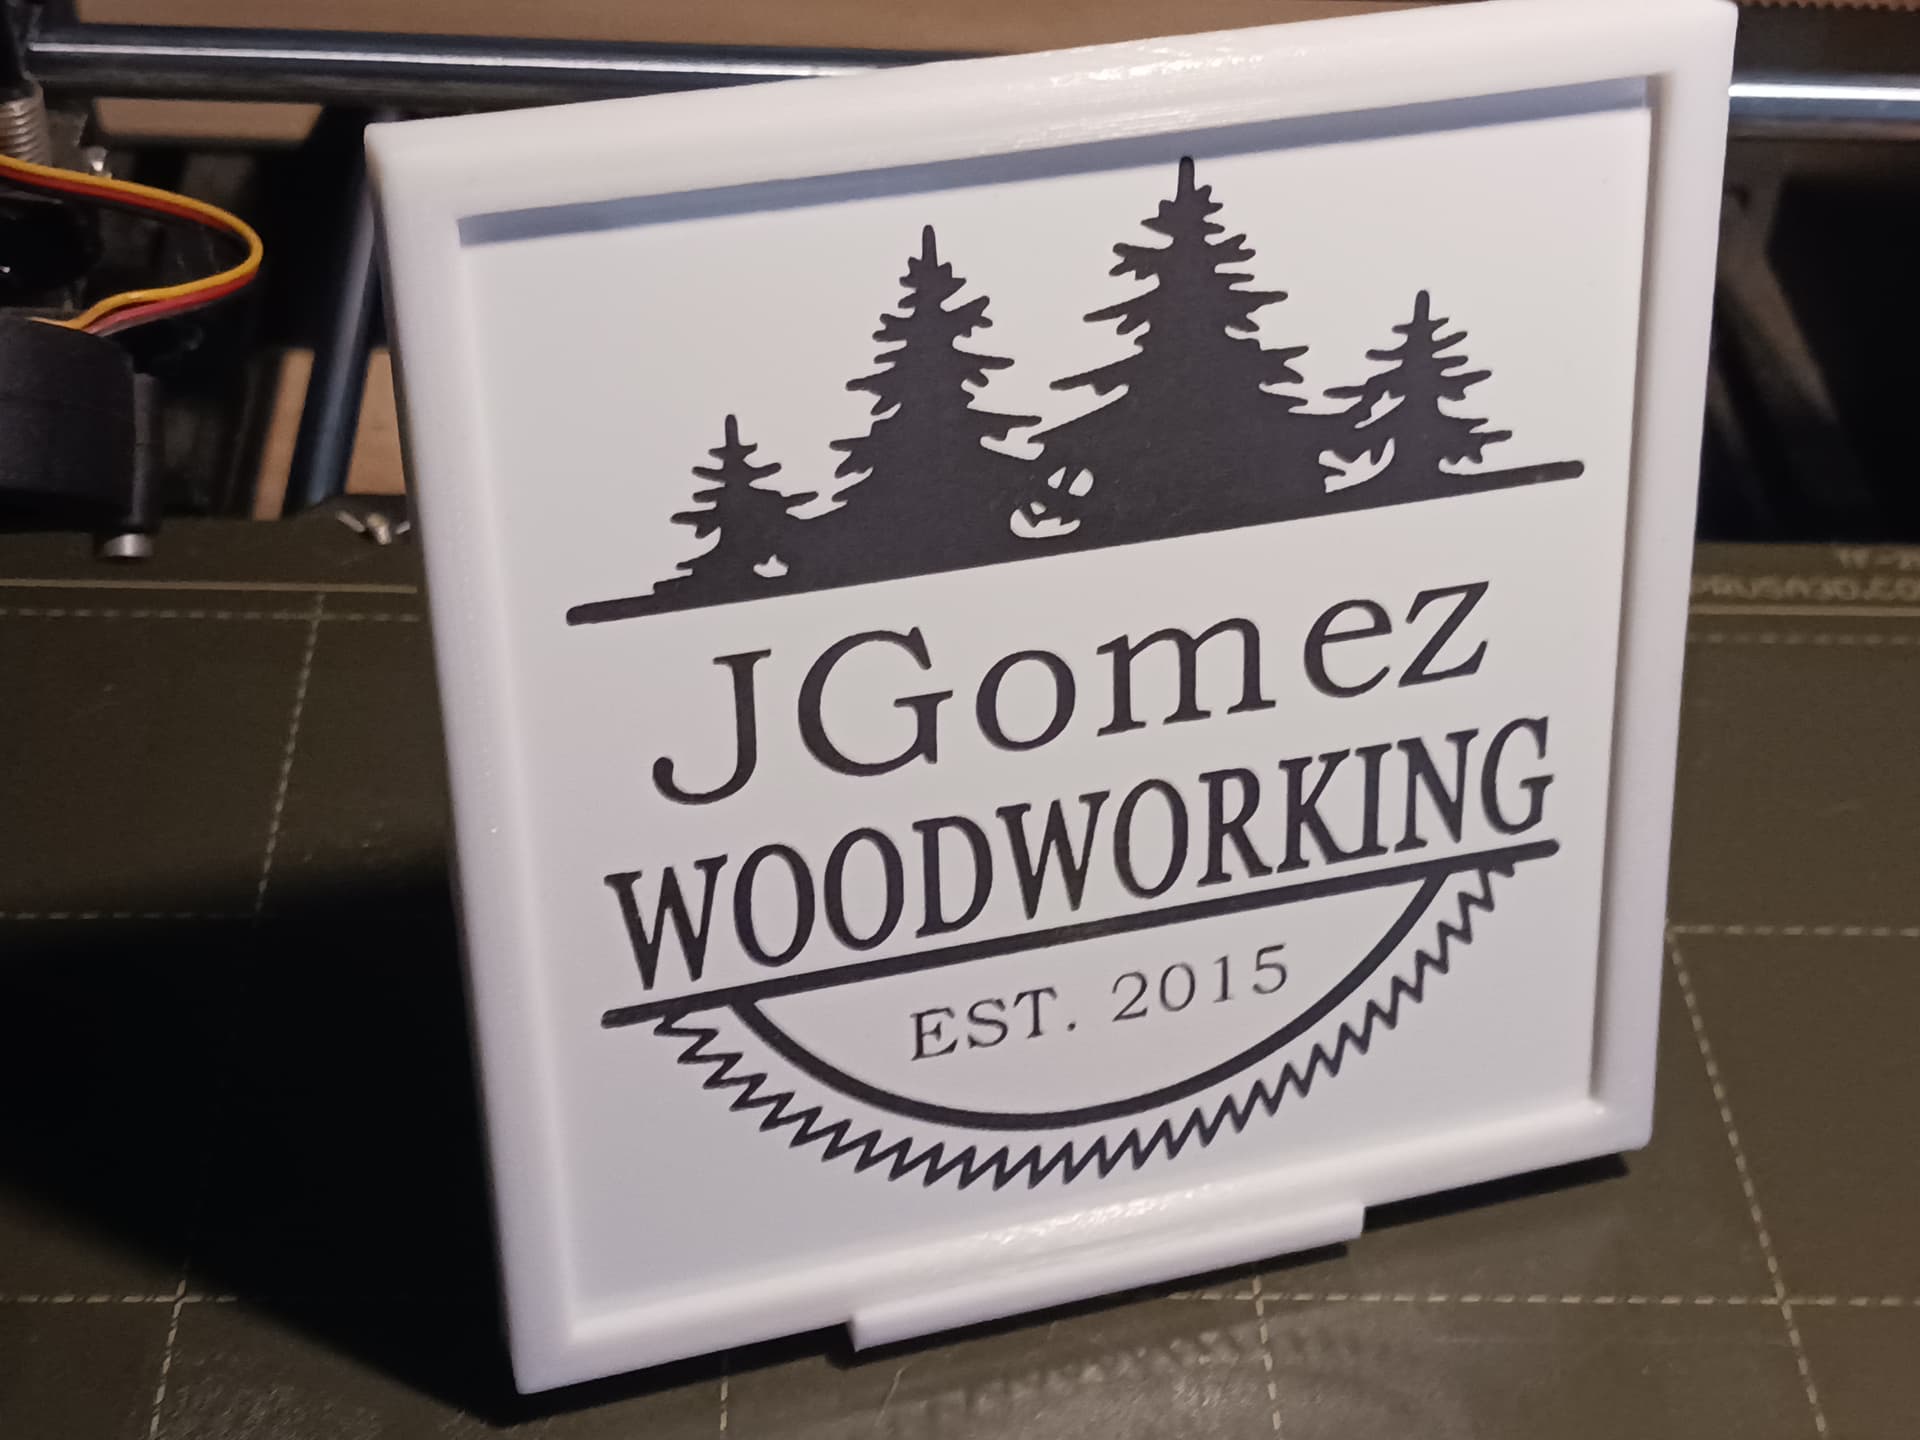
Different laser… Neje 4W(?) laser with friend’s logo…
A little printed frame and stand to dress up the tile edges and present your work…
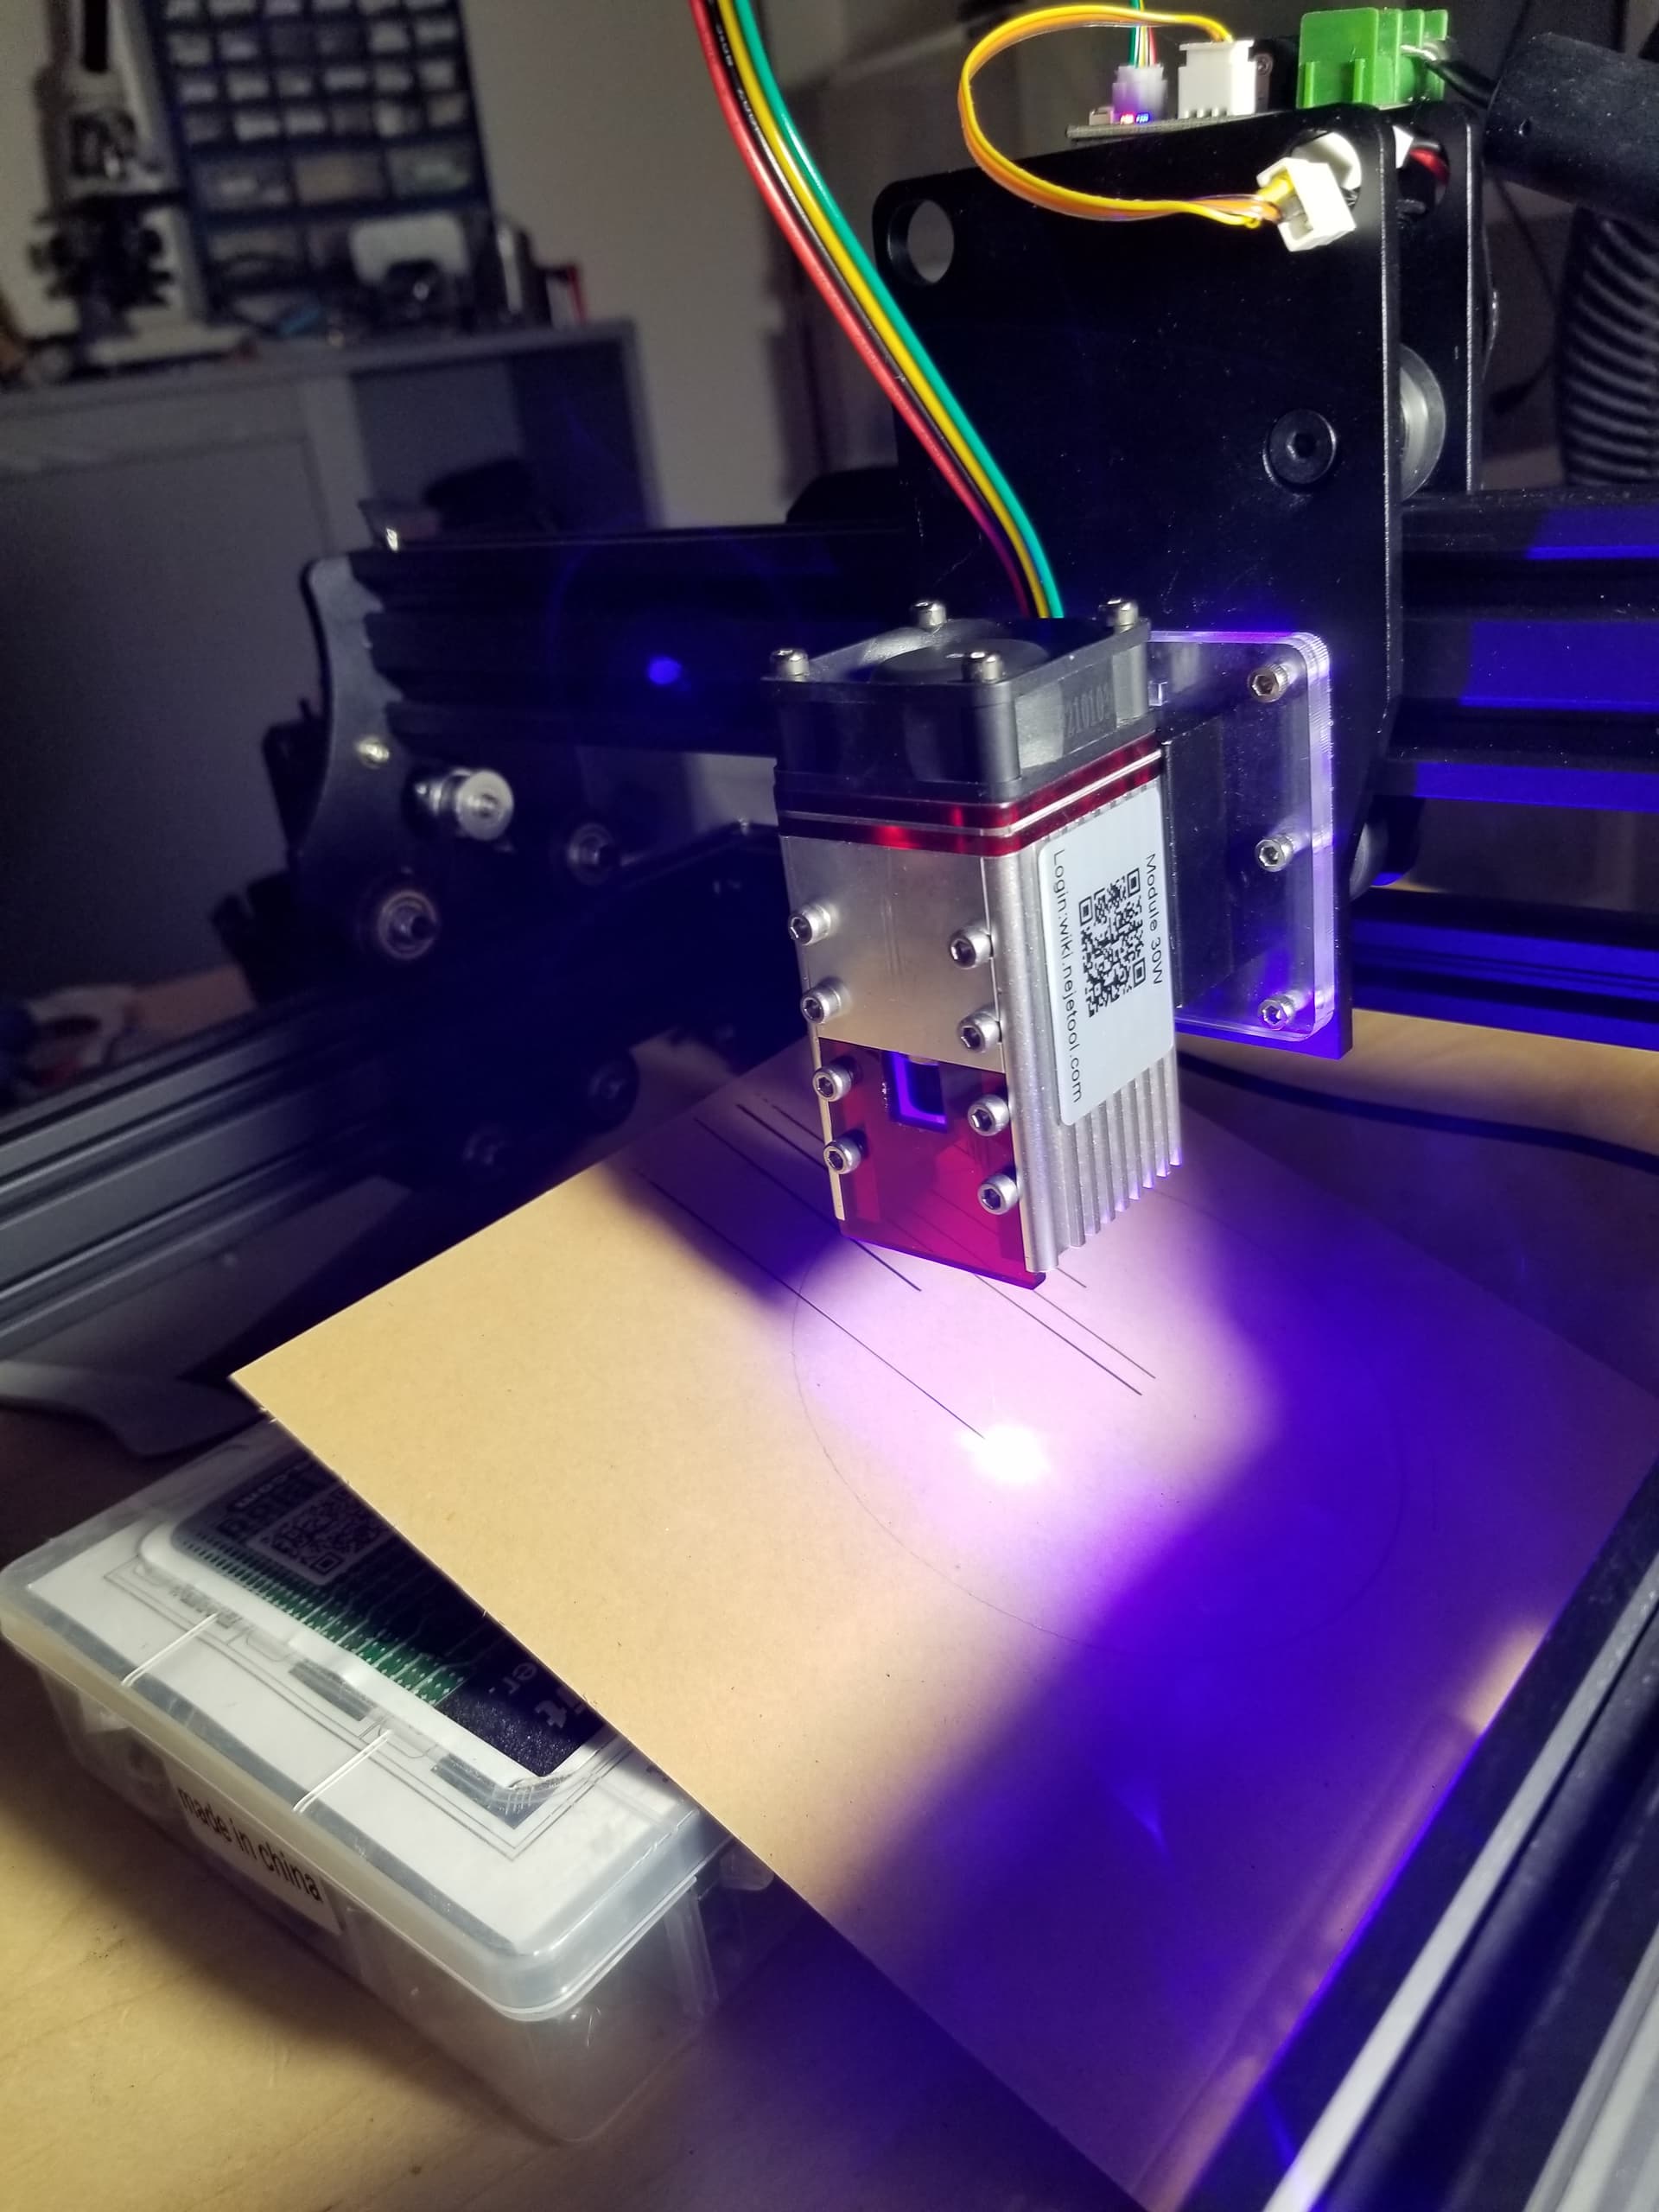
The included laser module kinda works but leaves a lot to be desired. I chopped off the funky connector and soldered on a 3-wire pigtail and now it’s pretty simple to swap out laser modules. Just keep up with which of the black wires match up to the red/black/yellow (+12V/Gnd/PWM) wires of the old laser before you chop off the connector ![]()
– David
Folks, while digging some specs about this board to be able to set proper hardware map for firmware, I have dig out some specs in Chinese. A5988 used on this board appeared capable of 1/32th uStep. I did not publish this info earlier, pending my confirmation. I finally able to find time and do the mod. I can confirm that this is in fact are 1/32th capable drivers. Why they did not use that as a default - probably will stay a mystery. With some trace cutting and jumping it so not very difficult to get that max step resolution.
I understand that this might be not for everyone, but as I see most here doing tiles with dithering - this will effectively quadruple dot density, that may yield visually better rendering.
I think this mod is a free upgrade that makes it technically superior to any board with 4988 drivers.
See my firmware thread for details.
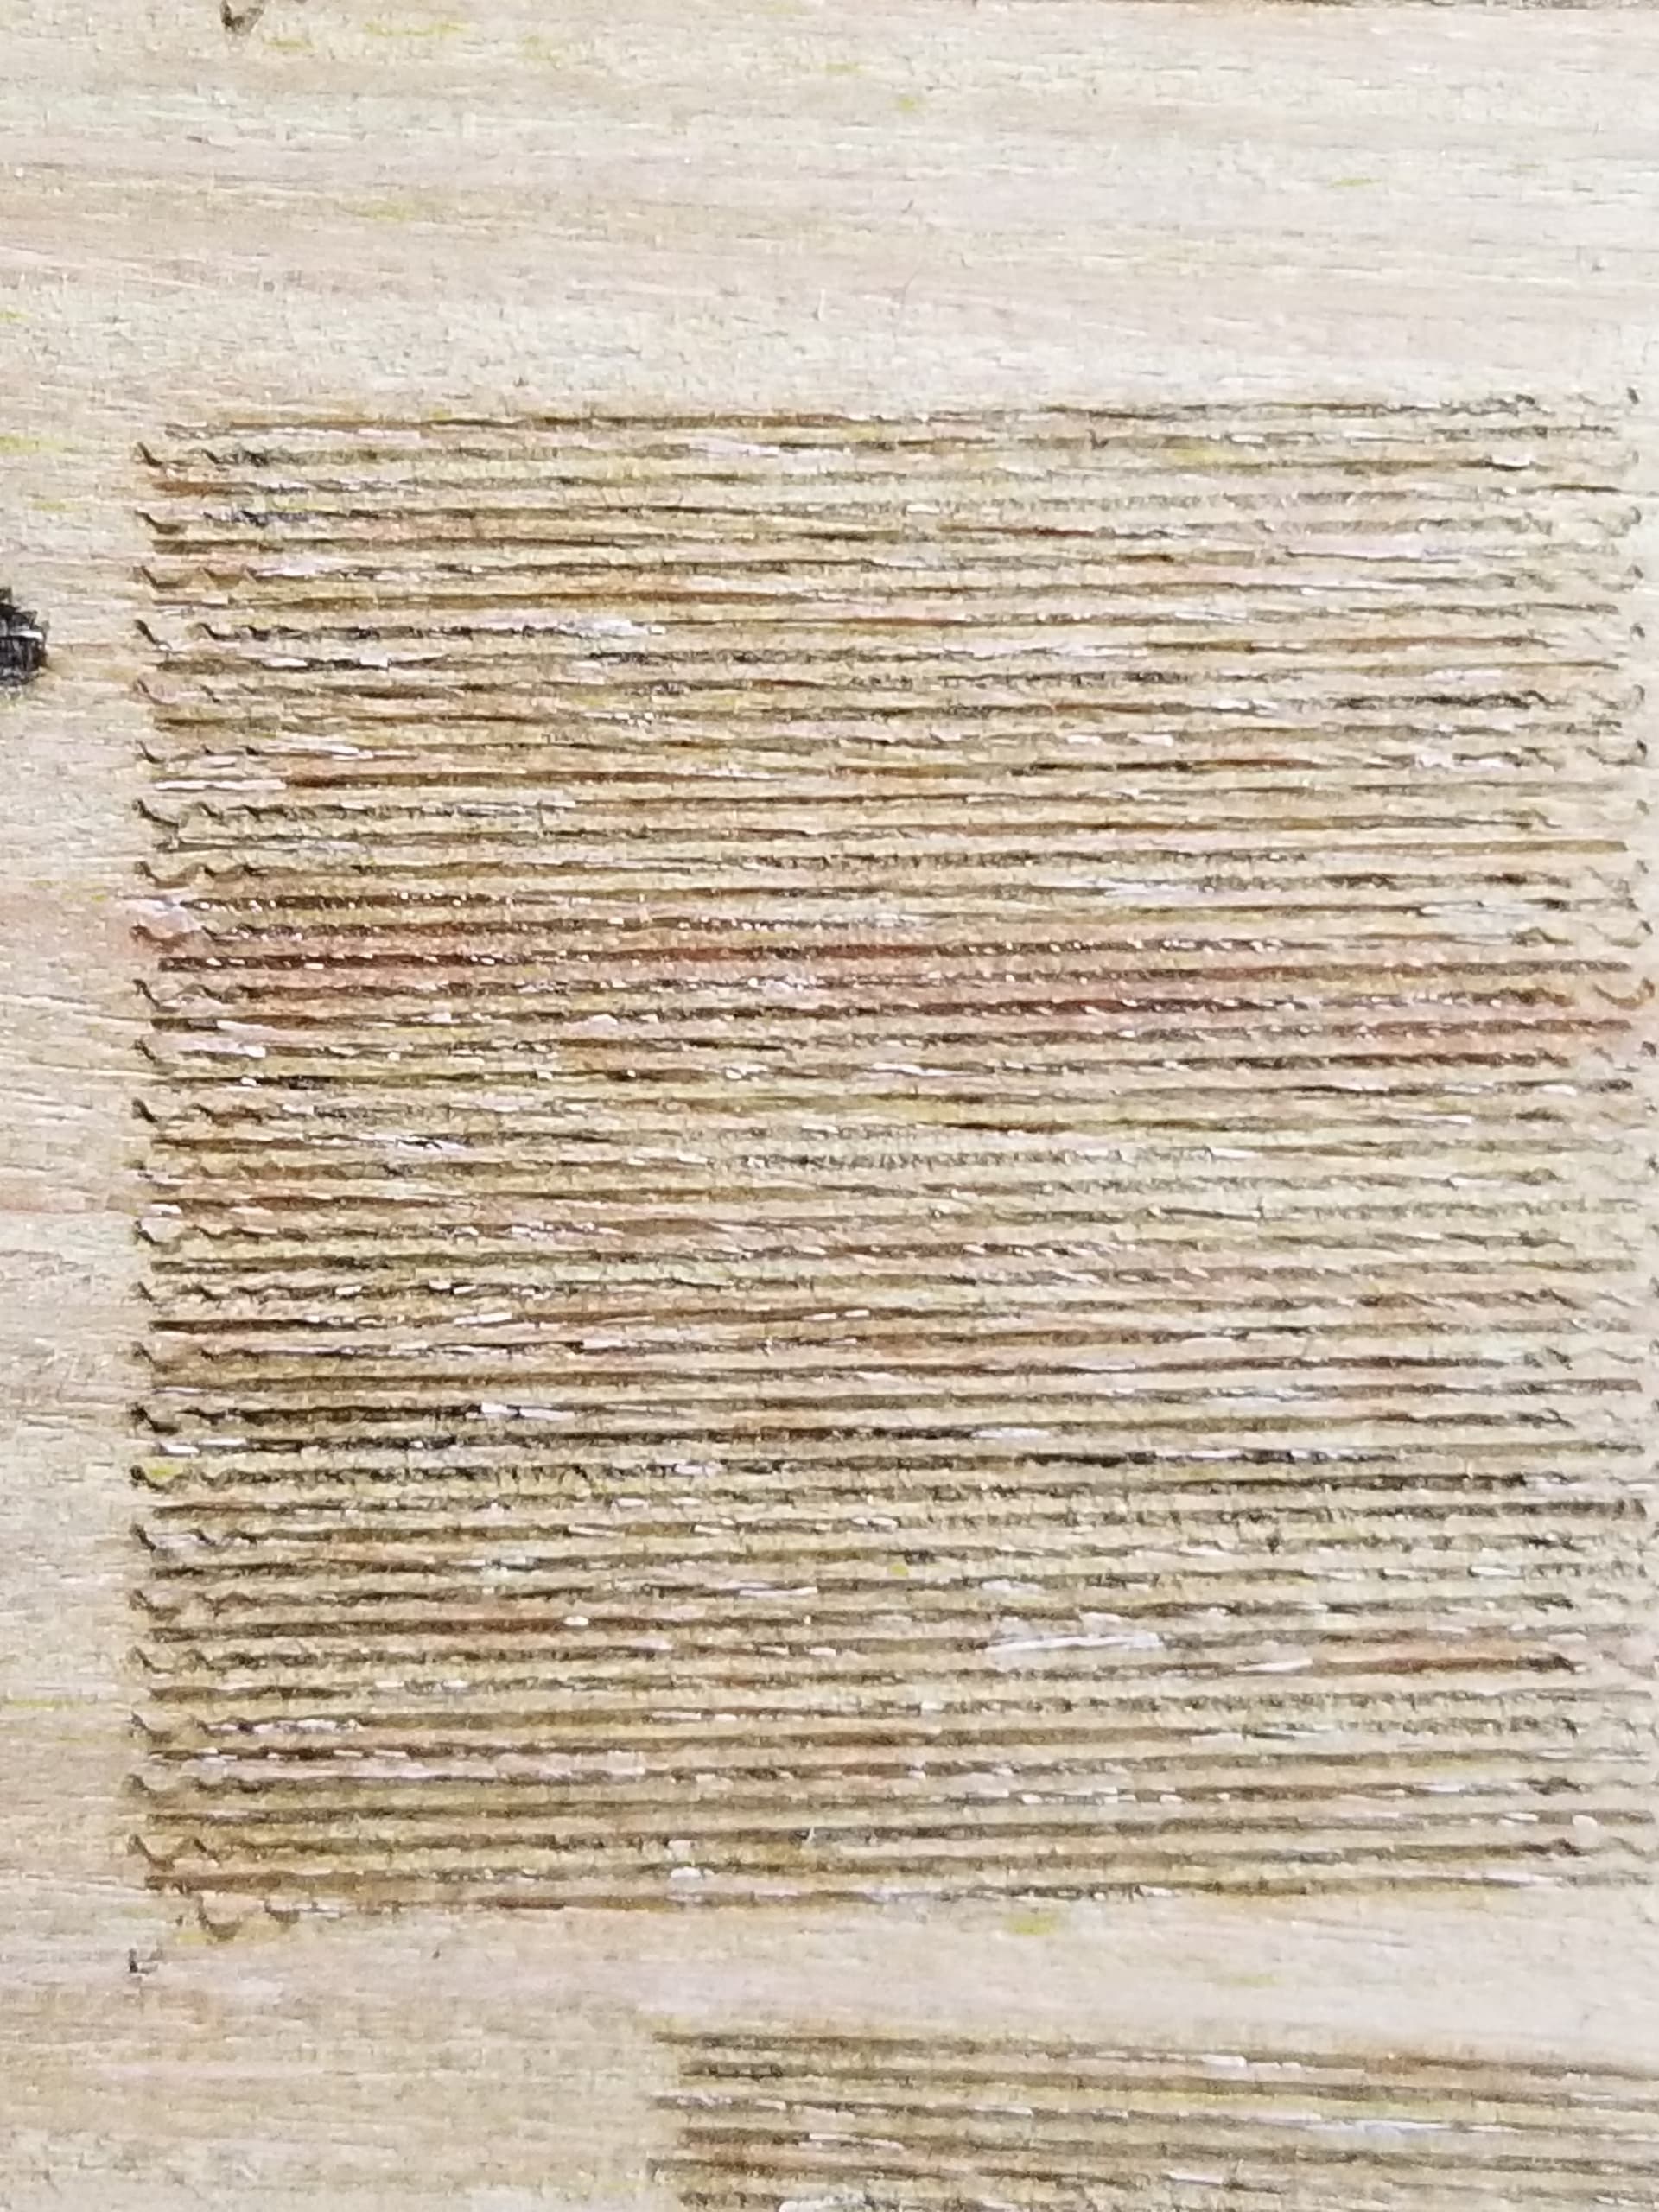
After replacing the original laser module with a little Banggood 2.3W laser, I’m getting a bit nicer results with it… it’s a fun little machine to play with!
1000 mm/min, 100% power, 300 dpi, Atkinson… it’s sooty, before paint removal. I keep a small personal fan gently blowing over the worksurface to clear the smoke/soot away from the lens to avoid fouling…
After complete paint removal with acetone… then washed with dish soap, like a dish…
– David
David,
Is that a “plug and play” module.
Or did you have to mess with the wiring?
I think he has his setup similar to mine in post 244… You can see the control board on the X carriage.
Mine is a 30 watt Neje…
Has anyone with this machine tried to tighten up the Y wobble on the head?
![]()
From my post above…
Shown here, to buy some slack, I pulled the black 3-wire ribbon cable back a few links in the cable chain and chopped off the connector, after marking with colored tape which black wires matched up to the +12V/Gnd/PWM wires on the original laser module. I then spliced on a 3-wire pigtail with the XH2.54-3P connector commonly found on laser modules and/or their adapter boards, as shown here with a Neje laser module.
or directly to this Banggood 2.3W laser…
I’m sure most folks can do a neater wiring job than I’ve done here but I have a “stable” of Neje, Banggood, and Eleksmaker laser modules that can now be readily swapped out as desired.
Hope that helps. It’s not plug-and-play… but not too difficult either.
– David
Hi Jack,
Yes, I read that post but it looks like you had to do some rewiring and mess around with a control board.
I don’t know anything about that end of it and was hoping to find a module that would simply plug in the existing wires and run off the existing controller.
BTW I don’t detect any wobble in the head.
Short wires and the odd connector are about all that keeps this from being near “plug-and-play”. The spliced-in pigtail to lengthen the wires and use the more common XH2.54-3P connector is all the “messing with the wiring” required to make it far more adaptable to other laser modules.
With a common connector to allow use of better laser modules, a Grbl-based controller, and some kind of slotted Z-adjust… this little laser engraver is so close to being “perfect” IMO.
BTW not sure the Y-wobble, Jack. My laser module and mounting system is not exactly “rigid” but it’s also not so “sloppy” that I see it wobble around during engraving jobs, given the light tool load and relatively slow speeds.
– David
I have to set my overscan to 10% and it is not visible… Without overscan, you can see it wobble in the Y direction…
Here is a < 10 second video of the Y wobble.
This is no overscan
10% overscan…
About the best compromise…
![]()
Yeah, your video shows the wobble and it needs to be adjusted.
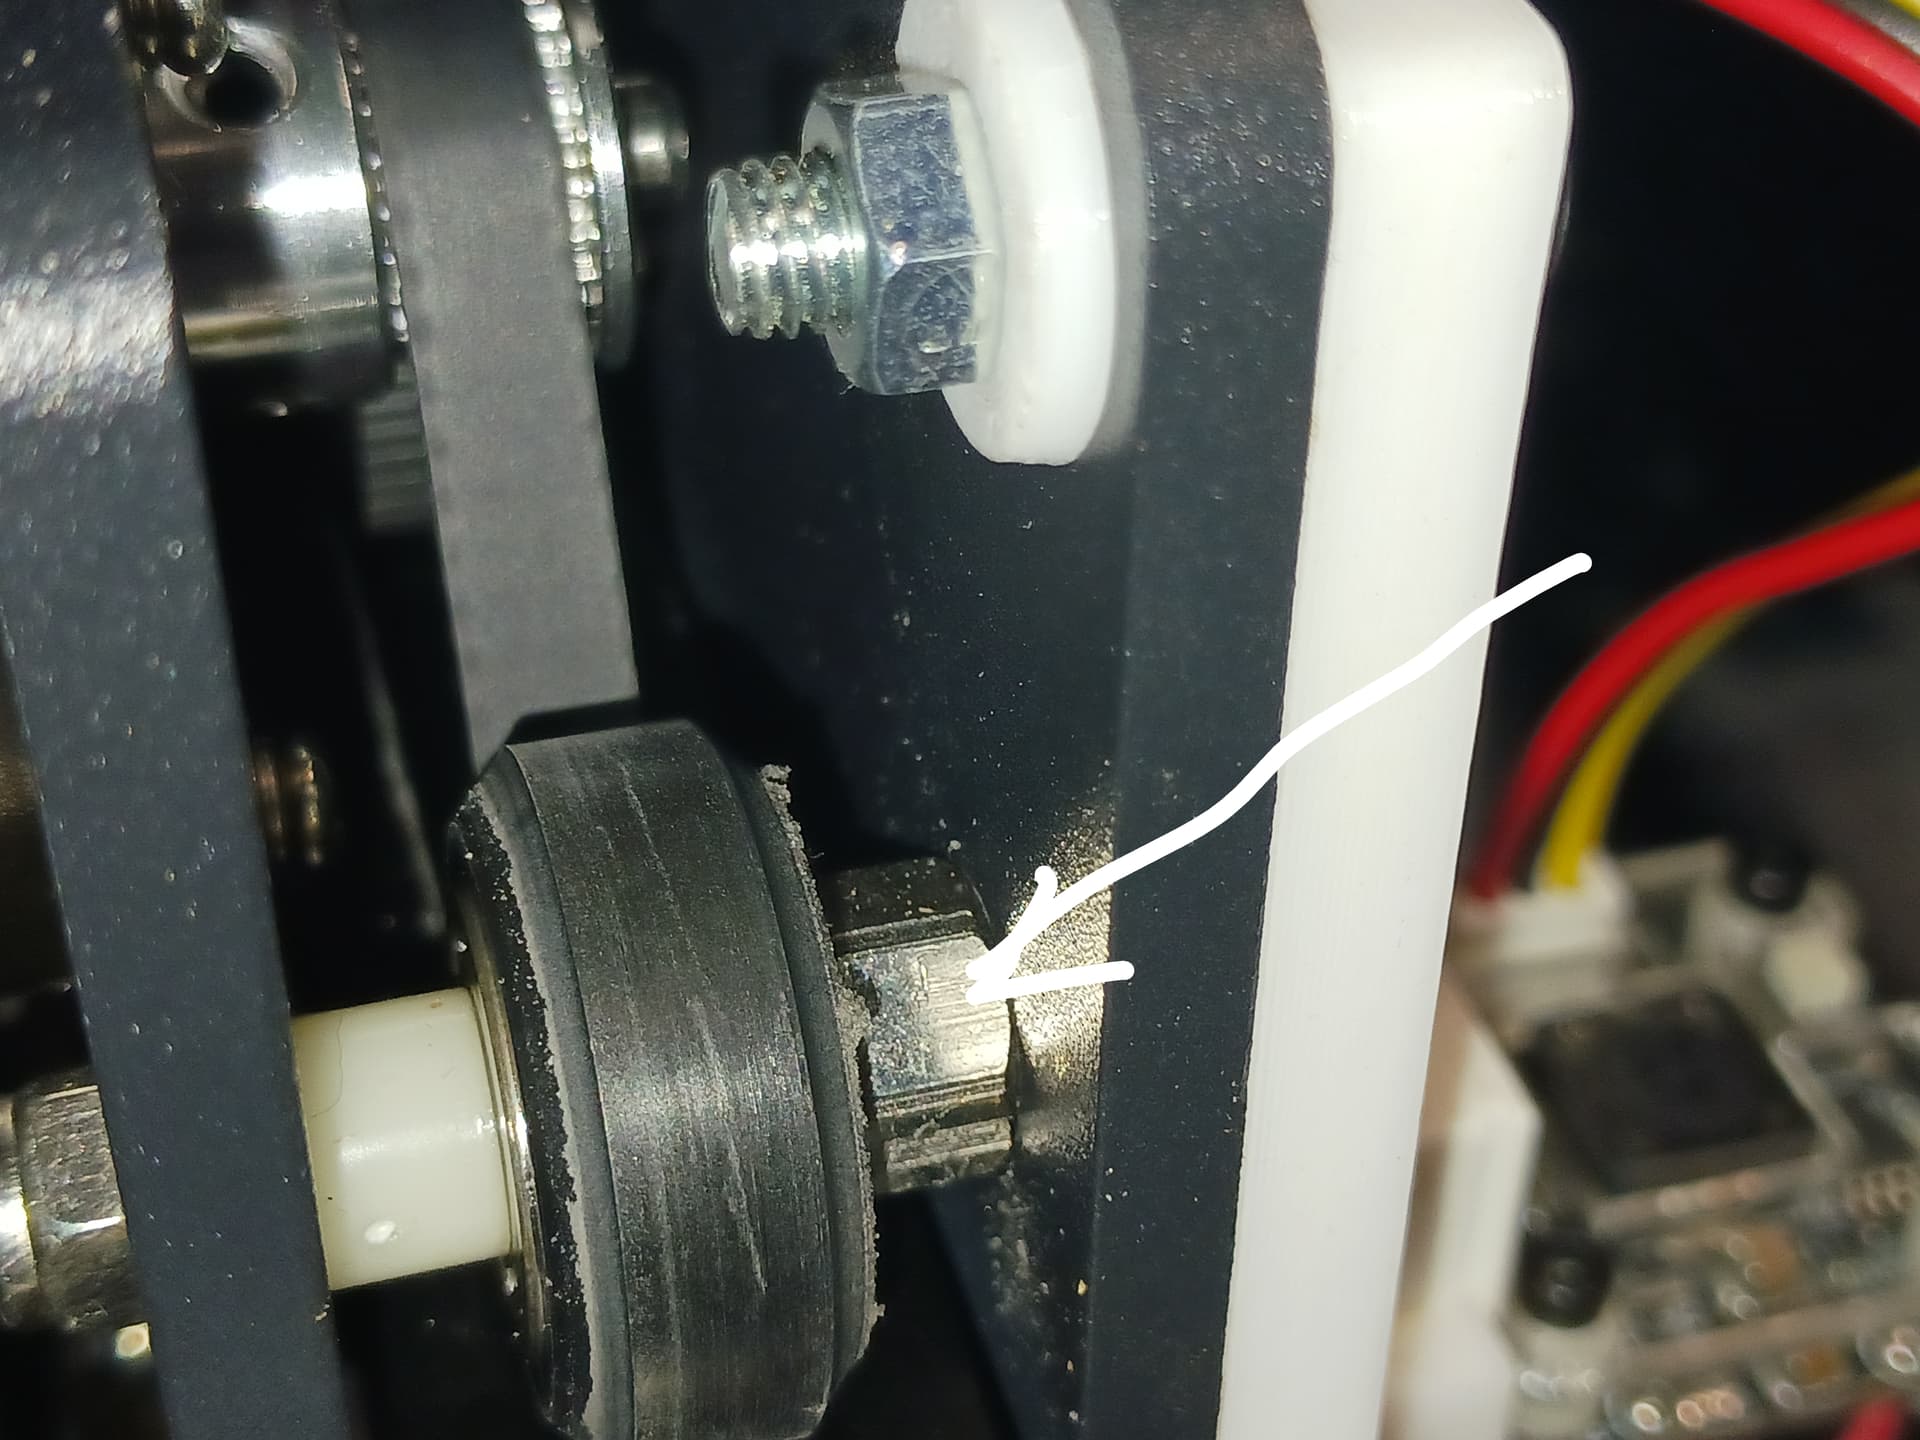
Note that the spacers on either side of the carriage’s four V-wheels are different… upper and lower. The lower wheel spacers are nylon and non-adjustable… and the upper ones are eccentric bushings and have a hex shape (under my white bushings).
Use an open-end wrench to adjust the wheels to be tighter against the V-slot extrusion.
You should be able to apply pressure from the bottom to push the entire carriage upward, away from the rail. As loose as yours seems to be, you should be able to roll each upper wheel freely with your finger. Now use the wrench to adjust the eccentric nut (< 180 deg) and keep testing with your finger until you feel the wheel just contact the rail and you detect some rolling resistance. Do that for both upper wheels and you should no longer see the wobble.
Note: you may need to slightly loosen the wheel/spacer “stack” to adjust the eccentric spacer.
– David
I originally tried this, I could see where the ‘wheel’ axes bolts go through the frame and it wasn’t in the center … and somehow didn’t get the desired results…
After a little bit with it, I took the slack out, so thanks for the information… It’s much tighter now, so I guess I’ll have to go back a do the overscan/scan offset again and fix that…
It’s been lose like that since I got it…
Thanks
![]()
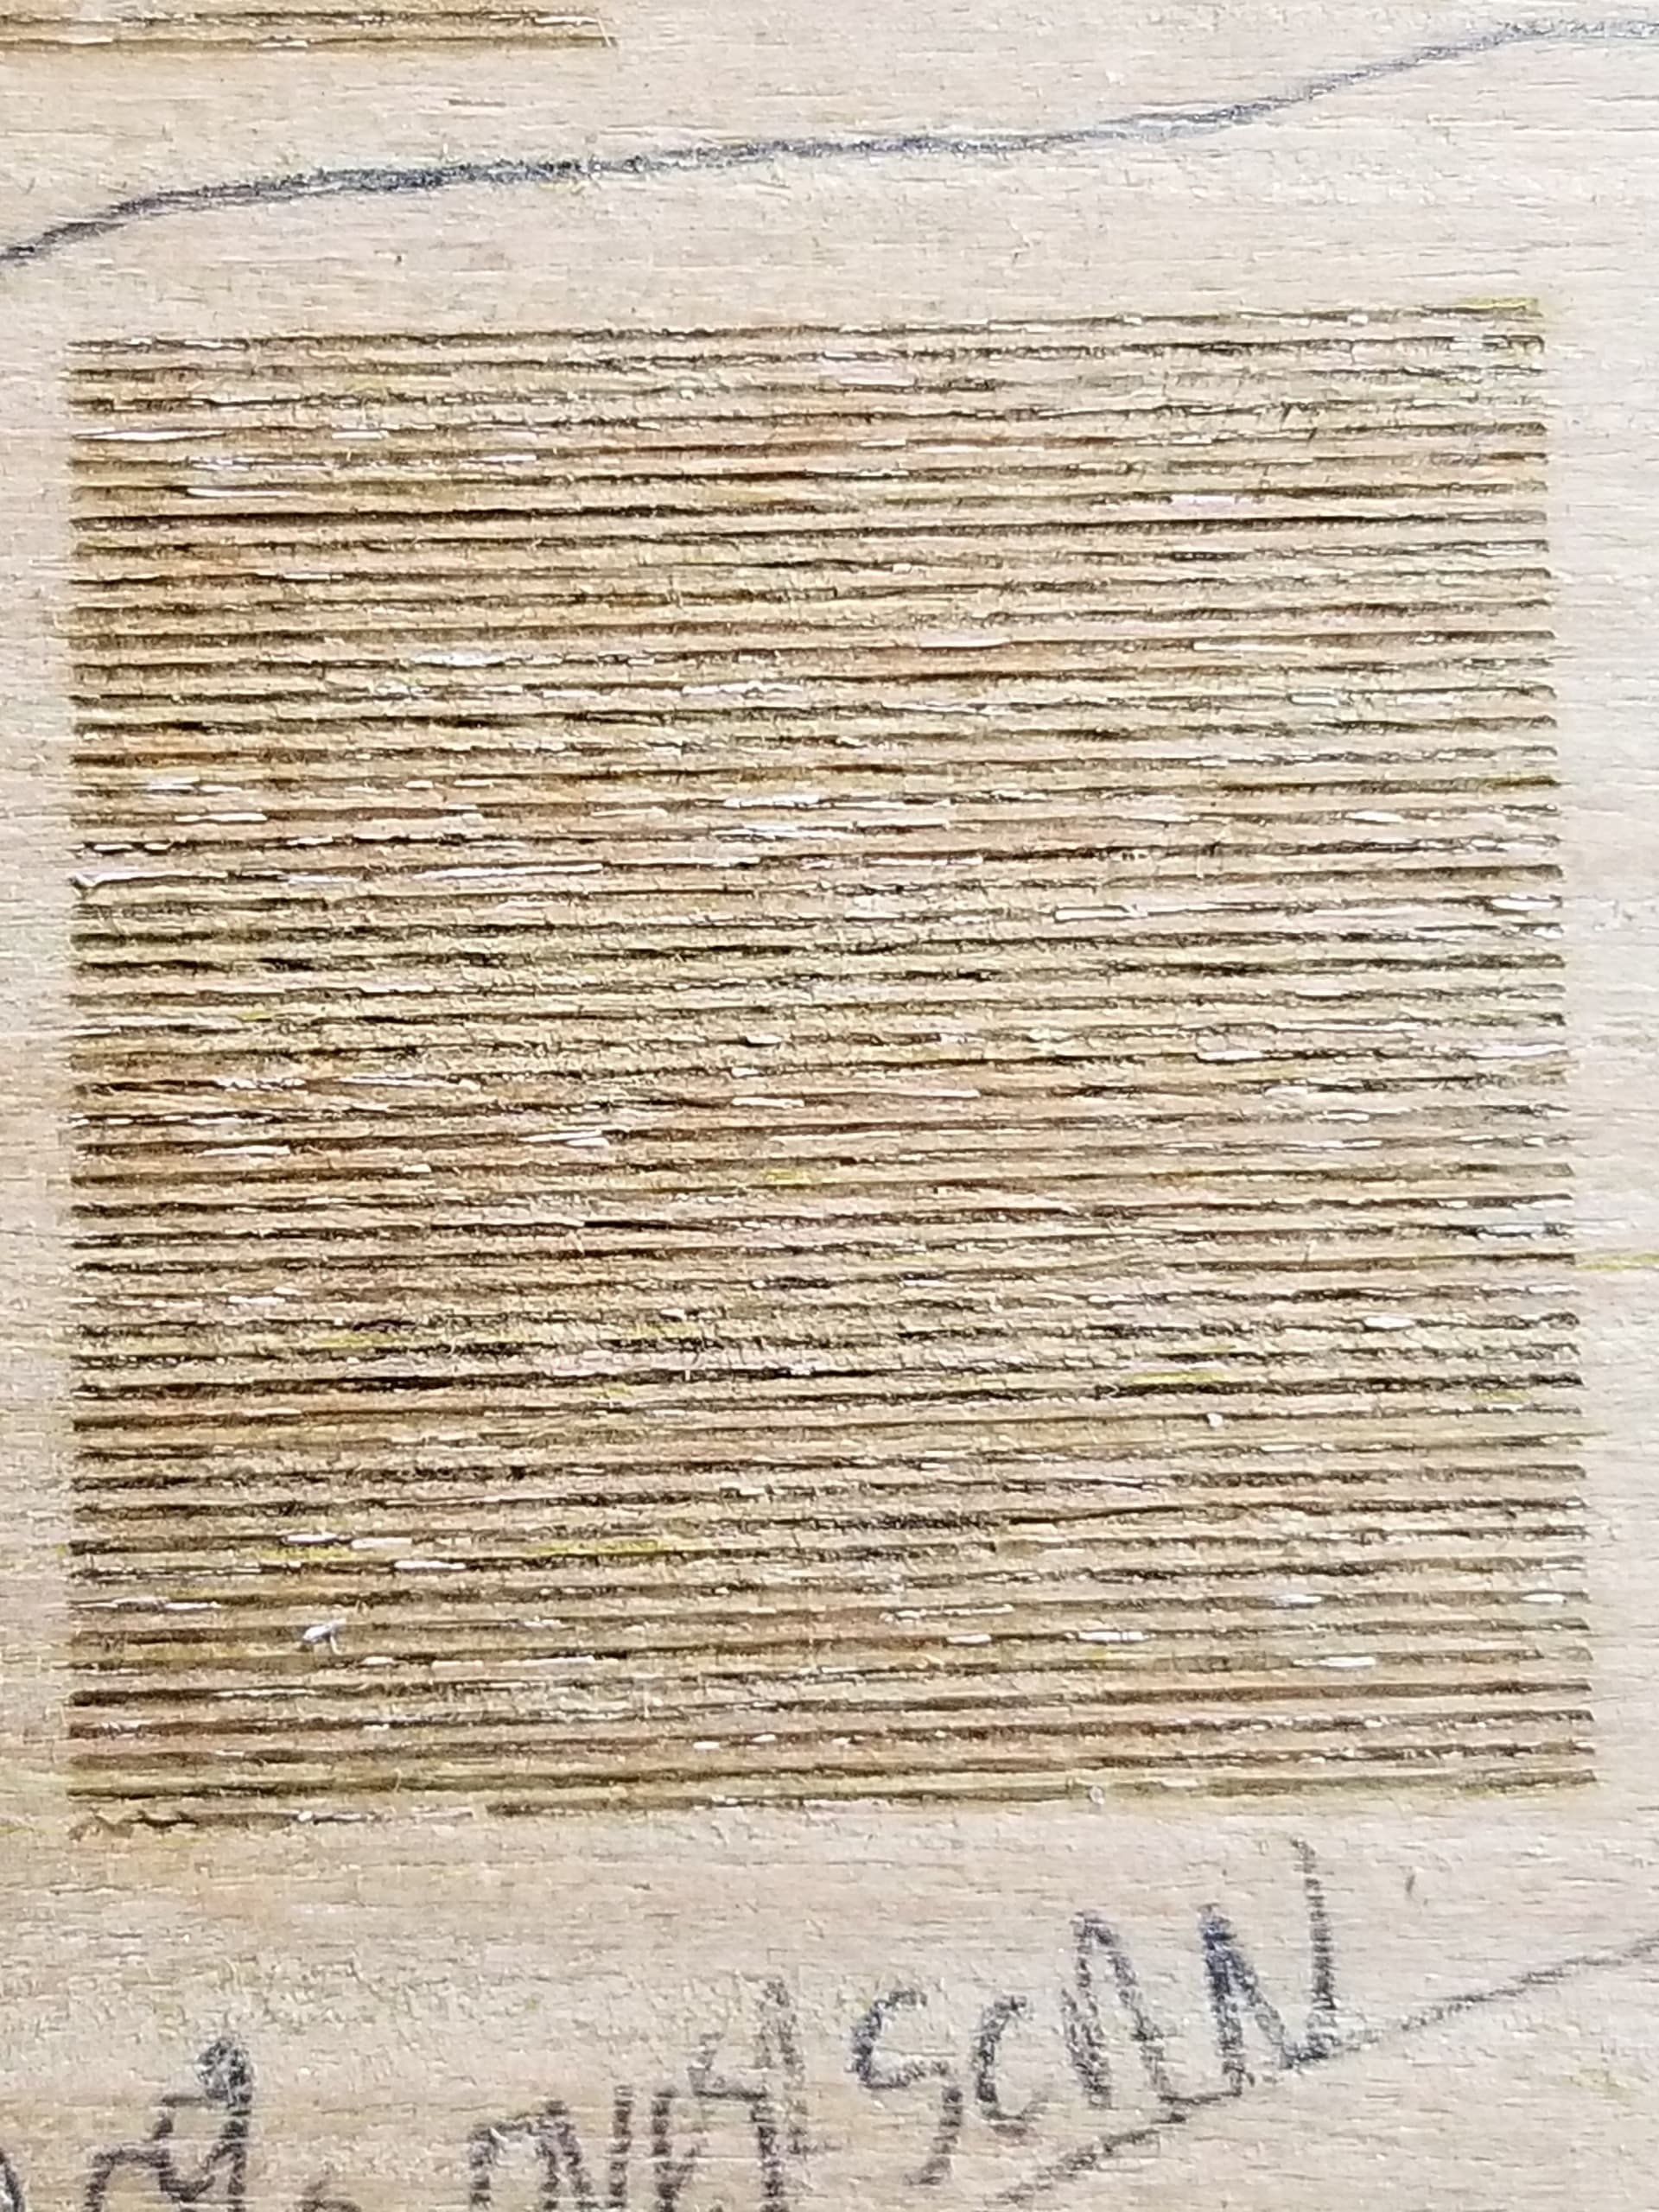
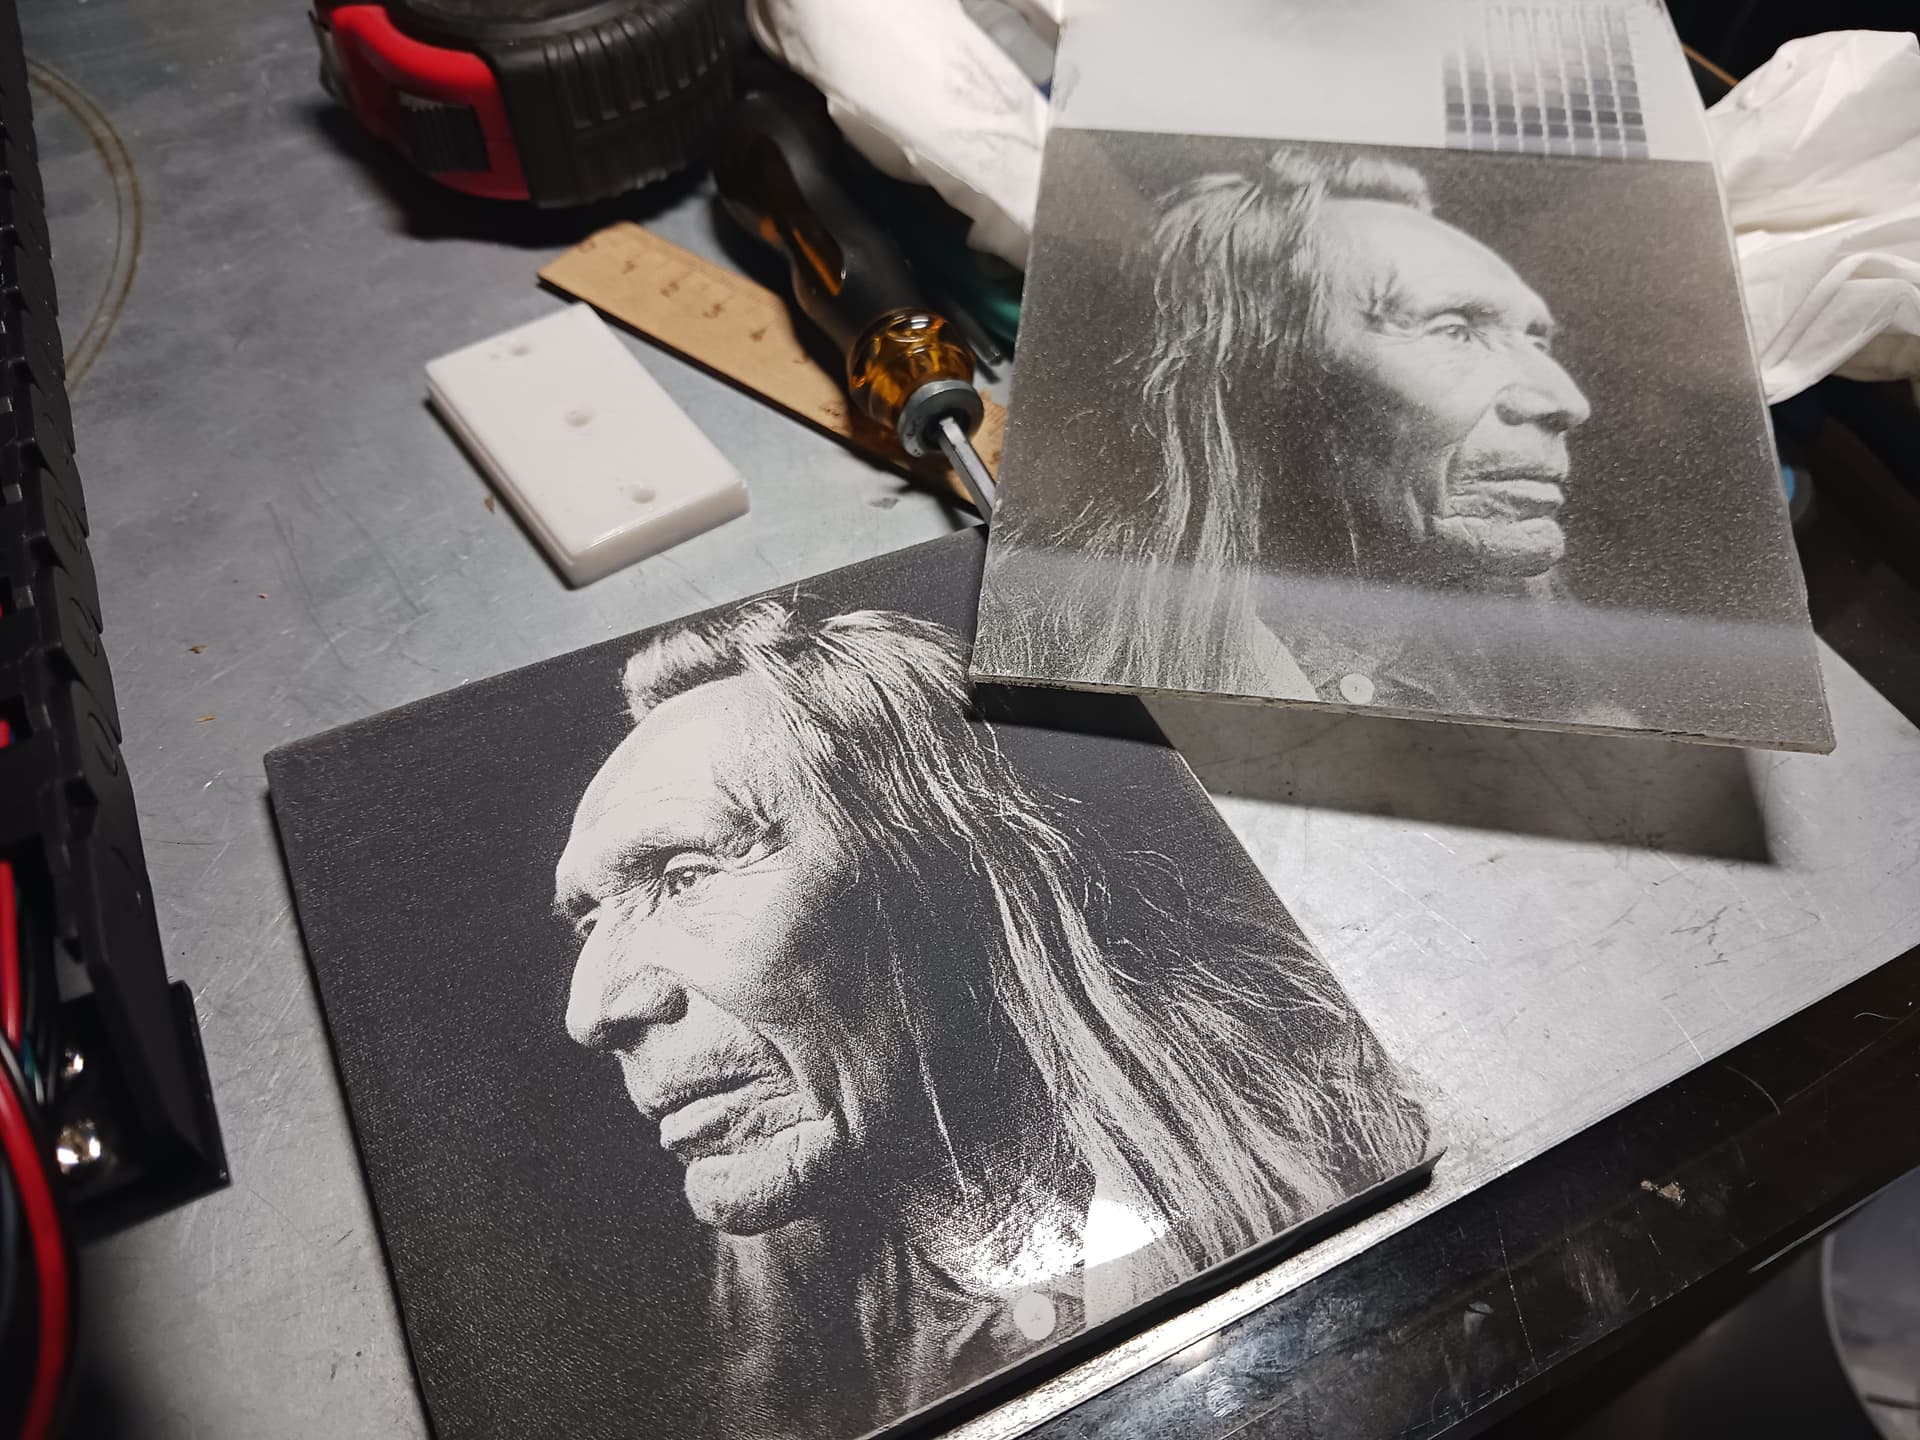
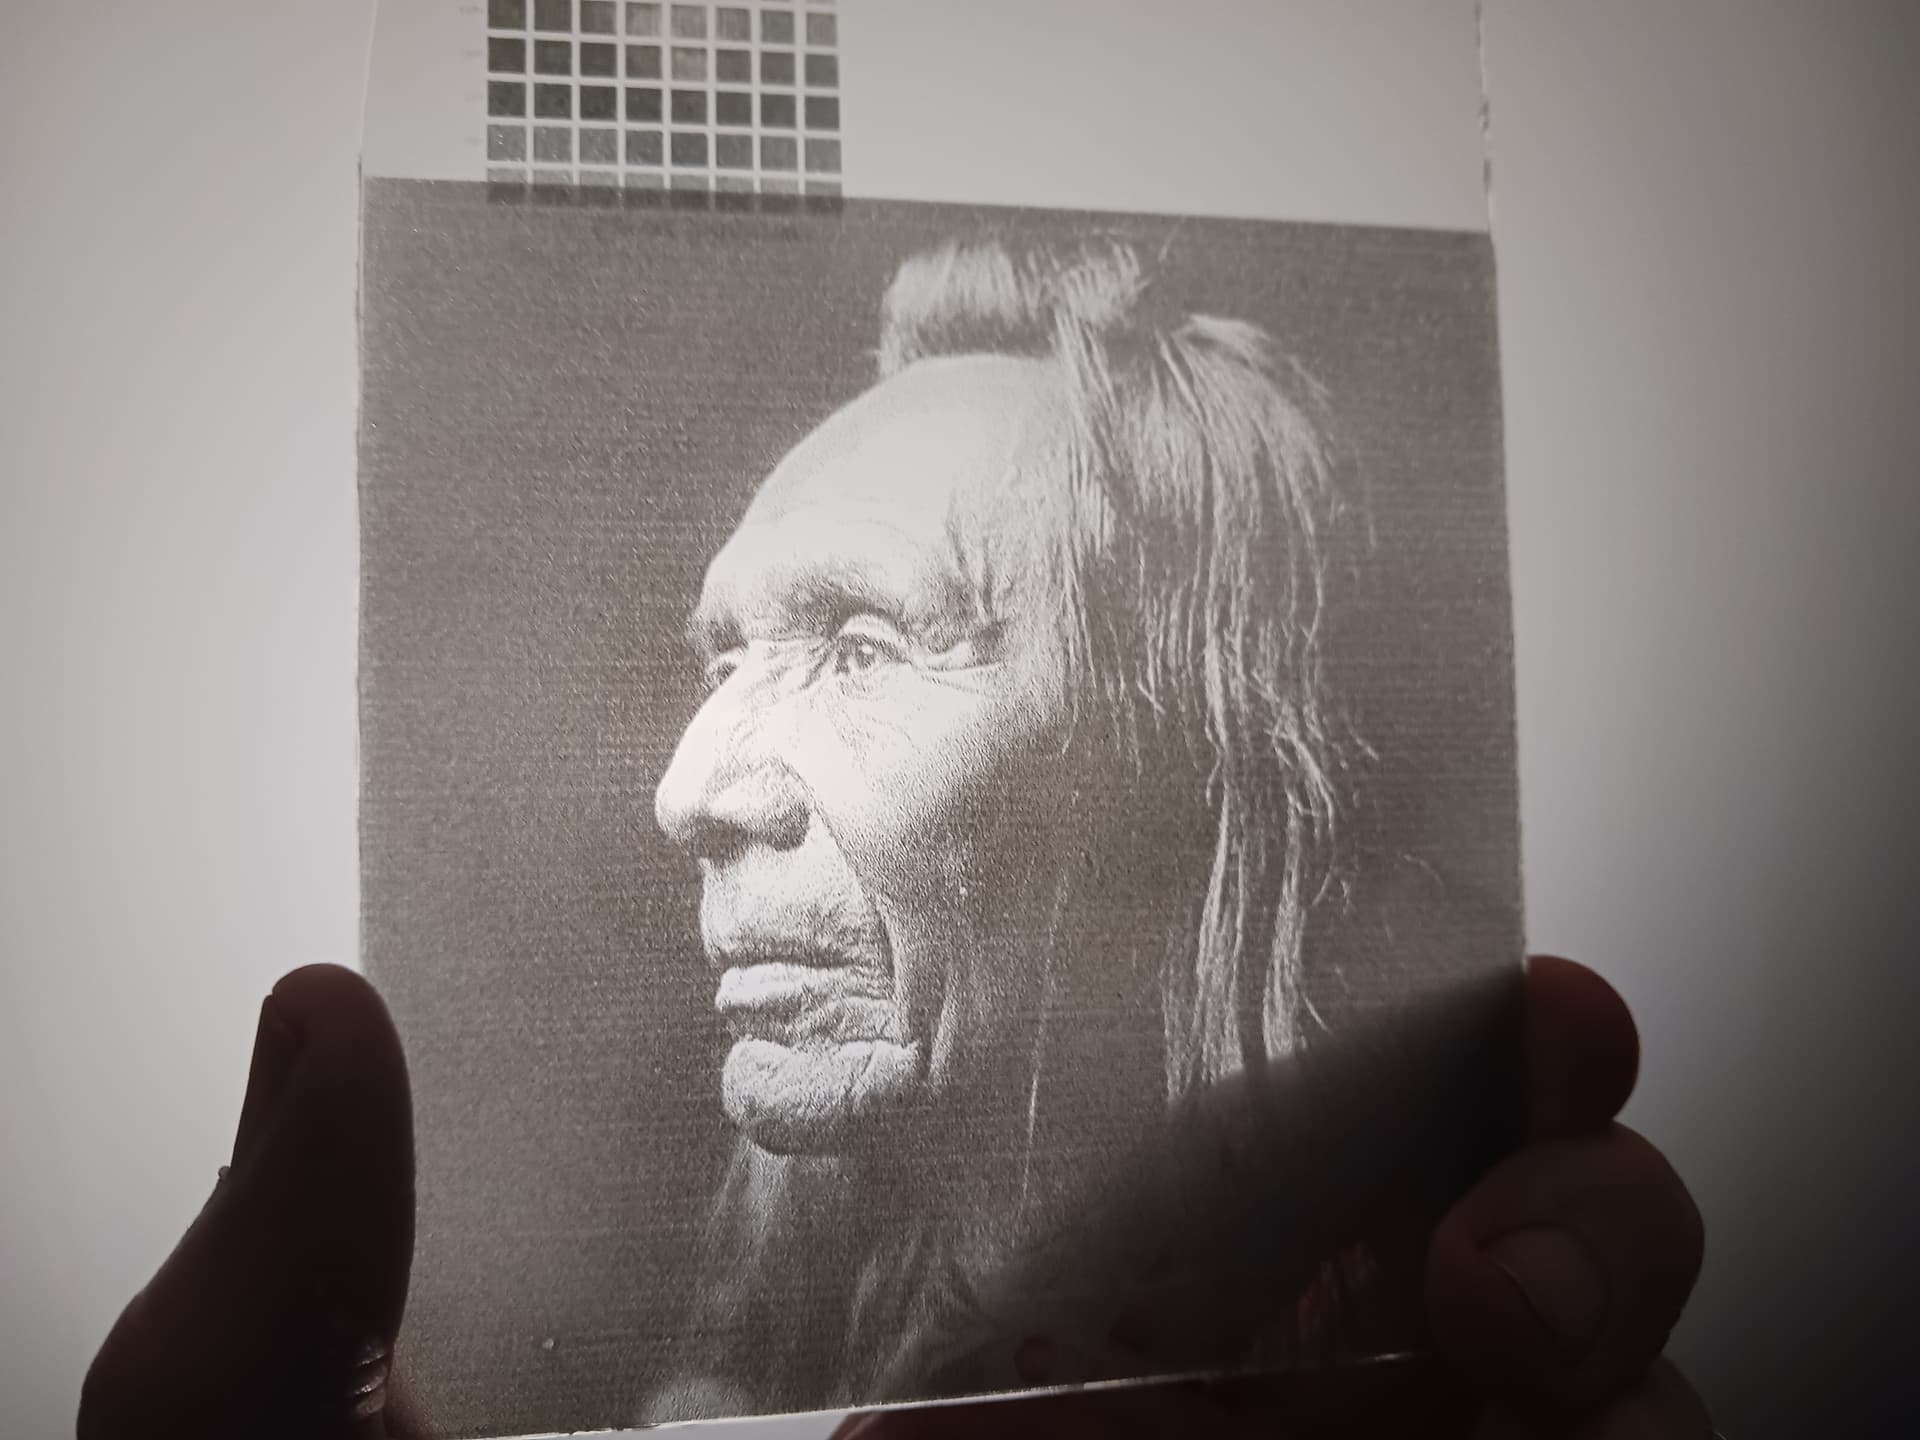
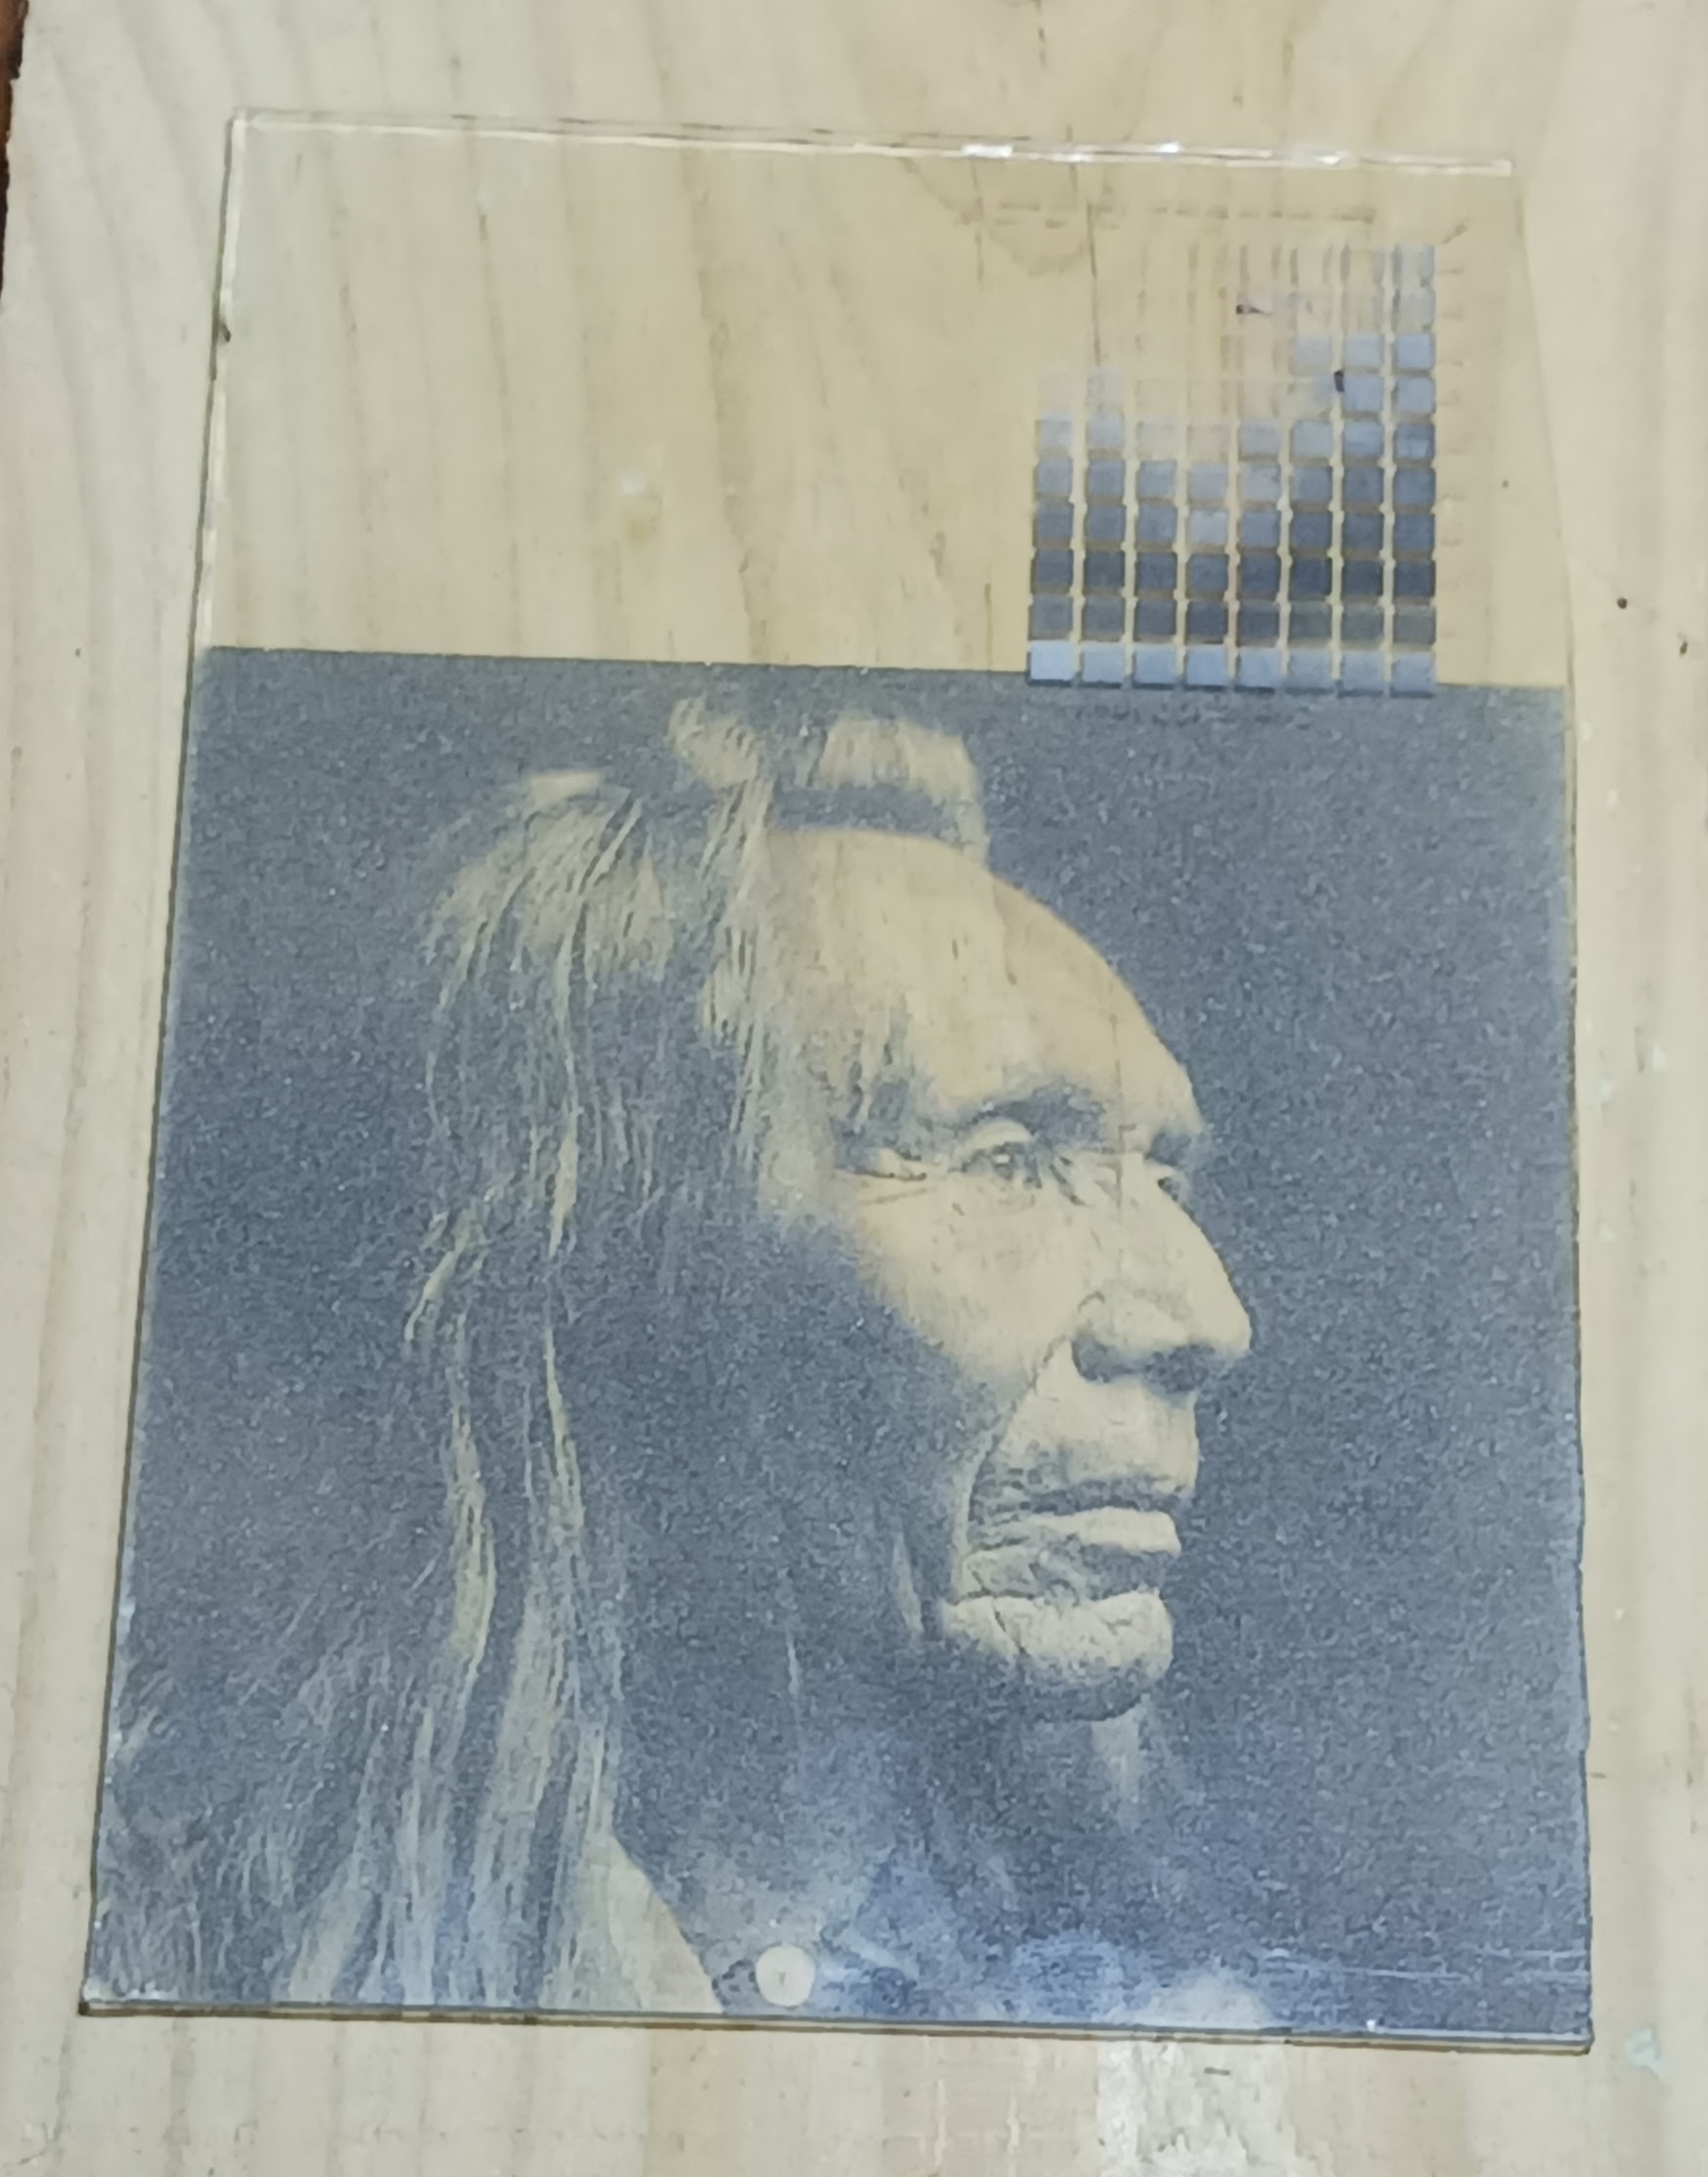
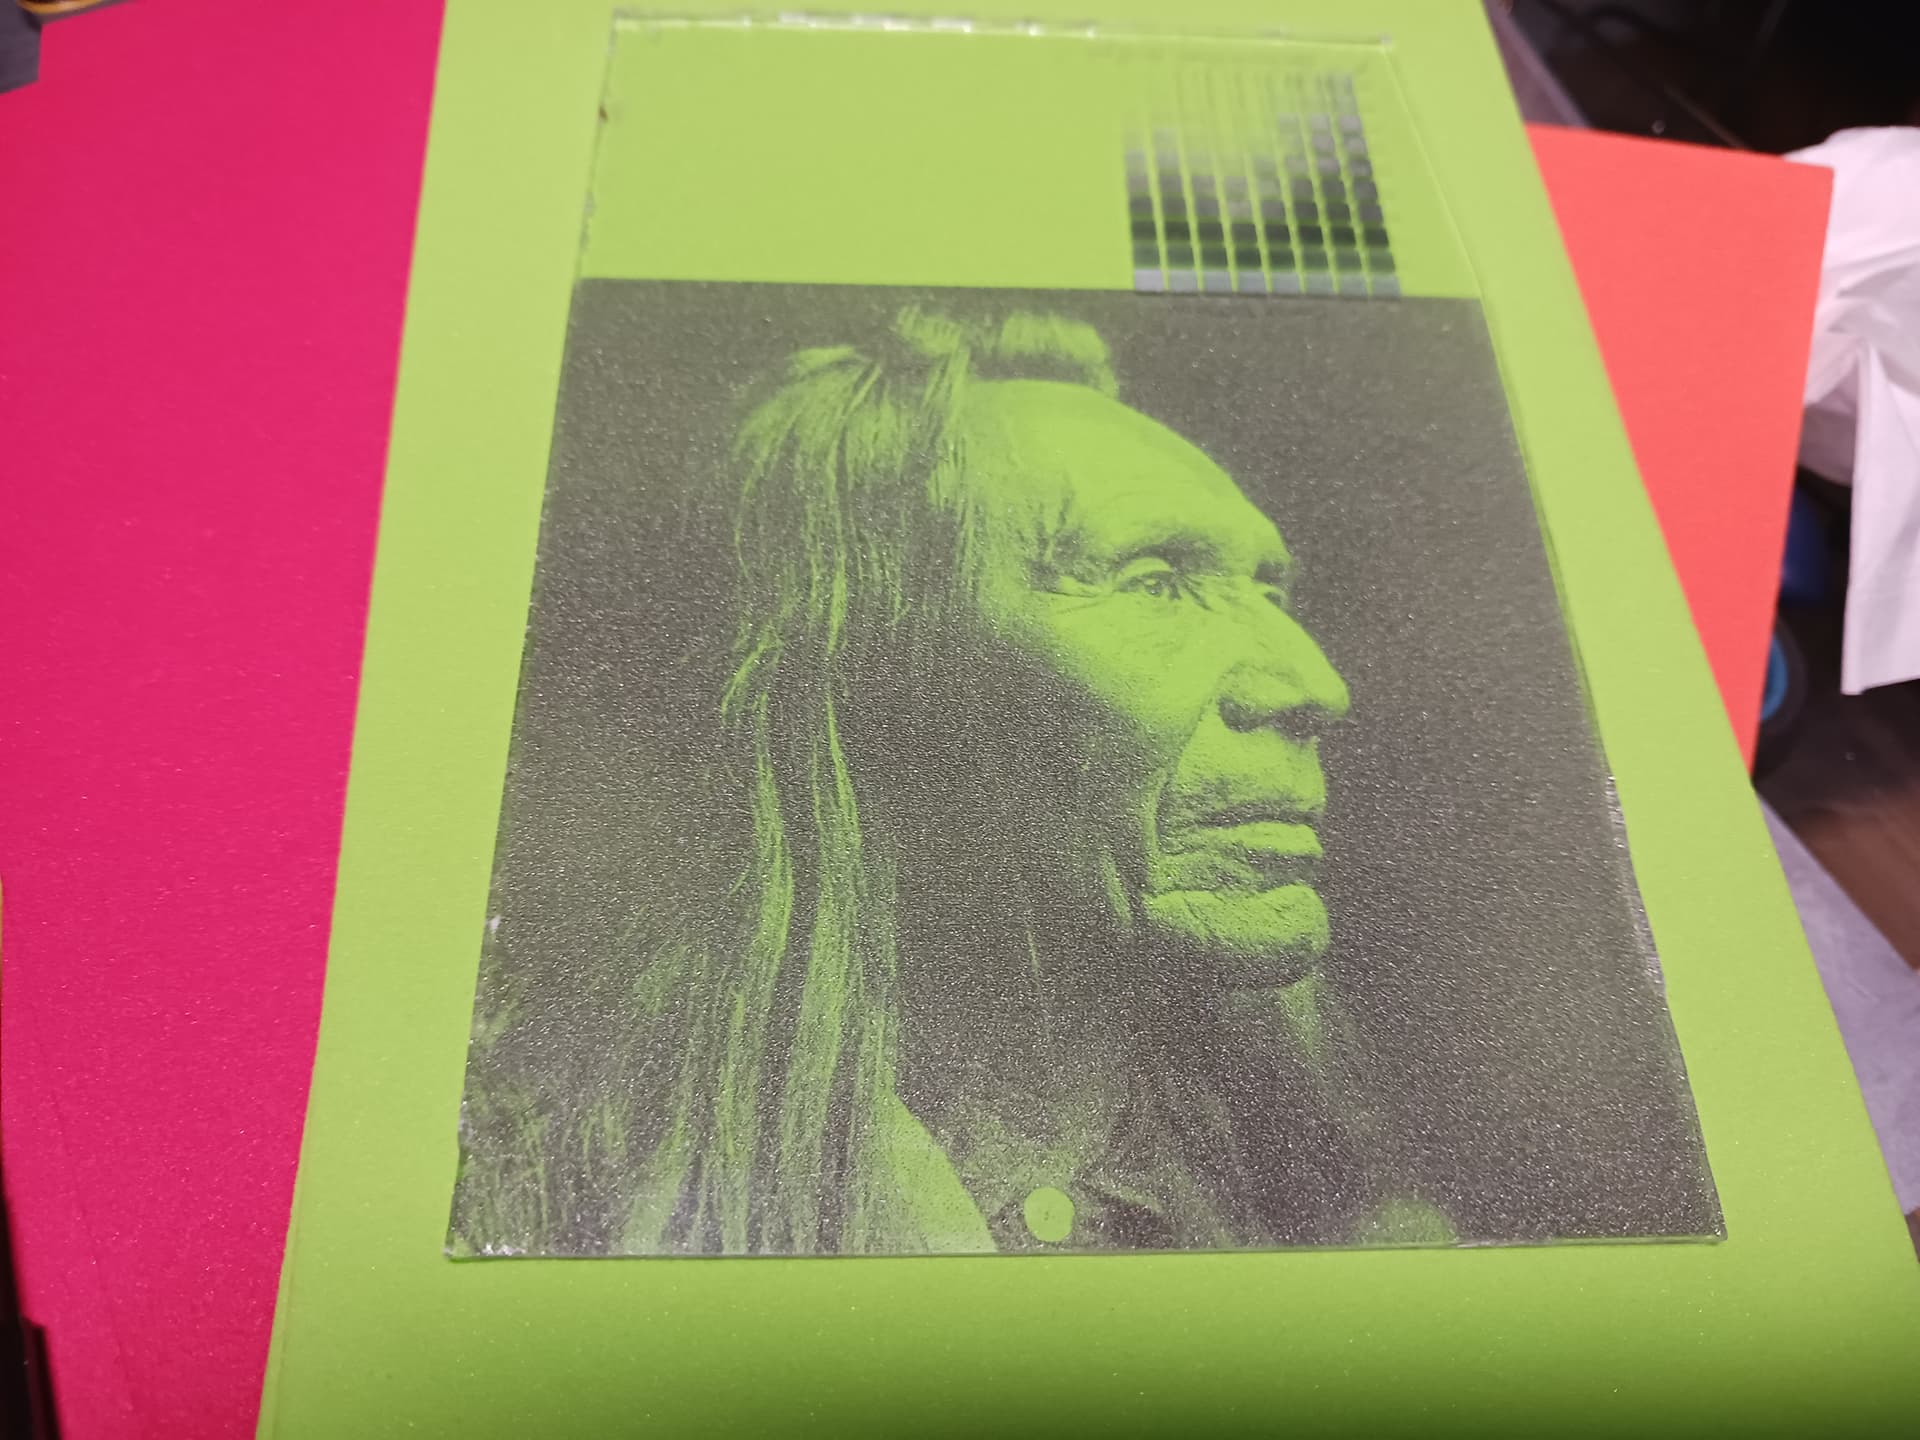
After doing the ceramic tile last evening, I decided to try transparent glass again… same flat-white paint and speed/power setting as for tile. After lasering…
Paint removed and held up against indirectly-lit wall…
Flipped to accommodate the glass thickness and placed on colored background…
Surely this should be good for something… ![]()
– David
Jack,
I had the same “wobble” + double image out of the box. On second day I took frame apart and discovered eccentric adjusters. After tightening these and all belts - all tight, no perceivable play of any kind at all.
Another suggestion: I think default acceleration in JL1 firmware is 1000. If you are running on my firmware - it can be anything. Unfortunately GRBL does not have jerk control at all, but it can be reduced by lowering acceleration, thus reducing start/stop excitation. Try to drop acceleration to 400 or below and see if/how wobble is reduced.
Also consider your extender acrylic plate. It is elastic and does not absorb oscillations well. You may try mechanically dampen your “pendulum”. For example get rubber strips, tire like density, on two side edges. Tire rubber has a lot of internal friction and absorb vibrations well. You may end up with single transient swing at the beginning of the line instead of multiple oscillations, maybe able to reduce over-scan to mm or two.
And finer micro-stepping will also help.
David,
Your rollers appeared to be worn out a bit.
How many hours (tiles?) you have on your machine?
Mine still looks new comparing to yours, but I’m just playing, no bulk work.
Conical races will definitely put more stress on the rubber. Then rollers will bottom out on the belts. Then the “wobble” will begin.
The good news is that these rollers are available on Amazon. Looks like Clear PolyCarbonate is another option that possibly may yield longer life.
Thanks, Sal. I noticed the same thing when I took those photos for Jack. TBH I’d not checked any of the rollers, belts, etc. as they all felt nice and tight and lent to the impressive, sturdy, compact feel of the machine as delivered. I was actually pleasantly surprised that it wasn’t all loose, sloppy, and poorly assembled… more what I expected for such a cheap machine. My X-axis is indeed doing the bulk of the work, rastering a couple dozen tiles and playing with the rotary fixture… but I’ve only had the machine for about a month so it can’t have too many hours on it. I’ll look it over a bit to see what I can see. I’ve been playing with V-slot for a few years now and have a pretty well-stocked junk-box…
BTW I only “play” with my machines… and don’t need a job. A retired EE, I’ve always been far more interested in the machines themselves than actually producing anything with them. ![]()
— David
Dave,
Same here, I’m EE, not retired yet. My initial intent was to cut my own (faux) leather or Tolex to re-wrap vintage camera (this machine is great for that). I can purchase precut form CameraLeather, for ~$20, but instead got x2 JL1, couple extra laser modules, honeycomb (I’m cutting through), spent weeks hand editing source code (and combing STM32 specs) for GRBL (I also use for CNC), diving deeper into it. All sport, no practical reason if you ask my wife. This initial $69 purchase now pushing my hobby budget for a month to half grand. On the way I got DLC32 with 3.5" screen, whole bunch of stepper drivers (for DLC), some ESP32s for playing with raw FluidNC. There is more.
I think that original JL1 board, and whole machine, is great and well suited for intended purpose. I would polish firmware for it, keep it all stock except the laser, and use DLC32 for something else.
This is like surfing the wave of laser engraving dimension of the world.
![]()