All lasers have driver circuitry. On original it is tiny and shoved inside of center heat sink cavity on double sticky tape, which is actually bad or rather cheap construction. Most have circuitry exactly like this one, outside and closer to cooling fan.
You will have exactly the same issue no matter what you purchase. There is no laser I’ve ever seeing that has connector matching JL1 laser. You will need to face that adapter challenge at some point.
I suggest to hang on to it. It is a great low power laser. (1+W optical).
I’m sure you will find a way to get or make this adapter. We are here to help!
I need to make one for my machine, making another one or two is not a big investment in time. Send me a PM and we’ll figure it out.
For the rest of you, no, I’m not going into the business of making adapters, I’ll probably make a dozen or so when I get started, just so I can have a spare or two. After I get a couple to Jan, I MAY distribute a few more but I’m not planning on making a bunch. I’ll let you know when. Don’t bother asking for one until Jan and I have ours. Make your own or just be patient.
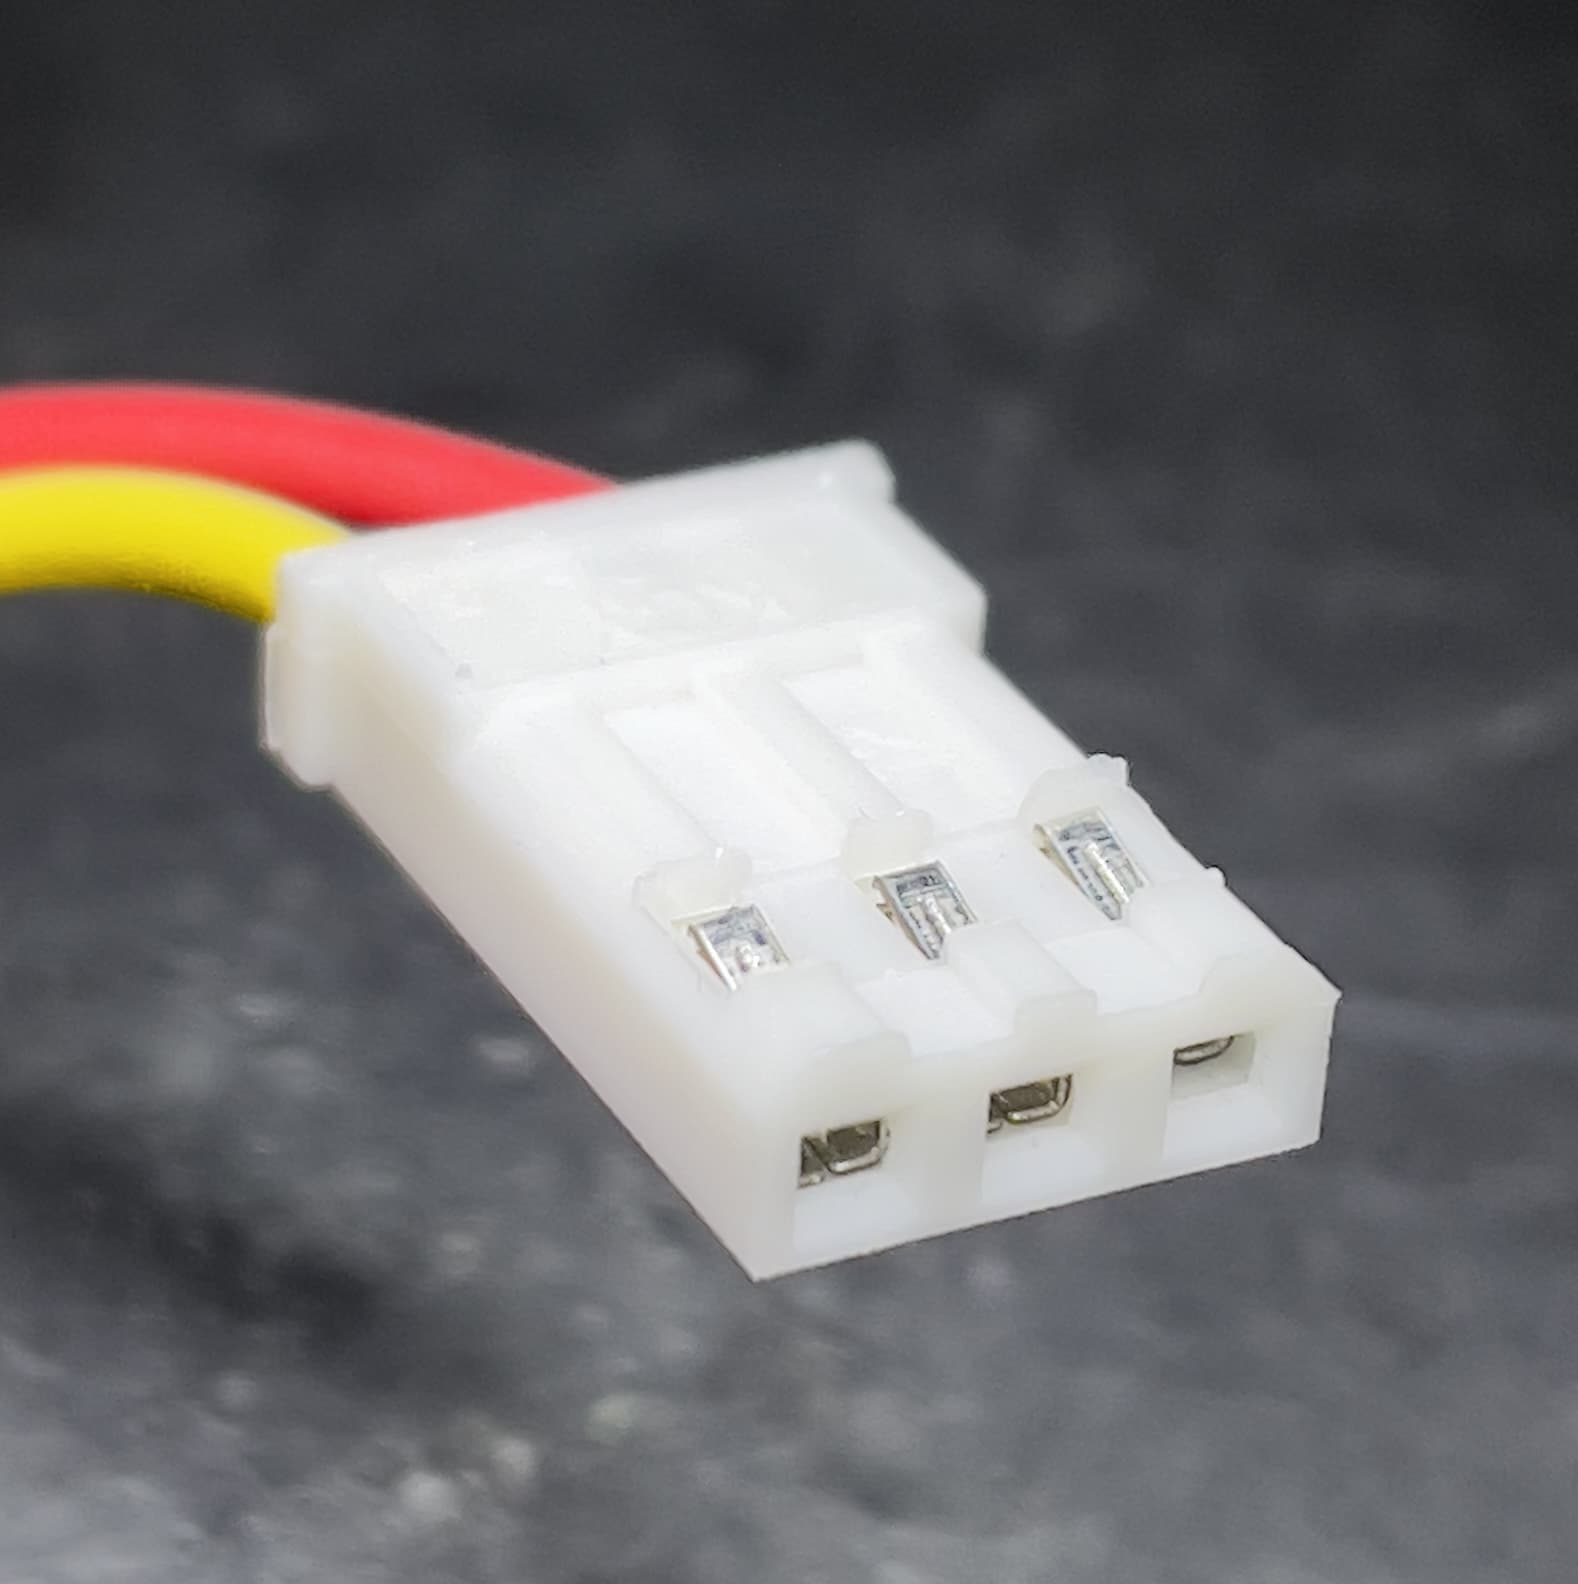
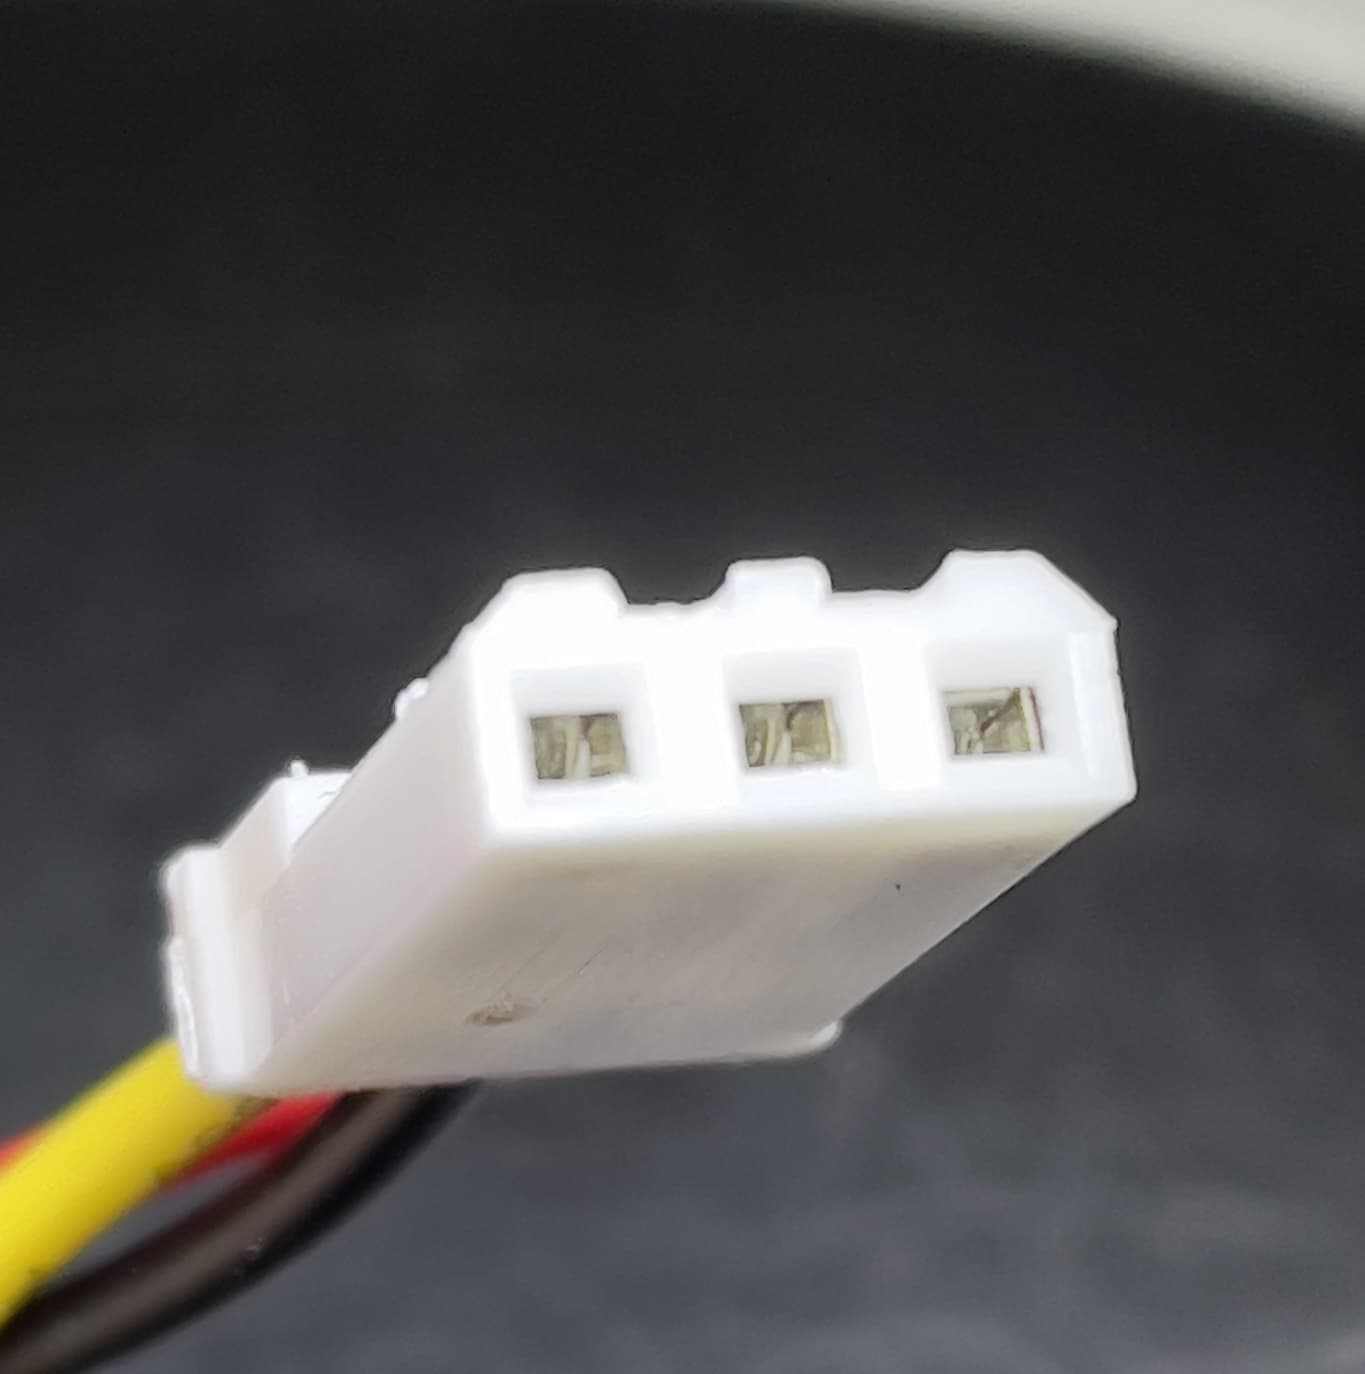
Connector marked KCY.
I was scanning whole catalog of JST and AMP but somehow missed that one.
PY, great job! It looks exactly like one.
Now the problem is to find the source.
Data sheet is for 2-pin only. Amazon flooded with 2-pinners as battery connector for RC toys, but I cannot find 3-pin, not even in Digikey or Mouse or elsewhere.
Posting email address allows crawlers and spammers to pick them up.
I redacted it - I’ll roll it back if you let me know that you’re certain that you wanted to make it that available.
Messages are working as expected.
Please keep the discussions open and shared - They will continue to help others for weeks and months to come.
My personal FDM would not resolve fine enough to be able reliably mate.
Getting access to SLA is a pain, but doable.
Big question is about pins. I guess that what you mean CAD-fu to change design for different pins.
I just vandalize my original laser for the pigtail and crimp XH to it.
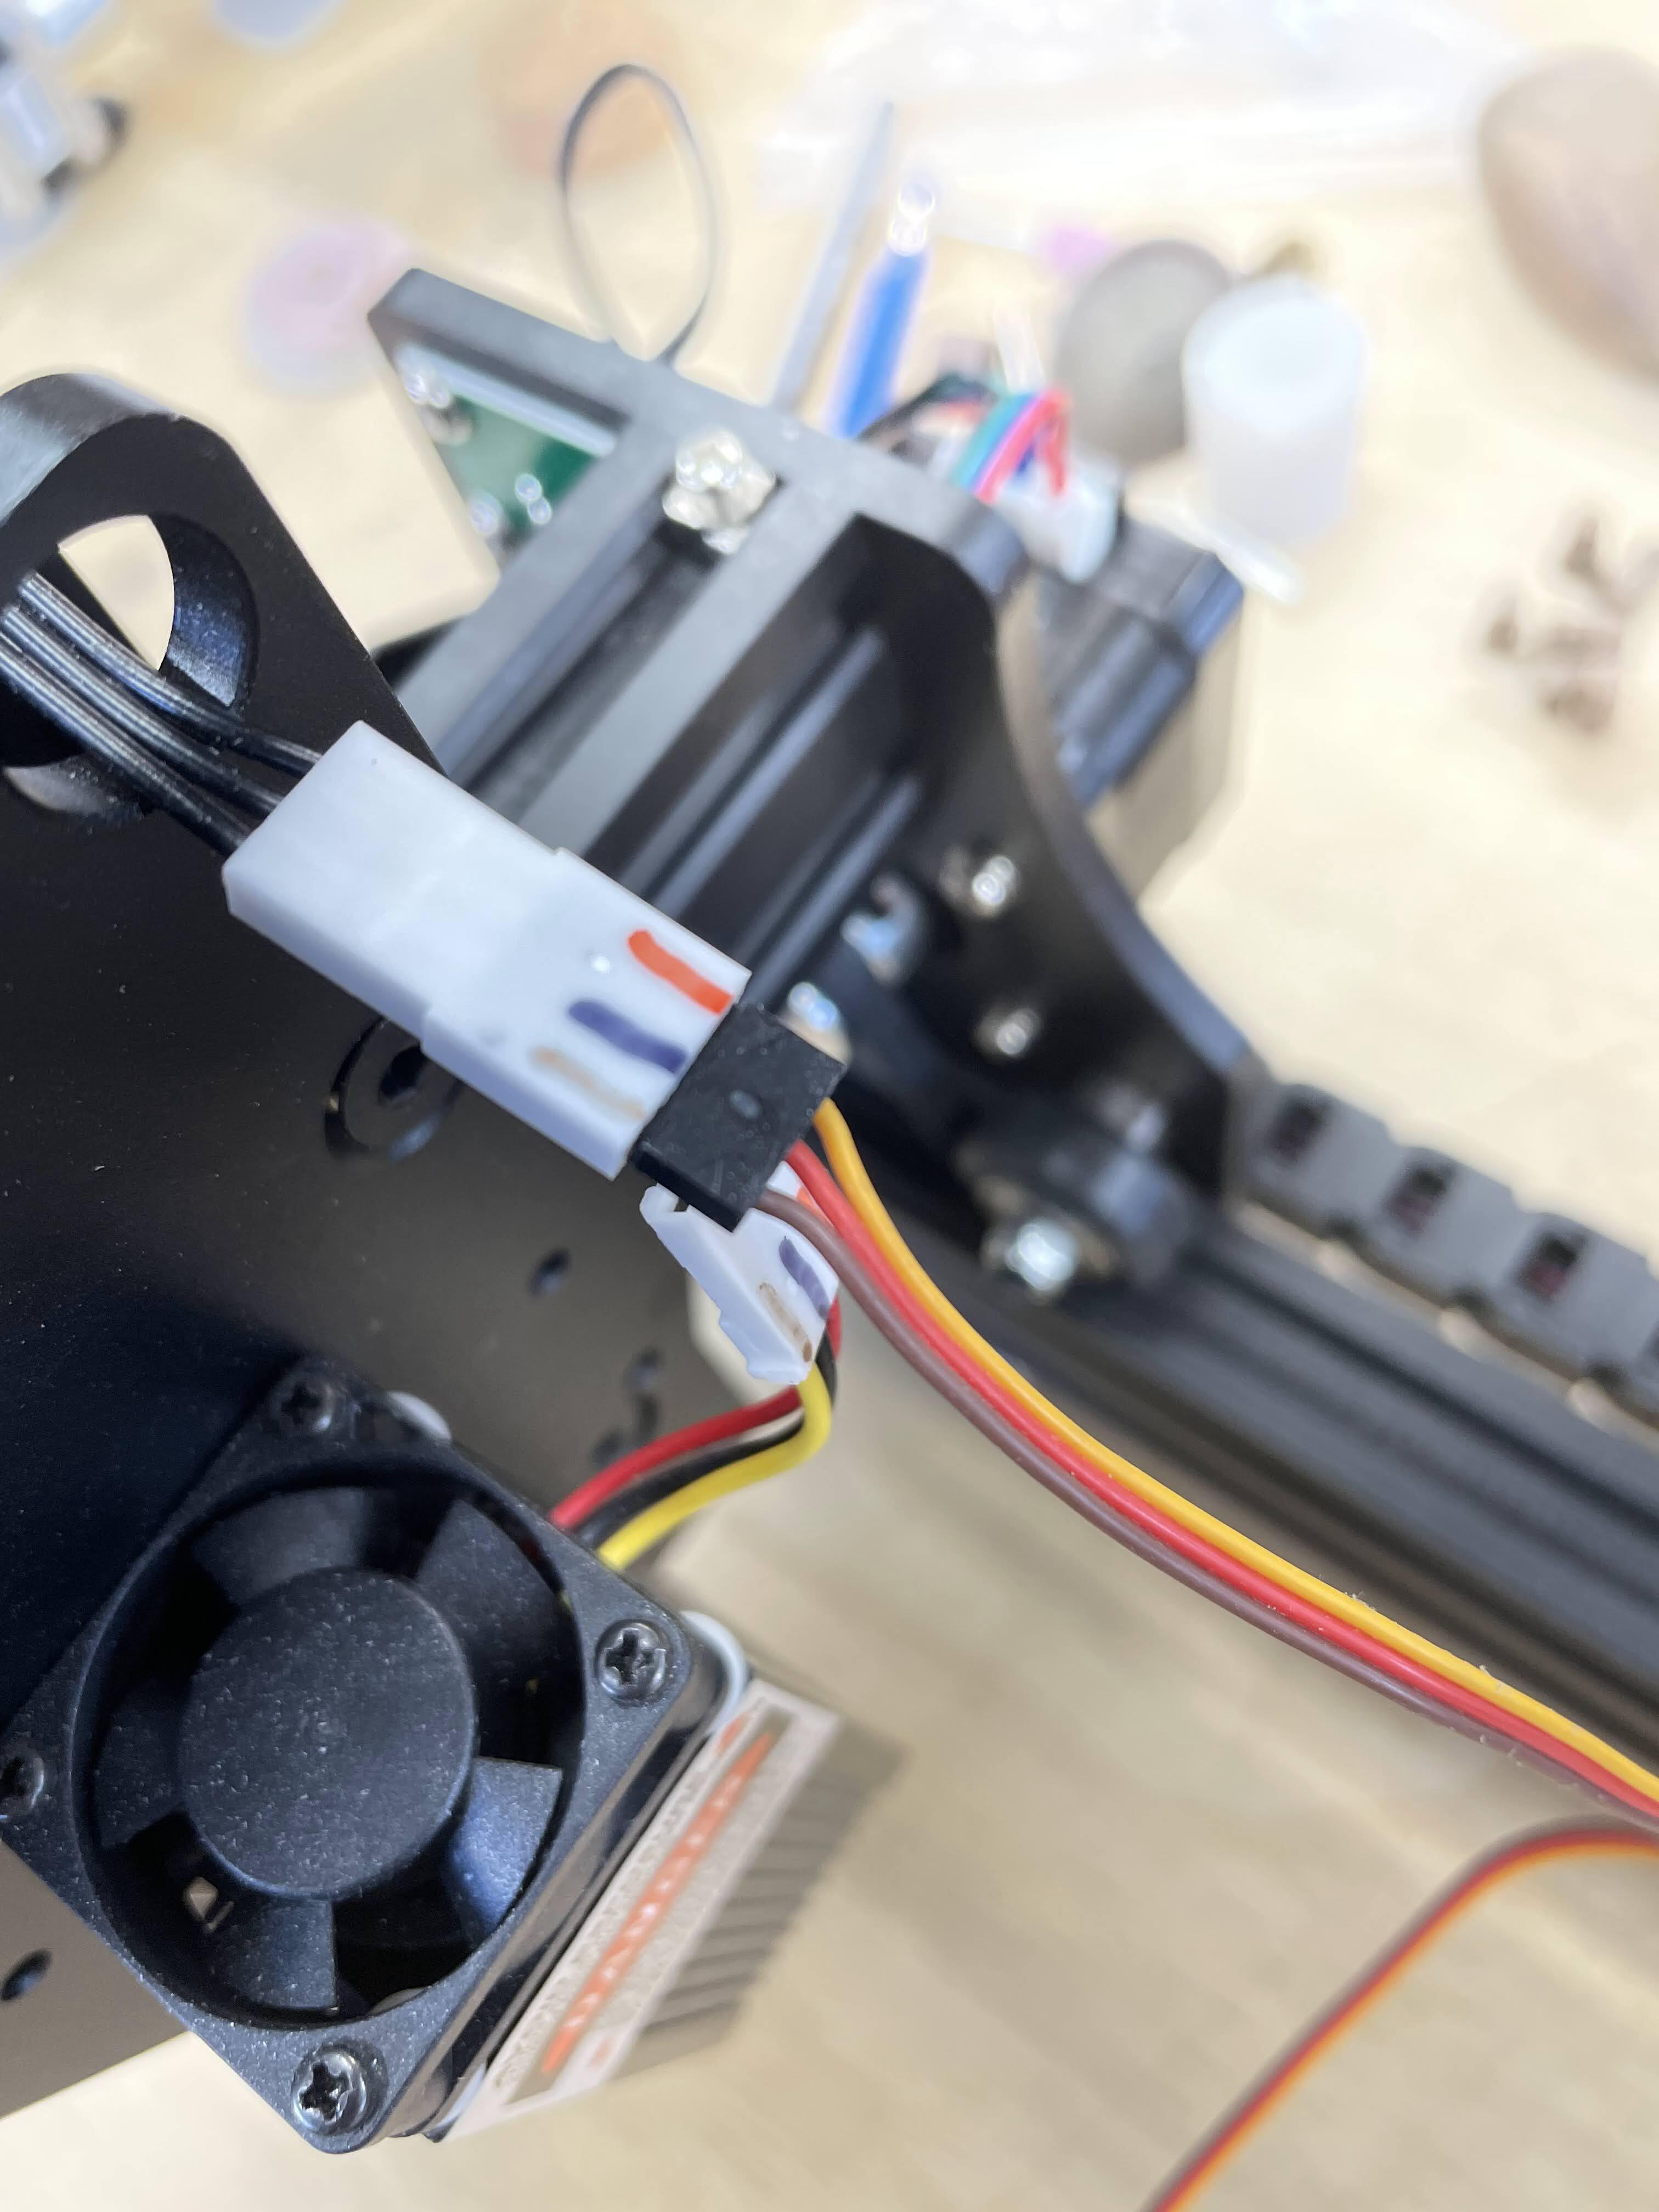
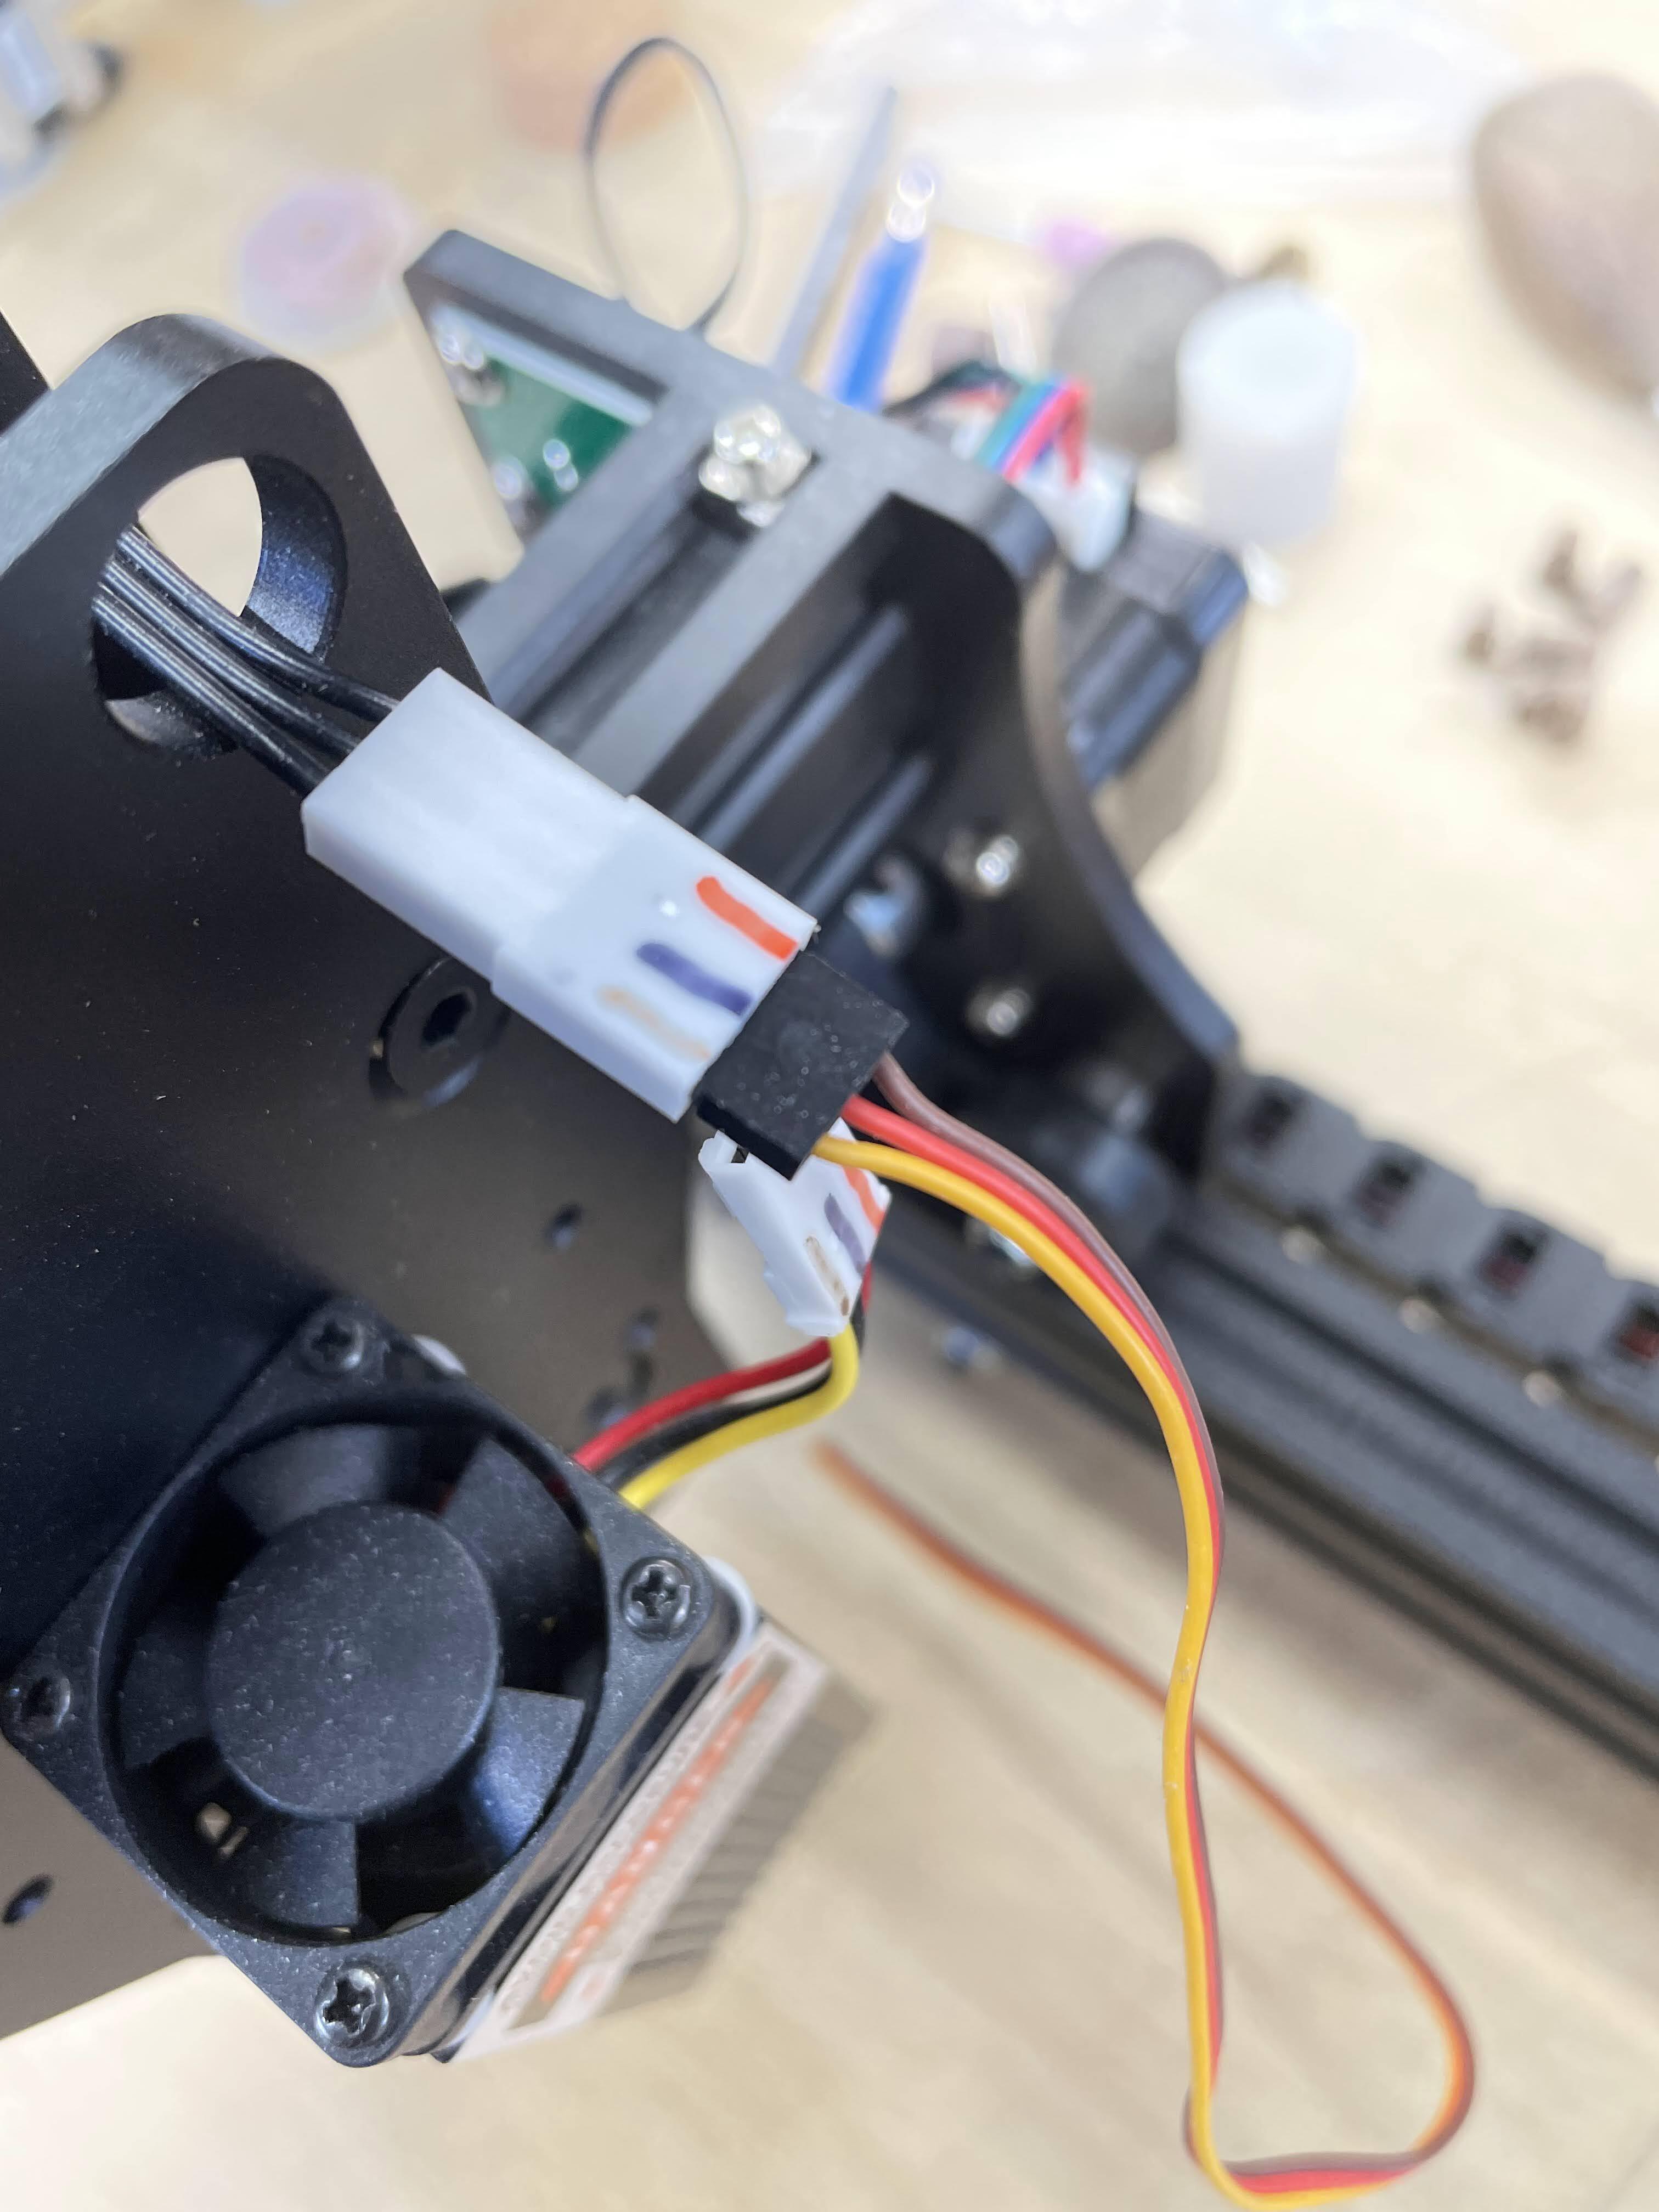
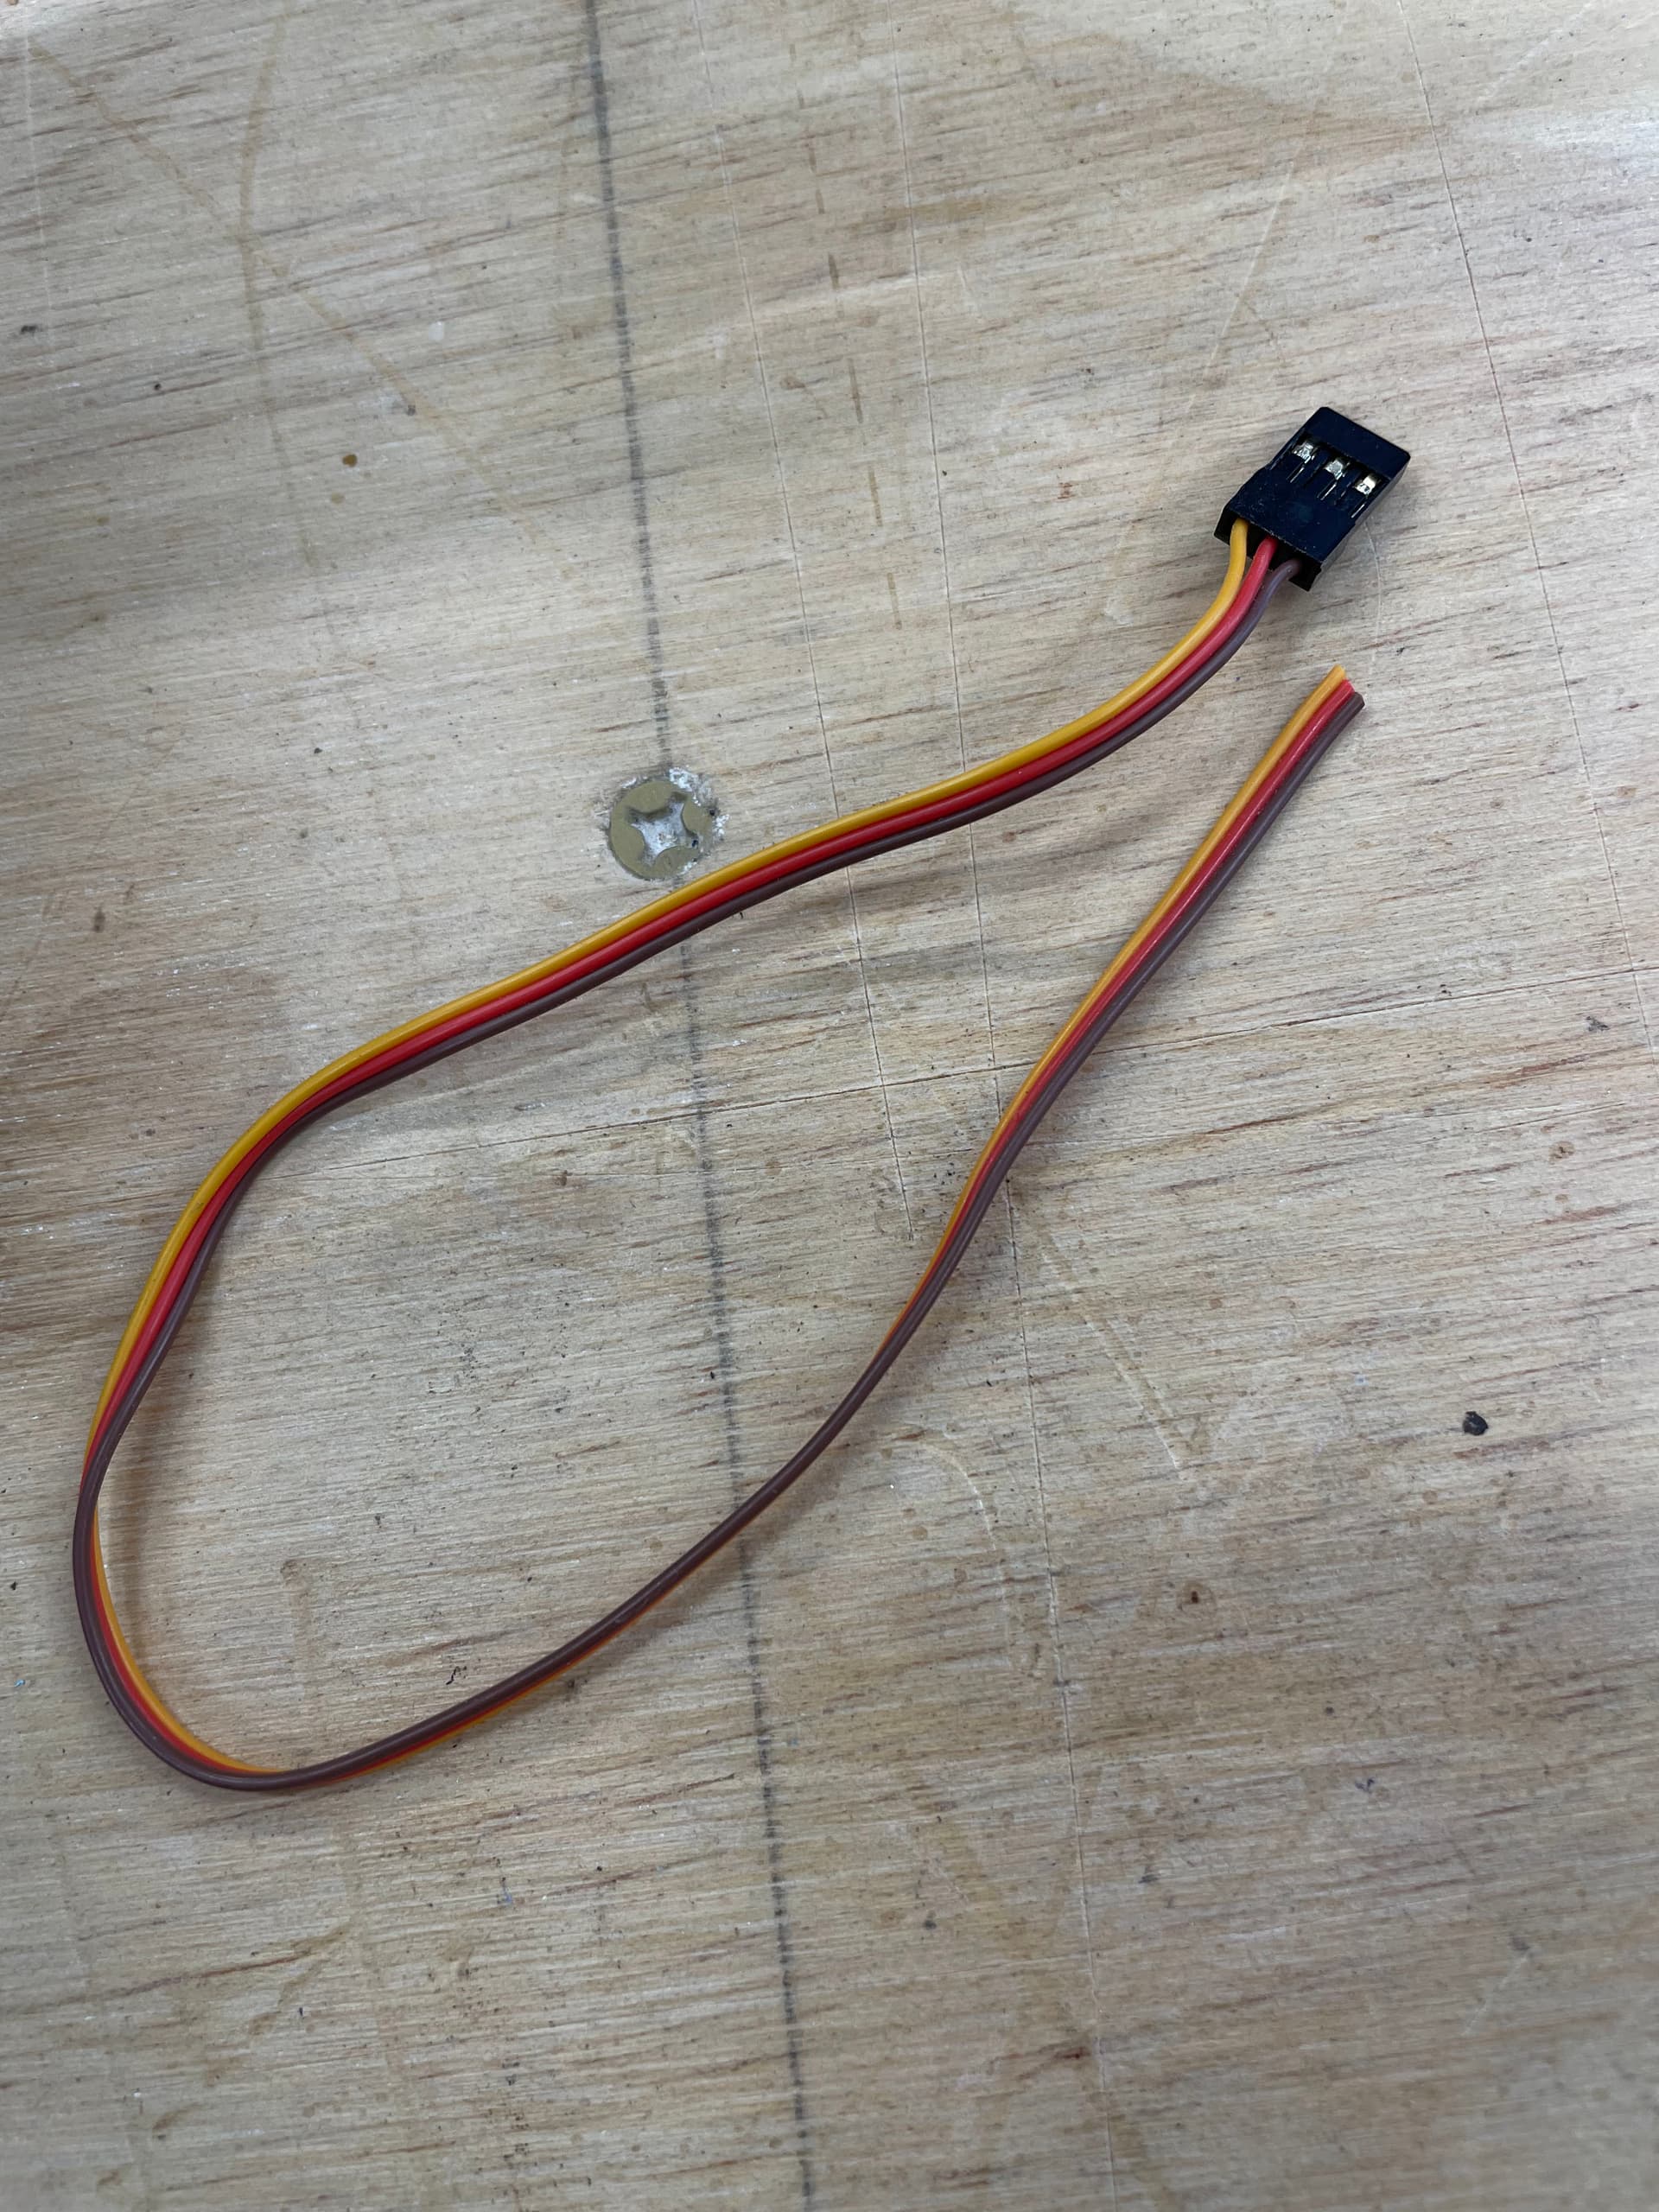
I have found a readily available connector that will fit the JL1 laser connector. It is found in most RC hobby shops and is an extension cable for a JR brand servo.
It easily fits the existing connector on the JL1, however it can fit TWO ways, so you need to pay attention when you plug it in. Pictures below: