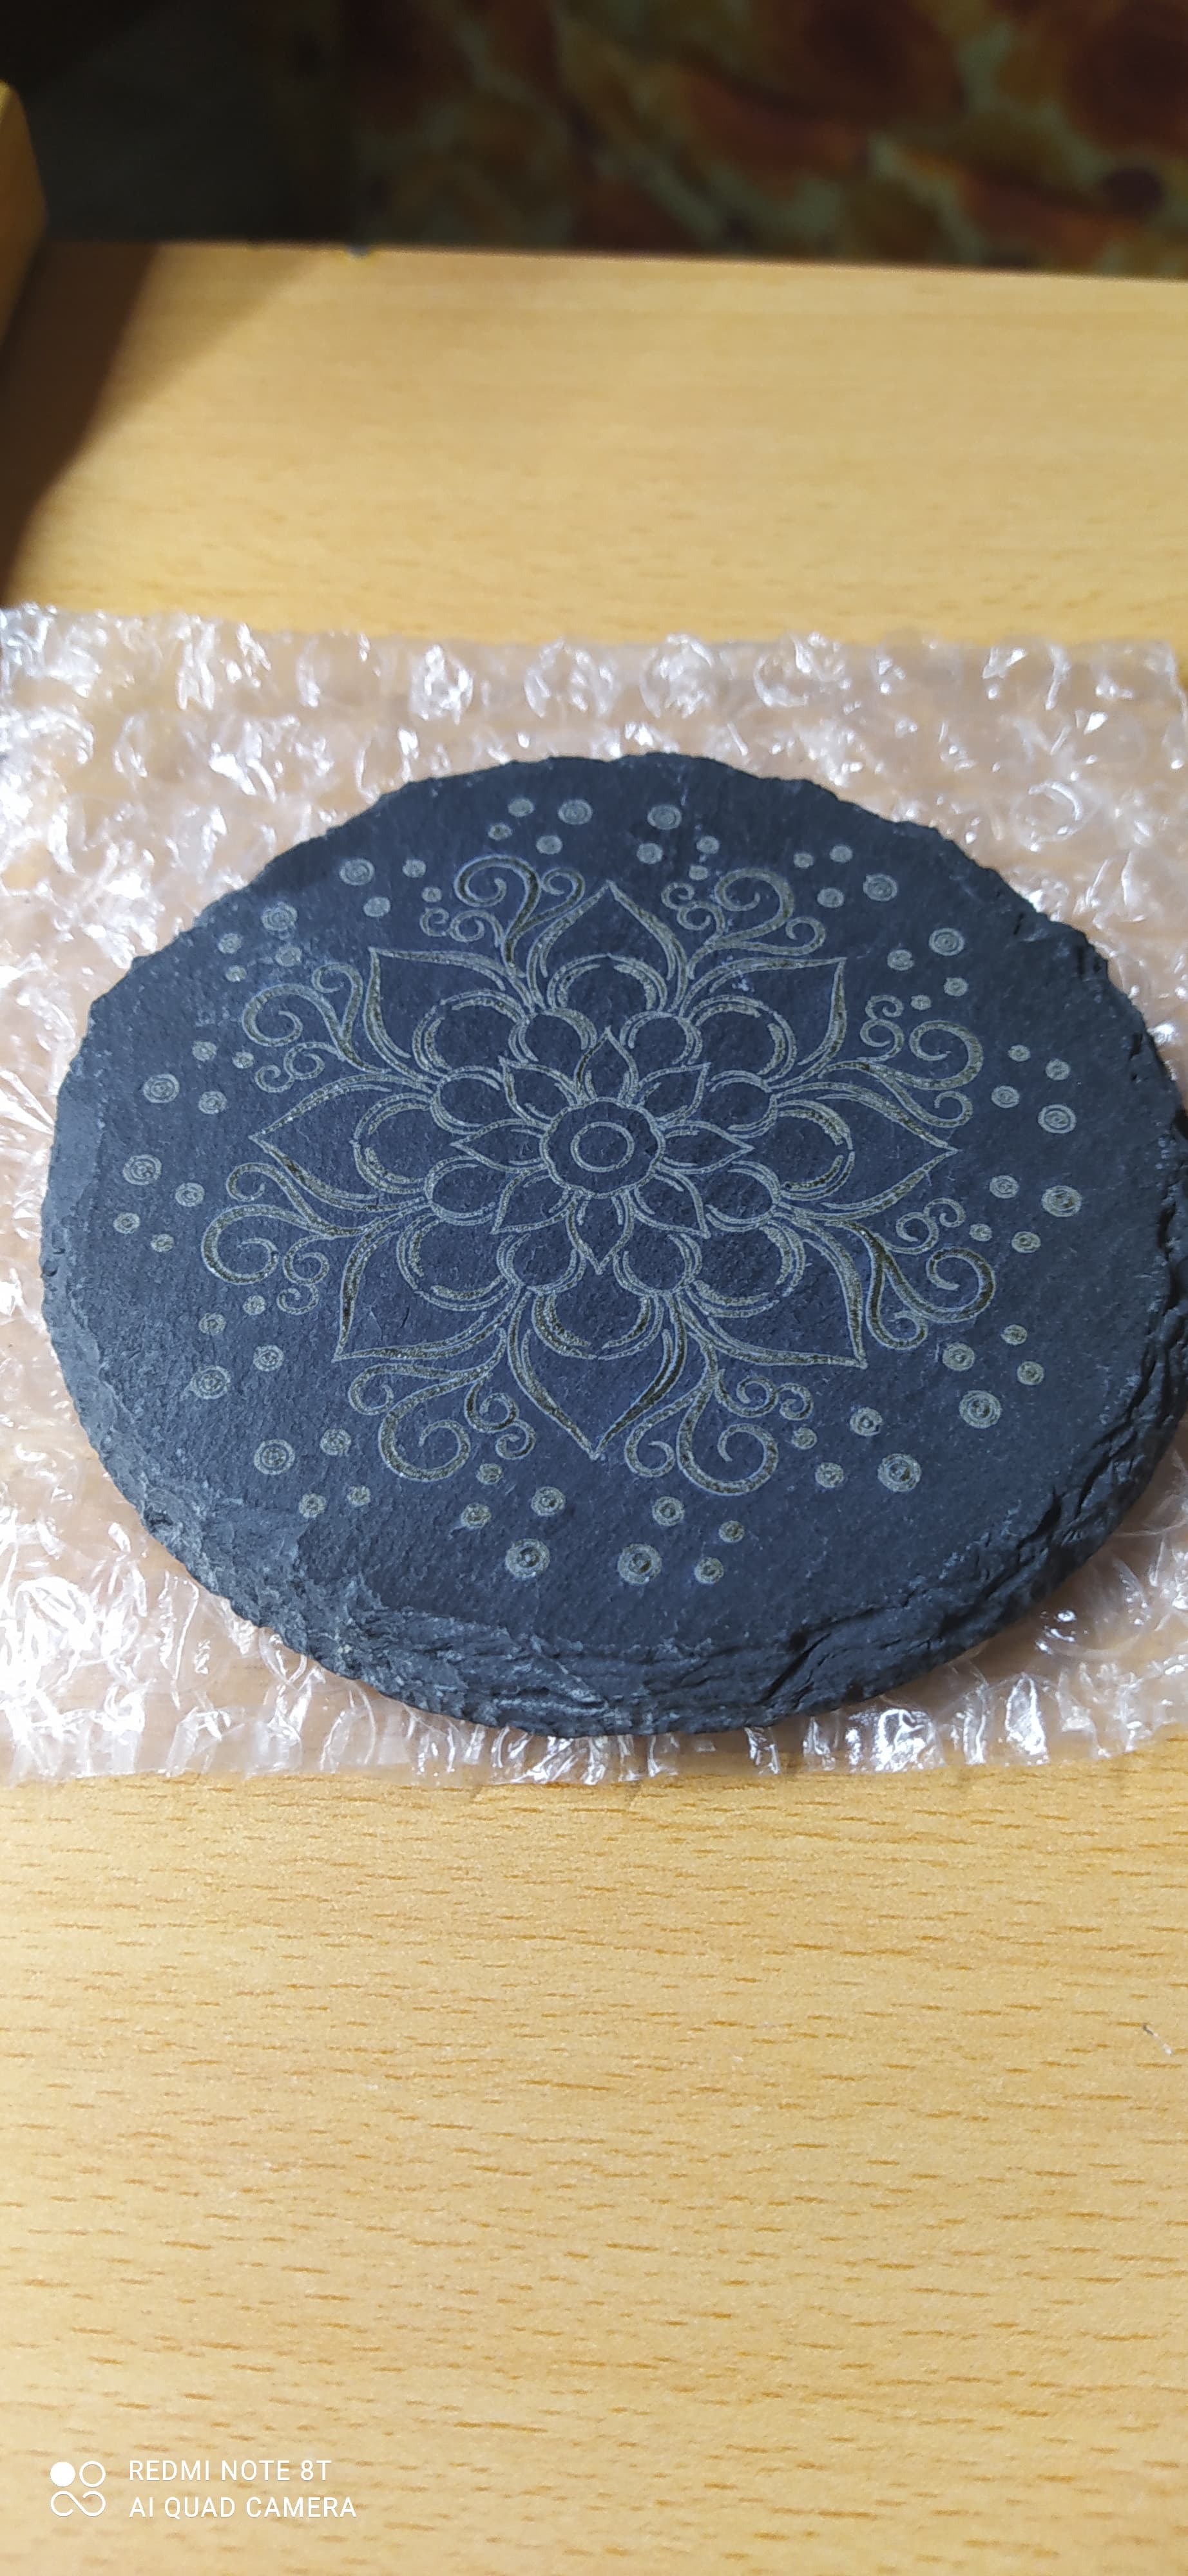
this is my first work on slate… pretty good i think
1 Like
Roberto, it looks really nice, congratulations. It will be even better if you wrote how your settings are for this result, then you help others and may also get good advice.
2 Likes
sorry you are rigth
7.5W 100% power
1200mm/min
3 passes
i though one was enough but… 
you know if there is a way to make it more visible? maybe with a transparent primer?
also to protect from scratch
Look at the recent Slate Tile discussion, there is a discussion about using floor sealer. It works pretty well, adds some contrast. I don’t know how well it seals yet.
Your settings look very high. I engrave the slate with 2667mm/min, 50% power, one pass. However, the difference may be whether you’re using a line or fill mode. I’ve only used Fill mode, 0.1mm line interval. I have an NEJE Master 2S with 30W module (5.5W output measured).
2 Likes
i used fill mode but with line interval of 0.085, you thing is wrong?
The floor sealer is used after engravig… right?
by the way, can i see a slate made from you? My 7.5W diode is the Neje A40630
Certainly not ‘wrong’, it’s not that much different from 0.1mm and you have a nice square beam where I have a BA Rectangle. So, in this case, the line interval probably won’t be critical (image, yes, fill, no).
Yes, after engraving and dusting.
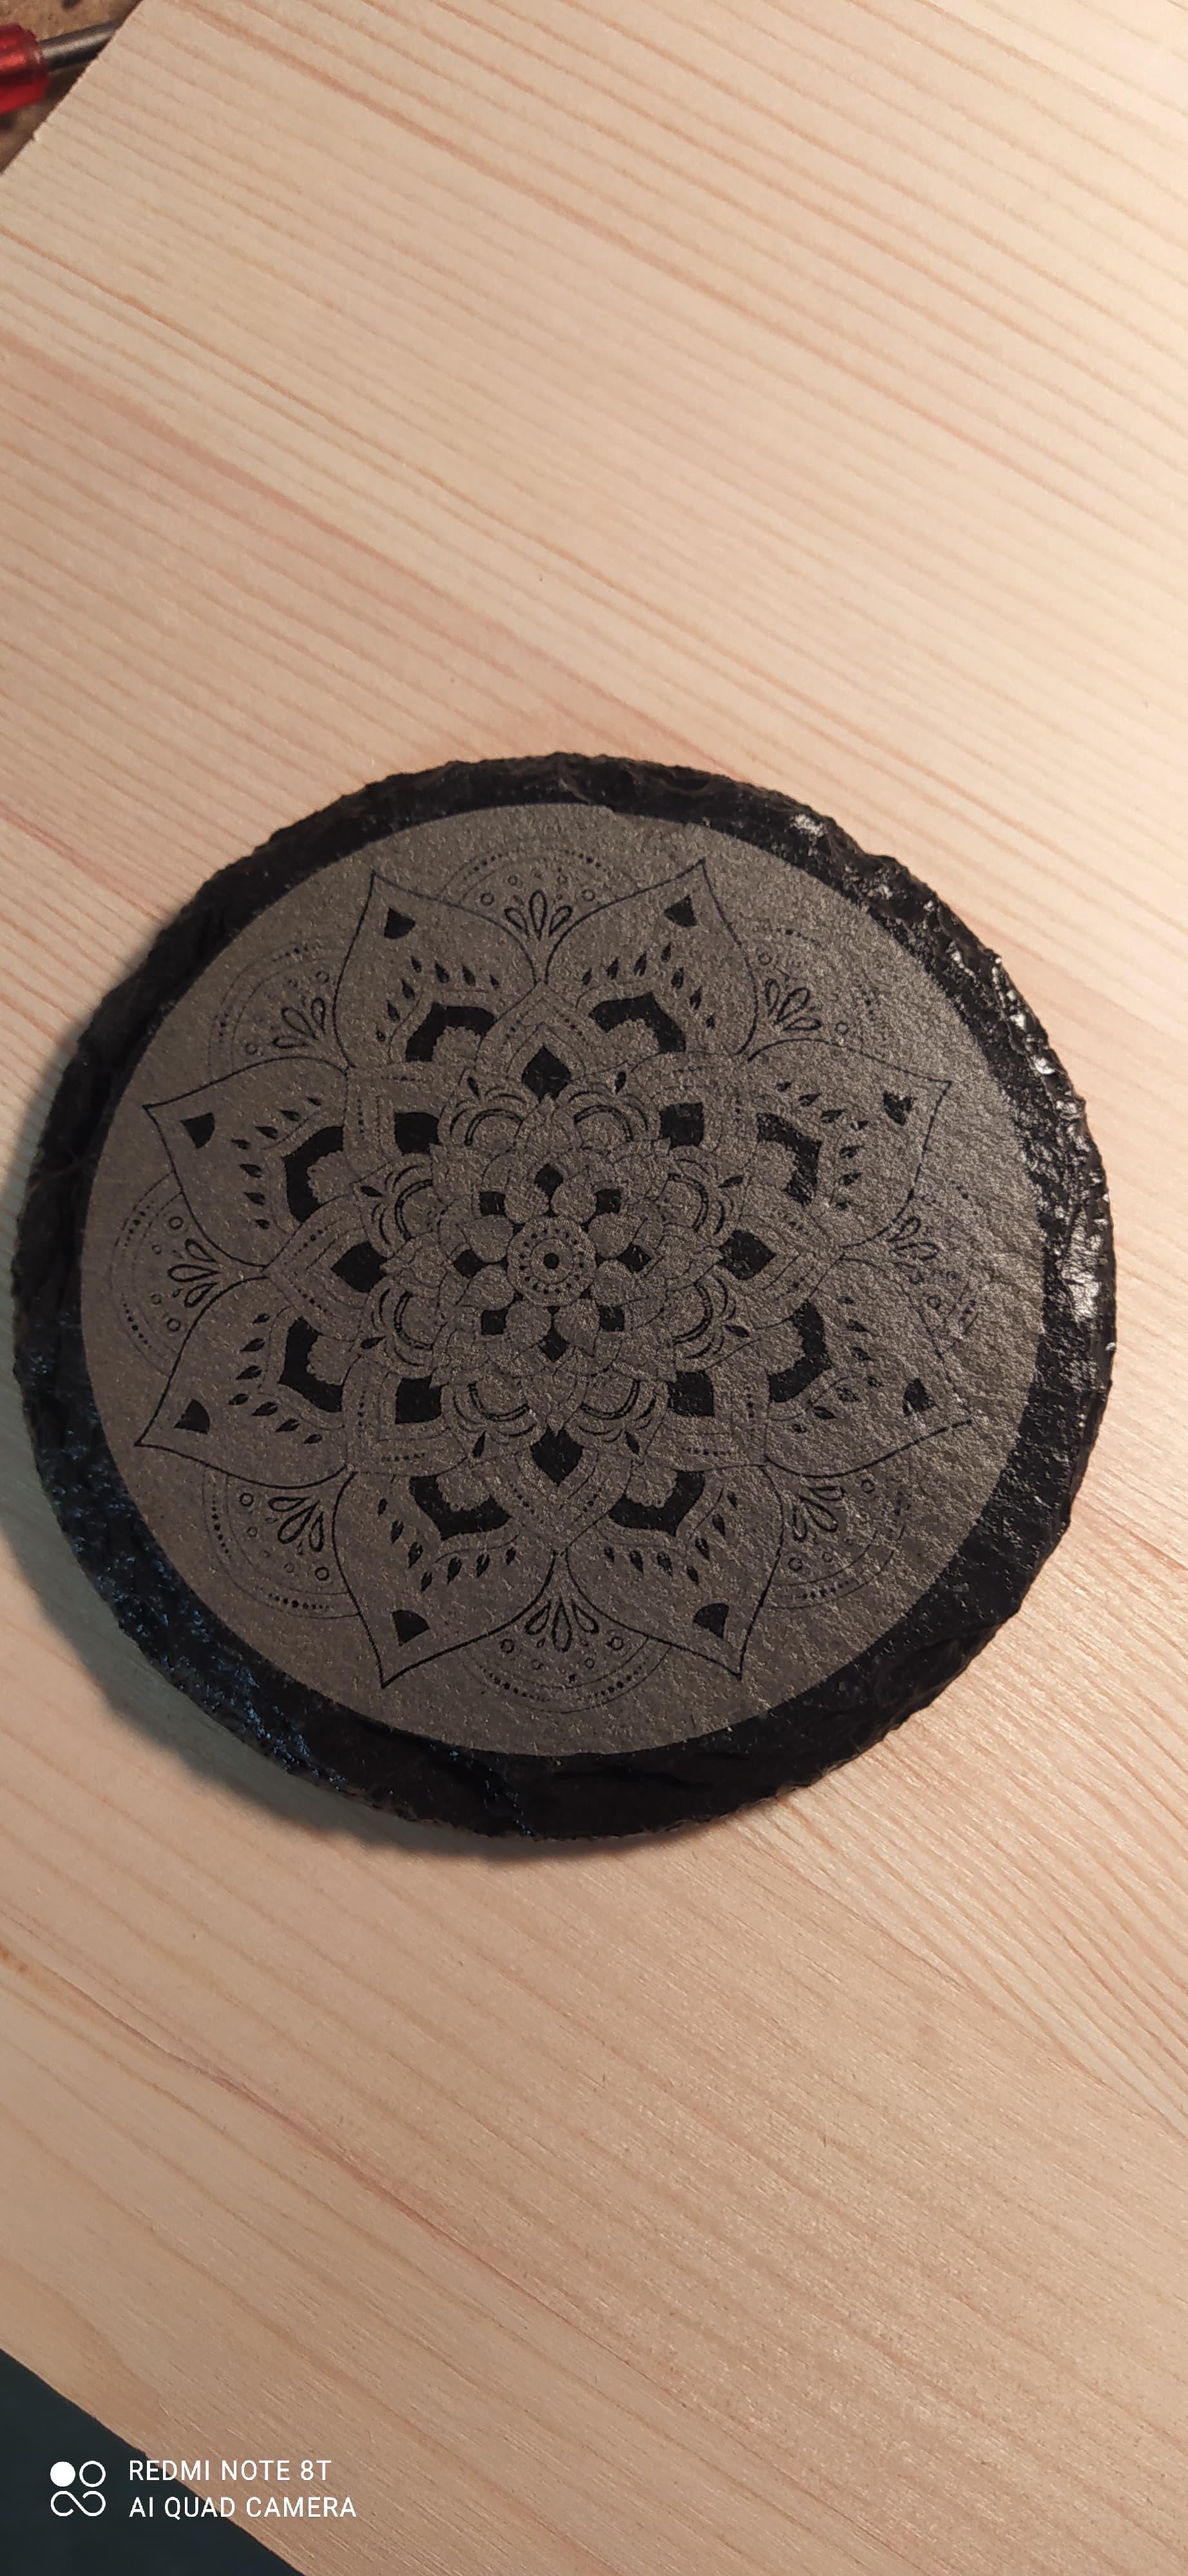
I posted my slates in:
Making money with Slate tiles - #28 by TomWS, post #22
1 Like
nothing to say… just WOW
btw i bougth a sealer, don’t have one 

I have found that, when making a negative exposure in slate, it helps if the artwork is adjusted so that all of the closed vectors defining dark areas are enlarged by some amount, maybe around 2 line intervals. This is because the ‘white’ AKA exposed regions are eroded and creep into the dark areas somewhat. This isn’t obvious with a positive image. With the uncompensated negative image you’ll find the thin lines get thinner with very fine lines disappearing into a sea of white.
If you look at the tiles I cited above, the eagle and cloud on the Air Force insignia had to be expanded. I thought I could show why with the other tile to the left of it (it is uncompensated and they’re not very well defined), but, when I cropped that photo apparently I ‘wisely’ cropped off the crappy one 
2 Likes
and how you do that? with a pics manager? like gimp? or PS?
In my case the artwork was SVG vectors. I had to isolate the sets of closed vectors and then increase or decrease their size proportionally as individual shapes.
In some cases I did have to node edit the curves as simply resizing enlarged areas inappropriately. It pays to learn how to massage your artworks with various tools like Inkscape, etc.
1 Like
ok , i suppose so, i’m not new to inkscape

If you spray it before you engrave it give more contrast. I use Rust-oleum xx clear gloss…
1 Like
i would like to use Rust-oleum products… but here in Europe those cans can’t arrive. I asked to an online seller, Jbtools if i remember well, that told me that aerosol cans can’t be sold outside America.
just another question to all. what about reuse engraved slates?
All you need to do to increase the image cut is to use a single coat of clear spray, Tremclad, Varathane, MinWax, Krylon etc. I prefer Satin finish. This will give you more contrasting image. If you add a second clear coat after burning, that helps to seal the material but it also reduces the image contrast a wee bit.
1 Like
That looks really good!
1 Like
I will add I seal with lacquer clear satin or semi gloss. Dries real quick. Works well for me but that is just my method….others may prefer different methods.
1 Like
You can sand them down with an orbital sander, although I haven’t actually done that yet.
1 Like