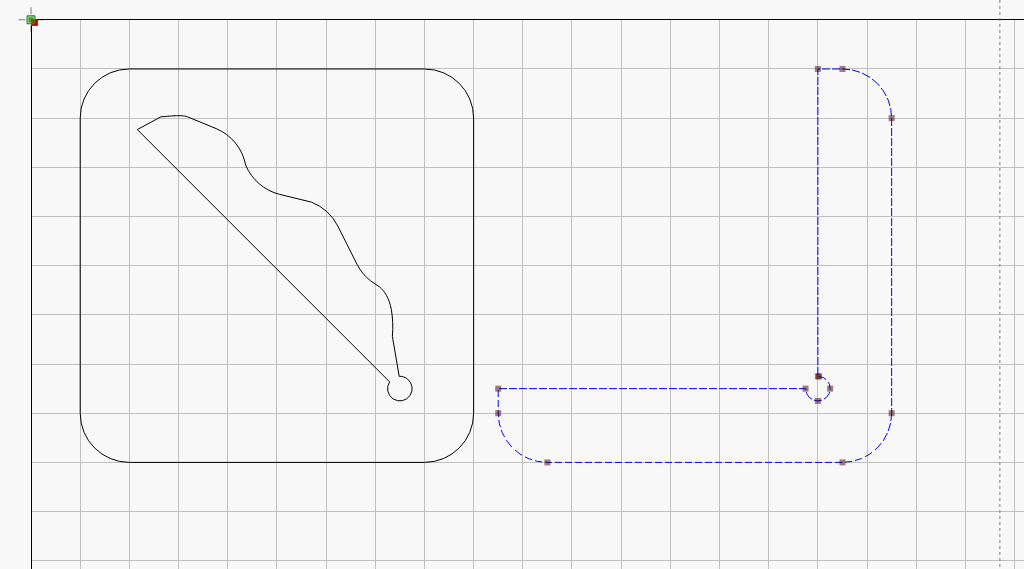
It was primarily intended to see if I could Lightburn-ify the tutorial, but I had an epiphany as I was putting it together. It seems like a Longworth chuck is a perfect center finder for regular (square/circle) shapes
My 3D printer and CNC are feeliing a bit lonely over the last few months. 3D is just way too slow. CNC is too noisy and has the mechnical contact with the material. Each still has their purpose, I’m just having more fun with the laser.
I’m actually looking at cutting a center finder like this one:
Ditto.
Since i got my laser my two printers are collecting dust. can’t do without them but they are hardly in use. since old habits die hard it took me some time to start thinking 2D instead of 3D. so many small things which took hours to design and print are seconds with lightburn & laser and parts looks and feels just great.
The center finder i’ve printed took about 2hours from downloading stl to finished product.
with laser cutting it can take couple of minutes to make from scratch using lightburn - even less if you download a sketch, load & cut.
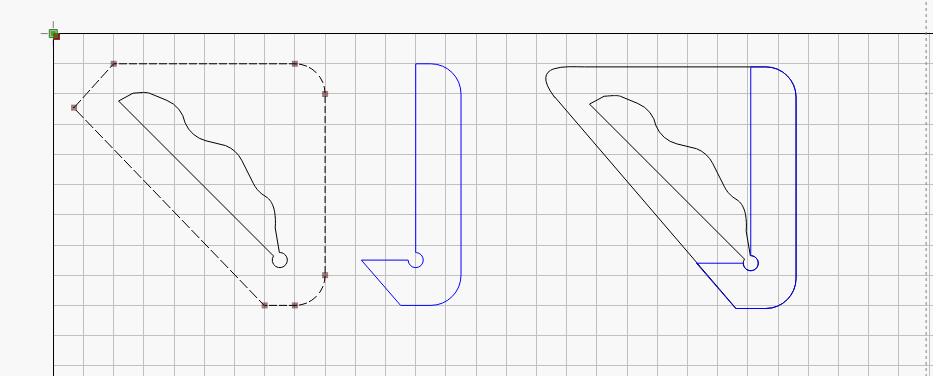
Have you considered sizing down the planform footprint? like maybe making it asymmetric with one face shorter than the other? there is no need to make it a square. i think…
Keyword phrase from my original post was “thrown-together.”
It could be more like the… bulging “L”… style than square, although that might make it a little harder to ensure that the sides are perfectly aligned when gluing.
A former project manager used to say, “You didn’t fail, you eliminated one possible option.”
Same idea, and I really appreciated the attitude - he understood that sometimes you’d get some distance down a path and realize it was flawed, so you had to scrap it and start again, and he just accepted that as part of the process. He was great to work for.
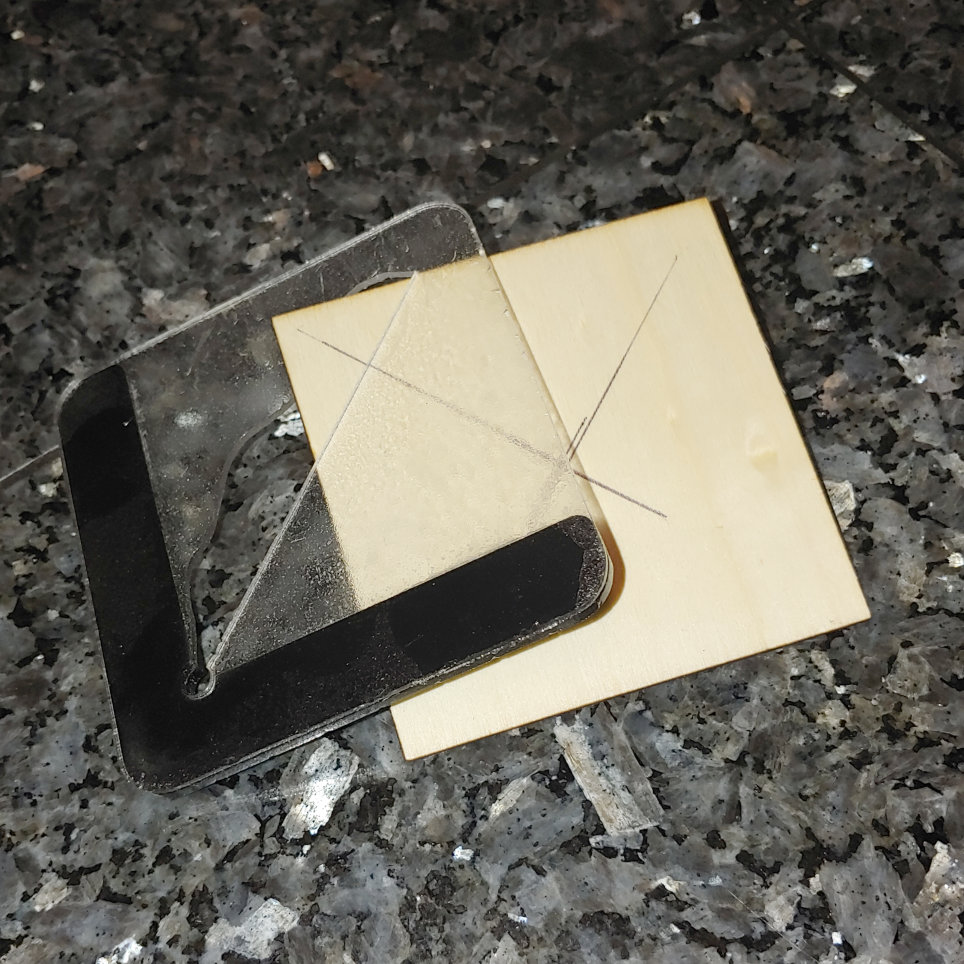
I just cut out the rounded version of the square original.
I had a “well, that wasn’t smart” moment when using spray adhesive for the 2mm clear top and 3mm black corner. I sprayed both surfaces since that’s stronger from the instructions. So the frosted look on the clear portion is now … umm… intentional. Yeah. Yeah.
Very nice man!
For Acrylic I use this glue and I’m lovin’ it. transparent, gives you few seconds to align the parts and bonds like James bonds to its ladies. - it actually melts the plastic a bit so the parts are welded together and practically become one piece.
Which spray?
Can’t wait to see the outcome. i fancy your design.
In regards to the L shape - Are you going to keep the inner upright lip straight or you’re going to add the portion of the arc at the base close the center hole just so it will not be floating?
I hope i managed to explain my point…