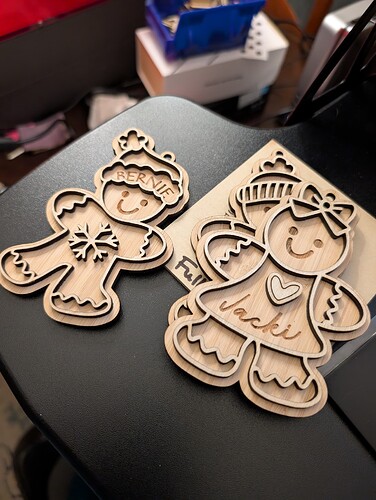
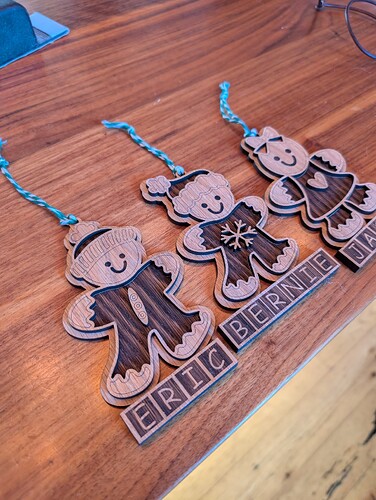
Hey all! I’m experimenting with ornaments for a local fundraiser. I made these out of bamboo, but they’re not to my liking. Does anyone have some suggestions on spicing them up? I don’t like the etched names. I think there should be more depth variance. I used 1/8 bamboo for both layers. Open to more materials. Paint is great, but it would have to be easy, meaning no expert hand control.
Bamboo can be an issue, it’s not wood, it’s a grass. Many have inconsistent results engraving on bamboo.
Good luck
![]()
Try using Cross Hatch with 45 degree and line spacing ca. 0.2-0.4 mm, not too much power and at the speed that “sounds” right for you, then a layer with, or as a sub-layer, a round “normal” line with moderate power.
PS. Line spacing at Cross-Hatch depends on how big your letters are, here you also have to experiment a little.
I’d fill the engraved layer with some nice paint (or even resin if you have the possibility). Afterward, you can sand the surface such that the color only remains in the engraved areas.
Or, you could put some painter’s tape on the bamboo before engraving, then you can fill it even more easily and remove the tape after painting. Then you avoid the necessity to sand it.
+1 on fill layer in parts at different powers and different scan angles for shading.
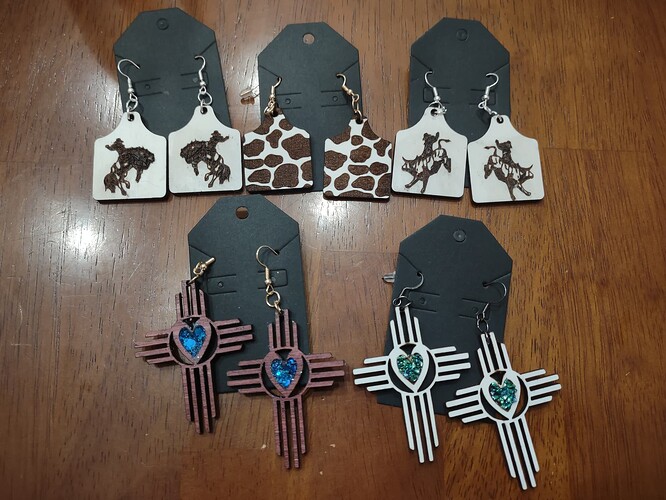
I have started to use craft glitter and super glue on the earrings I make. I engrave a shallow pit, put in a drop of glue and fill with glitter. Allow to dry then tap the excess glitter off…
I’m also thinking about options of changing the design to include more 3D complexity, versus just two levels and engraving. I’ve tried colored epoxy once on a vcarve. Haven’t tried it here yet.
@bernd.dk , I had not heard of that cross hatch and changing the spacing. Will do. Question, though … could you elaborate on the low power approach? I’m still super new to this and I’ve spent HOURS doing materials tests, trying to learn. My latest thought has been to try to use the fastest possible speed. Last night I was running at 25k/40% and think it looks fine (basswood) - not burned. Are you implying that there are use-cases more suited for low power and speed?
Thanks all.
Focal length, speed and power will give different depths and color effects.
Our posts crossed. Didn’t want you to think I ignored you! Soooo… way more experimentation is in my future. Ok.
I have a friend that makes jewelry. I’ll have to show her your stuff. Thank you.
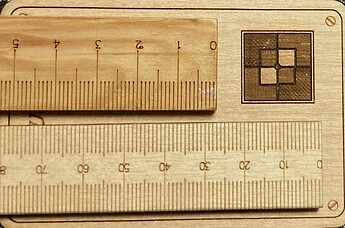
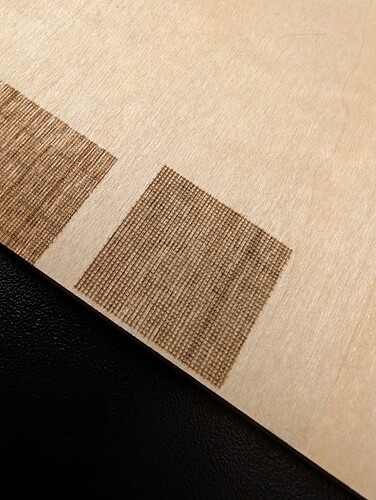
In the picture is an example what the possibilities are, I couldn’t find something I’ve done recently.
Image is 20x20mm and at a distance gives a finely nuanced image and is part of a business card to my brother who is a carpenter master with his own little business.
I use Cross-Hatch Fill with many different settings, depending on the material. In acrylic I can make a fine diamond pattern that is fine for grips and similar items, mostly decorative elements.
Cross-Hatch takes more time but has plenty of options, try to play with some leftovers, start with something simple, and try it out. As I said, I also use it to fill text with.
WOW! This is great to know!
…I found a slightly newer example, note that the diamonds break out when they are too deep/used too much power.
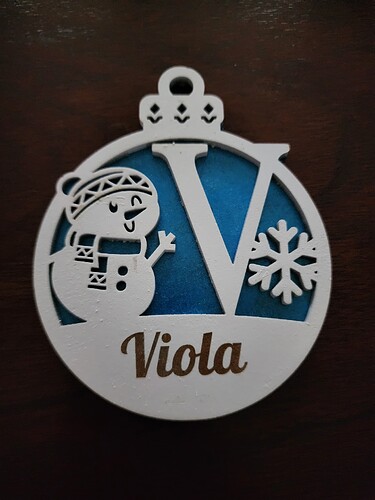
After some tinkering, this is what I came up with. A mixture of cutouts (with and without) hashing on the base layer and engraving. I’m pretty pleased with this as a starting point. Using this as a fundraiser at the gym for a toy drive.
Love your CrossHatch Bern
Happy and Glorious Holidays to you from our family.
Just my opinion, if you make your laser work with the wood veins horizontal they become less noticed.
If you don’t want to paint try powder coat powder and a hot are gun
Oh my! I was unaware of that option. Will investigate.
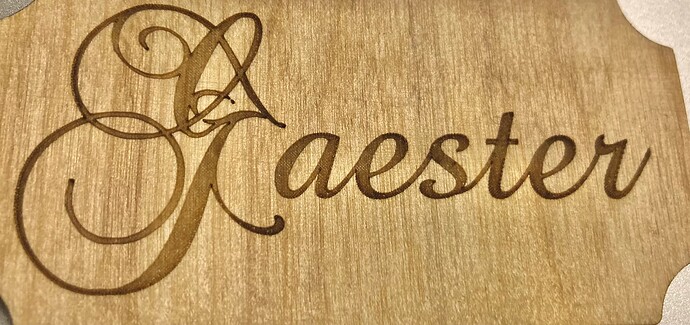
I actually did cross hatch here, which is not obvious in the photos because of the grain, as mentioned. I will continue to experiment with that in mind. Thanks.
