Since it’s DC I figured that the solenoid is running opposite since it’s polarity is reversed. But I only looked a schematic for something else for a few seconds. Not sure if a relay needed to be installed or not. I returned all my air assist stuff since mine includes a very nicely upgraded pump. It still needs more control though.
For these kind of applications there’s no polarity to the coil itself. It would only apply if it has some kind of protection diode in it. Which I doubt. I’ve got a few of them and none of them do. I assume they use two color wires so they don’t confuse you with a single color.
Does your supplied compressor look like this?
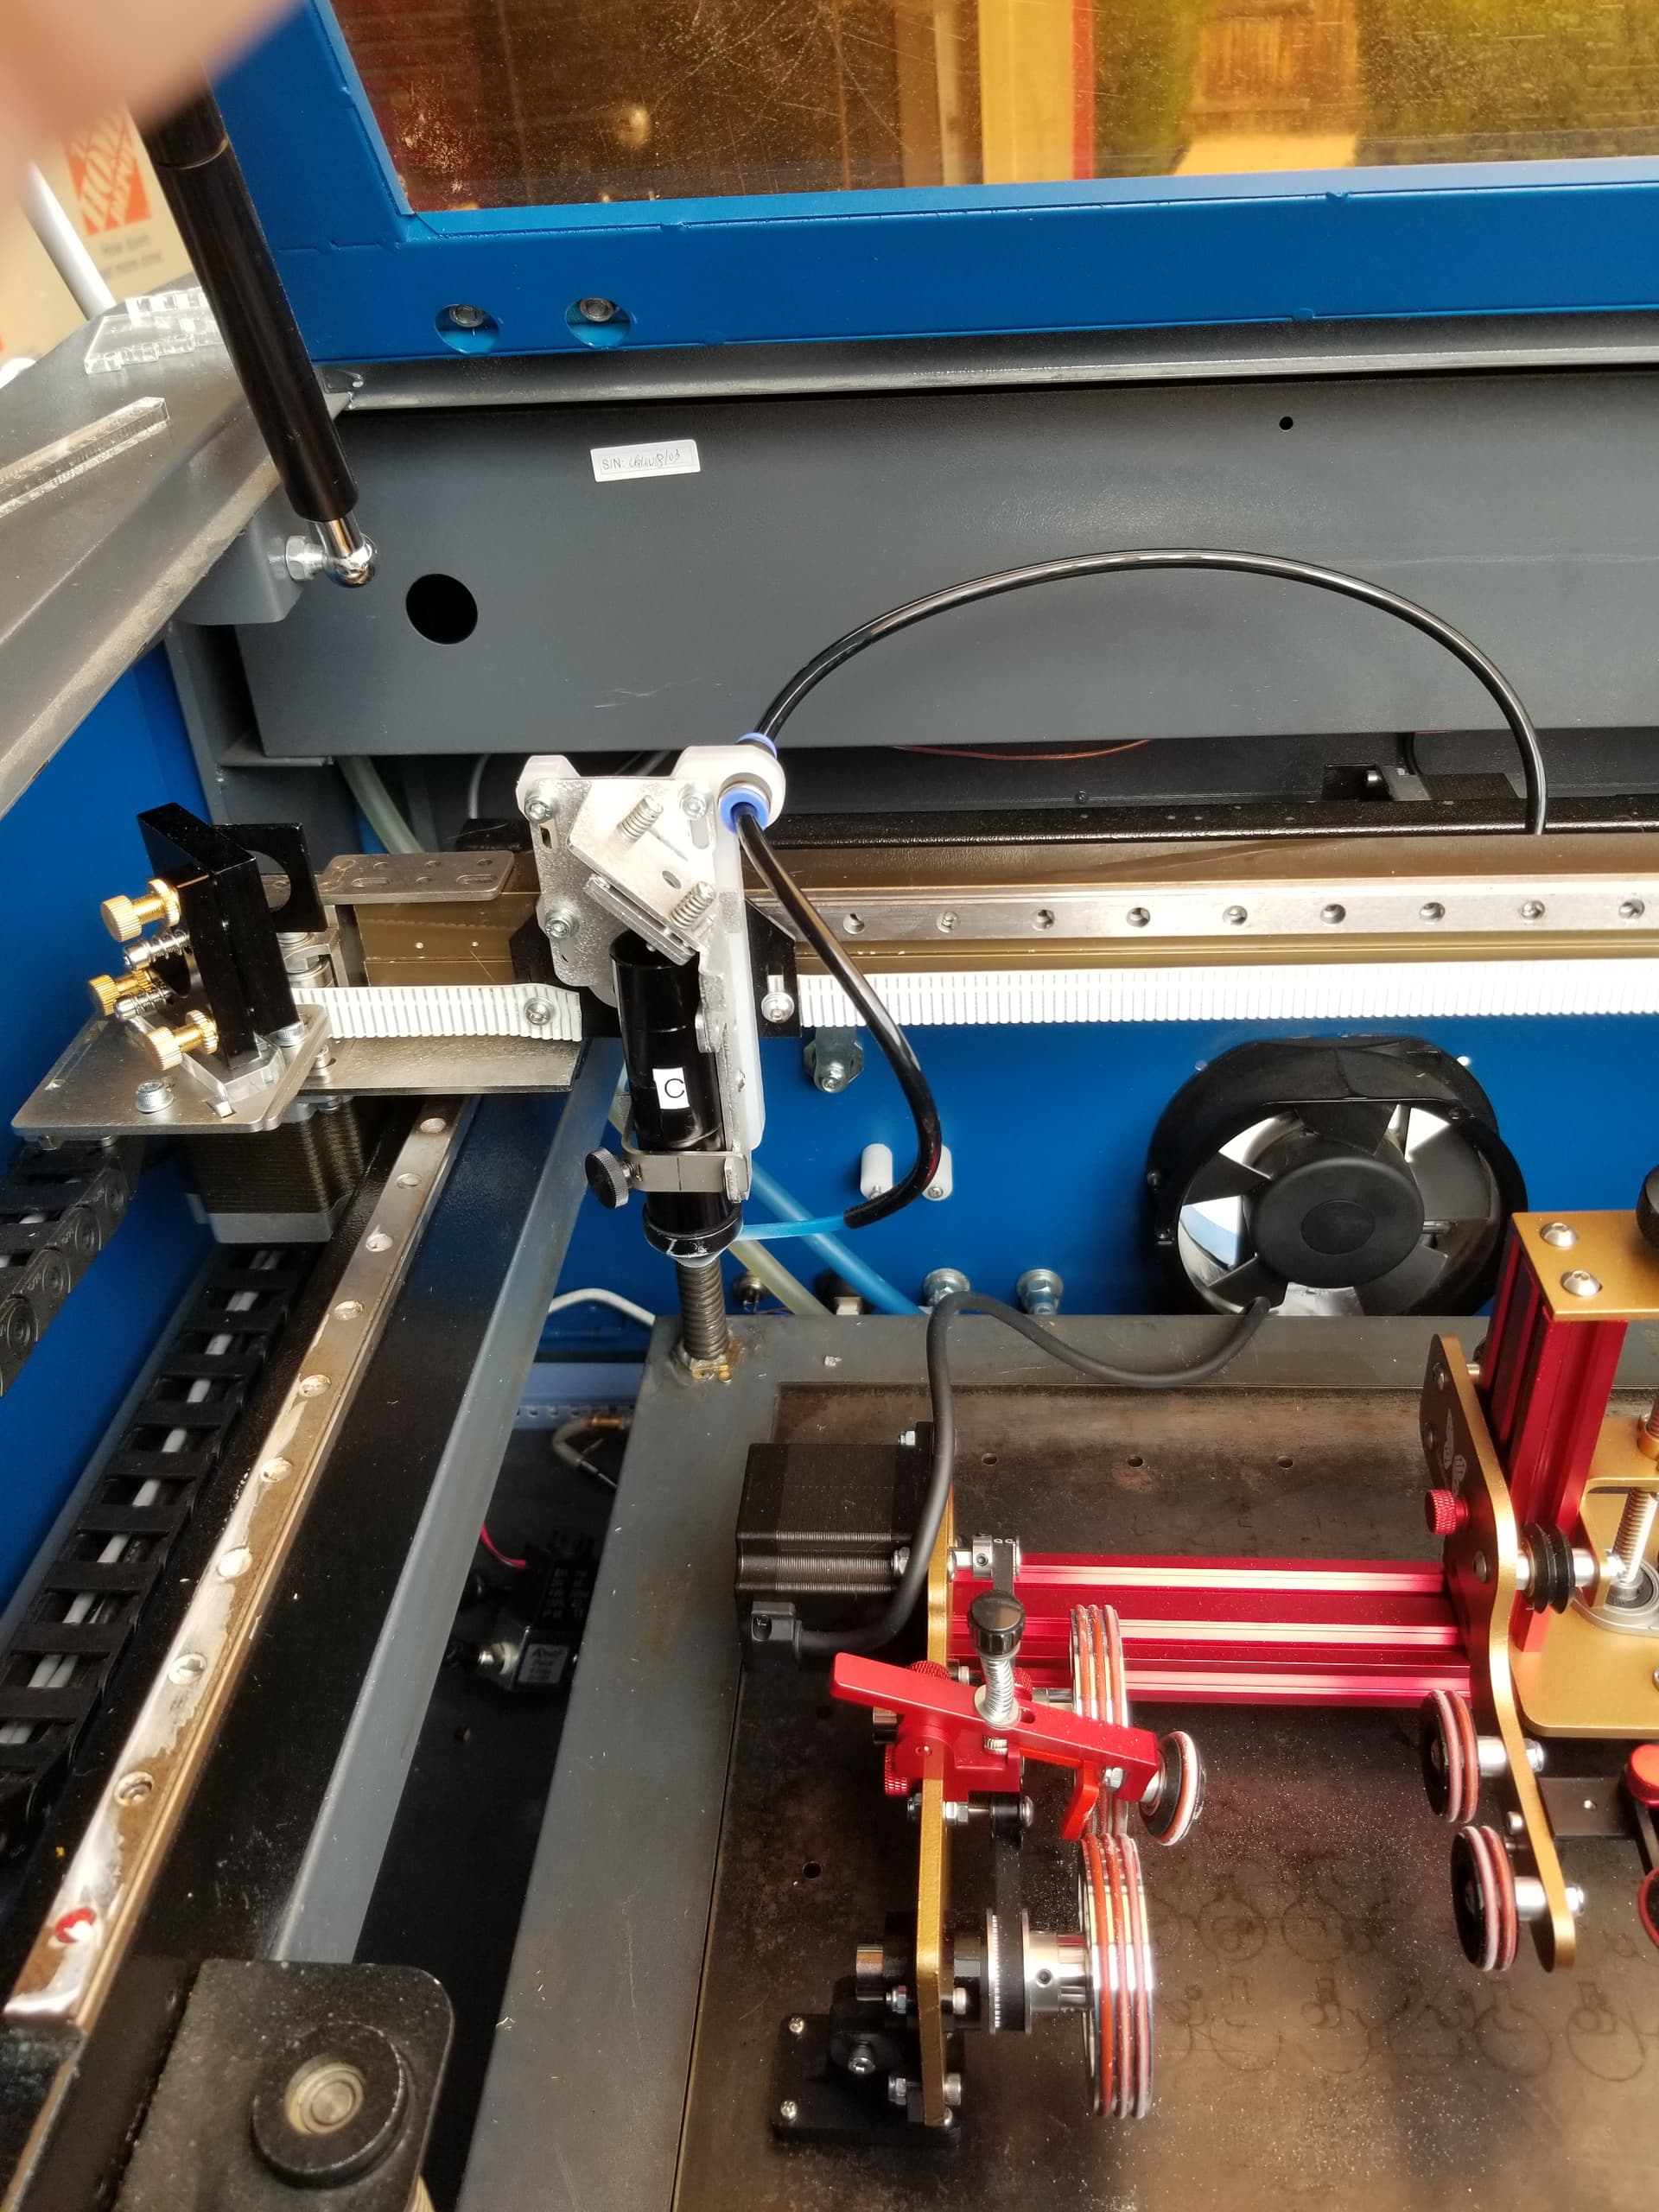
This was part of the ‘2021’ model upgrade, along with a honeycomb bed. The best upgrade was an access door on the left side, that’s been a lifesaver.
You can see the old mount is still there.

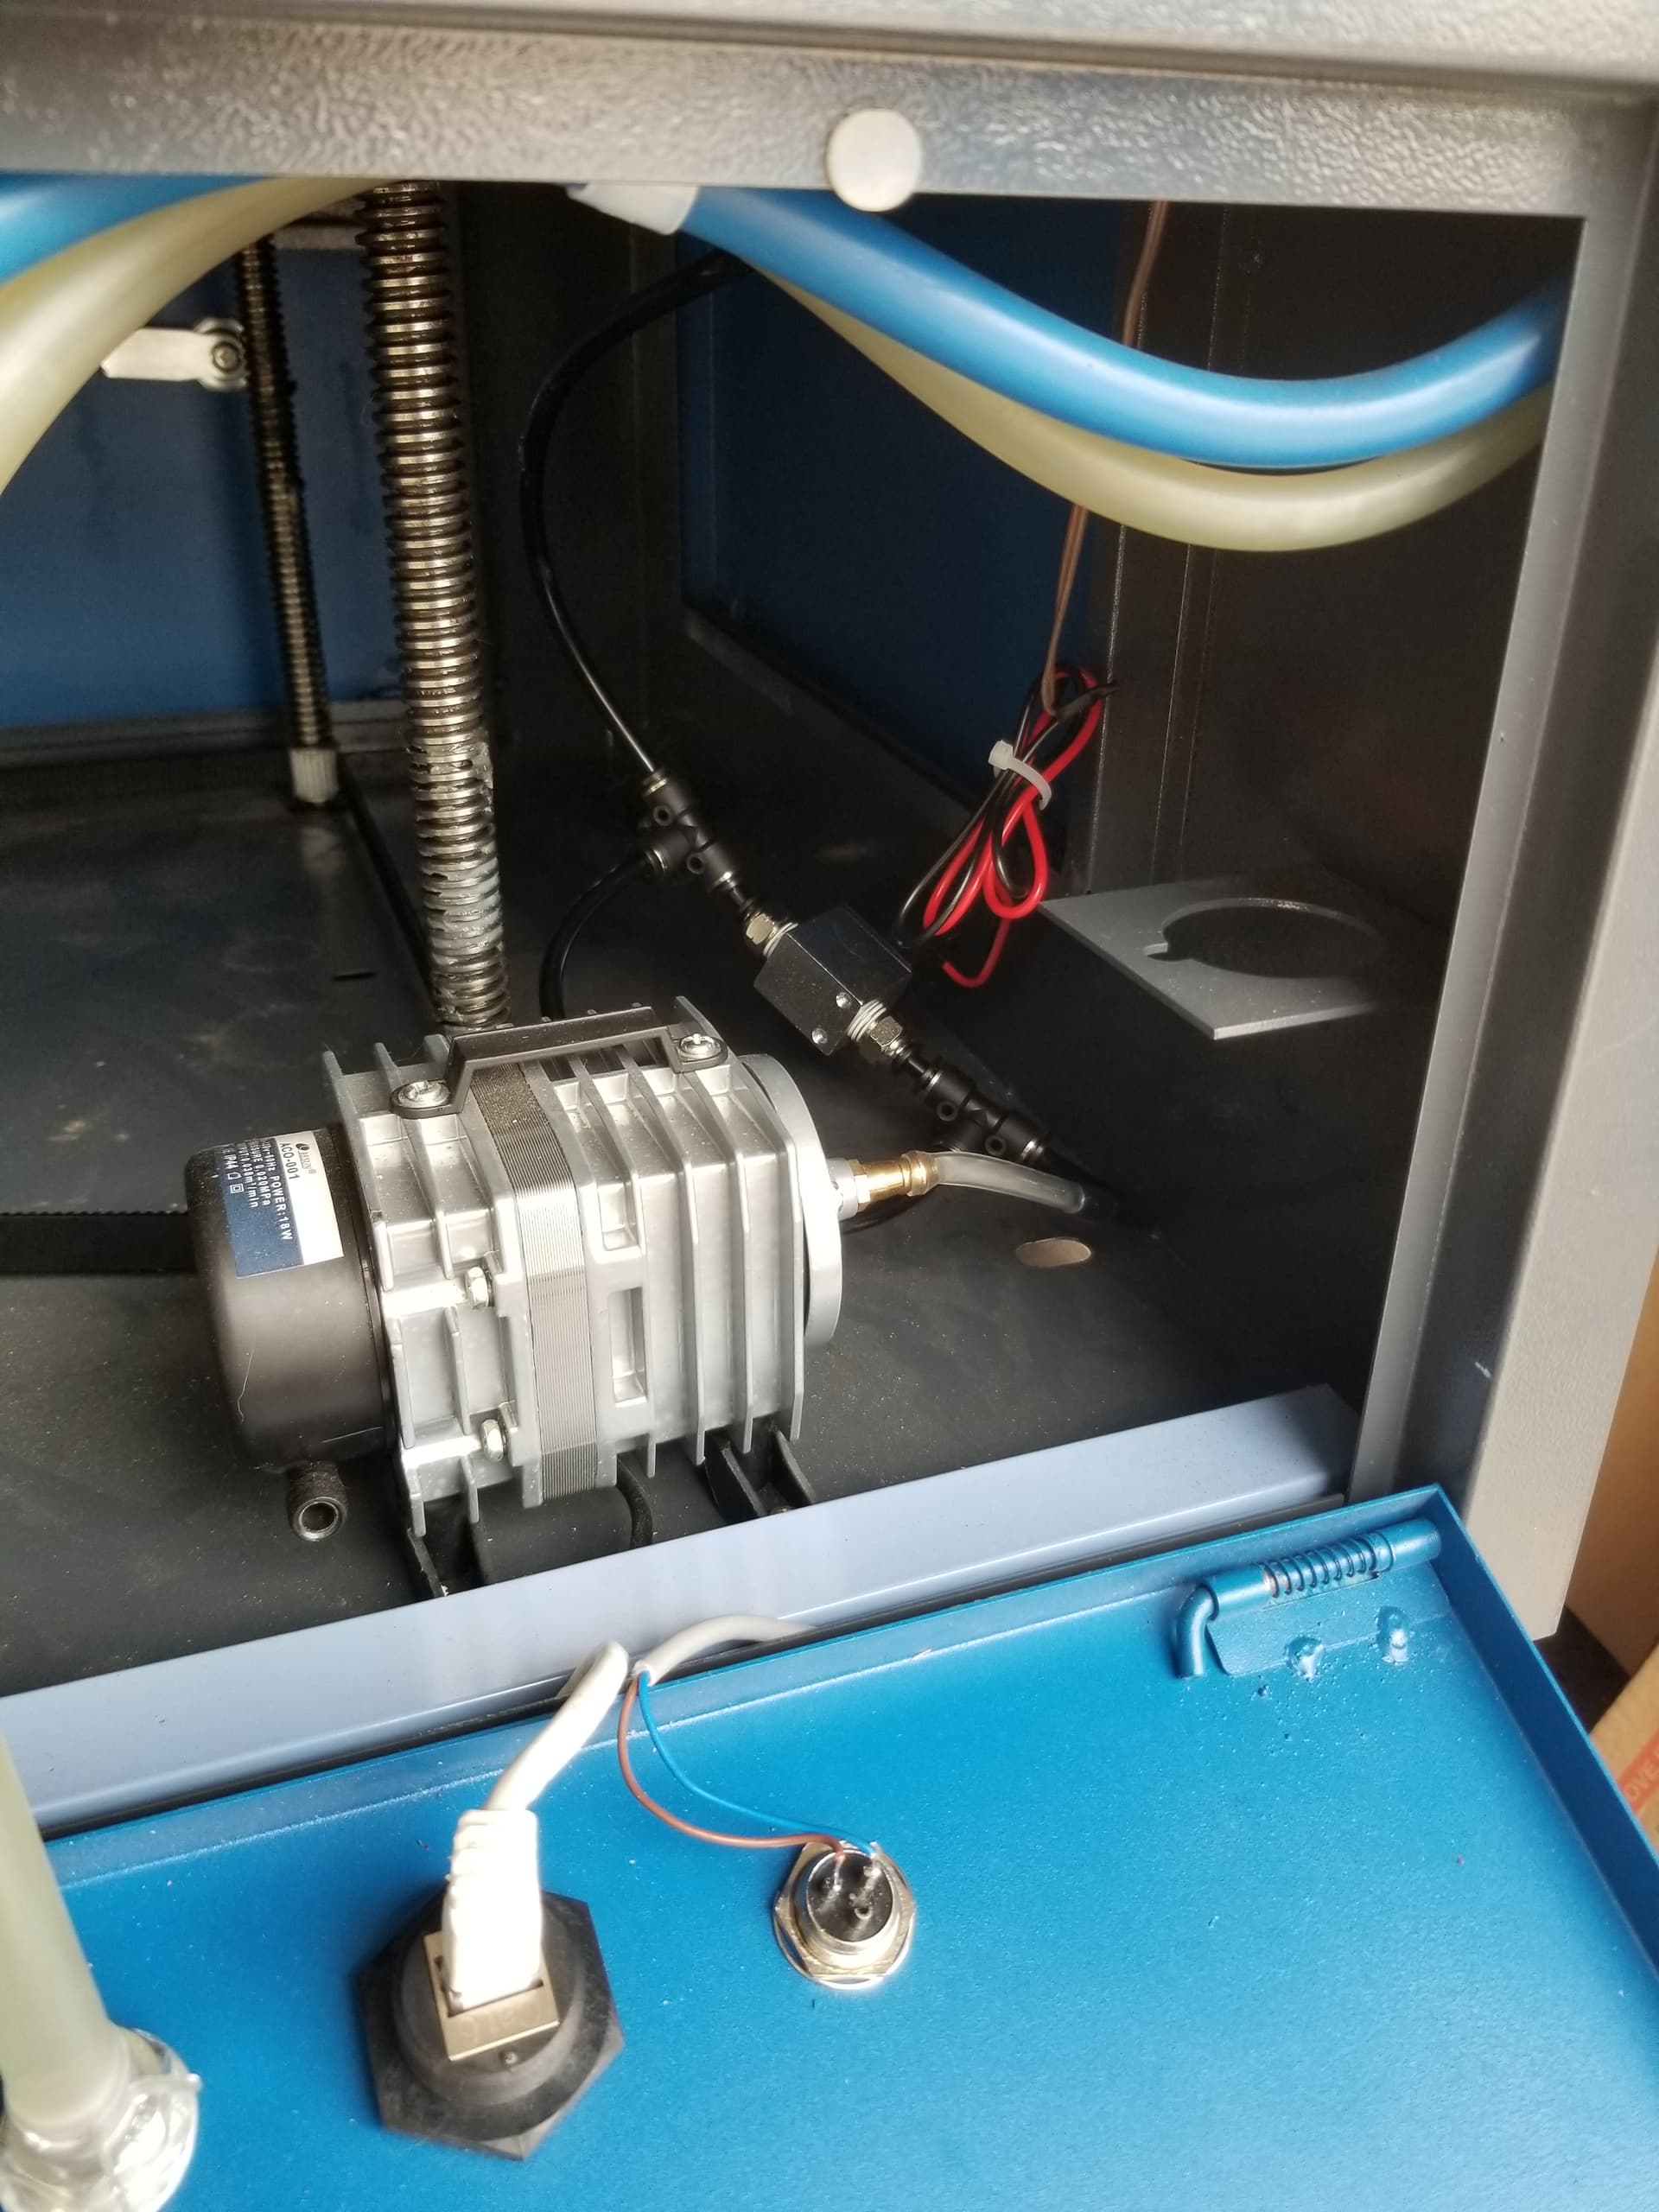
Yeah, my upgrade is one model above yours I believe. It puts out some decent air and is almost completely silent. I don’t have the old mount though. It doesn’t turn on and off with the controller though. Something I’ll look into later once I’m happy with the rest.
Mine is connected, with the ventilation fan to a SSR wired to ‘Status’. When the machine ‘runs’ it turns on the pump and the fan. So I get low pressure during a ‘run’. The relay is selected by ‘Wind’ to bypass the restrictor when I want full pressure.
Low cost air assist.
1 Like
Don’t forget to turn on your extraction fan when you are using your laser.
When used in conjunction with your air assist it/they will not only limit the flame(and give you a cleaner cut) but keep any gas from building up and keep your lenses clean
Hi,
Thanks so much for all your help. @Nev yeah, I always turn on the extraction fan (though, knowing me, it’s possible I could forget:)
I’m happy to report that the problem was 100% that the polarities were reversed. I had told my spouse to wire it up and he put it in there the only way it would go.
But I had some of the green two-pin, not six-pin connectors already on hand and wired it to those and it works great now. Seems to have solved the flaming issue too!
Thanks so much again for all of your responses.
Cheryl
1 Like
The main difference between the solenoid you have and the one with the kit is the operating pressure. Most solenoids will not operate with the minimal pressure put out by the piss as included air pump. The one in the kit will. If you have upgraded to a proper air compressor as you should, then the solenoid you have should work just fine.
As for testing, shut the laser power off and run a test cut. Good air assist can be easily heard. I run around 15 psi flow pressure through a Cloudray No3 nozzle for my MDF cutting. You definitely know if it’s on or not.
The selenoid is polarity agnostic so it doesn’t matter which color wire goes on which.
I use the exact same selenoid and they are polarity agnostic.
I had the exact same issue when I hooked mine up.
Turns out I missed one step which is to enable air assist on the controller. You can do this from within Lightburn so it’s pretty easy. I’m linking a video that explains the whole process of adding air assist but the part you want starts about 10:30 in the video.
Sorry, I really don’t get what this means.
She had already done this, she confirmed it in one of her responses.
They mean the polarity shouldn’t matter. I can’t attest to this because I’ve not used a solenoid like that. Some the polarity does matter. Some they don’t. Apparently this one mattered.  or didn’t. It’s fixed so that’s what matters.
Too bad the country of origin is China… I’ve fried a few things ‘following our countries wiring code’ ![]()
![]()
my first 60w blue 28x20 machine had honeycomb but the old 24v pump, march 2021.
my 2nd machine, sept 2021, has the new AC pump, a different focal length lens, and they moved the lights inside to the bottom of the X gantry (way better than lights on the rear of the bed).
1 Like
Mine arrived mid June. Honeycomb, which I replaced, new air compressor and left side access panel, a godsend.
Mine was a 1.5" lens that I still use now and then. I think the lights on my gantry are feed by the mains voltage. 
left side access near the 2nd mirror? both of mine had that, agree. i can’t imagine it without…
Jack,
Where did you find a replacement honeycomb? Mine has a few places that aren’t level with the rest of it and I would love to get a new, flat one.
Thanks
Where do you live? I’ll give you mine… It’s laying up against the wall somewhere in the garage.
I went to the local steel dealer and purchased a sheet of rolled steel, cut to the right size to fit in the machines hole. Cost me $12 by the time I paid for the steel and the computerized cut…
You can see the PiBurn rotary sitting on it. It has alignment holes drilled into it for jig setups.
Watch Russ’ video on honeycomb beds. It’s less than 16 minutes, always helps to visually see something for yourself when making decisions.
If you still want one, they’re on the Internet, but there’s no judge of it being flat. Keep in mind, virtually nothing is perfectly anything…
I can cut a bunch of acrylic and the residue just wipes off with a rag and alcohol (acetone for woods).
I don’t want to hijack this thread but I see the problem has been solved and I have a question which relates -
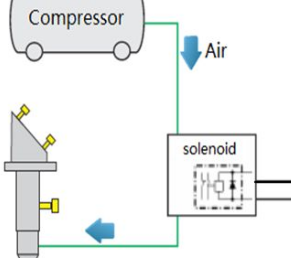
I have an ultimate air assist set up with a compressor so I am wanting a ‘master’ solenoid which can operate on the status to turn the air on and off from the compressor prior to the UAA switching between high and low flow.
I have purchased the same solenoid which @jkwilborn has linked above (https://www.amazon.com/gp/product/B07BW21Z5M/) - this comes prewired but do I still need a diode to run between the + and - wires? (I have some spare diodes from the UAA kit). There are lots of warnings about solenoids causing damage to the controller if a diode is not installed.
I don’t think I can be bothered installing the bypass switch as I haven’t had a need to run the air when not running a job - is this something most people can live without?
If I ignore the switch I think I need to wire the UAA solenoid between the WIND and 24V and the other solenoid between the STATUS and the 24V and that is about it?
PS thanks @dvdlock for pointing out the incorrect flow valve part in the UAA kit - I have ordered a replacement. This would have been very frustrating and I am amazed Cloudray has not rectified this issue (I have the incorrect part in a kit purchased about a month ago).
It is recommended in the Ruida manual to have ‘reverse diode protection’, at least in their graphics.
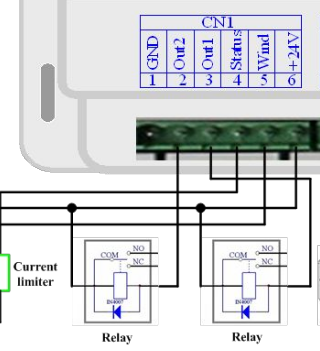
Is different than
and is the way it’s in the Ultimate Air Assist, across the coil.
Mine have run since around April - May without any diodes and many others have stated the same. The solenoids I posted probably do not have a diode. That would add costs and give them an ‘advertisable’ advantage which they don’t use. QED, there are no diodes in these.
The diodes don’t have to be ‘at’ the solenoid. You can put them across the ‘solenoid’ anywhere on the path to the controller, as long as they are ‘electrically’ across the coil.
If you have them, stick them in… When I rebuild mine with a pcb, it will have them on board. Already have the smd packages ordered. They are probably the lowest cost insurance for protection of the controller you can make.
Take care…
1 Like