I just ordered the California Air Tools 8010 as well.
Lowes and Amazon have it for $155.19, and Home Depot price matched over online chat. See if they’ll do it for you.
I was looking at the Harbor Freight fortress models, based on videos I think they are louder even though both product lines advertise 60db.
My initial impression from half an hour of frantic research is:
You can’t beat the discount price of HF at $110 for the 1 gallon, but the 2 gallon for $150 or a few bucks more for a Cal Air Tools brand 8 gallon, great. The HF 2 gal is a 1.2 HP vs Cal Air being 1.0 HP. Oh well. Will see what happens.
I’m wondering if I can run multiple machines off of one of these. I have several K40’s including a K40D and more recently the typical 50w Blue and White that still needs to be set up.
Compressor arrived today… It was loud… I needed to RTFM and install the included air filter on the input side, then it got quieter. It’s still a bit louder than I expected though - they advertise 60db, I’m measuring around 63-65 if I start it from empty, and as the tank gets closer to full it goes into the 68-70 db range.
I’m working out the set up to get the triple manifold to branch out to 3 outputs each with their own pressure regulators so I can run multiple machines and maybe a blow gun all off this compressor.
I have to agree with the compressor conversation. Only other comment I have is I find that too much air blows smoke back onto wood when engraving, causing smoke residue stains.
I have a small air tap in the air line at the machine. Using this I can directly control air flow to maximum effect.
Different tasks often require differing air flow rates.
Hi.
Another one who switched from acuary pump to a higer flow compressor. Mine has 50L tank, and the improvement on cuts are amazing.
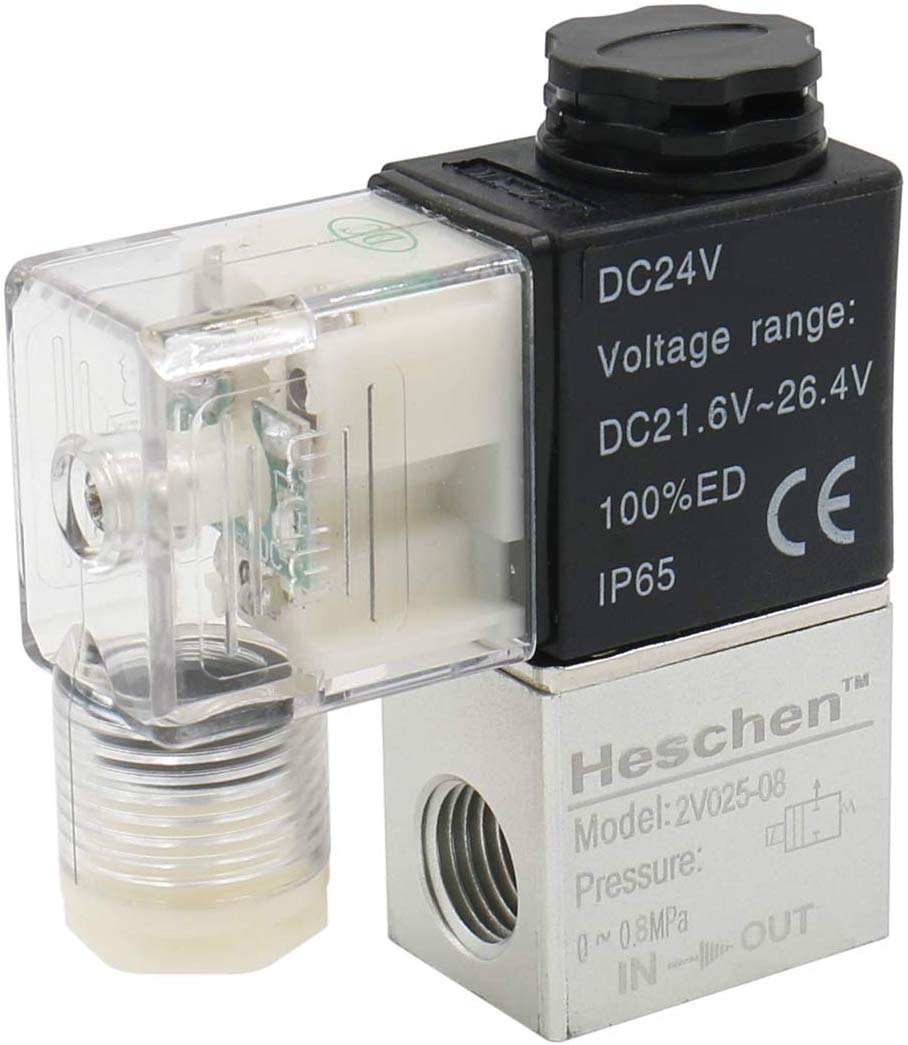
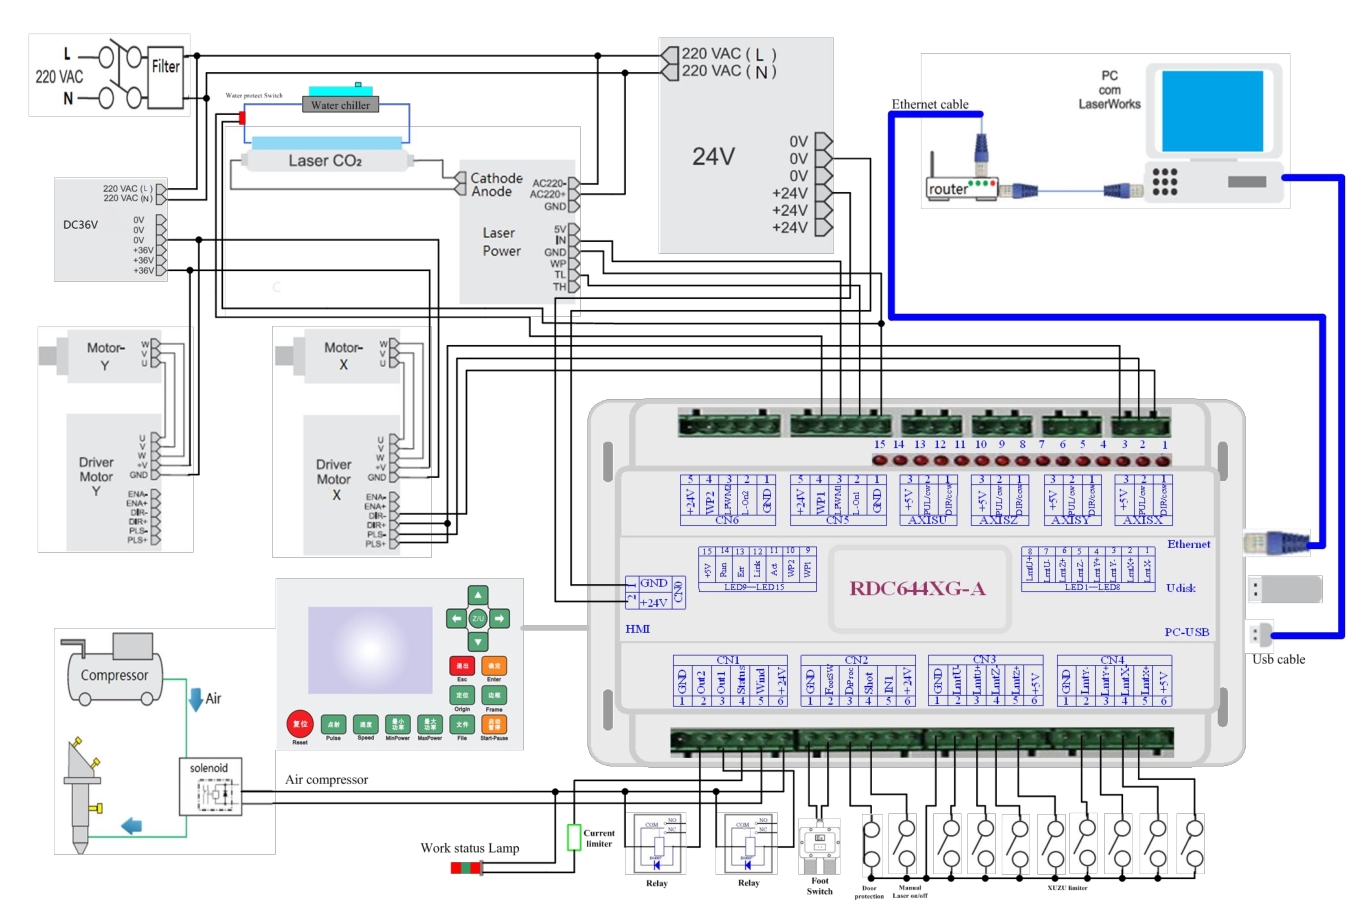
I have a 100x60 Ruida 130W CO2 laser, and used the air output of the controller to open a solenoid valve, wich opens a regulated and filtered air flow so I can control it depending on what I’m cutting or engraving.
The real question is 'Why I didn’t do it before", specially because I had the compressor 2 years before my laser.
I’ve been wanting to do that as well with a controlled valve. What did valve you get and how did you connect the circuit and make it active in the controller?
I use Hailea pumps, they are made to run 24/7 very reliable , I have the 328 model which puts out 70 litres a minute, there are much larger models if this is not big enough, I paid about 50 gbp for mine.
on my diodes it works fine as an air assist. I also use it on my CNC to blow dust away and on my 3d printer as additional cooling when printing in PLA.
For those who are running an air compressor (and not just a small air pump), be aware of the impact humidity will have on your air quality.
If you’re not drying your air, then you will most likely find water coming out from the laser nozzle. Now it’s too late. You also have water on your lens now! Uh oh. Get water on your lens, burn a hole in your lens.
Water also collects contamination on the lens. Lesson: use an air dryer and a filter if you are compressing your air.
Hi.
I think this solenoid valve hasn’t a diode, because it’s nothing printed on it that shows is has. Anyway it’s easy and cheap to put one.
The 1N4001 will fit, but I used an 1N4004 of wich I have some.
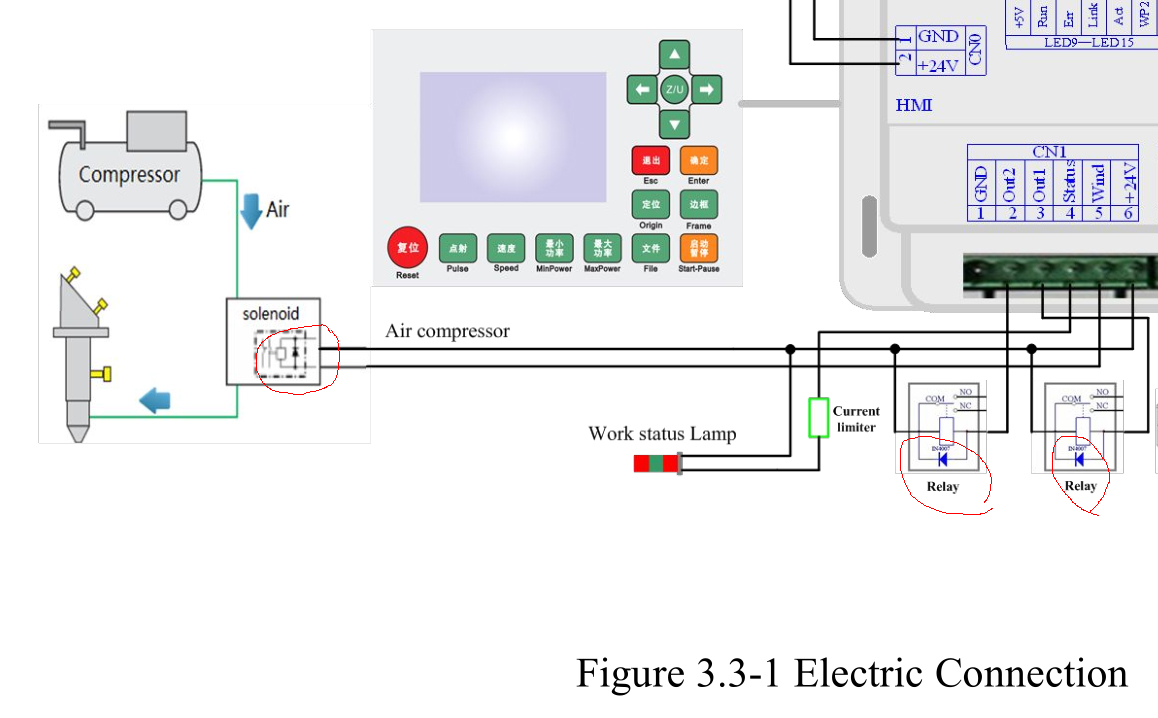
The way to connect it is on the pict I posted. Here is a closer view:
As you can see, the band of the diode must point the +24v side, in order to virtually nonexist when the RUIDA opens the circuit, and do its job when closes it.
How many PSI do owners of typical 700x500 Chinese lasers pump into the socket at the back of their machines? I have wondered how many psi the internal tubing could take without damage.
I modified my air assist years ago so that the air comes out a small aluminum tube right next to the nozzle, like the setup that some mainstream machines use. The tube is on the front side so that the air is is deflected rearwards. The lens stays much cleaner now - any moisture that does come out (which is very rare - and then only for the first couple seconds) is not a problem.
Unless the output of the lens nozzle is very close to the workpiece there is no advantage for the air coming out of the nozzle vs a tube right next to the nozzle. If you use a longer lens then you can’t have the nozzle very close anyway.
With a longer lens you also need a larger hole in the end of the nozzle so that the wider beam does not hit it - which leads to some curious side effects, some sort of vortex is created which will actually suck material up into the nozzle and then onto the lens.
For the best nozzle based air assist some people will put a nipple (baby bottle type) over the nozzle such that it is almost touching the work. This forces all the air to go through the cut, and the nipples are easily replaceable. I am not one of those people.
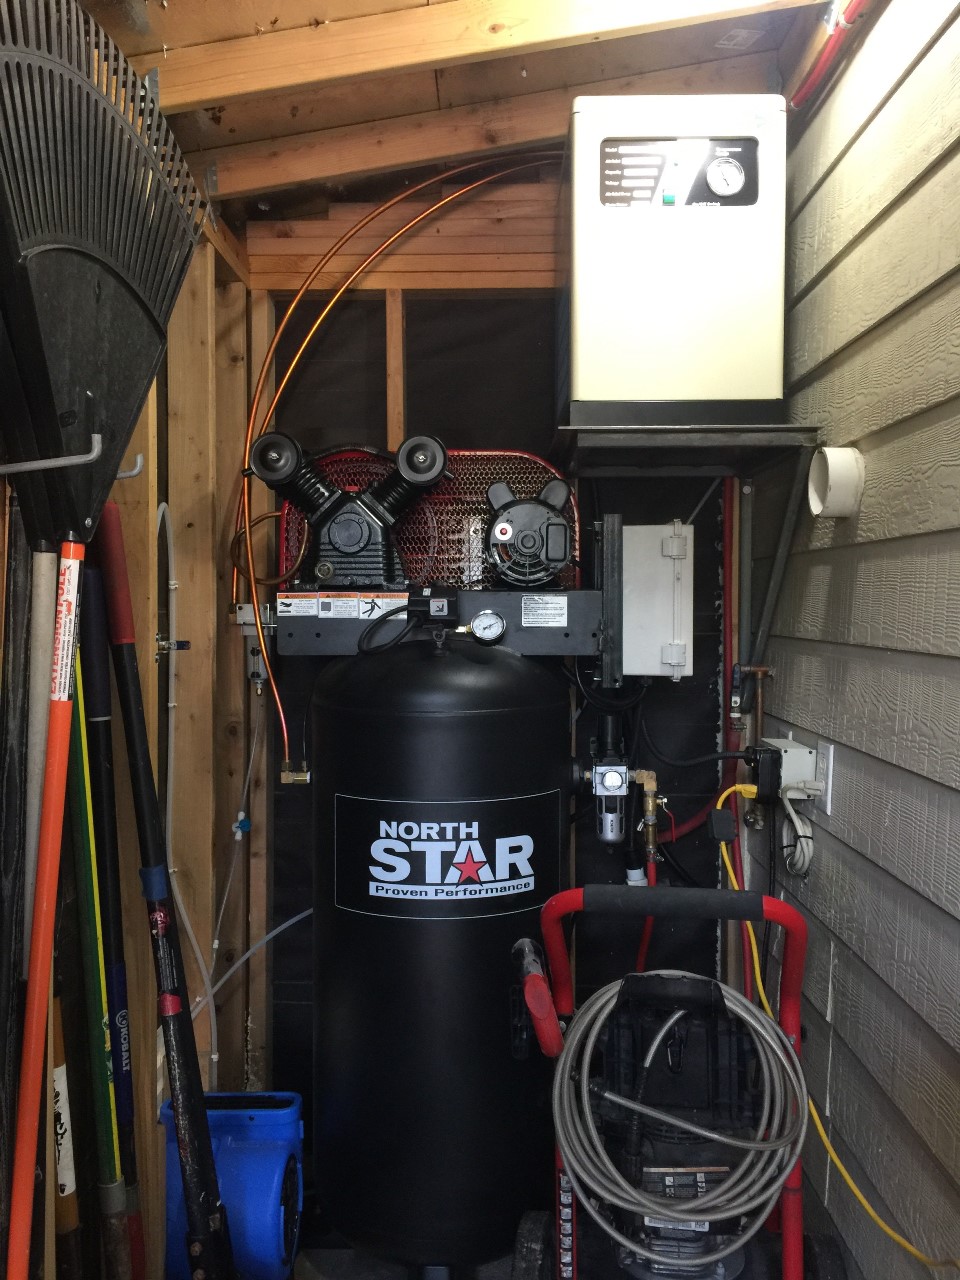
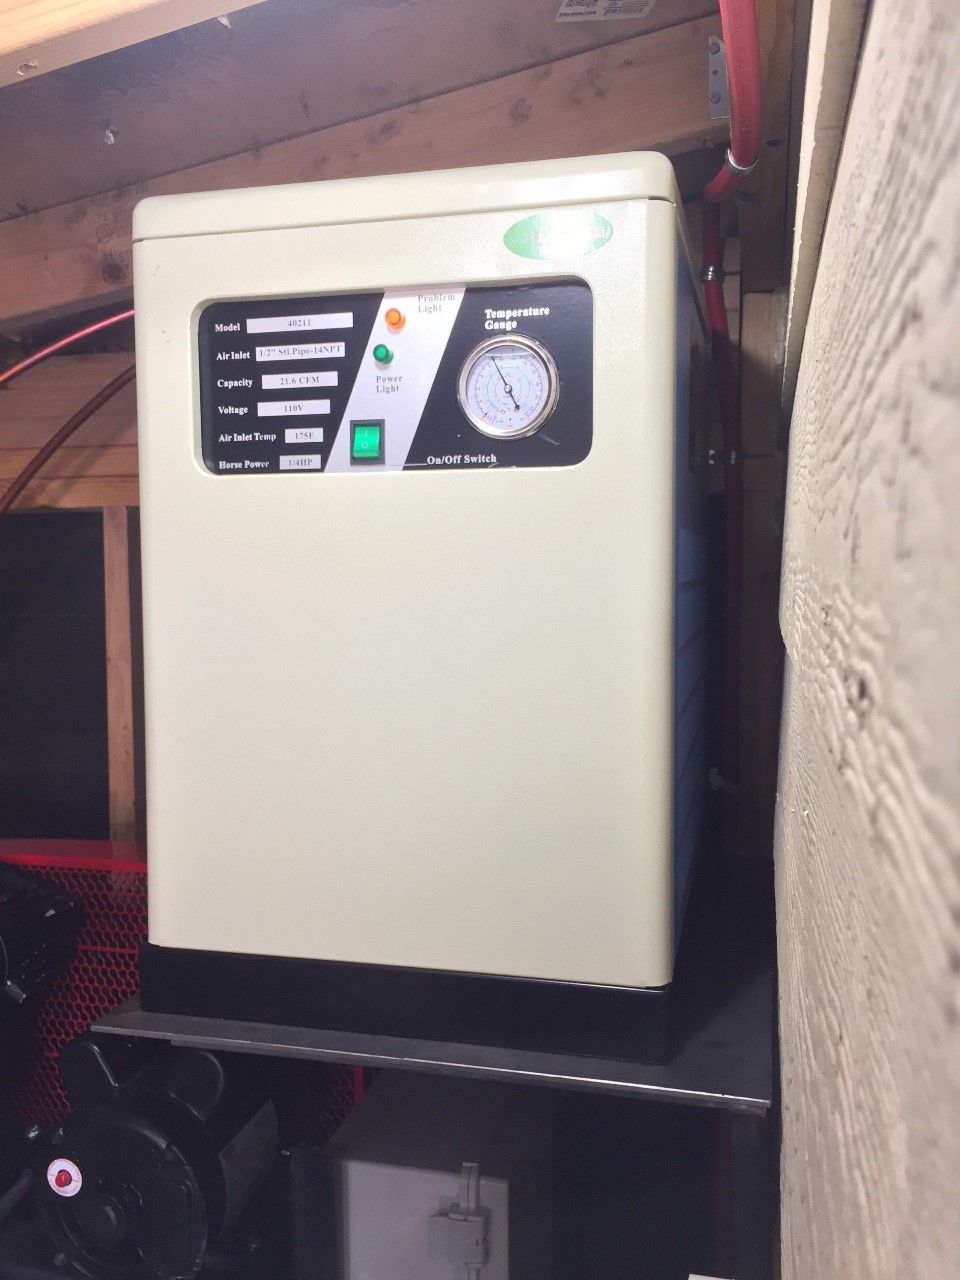
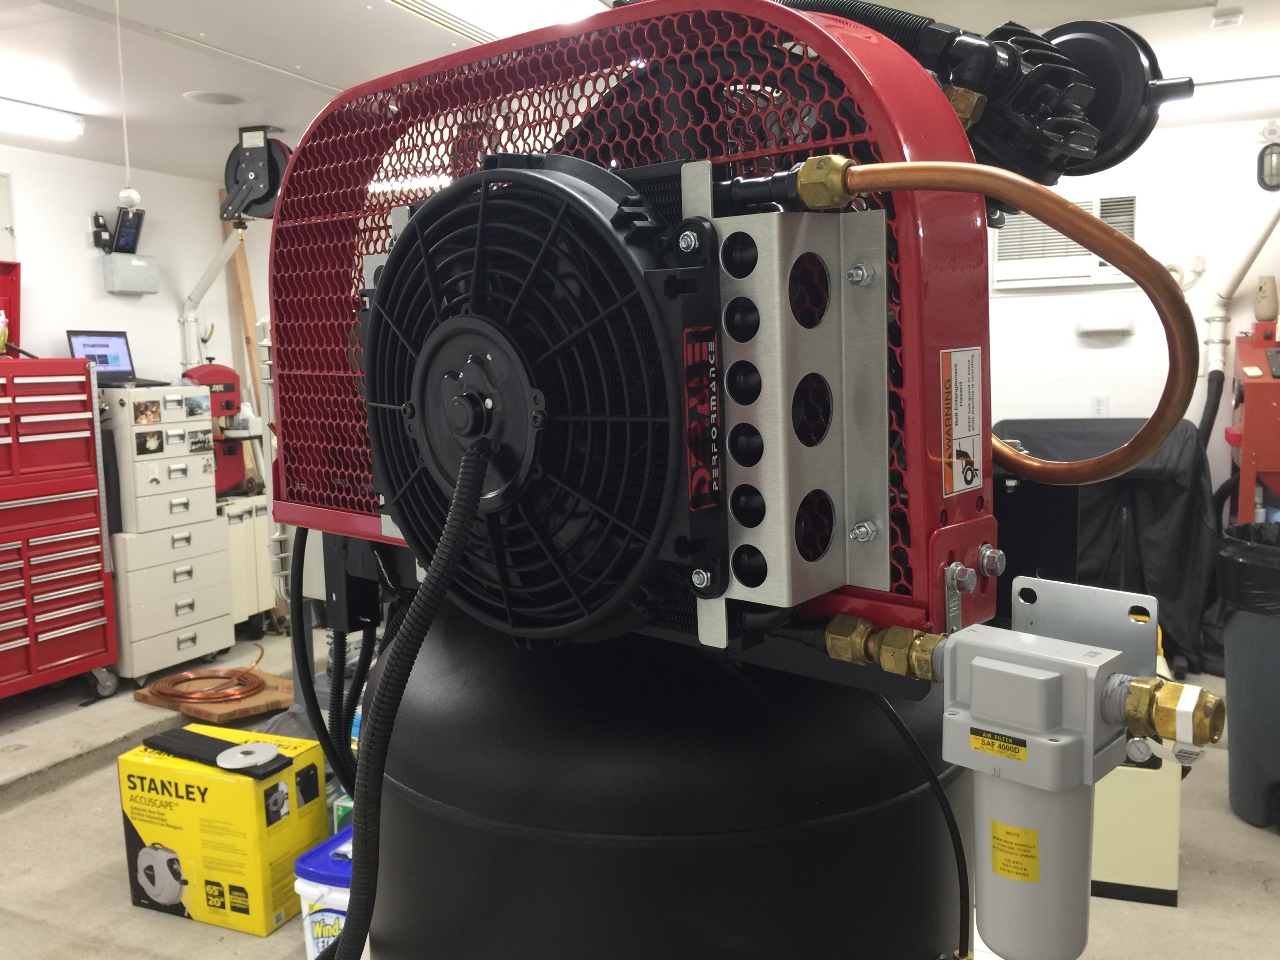
I designed and built a controller for my compressed air system which incorporates a delay panel so when the pressure switch engages, an air dryer and aftercooler fan start. Then 45 seconds later the compressor turns on. This allows the air dryer to chill down for the recovery cycle and prevents me from having to keep the dryer constantly running. Automation. Its everywhere!
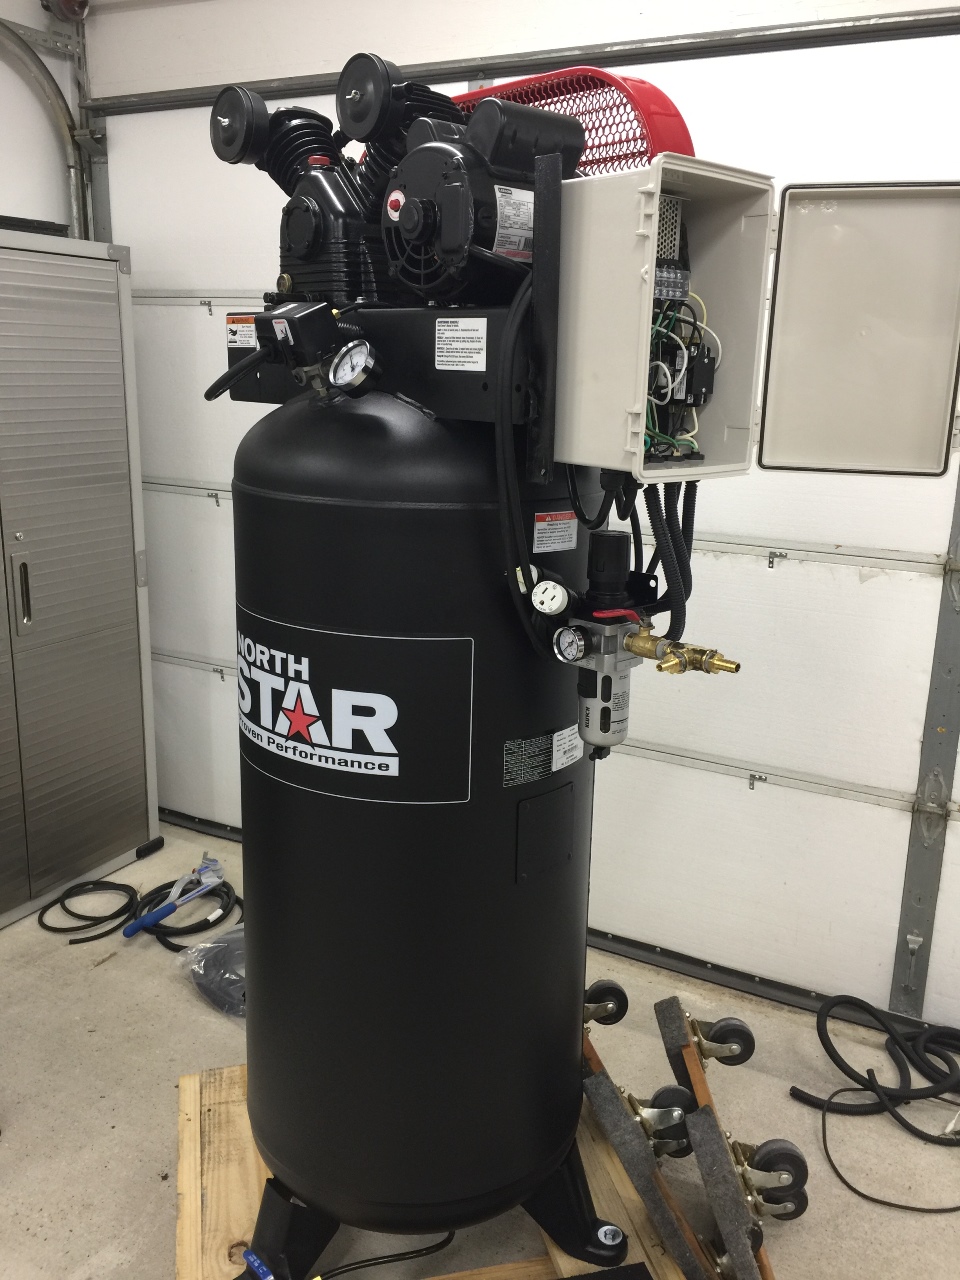
I used the laser cutter to make the mounting panel for the components in the controller box.
The large auxiliary device in the picture is the air dryer which (through refrigeration) chills the compressed air (hot and compressed air holds a greater amount of moisture) and drains the moisture. The added advantage is the way I have the system set up:
Right out of the pump, 200+ degree air is passed through the tube and fin fan powered after cooler. The after cooler alone drops the compressed air temp down to ambient and drops out a significant amount of moisture!
Think of drying compressed air almost like wringing a towel (but with a slight difference).
The towel represents air
At atmospheric pressure (uncompressed air), the towel is dry
As the air is heated and compressed, the towel begins to collect and hold water (wet air)
As the compressed air cools (or when going from a high pressure to a low pressure such as in a paint sprayer or blower), this is like wringing the towel out causing the water to drop out of the air.
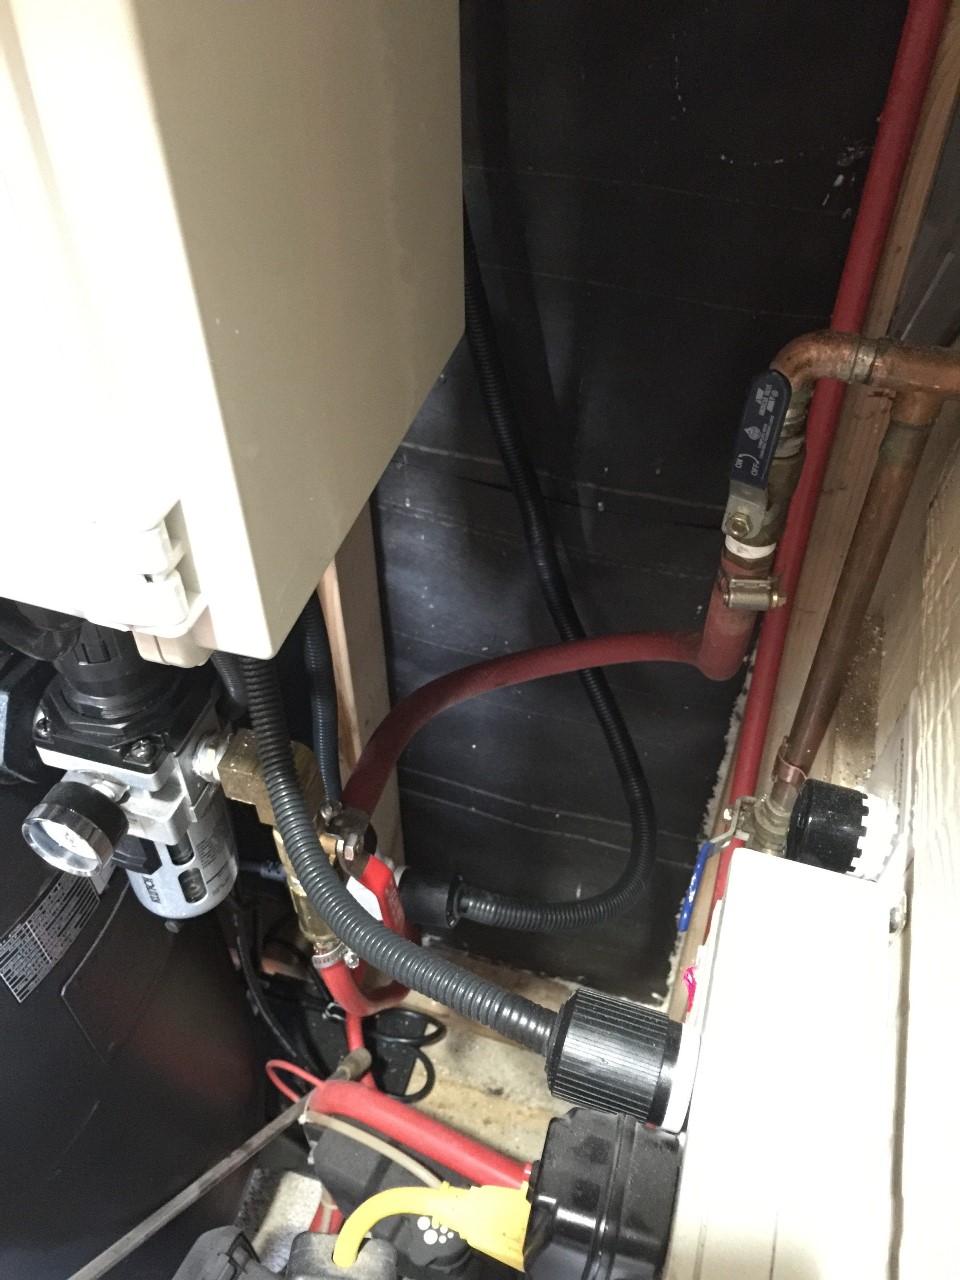
So the initial after cooler wrings the towel / air out and that is automatically drained with the filter attached directly after. The air then goes to the refrigerated air dryer that takes the air temp down even further to near freezing. This squeezes even more water out from the compressed air. This water is automatically drained as well.
The DRY air is then stored in the receiver (the tank) and therefore I never have any moisture in the tank. And I never have any moisture in the lines. And I never have any moisture going to my tools or laser.
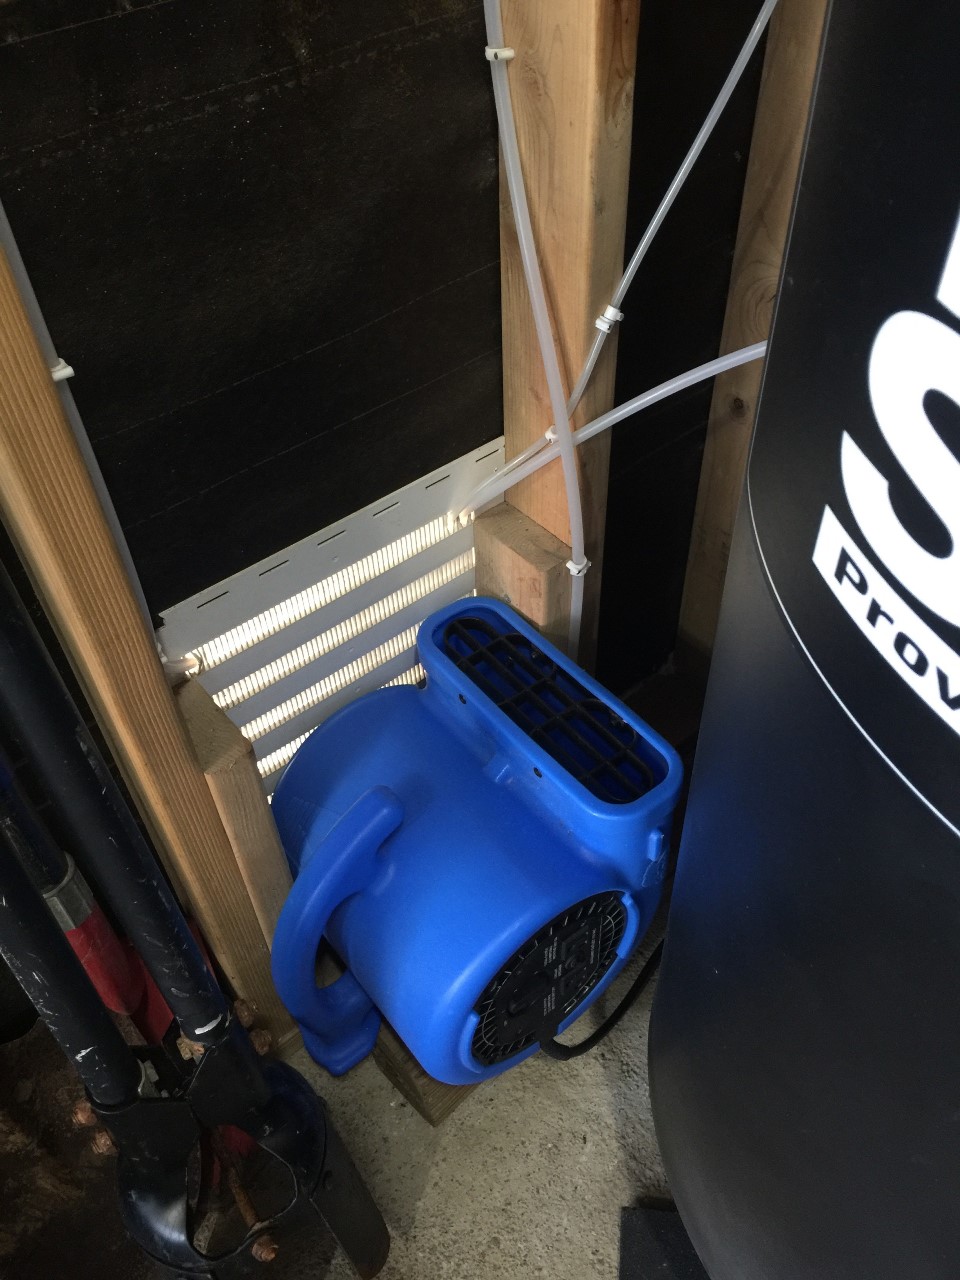
A small addition I made when I installed the system was adding that blue blower (in the picture) just below the compressor. It automatically comes on with the air dryer and pulls in outside air from the vent into the compressor shed (to help keep the heat buildup down). It makes a big difference!
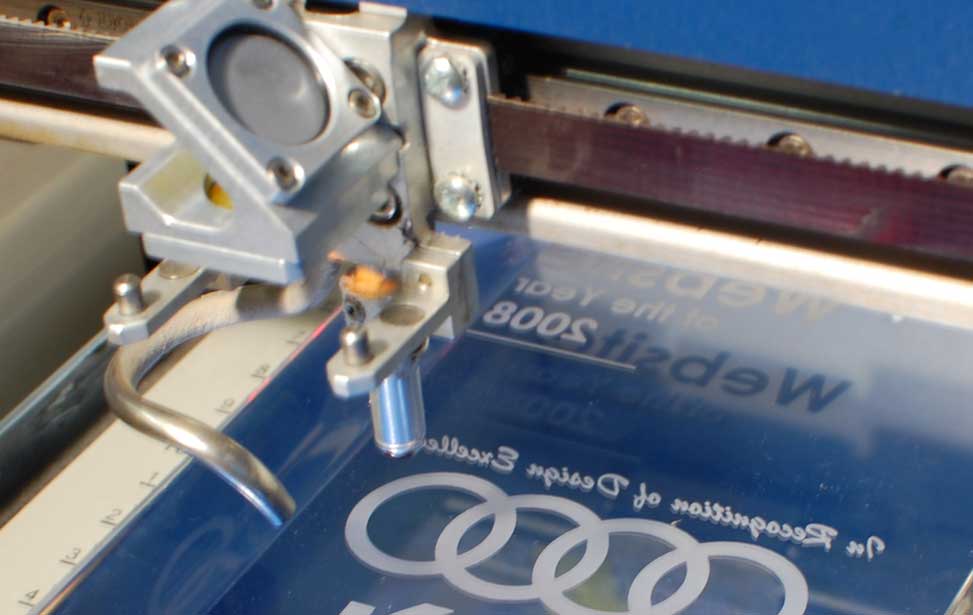
I can’t take a photo now, everything is packed away during my shop remodel. Here is a picture of how Epilog does it, notice that there is no lens tube - no need for one, the lens (and mirror) are mounted in open trays.
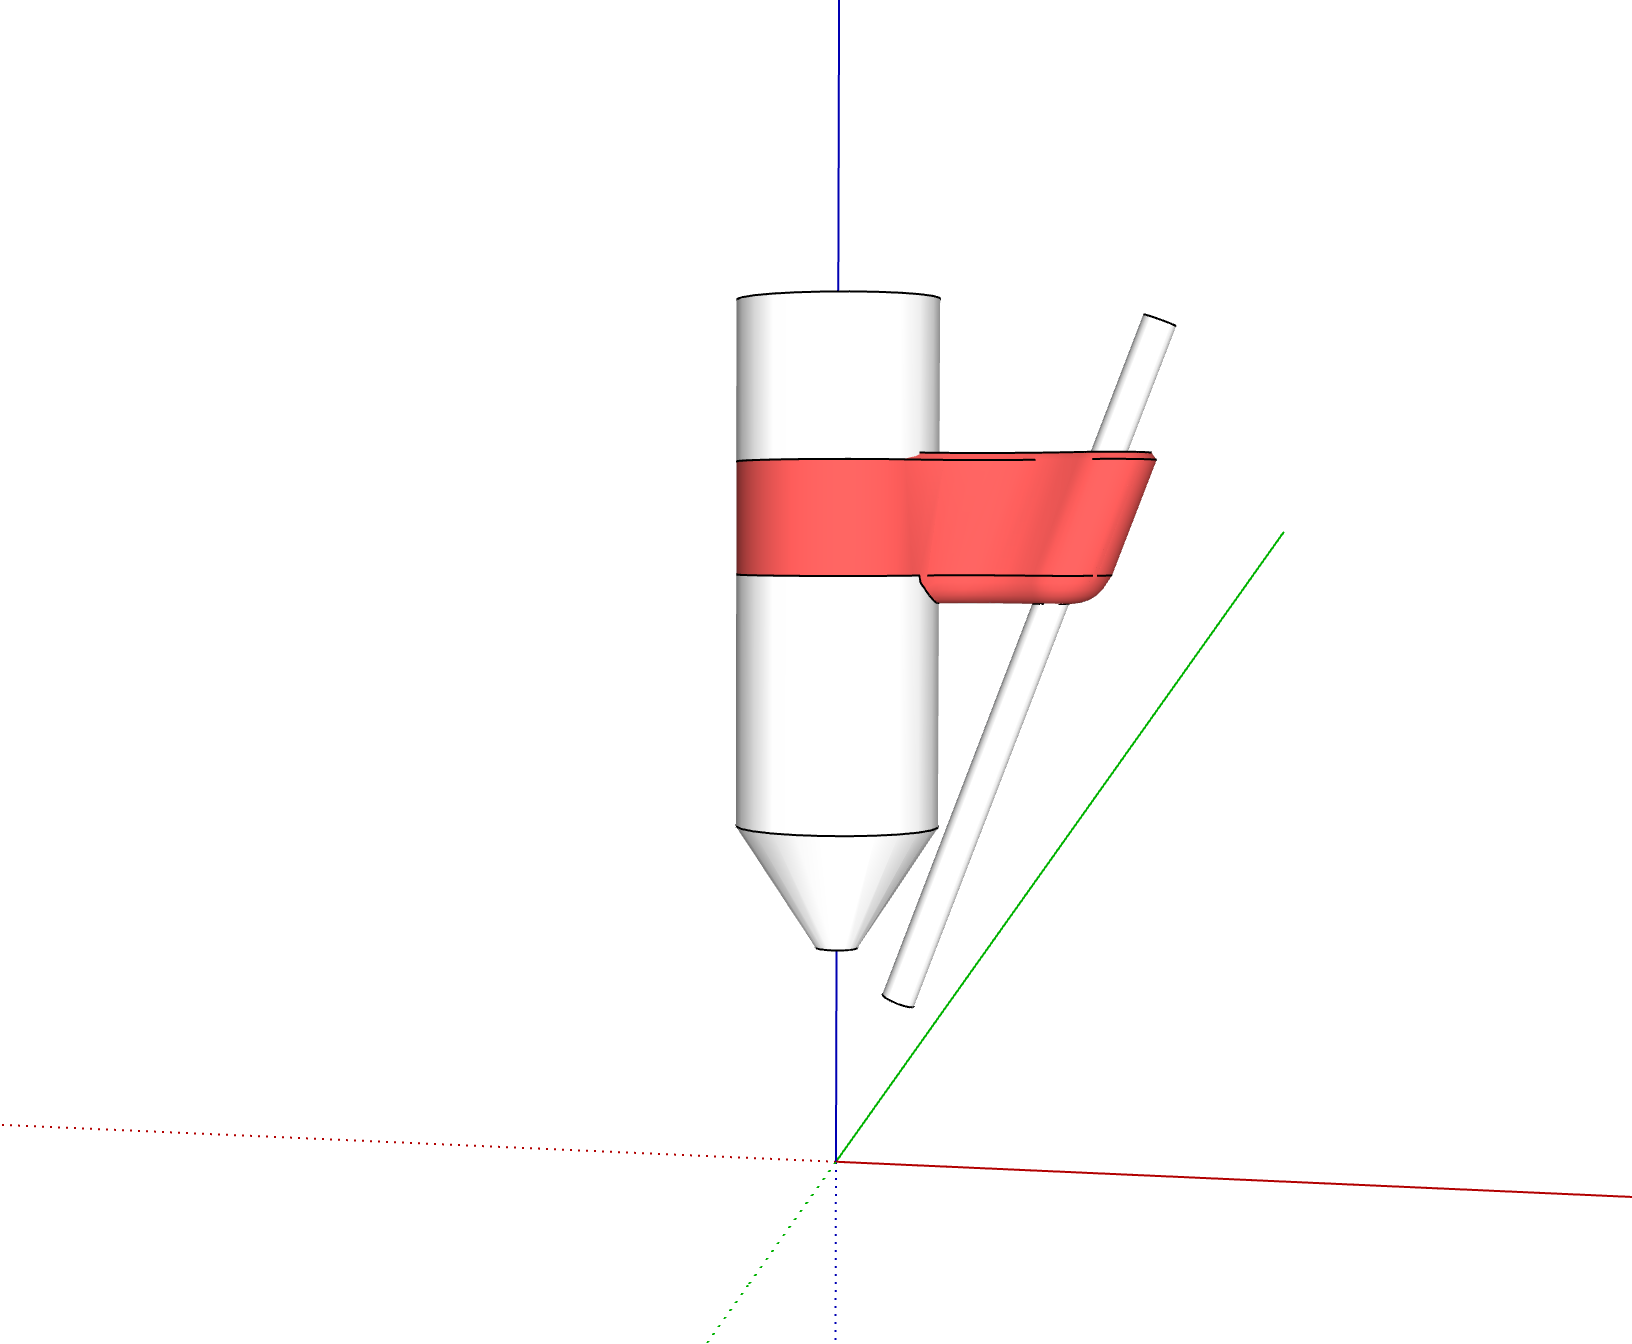
I also found the old SketchUp file that I used to make my 3d printed tube holder. The end of the air assist tube is slightly more than 1/2" above the workpiece, just high enough so that it clears the 1/2" x 1/2" by 2" magnets that I use to hold things down.
Here is a low res image of my dual head laser. Our new machine will be here end of this month I’m working on re-designing A harness to cover up the wild wires and tubes so it looks a little more tidy.