Hi, I am sorry if I am being dumb, but I am really trying to do this all as correctly as possible.
My question is about kerf adjustment. I have read numerous posts on here and I don’t think I have seen anything that is asking the same question as I am about, again sorry if I have missed it. I am making a small award for long standing members of our Newfoundland dog training group. I want the main body to be in acrylic with a wooden base. The acrylic fits through a slot in the wood and is held in place with a key…
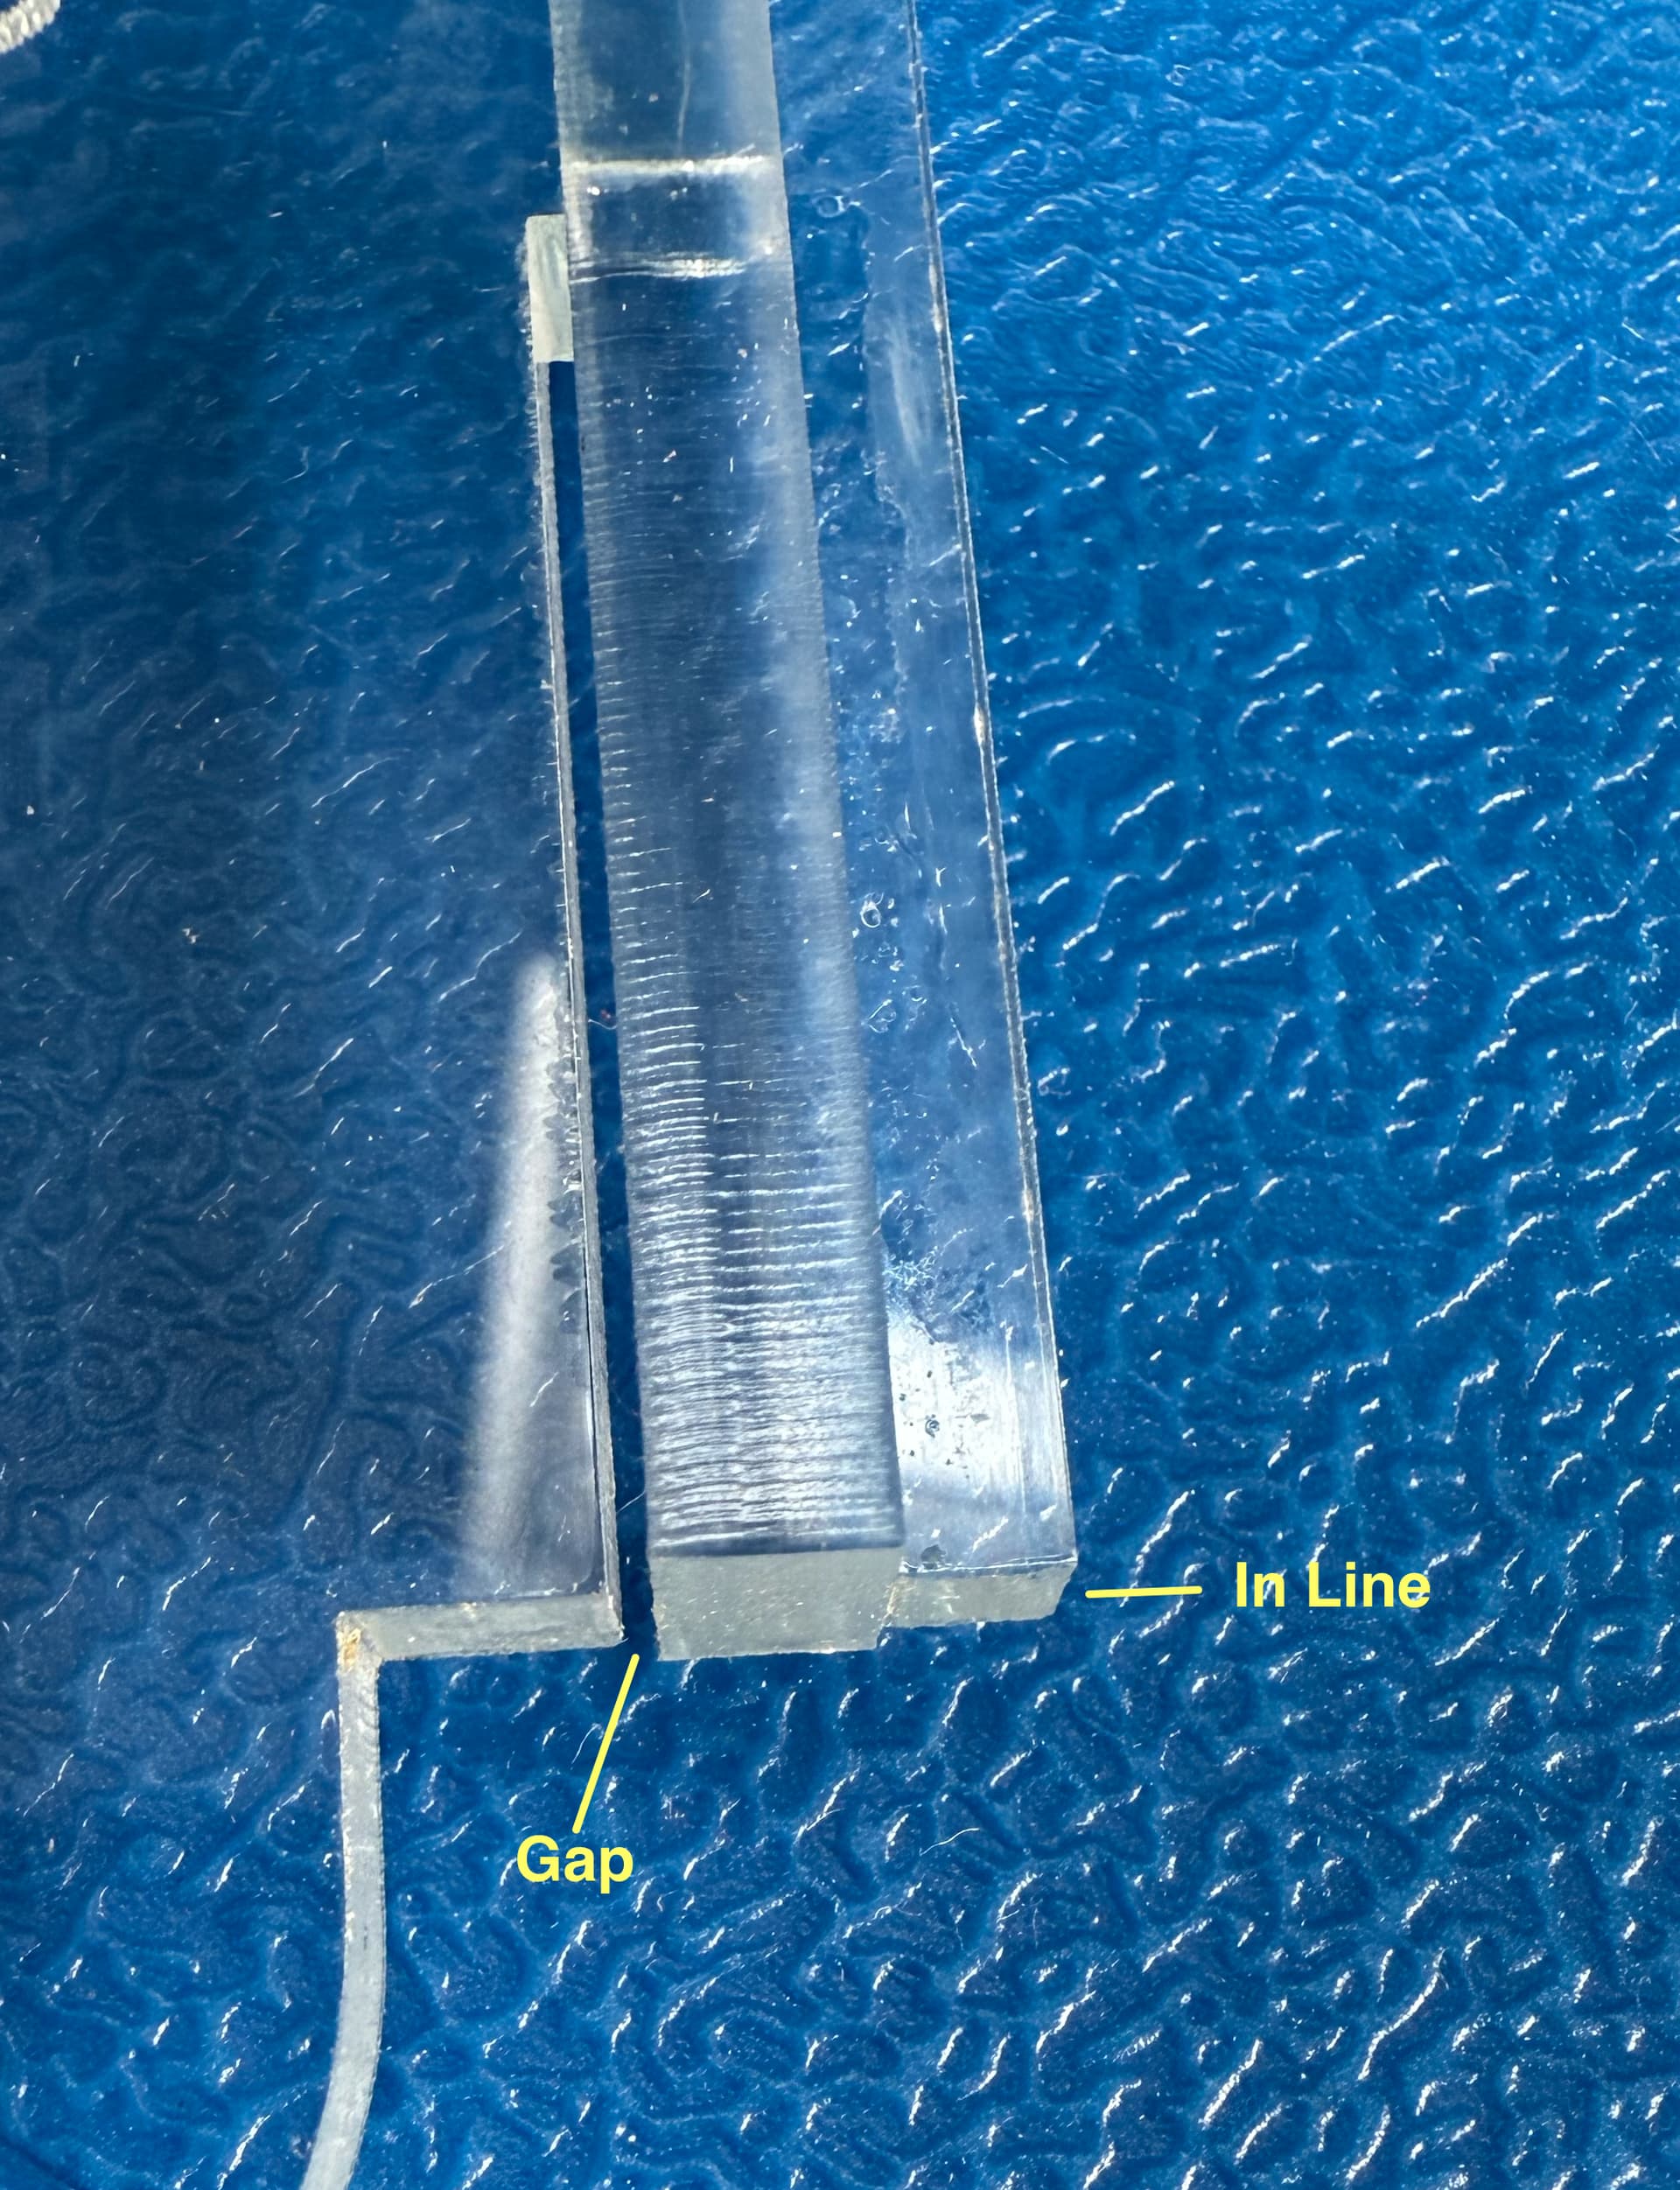
… the fit was now perfect with no gaps and locked in to the wooden base perfectly. However, I am puzzled by the fact that the key and the main acrylic panel edges no longer line up as demonstrated in the attached pictures. It would appear that the edges are out of alignment by 2 kerf widths yet all the cuts are set to use the same kerf settings. What am I missing?
It is not at all important in this application, but will be at some point. My inexperienced brain tells me that there should be a misalignment with no kerf and perfectly aligned with kerf - so I guess there is something I am not understanding.
Before digging deeper into the actual question: your kerf offset seems to be huge! It’s usually around 0.1 mm or so, but it looks more like 1mm in your case.
Are you sure your axis are running as expected?
To me, it looks like the y axis movement is not correct.
No apologies needed.. Glad you asked. Kerf-offset messes up a lot of people.
Kerf is the material taken away by the cutting tool. It’s easier to get a feel for it if you imagine a zip-cutter or a router for woodwork.
The project in LightBurn is usually modeled ‘on-size’. When you measure the project in LightBurn, it’s usually the size of the finished project.
The Laser cutters follow the line they’re given. So when a project is cut out of a piece of material (without Kerf-offset), the project is undersized by half the kerf on each outside line. When a hole is cut in the middle of a project (without Kerf-offset), the hole is oversize by half the kerf on each cut edge, and the fun part… the piece you cut out is undersized by half the kerf on each outside edge.
Kerf-offset is the amount one would have to move the laser to make the project on-size. Half the Kerf is ‘Nominal’, because you lose half the width when the laser follows the line. If you want to hand-finish something to a precise size, increase the offset slightly to leave a little bit of extra material (all the way around) to sand off.
When you enable Kerf-offset, you enter an offset to overcome half the width of the cut.
LightBurn looks at your project, and automatically moves the laser half the width of the cut…
Outward for an ‘outside cut’.
Inward for an ‘inside cut’.
The model shows two outlines:
The automatic part of the Kerf offset will move the laser away from the inside of the shape in an effort to have the cut-out arrive the outside dimensions.
If I’m understanding what’s happening here,
Without Kerf-offset, the cut inside in the U-Shape would be wider and longer than what is drawn.
With Kerf-offset, the cut inside the U shape should be the same as what is drawn.
Accidentally doubling the Kerf-offset, by entering the size of the Kerf in the Kerf-offset box, makes the cut inside the U shape narrower and shorter than what is drawn.
If this doesn’t shed enough light on this to make it make sense, you’re welcome to post the file you’re working on. Also, if the file is private, you’re welcome to send the file to me privately so we can get a little further into the specific details.
One last thought.. The short line inside the U shape will be offset by the same amount (and in the same direction) as the two short lines across the top of the U-shape. If you’re measuring ‘the depth of the U shape’ it should be identical every time. You would have to measure it from the opposite edge to see a change in the offset.
If the U shape is not the same depth each time kerf offset is changed, then @Misken is likely correct about machinery.
An open shape will not activate the kerf offset tool. This minor detail can also catch or confuse folks.
I’ll take a stab at it from another direction.. Just to start, you need to understand that the kerf is applied to the whole object, so it will grow or shrink depending on the kerf you set.
It’s always nice to tell us what kerf you are using and how you arrived at that value. It helps us help you clarify anything that may be an issue.
I like to use the handsaw to demonstrate kerf. If you mark lines 16" apart on a piece of wood, then cut down the line, the resulting board will be short by the width of the kerf of the saw.
To get a proper length, you have to align the edge of the blade to the line, not the center. This is a kerf adjustment.
Kerf is applied to the entire object.
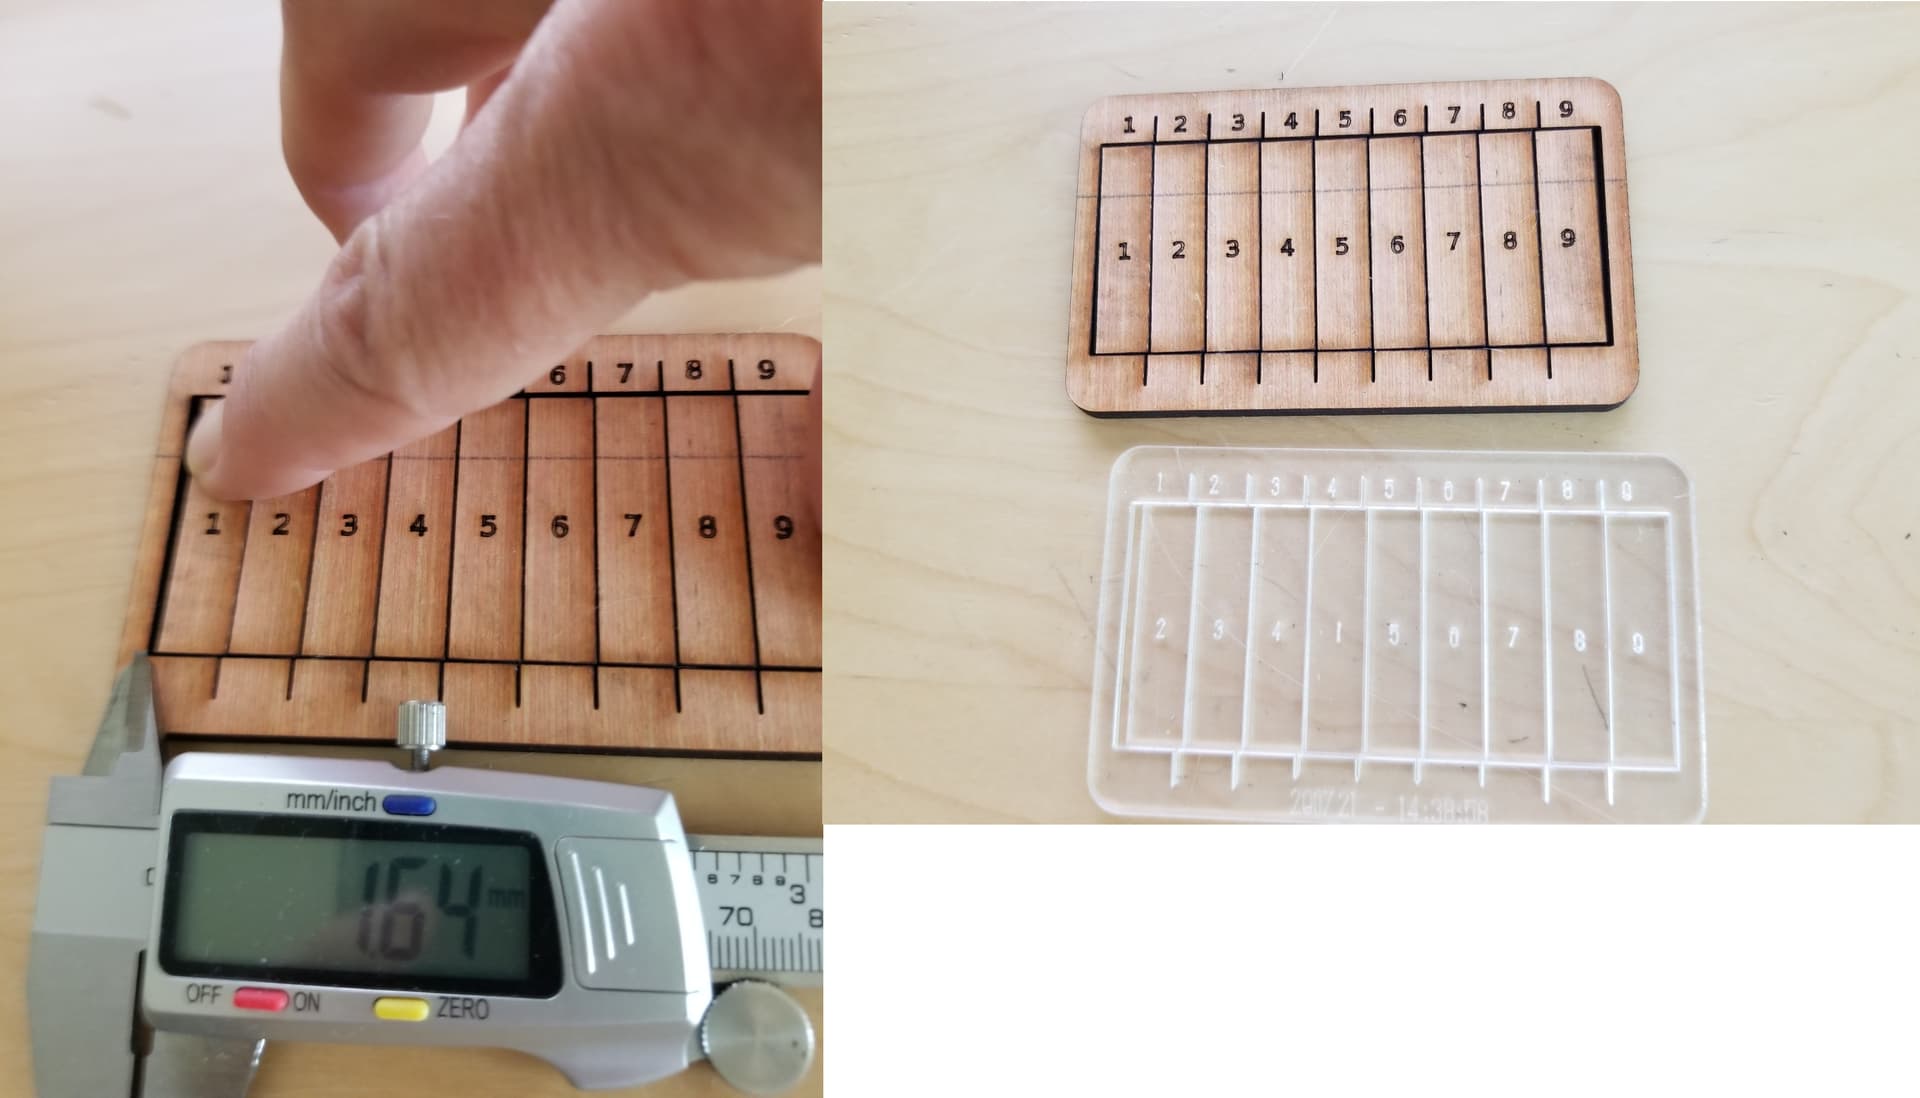
I think my kerf for acrylic is around 0.2mm and for basswood it’s about 0.164mm
Hi guys thanks for responding. My kerf (as measured by using kerf measurement topic) is 0.125mm - this is on 5mm cast acrylic at the whatever the power speed are for this cut (I am currently away from my LightBurn machine). I have entered the full kerf as a positive offset are you saying I should only be entering half of that amount?
I do agree with your bullet points and hence my confusion… with NO kerf offset I would have expected the cut out to be wider (and it was) but also longer and it wasn’t. with no kerf the edges of the main piece and the key, when inserted together aligned perfectly albeit with a lot of vertical slop as shown by the “gap” in one of my pictures above.
I have removed the names from my project, I know what is in a name, but people are sensitive these days…
So just to make sure I fully understand what you are saying Lightburn adjusts by the offset you enter NOT half the amount? So if I measure the actual kerf to be .1mm I would enter an offset of 0.5mm?
And my other point I can answer myself: the depth of the slot will always be 50mm (as per my drawing) as kerf compensation or no kerf compensation will be applied equally at each end of the slot. I can only assume that in my kerf compensated cuts I didn’t managed to engage the two slots together enough as they were too tight - I can’t test now as it is all glued together.
Thanks for all the input on this - I am loving Lightburn and my laser… SO much to learn, every day is a school day!