Hello - My wife received the ATEZR 36W L2 this Christmas and we finally had some time to open it up today, put together and installed LightBurn. Thats about as far as I’ve gone. I’ve been reading MANY sites, watching youtube and etc. Anyone out there, have some time to answer a few questions for me? I really want to get this going and my wife has something she would like cut/create. It looks very easy (honeycomb layout) but I’m not sure how to design/import into LightBurn, or where to begin. I’ve gone as far as, adding the machine to my macbook pro and stopped. I’m an IT engineer and work on servers all day, but this is something completely out of my "area’. LOL. I have a photo of what I’m trying to accomplish if you would like to see. I know i have to get auto focus and etc. setup and would like to start, but I feel like a deer in headlights. Any help would be greatly appreciated. I’m hoping to get a hang of this, over the weekend and attempt to cut this honeycomb holder my wife would like. Thanks in advance.
Give us a place to start and you will get plenty of help.
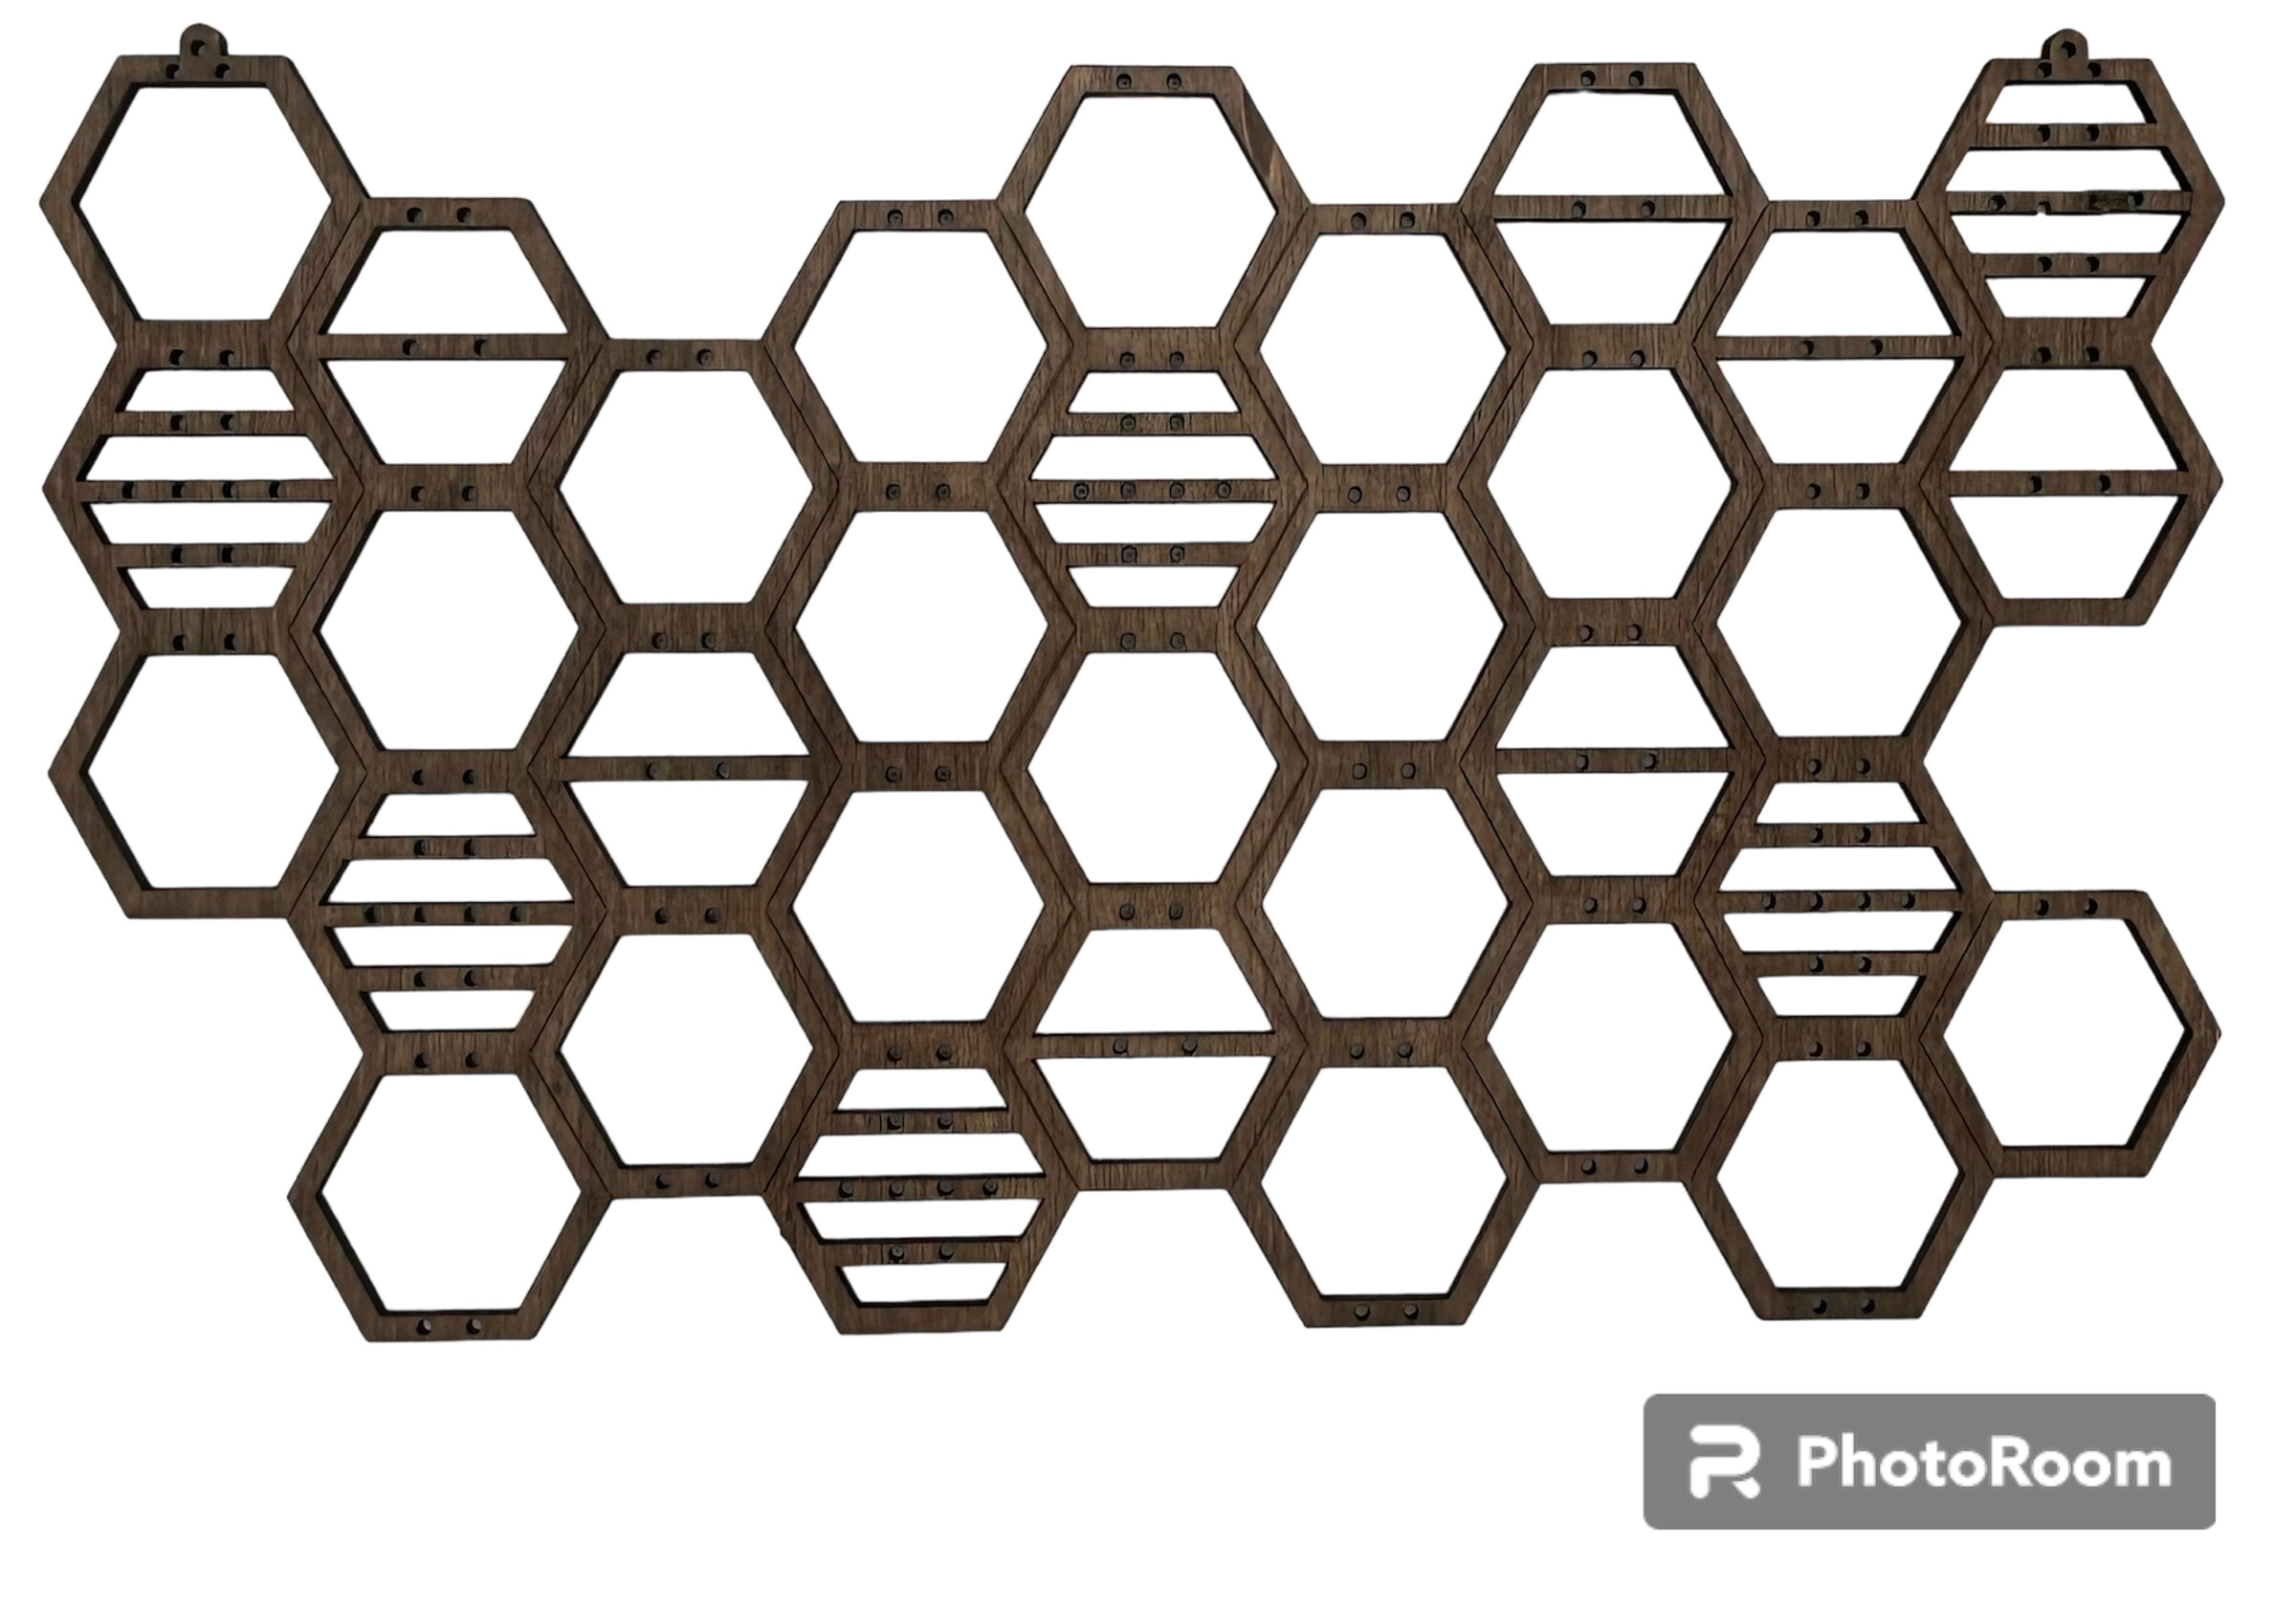
Here is a photo. It has holes as you can see. It’s 1/8" thick. Not sure the type of wood. It’s very light, the one she has.

Ambitious first project.
If you are just starting out, I would suggest you practice with some material tests first.
As I expected trying to put this into Lightburn I had little success. You would be better off designing from scratch, unless you have a better picture of it.
Something like this would be pretty tough? I’m assuming if I were able to find the vector file for it, it would be my best bet? It’s so light, im not sure what kind of wood it is or to try.
That photo is my wifes. She has it hanging up. I can get additional photos. Just gotta take her earrings off of it.
A good photo without the shadow and good contrast. But Ya a vector file would be better.
I would use an 1/8" plywood.
Can you explain your goal for this?
Are you planning to make this modular where you’re creating the individual various hexagon shapes and attaching them?
Or do you want to cut this from a single sheet, with the joints between hexagons as an engraving to mimic a seam?
If modular, the simplest of the shapes where it’s just a hexagon shape would be fairly trivial to create in LightBurn.
- Use the Create Regular Polygon tool
- Draw the hexagon
- Use Offset Shapes tool to create inset or outset of the shape to create the wall
- Add circles and place them appropriately for the holes
I want to cut this from a single sheet, with the joints between hexagons as an engraving to mimic a seam.
Tough to see the holes and the upper right corner is broken.
Ambitious, but entirely doable first project. I wouldn’t even consider trying to work from a vector or trace for something this simple. The opportunity to learn is too great and the process is straightforward.
The array tool is your core concept here. You’ll need two layers. One set for the cut lines and one for the engrave lines.
Also offset and line
Not an easy job to create, but not impossible.
The attached is not perfect - the engraved lines on the blue layer between each hexagon will be doubled up where they touch, so you’ll get a slightly darker line here. The red cut layer is the very outside profile, and is 0.2mm away from the edge of the outer hexagons - you’ll have to zoom in to see it clearly. Obviously, the layer order means that the cuts are done last. You’ll have to adjust the speed, power settings and number of passes to suit your laser. And you’ll also have to do a fair few test cuts to get the settings right.
HoneyBeeHouse.lbrn2 (60.4 KB)
Remember to post a photo in Finished Creations when you’re done!
Thank you so much! When adding the earring holes, should be a “red cut” as well? How do I add the circles and make sure they “cut”?
Also, how would I add the wood going horizontally across some of the hexagons? For example, what you sent me, if you look in the upper left hexagon (and others) you can see in my photo, the hexagons that have them (with holes). All your help is very much appreciated.
Any “Cxx” layer can be configured to do whatever you like. The two “Txx” (aka “Tool”) layers are unique and set aside for uses that don’t output to the laser. The “Cxx” layers can also do that, but not the other way around.
The laser and software has no bearing on, or knowledge of, the workpiece other than those dictated by physical limitations.
I typically use the tool layers as workpiece or fixture outlines to help layout.
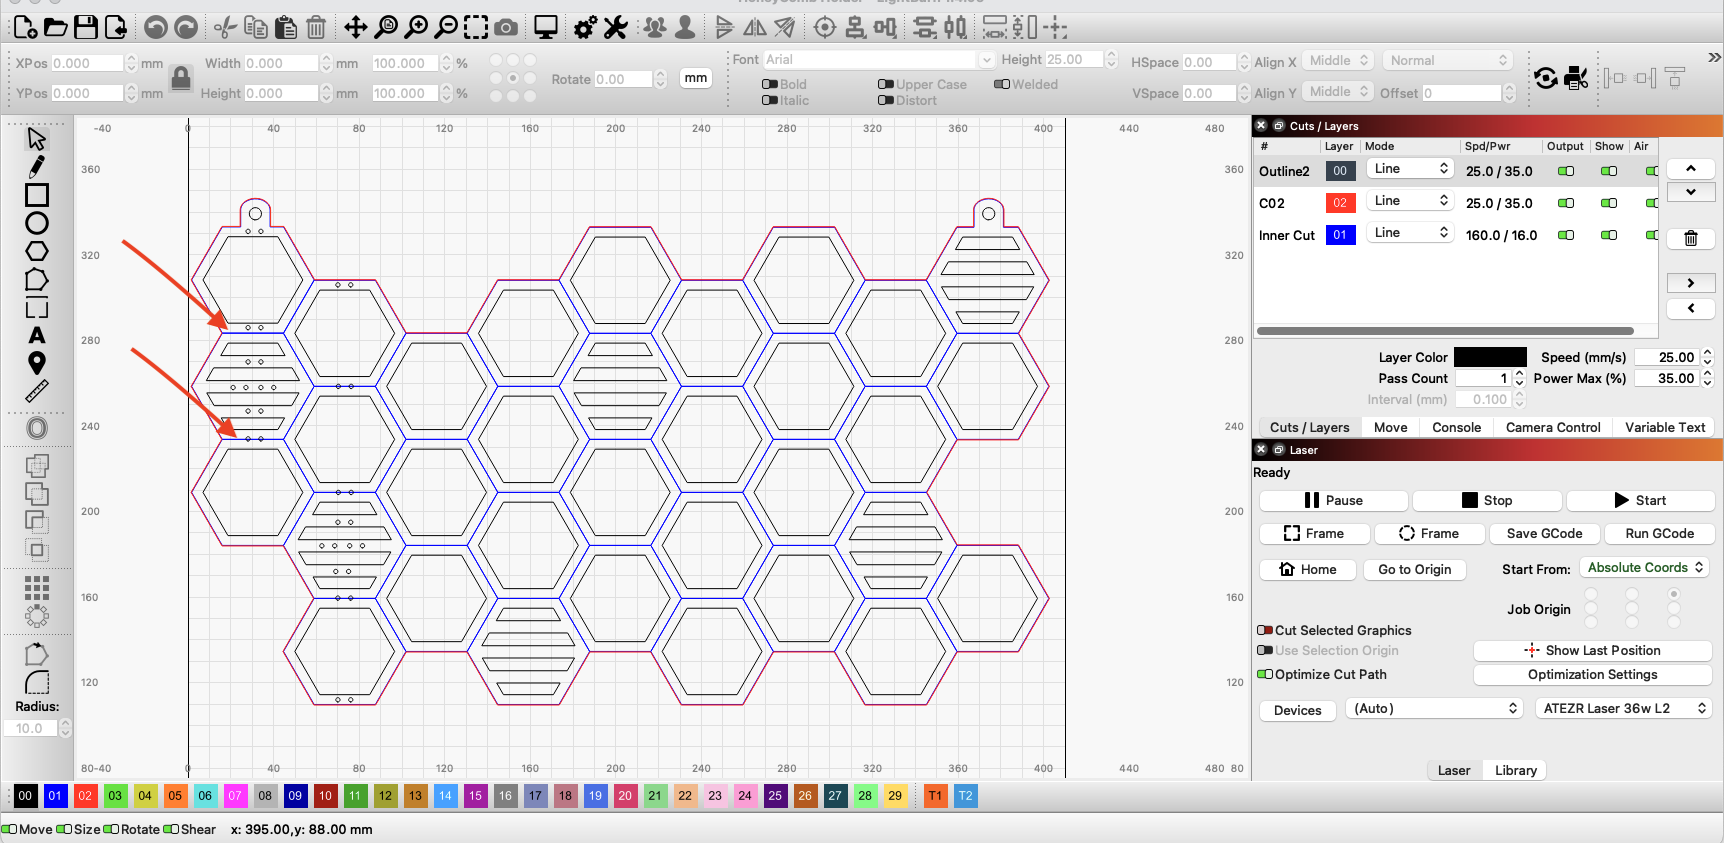
You’ll have to check your own power/speed settings of course, but the first layer, blue, is for the engraved lines around each hexagon. The second, black, layer is for all the internal cuts, ie inside each hexagon and to leave the three horizontal bars on the six hexagons as depicted on your original photo. When those are done, the red layer performs the cut around the outside, as I mentioned its 0.2mm outside the engraved lines as drawn.
Re the tabs for hanging, the holes are black so will be cut. Note that the overall size of my drawing is around 350 x 207 mm - you may want to enlarge it to more closely match your original, but make sure you maintain the aspect ration (keep the little padlock ‘locked’) otherwise the hexagons will no longer be regular.
I’ve done a sample test piece cut and pasted from the first one so you can test your own settings and make sure its as you want it - it has an extra (blue) engraved line that you won’t want on the full size version, just to test the engraving layer.
HoneyBeeHouseTest.lbrn2 (26.6 KB)
Thank you! All this information is really helping me. I’m assuming I need to configure my new machine within lightburn and set autofocus and etc. Any important and/or helpful settings i should configure in lightnburn? Any recommendations? I have the ATEZR L2 36W. I already have the tilt alarm, flame alert set. Right now speed is still at default.
Happy New Year! How can I remove a single blue engrave line? Every time I try, the entire blue engraving line deletes. For example, see the two red arrows. I started adding holes but, trying to get them all even/lined up. I’m still working on the correct diameter of the hole too. I’m going to do some tests tomorrow. I just want to place the rest of the earring holes and remove a couple engraving lines, then I’m ready.
Highlight the blue lines and go to Arrange… Ungroup. You might have to do it more than once, it depends on how they are grouped. If that still doesn’t split individual lines, then try Arrange… Break apart.
For the holes, you can use Arrange… Align and Distribute to draw groups of holes, then copy and paste them into position.