Awesome. Thank you. Once I have everything in place, do I select all, and lock all objects? Is there a way I can print my current design to my printer and look at it before sending to my laser?
Whats the best way to ensure my shapes/hexagons and holes are all lined up evenly, same size, spacing and etc? (Other than, copy/paste the objects/holes.) I guess, kind of like a "debug or check of a lines and spacing? I appreciate your help walking me through this. I’m almost there! (FYI: I am searching and going through lightburns FAQ’s and forum as well)
Yes, you can print a copy to your printer. You can also do a preview to make sure your cutting order is correct, and it also highlights other things like, say, duplicate shapes superimposed and so not easily spotted.
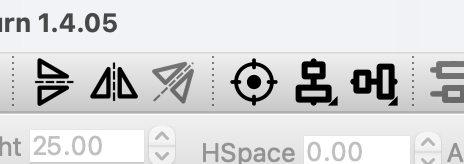
For distributing and arranging various shapes, use these tools:
 .
.
You can also group a number of shapes together, useful if you have repeat patterns that you want to duplicate. And you can lock shapes in position (arrange… lock).
1 Like
I really need to get one cut by mid day tomorrow. I think, i’m almost finished with the template. Would you be willing to take a look at it? When I run the preview, it does not look correct. Doesn’t show blue engraving, and the cuts are all over the place.
The template is finished… I think. Anyone willing to look at it for me and provide feedback and let me know what I need to change/fix? I need to get this cut and give to my daughter and wife. Any help is greatly appreciated. Thank you.
I suggest just uploading the file. Someone will likely be able to review it. Make note if you have specific things you’d like feedback/help on.
1 Like
I have attached my first template for this honey comb holder I’m trying to make for my wife and daughter. I really want to cut tonight.
first layer, blue, is for the engraved lines around each hexagon. The second, black, layer is for all the internal cuts, ie inside each hexagon and to leave the three horizontal bars on the six hexagons as depicted on my original photo. When those are done, the red layer performs the cut around the outside, as I mentioned its 0.2mm outside the engraved lines as drawn.
Please let me know if I’m missing anything, need to make changes, and etc. Pretty much my question is: Will this work? I ran the preview and it didn’t seem right. This is my first time using LB, and will be the first time using my new machine. Please feel free to add/change/fix antyhing if you’d like. Thank you for taking the time to look and help me out.
HoneyComb_Holder_CG.lbrn2 (95.6 KB)
I would center my holes a little better. And speed and power settings.
I wanted them all in line - but couldn’t get it to work using tools and etc. I have the correct amount of holes and where they need to be placed, but I agree, I wanted them aligned better.
What speed should I use? I’ll be using 1/8" underlayment for this. My machine has intelligent air-assist system, 54,000mm/min (900mm/s), engraving precision 0.01mm.
I want to make sure i don’t get burn marks on the front surface. By increasing the speed and power cause this?
Thanks for your advice.

Check the layer order - when I previewed your file it ran the cuts first and the engraving afterwards - that might work if the piece is heavy enough to stay put but I always engrave first, internal cut-outs second and the final external cut last.
If you want to move the holes (eg the ones on the cross bars that are a bit close to the edge) you can select them and change the Xpos and Ypos values - much more controlled to achieve precise positioning than trying to drag with the mouse.
I can’t help with the cut settings as it depends on your laser - do a test run on small scraps, and make sure you know which units (mm/sec or min, or ins/min) your machine is set for.
I hate to be the harbinger of doom here but, if this is literally the first job you’re running on this machine, you’re very likely going to have a failure.
If you have already run multiple machine function and material tests (speed/power, focus, geometry, kerf, homing direction/quadrant, jog direction, Z function/behavior, etc.), then disregard. If not, I suggest testing the hell out of every aspect of that machine before commiting to a job like this.
My K1 was in NO WAY fit to run “out of the box”. It took many hours of testing, adjusting, and familiarization before I could run anything with expected results.
Thank you for the advice. This is the template you helped me get started with. How can I change the layer/cut order?
1 Like
I agree and understand. It’s very overwhelming. I’m going to have A LOT of testing and tons of reading/youtube and etc. ![]()
One step at a time. One hurdle at a time. It will come together.
1 Like
My Di-pro was almost an ‘out of the box’ experience, but I have to agree with the above - without running some tests first this is going to result in some scrap being produced.
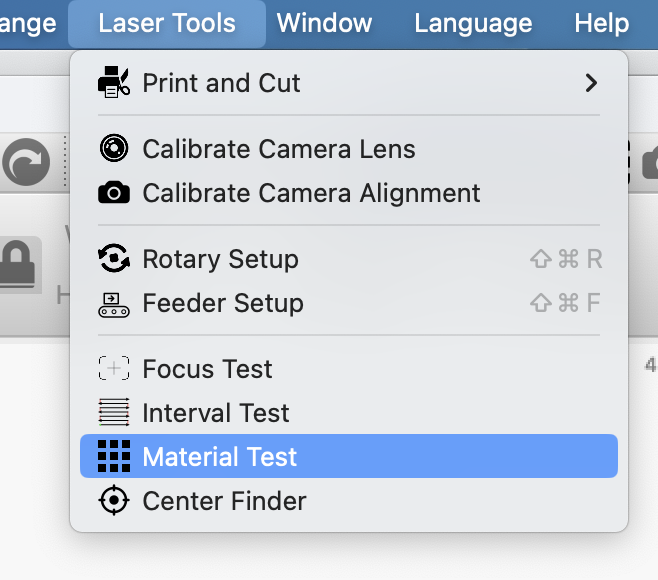
I sympathies with the impatience but the material test, for example, is going to provide you with a handy reference for many future jobs. A focus test is vital too, before any other test is run.
Your using underlayment. This doesn’t appear to be a do or die problem. In 10mins. you will know how well it worked. Adjust and repeat.
I ran many tests with my template today. Everything was going great, then near the end my last one, my machine stopped and i have these errors. Machine wasn’t touched, and is laying on a flat surface. 3/4 of the way through the laser started going over existing cuts, all over. (Like a kid scribbling on paper) then I received the errors. Anyone familiar with these errors?
ALARM:1
Hard limit triggered. Machine position is likely lost due to sudden and immediate halt. Re-homing is highly recommended.
On or near line 16579:
Job halted
Stream completed in 30:34
ok
Grbl 1.1h [‘$’ for help]
[MSG:‘$H’|‘$X’ to unlock]
error:11
Max characters per line exceeded. Line was not processed and executed.
ALARM:1
Hard limit triggered. Machine position is likely lost due to sudden and immediate halt. Re-homing is highly recommended.
The focus Test requires a powered Zaxis. Can I get around this issue by raising one end of the work a fixed amount specified amount (Start Z) in the test?
Commonly referred to as a “ramp test”. Several good videos explaining this on YouTube.
1 Like