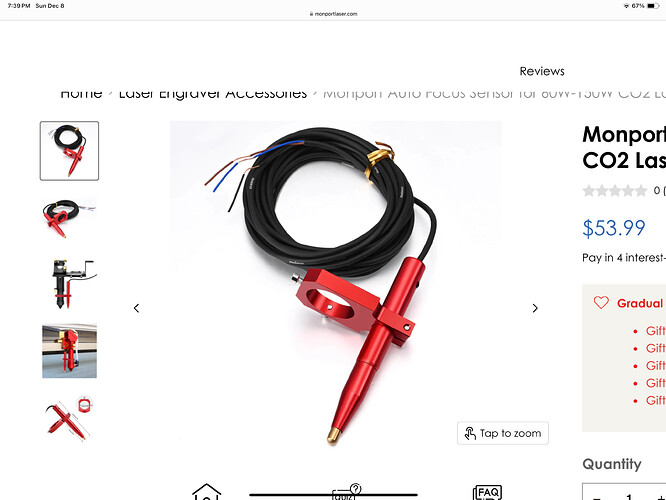
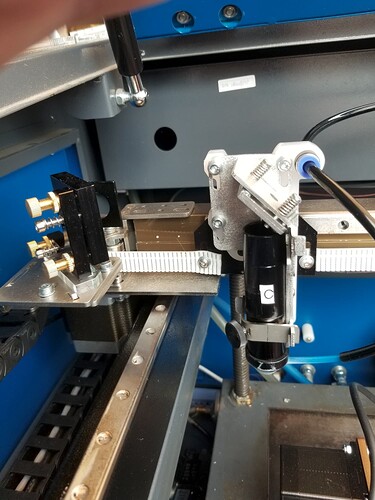
Autofocus re-connected, Giving it a try

When I first rcvd my new Monport 130w laser, the autofocus pen was set up and working fine ;… I guess…

Did not really understand the need at the beginning, and well… still not convinced that it will make my life better…

But i am willing to give it a try now since I’ve settled on a 3" lens.
Cutting Acrylic…!
I’ve spent a exhaustive amount of time setting up the mirrors over and over
to get the the perfect ‘pulse dot’… Caution engineer at work!
Thanks to Russ’ exhaustive work with lens’, this surely shortened the learning curve.

My main concern, coming from a 3D print background was Z-axis crash.
Watching the bed raise to within mm’s of the laser head was daunting and could easily trigger shingles in most folks familiar with a Z-axis crash…

I tested the Autofocus in Lightburn and tweaked the offset correctly,
Hand Firmly on the STOP button, I watched the Autofocus pen plunger push, push and push about 7/8 of it’s travel, I was 100ms from hitting STOP when
the Z-axis stopped reversed and adjusted to the correct distance from the nozzle. Predetermine from a ramp test earlier…12mm

I have the autopen set to have a 4mm distance off my material, because of the plunger seeming to have a excessive distance before triggering…
While this set up is working well, I am not sure I can get past the trust factor being the plunger takes so long to trigger.
I am sure it is the internal set up, as these are simple prox sensors that I use all the time, but this pen is testing my trust level with each trigger…

I think in the coming days, I need to cut the pen off the cable install a 3 pin connector for easy removal.
Then: tear the pen apart and modify it to trigger just before the midpoint, thus allowing the Z-axis time to turn off and not go past the plungers midpoint…
(in theory)…
Will this help the trust factor… not sure… but I have to admit it was nice setting the material height with a simple Mouse button click…

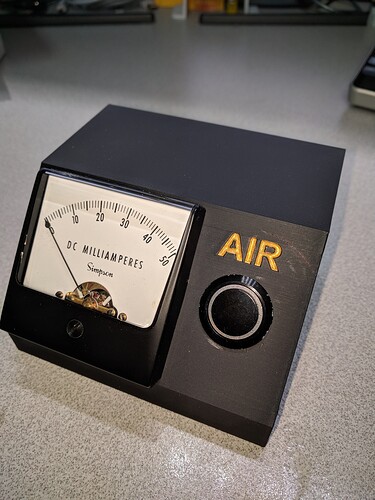
Every day is exciting with a new laser… Unfortunately I find reasons to tinker and modify as with the current meter and air assist ON button…

I found the Light burn Turns on and off the air assist during travel while cutting,
the outter ring of the button Lites Green when on, and I got un-nerved hearing the air solenoid kick in and out, now there may be a Lightburn setting I have not found yet , but I can override the LB software by simply pressing the manual ON button…
And Yes I choose a Simpson meter over the Chinese flavor, old school engineer, hard to move away from quality… And the case is 3D printed, recessed text, Gold paint.

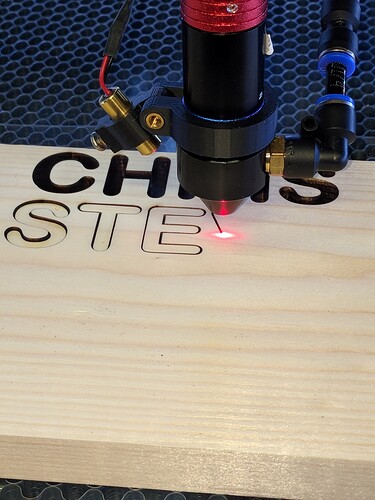
Cutting 3/4Pine
As you can see Top has no scorching using 20PSI air and cant see the botton
which is just as clean with the exception of very few flashback marks from the honeycomb bed. Overall it is nice to see the letters just drop out.
(the board had a ver slight bow as most do)
(cutting some of my Band mates names as a test)

I am not cutting wood, specifically as I mentioned it will be Acrylic,
But the kerf on this was amost null, yes some but it was very acceptable.
(this is what prompted the numerous mirror Alignments)
Forgot to mention these cuts are in the furthest X/Y quadrant, Front Right
on the bed, furthest away of the mirrors…

Ok just a quick mention of this adventure… Wondering what is next…
1 Like

Russ did a video or two on the use of auto focus. You can watch them, if you haven’t and make up your own mind. You can hunt down the videos he did on this if you go to his youtube site and search there.

Lab 167 Auto Focus Frustration
Lab 169 Auto Focus Practical Alternative


You didn’t mention how thick of acrylic you’re cutting?

Don’t forget you need to focus at the center of the material, unless that lens has twice the depth of focus as the material has in thickness.

Glad you’re having fun

:smile_cat:

The autofocus “pen” on my machine is just a mechanical switch, with the same breathtaking pretravel as yours, ending with the nozzle all of 3 mm off the material when it clicks:

The tempting setscrew on the top clamps the cable strain relief in place, but doesn’t release the switch. I have been unable to twist the pen apart at what must be the joint between the two pieces. If you succeed, take pix: I want to see what’s in there!

Hey Ed…'Yea I found out the top screw was cable retention :frowning:

You mentioned yours is a switch ! Is it 2 wire ?

I assumed mine was a simple hall devices of some sort inductive prox…
since it is 3 wire Pwr/Gnd/Output (N/P type)? TBD. if true

Hence the curiousity, I may have order a spare and do a tear down…
The travel is not acceptable, IMO.

Yes for sure PICS will help alot understand !

I may have to cut the cable and throw it in the lathe to get the back case off…
Can always make a new case hahaha…

Should be interesting… Need to make time now, seems every can of worms has another can inside…

I have all sizes 3/5/8/10/15
have already cut 20mm samples and set the initial depth (in the material :slight_smile: )

I found the 3" lens, after mirror adjustments can easily cut the 20mm
with just a slight kerf… so yes thanks good to go…l just waiting on the
Pallet to arrive… ugh… 50 sheets should keep me busy…

On another note: since I have the big guys here, i have not done any research in Lightburn as to setting up a line test on a flat surface, and adjusting the Zaxis thru each cut… is there a setting when you specify in the cuts window for the Z axis ?
Again have not looked into this yet…
but seems like a flat line test may be useful, altho I like the resolution of the ramp…

Yup: one to GND, one to LmtU-.

So the “focus pen” is just a pull-to-ground normally open switch.

I’d be surprised to find anything as complex as a Hall switch inside the pen, but it’s early in the week and anything is possible.

Yes very early…
My pen has an LED in the top that lights up…when ON…

Now I know I have to tear it open :slight_smile:

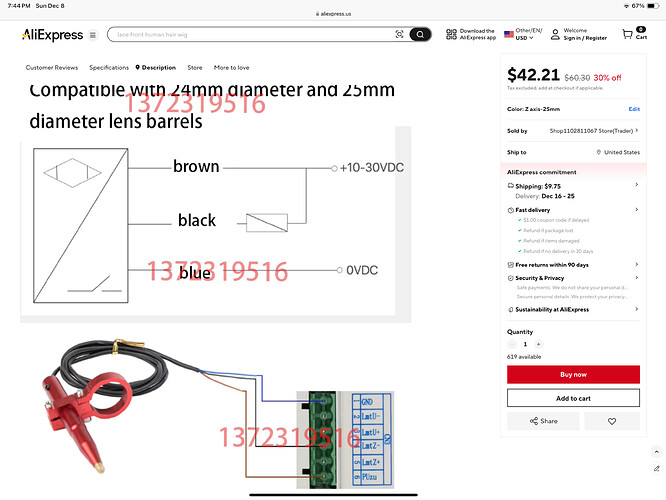
Found this on Aliexpress pretty sure it is the same…

There are on-line calculators that will tell you the depth of focus (dof). They’re pretty easy to use and will give you a good idea of how long/short lens you can get away with.

:smile_cat:

Well I figured out how to make the Z axis work for the LB line test…

I think the Ramp test gives a better picture (resolution), but wanted to try the
flat bed line test with moving Z axis…

ED: Got the new autofocus Pen on order, so when it gets her I will
attempt to open up the original and take pics…

Still thinking, may have use the parts and make my own… :smiling_imp:

I can tell you the schematic drawing and how it’s wired up isn’t right. One of them is wrong.

:smile_cat:

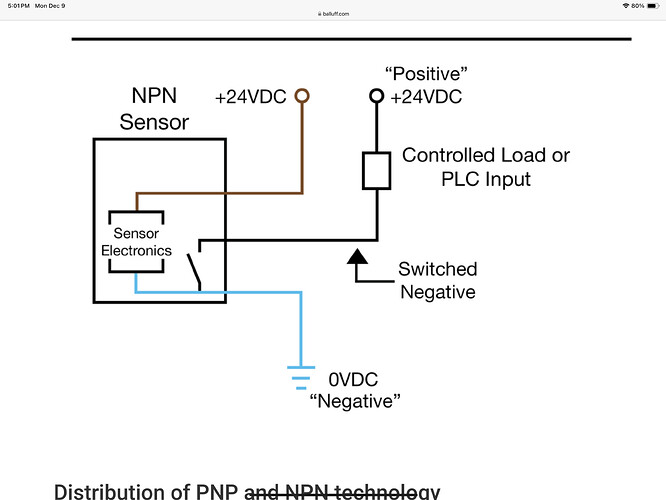
I am pretty sure these are N-Type inductive sensors… typical wiring…
Ignore the ‘load’ that is just the Ruida internal Pullup Resistor…

Black supplies Gnd when activated…

Jack what are you thinking ???

I have no clue what the stuff inside the box is supposed to be, but the PUzu terminal on the controller is “5V Power positive (output)”, so it’s definitely not good for the 10 - 30 V called out in the diagram.

I think the black wire is a simple normally open switch (probably an NPN transistor) tripped by the plunger, if the power supply was adequate, it ought to work.

It could be just an NO mechanical switch with an unused third lead, specifically to justify the price, but they’d never do that, would they?

1 Like

Right ignore their wiring,
On my Ruida they are using the CN2 pin 6 24V for the supply…
I just ignored the PUzu they connected to… sorry…

Ed: sure they would never…ever…

Will tell ya in a week or so exactly what the heck is going on…

I listened to the plunger on my pen and did not hear a mechanical switch click
hence… Inductive/hall type sensor jumped out… maybe a silent switch…
those chinese are pretty inventive…

Thanks Jack… did not see this post,so was not,ignoring ya…
And yes…oh yes… I have watched many many of Russ’ videos…
One thing I dont get is WHY he does not have more views on his video’s.
I realize they are technical, but even then, the subject matter is addictive…
He is a treasure for his efforts …

2 Likes

Maybe the british humor?

Some people learn differently, using different techniques, some can stimulate some while depressing or turning others away. His background as an engineer is also a plus, mainly he can do the math to prove his end.

I found him very helpful. I was having an issue and he told me he’d phone me directly if I couldn’t figure it out. I’ve had a number of email communications with him.

As you can see, I’ve got a couple of his parts on my machine …

:smile_cat:

Yes, looks good, I love the simple turn screw to release the lens tube,
I am fighting my set up with the turn collar lock ring, not a big fan…
I have a few ideas to make it better, not that I change out the lens oftern
but would like to switch when needed easily…

I think I find Russ’ stuff very interesting being an engineer for 50 years also.
My idea of light reading, actually any reading, is a good tech manual, especially when picking semiconductors for a new design, the data sheets lock me out of reality for hours…

Thanks for sharing the pics…

Oh I noticed the white frosty build up on the bottom or your nozzle, is that from Acrylic etching ?

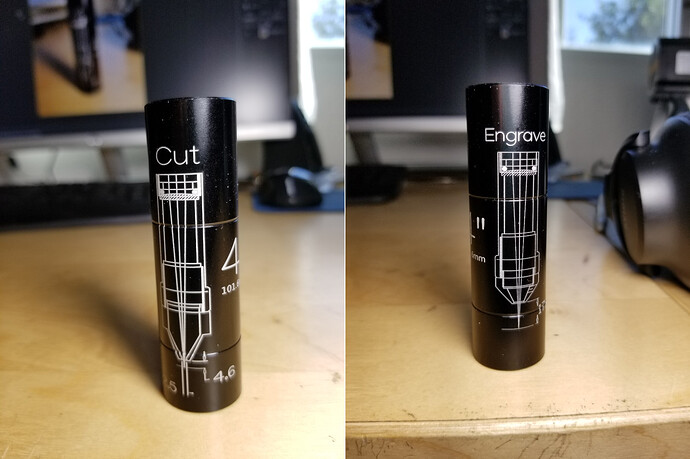
That could be… It’s my shortest lens so, likely, I’d only be using it for detailed engraving and not cutting. That photo is a bunch of years old, I need to re-do some of my photo now that some things have changed. I now have my tubes marked so I don’t have to reference anything else.

It’s also possible that the color is see is from the background. I run the least amount of air pressure when I do acrylic.

:smile_cat:

Wow Jack those are great… I assume you did a rotary engrave, what a great idea and they look super…

Great job…

Thanks…

Did them on my fiber machine with the rotary. I have the lens tube information from Russ and got tired of looking it up in his pdf…

It’s a pdf, so remove the .txt extension.

Lens Tubes, Lenses and Nozzles Chart.pdf.txt (30.0 KB)

:smile_cat:

Yes today I cut alot of 5mm just to nail down the air flow, I changed the
nozzle tip to a smaller opening, I had made a custom nozzle with a 4mm nozzle hole opening and while it pushed alot,of air slowly it works great for wood, no scorching etc…very clean at 20psi…

With the Acrylic I had to switch back to the 2mm nozzle hole, I used 7psi today and it seemed to work well, 6mm/s 30% (130W Laser) no flare ups anyway.

Nice to see the small pieces drop out cleanly, the air assist helps push them out some also.

My next, project, after the Autofocus Pen teardown, ot to install a 4PDT switch
with extra connector on the Y axis for the Rotary. My connector is all the way to the right back side and a pain to get at, so I plan on dropping a new port on the front where it is easy to just drop the rotary in and plug in toggle switch and go…

1 Like