Hi guys, I have a problem with newly purchased (used) machine. it has ruida rdlc320 and Reci 100w tube.
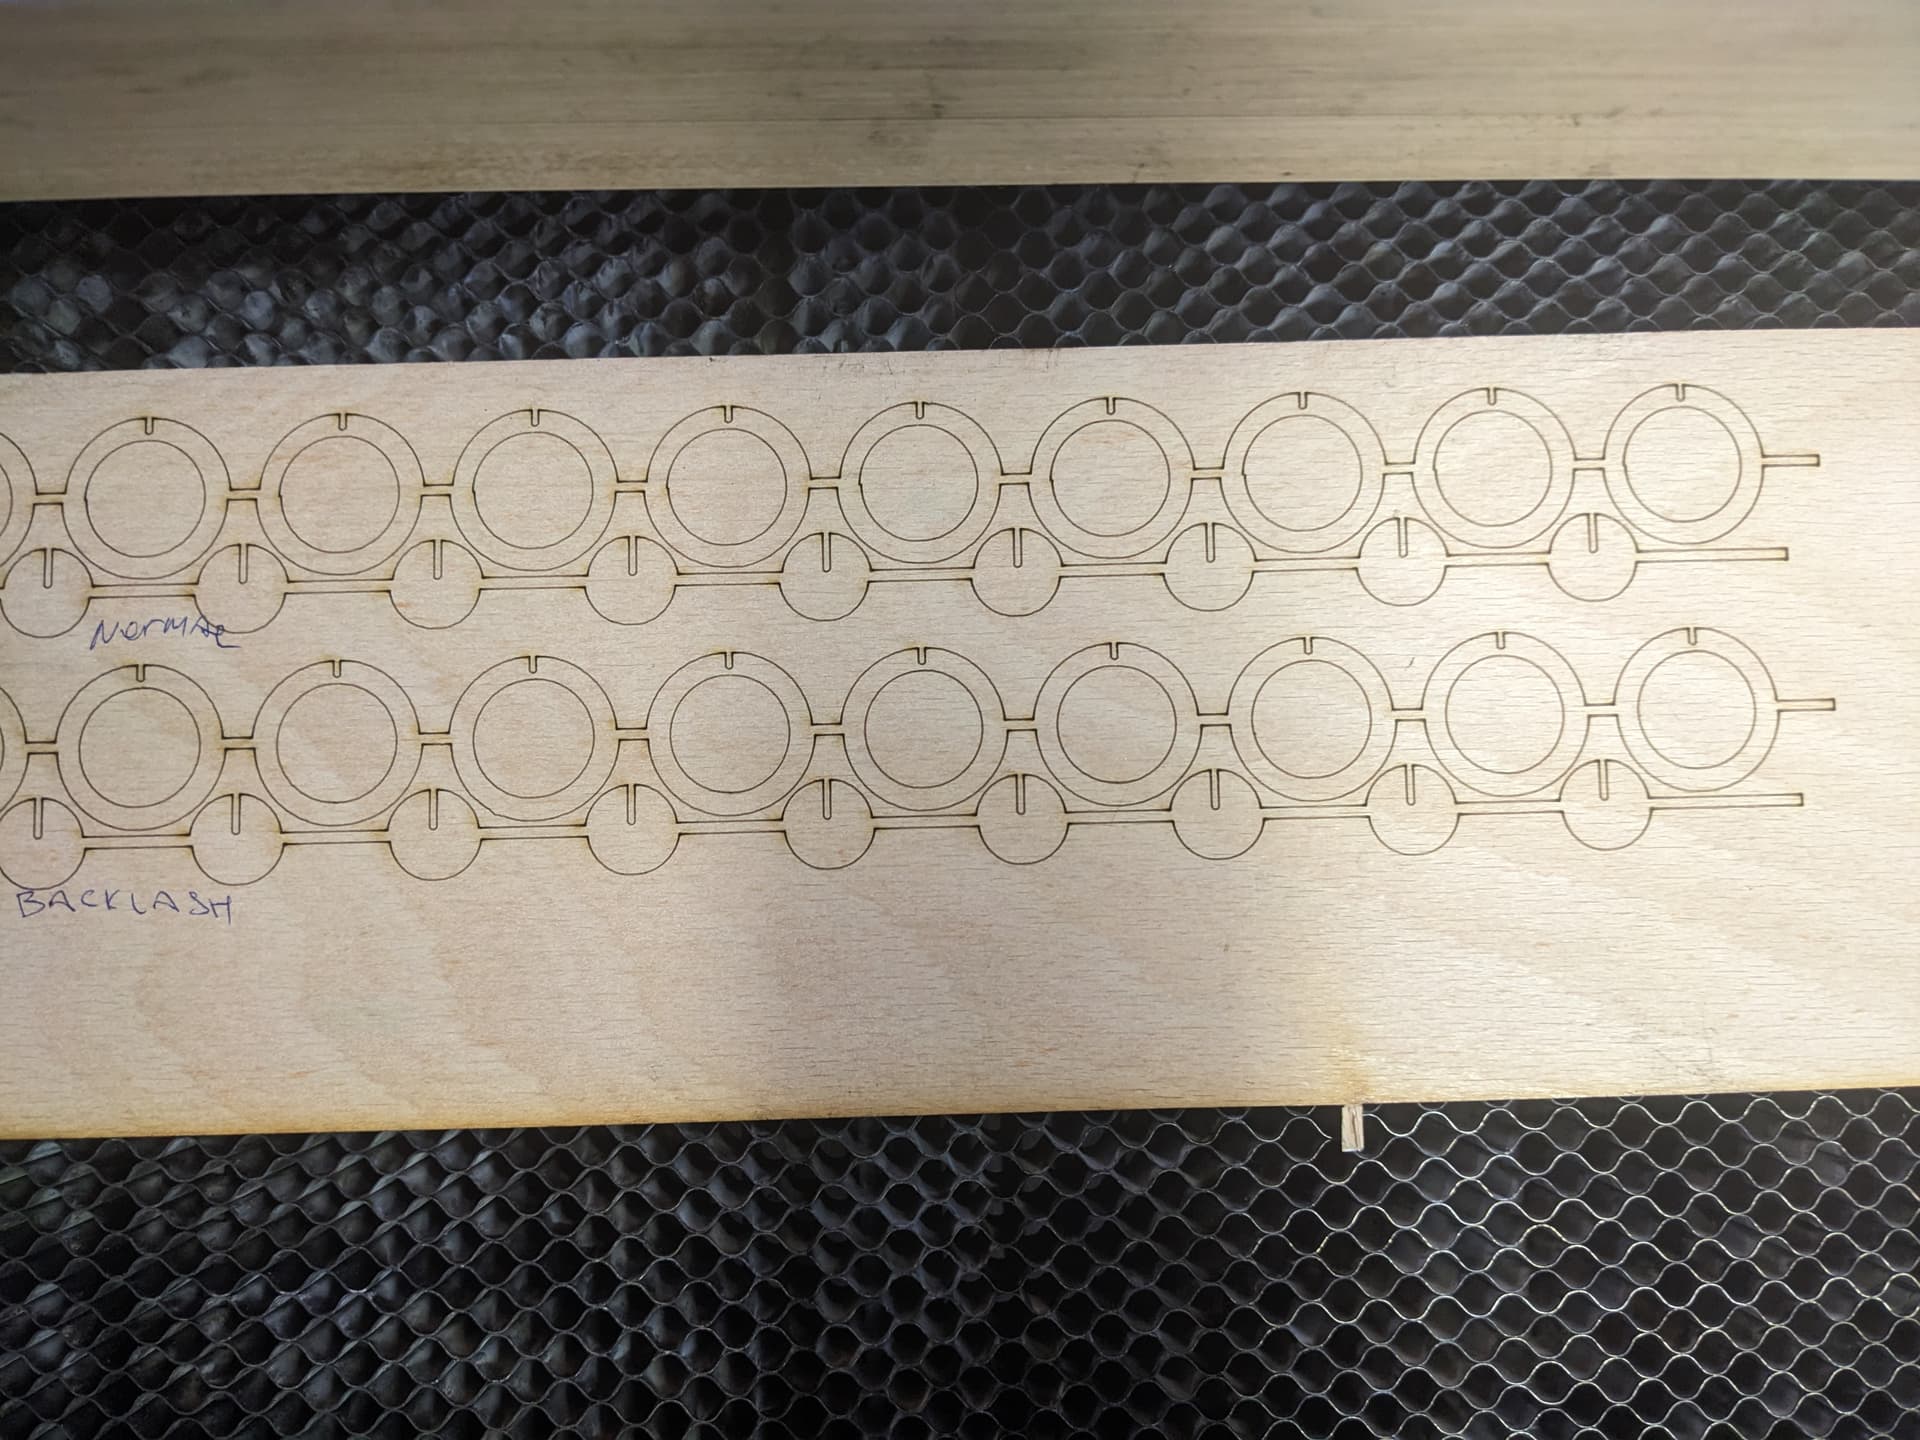
The issue that I am having, the machine closes the first circle in a row, but starting with the folowing the circle is not closed correctly. I tried different speeds, but it doesn’t matter. I checked the hide backlash option in optimisation and it seems that circles are better, however, the discrepancy of the parallel lines is still there. We tried to loosen/tighten the belts of the laser head and also replaced smaller belts on the motors, but the result is still the same. what can it be? Is that a backlash if the “hide backlash” helped with circles?
Thank you so much for your reply, I will try this now. I was checking different speeds on this design, as low as 5 mm/sec and the issue is still there, as much as on 100mm sec
corners thank you!
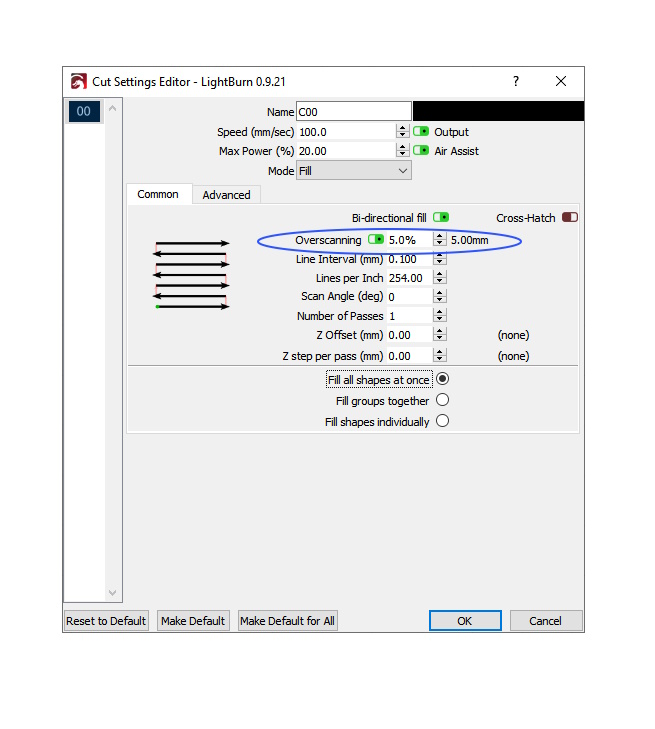
Upd, Oh it seems that I don’t have over scanning option, there is no support of this function in my controller i guess ?
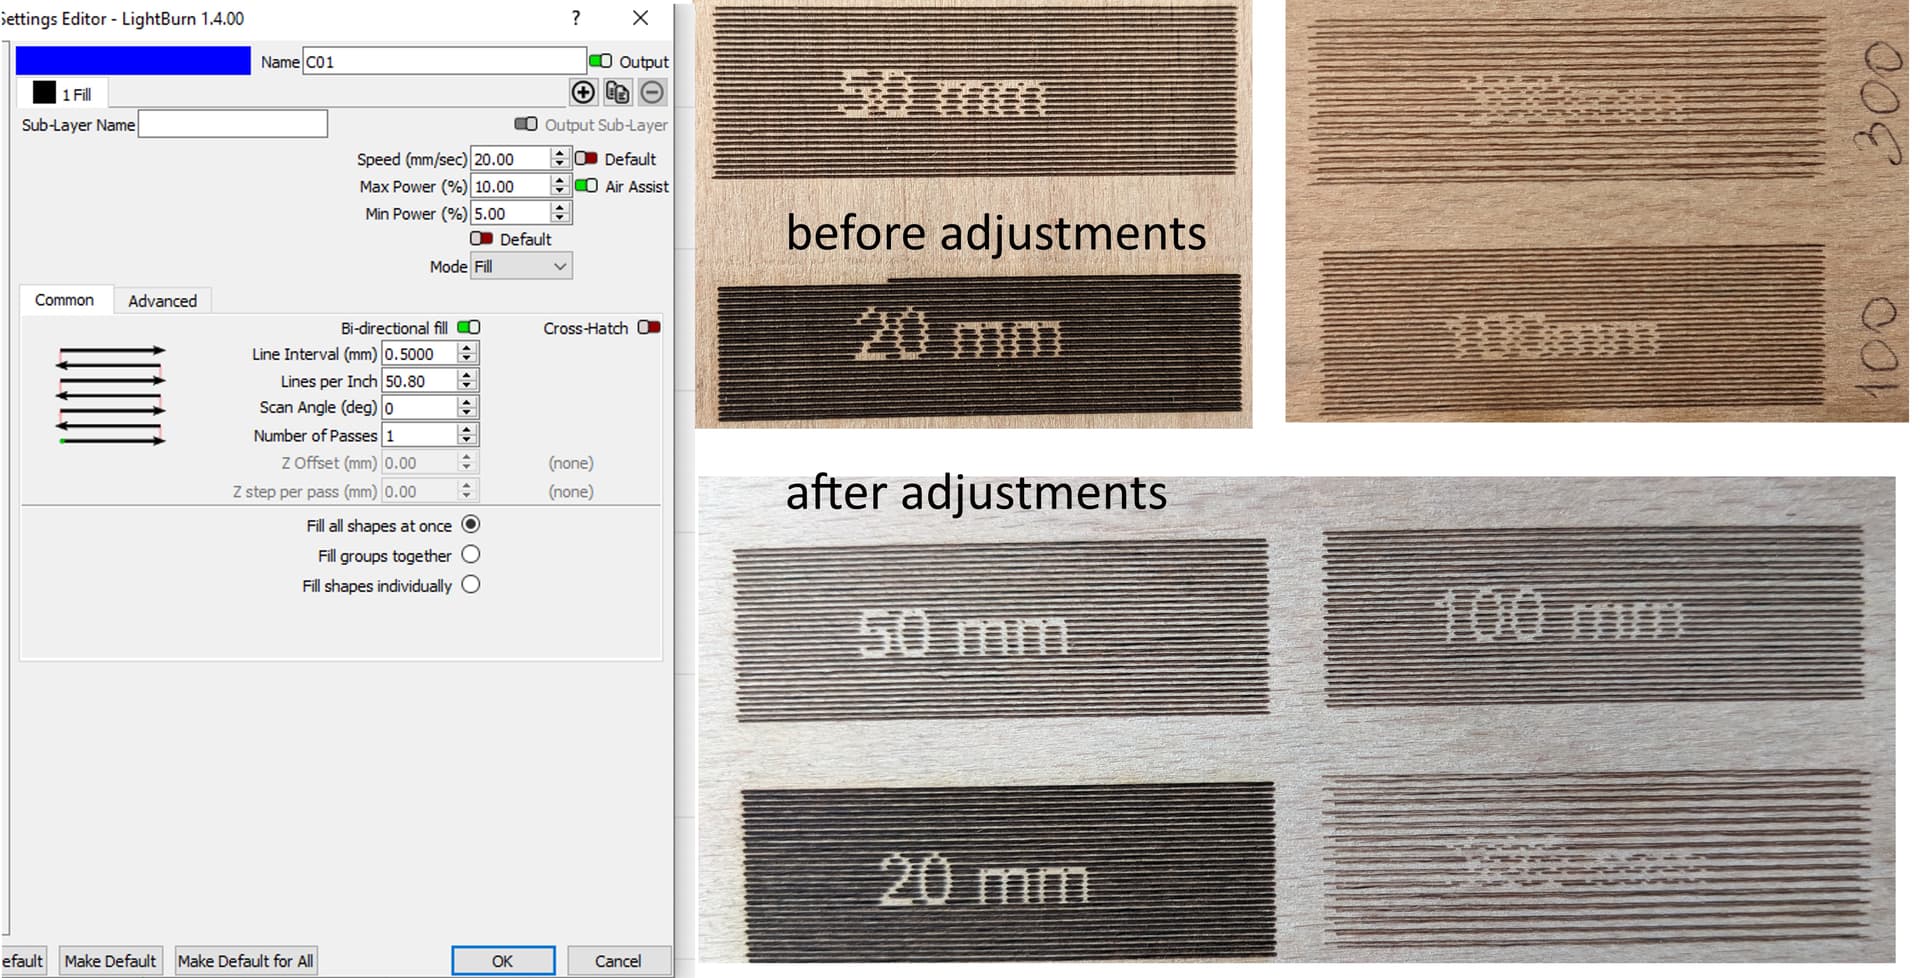
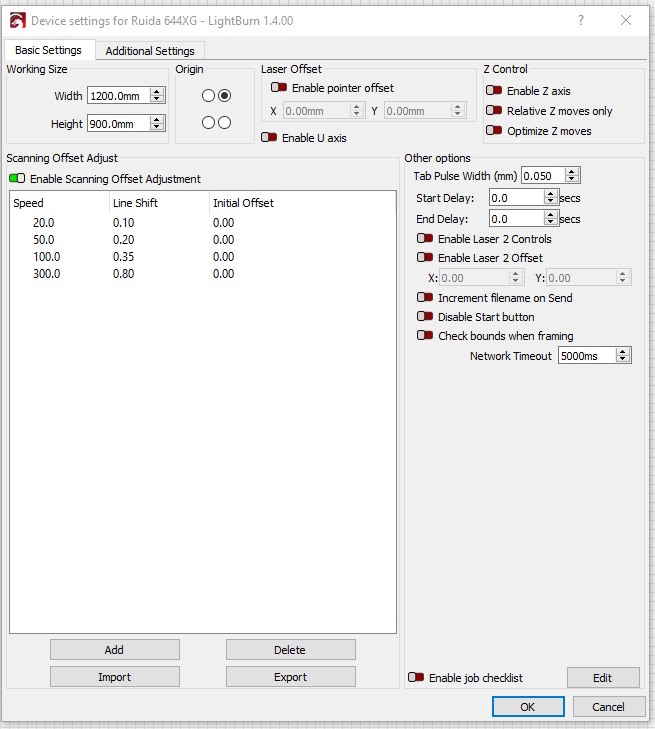
It seems that with scanning offset adjustments the letters are much better for 50 and 20 mm/sec, but 100 and especially 300 did not improve, and I guess there is an issue with y axis, the distance between lines is shifted, at 300 mm/sec there’s normal 0.5mm distance, and then the next line is almost one mm apart.
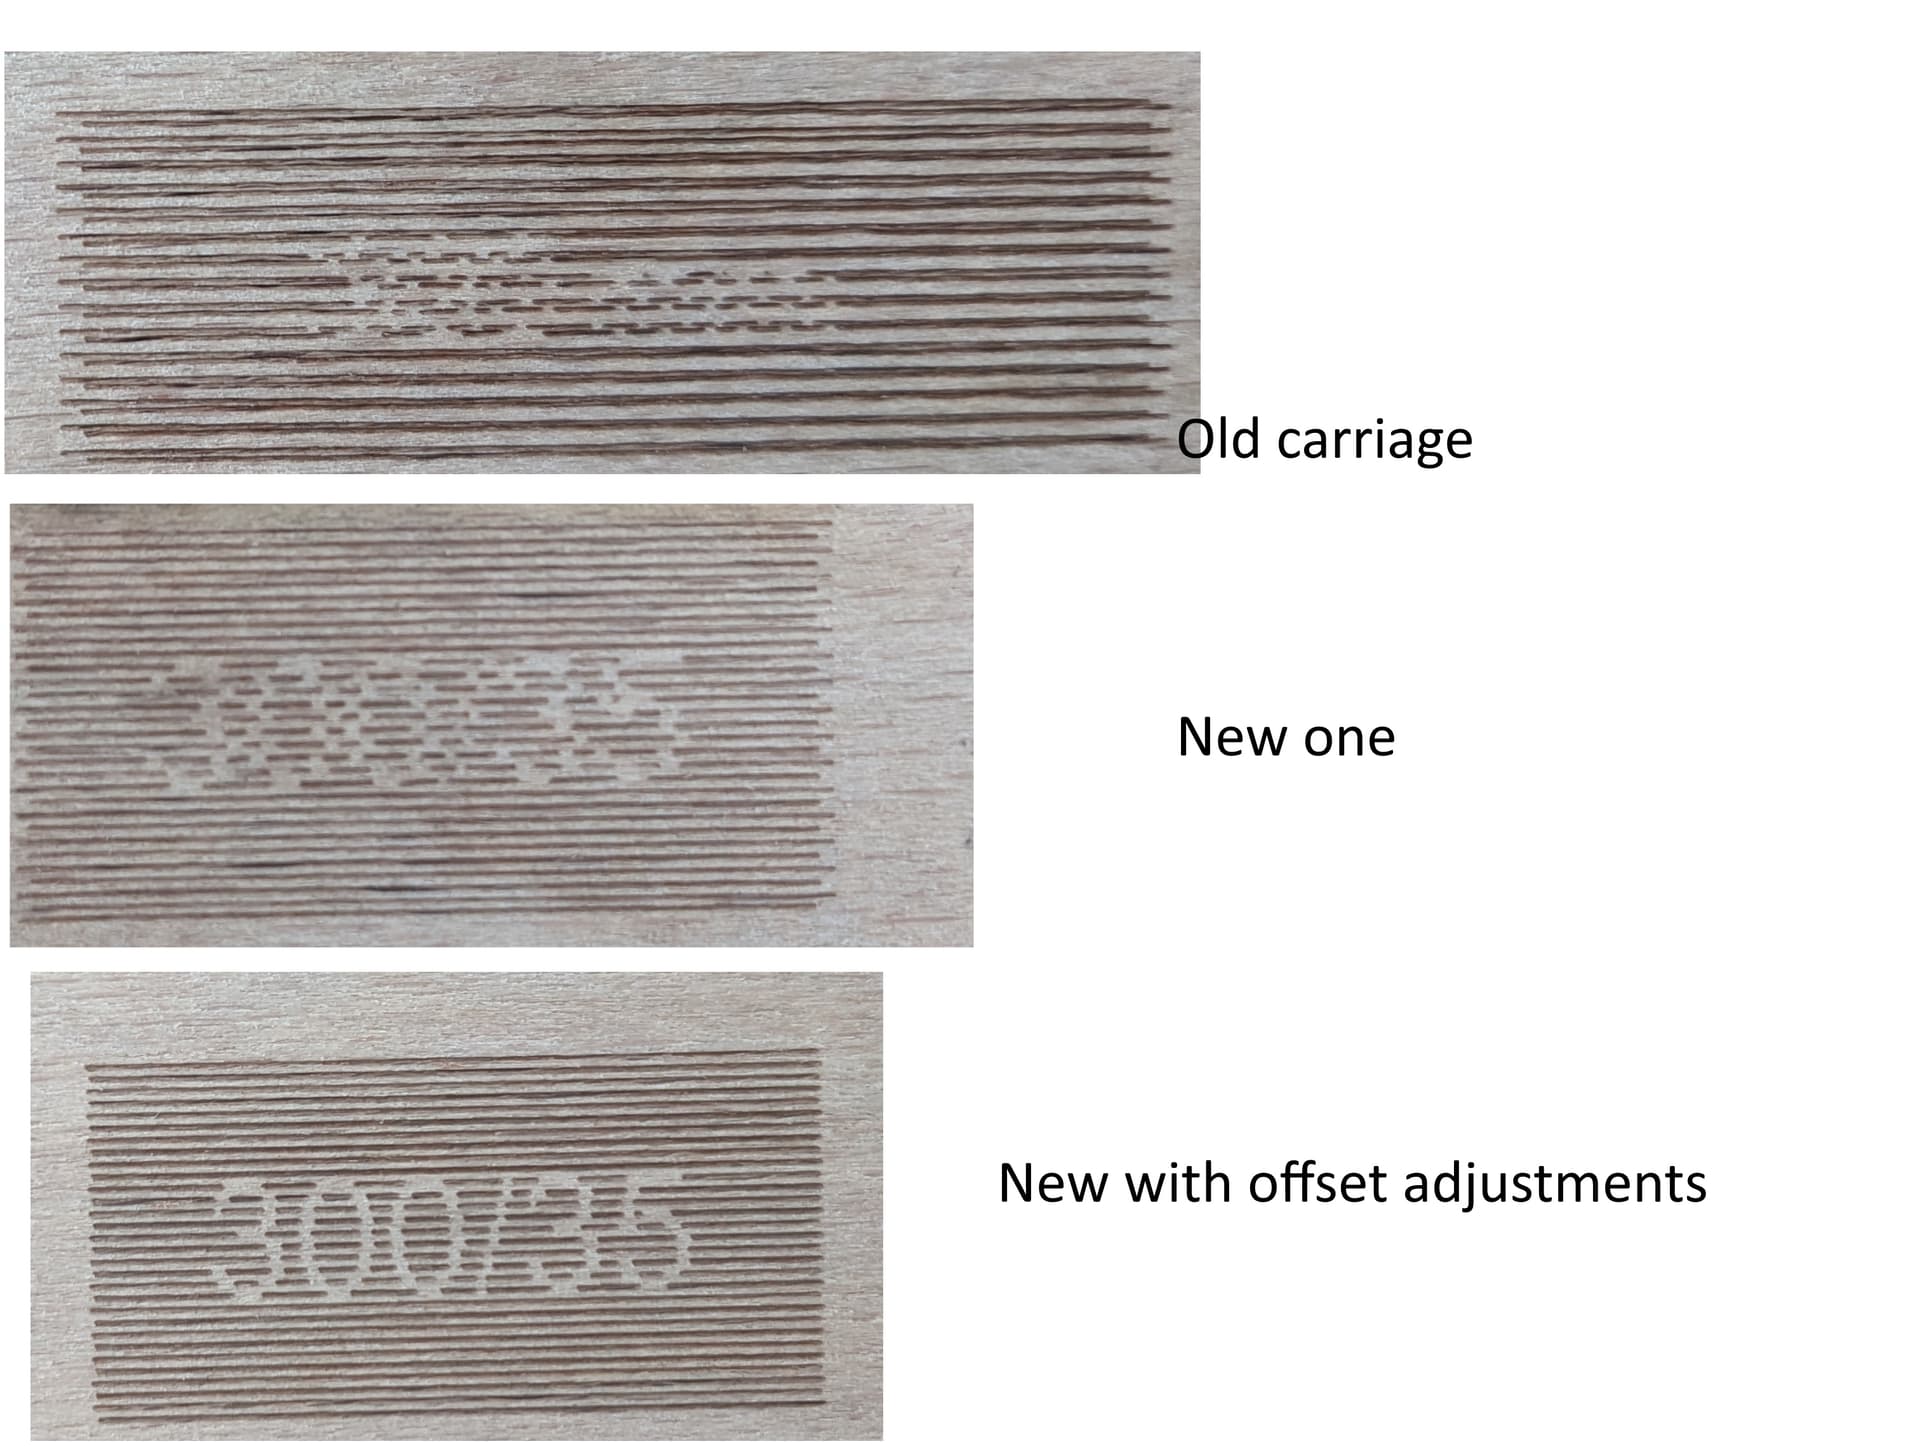
I re-uploaded a different file with my design and it is no good at all :
The min power is at 5% I have increased the acceleration yesterday, and I thought that I did not have burnt edges on a different design, but this one is still there.
I don’t know if any settings can impact this, and if acceleration plays any role in this.
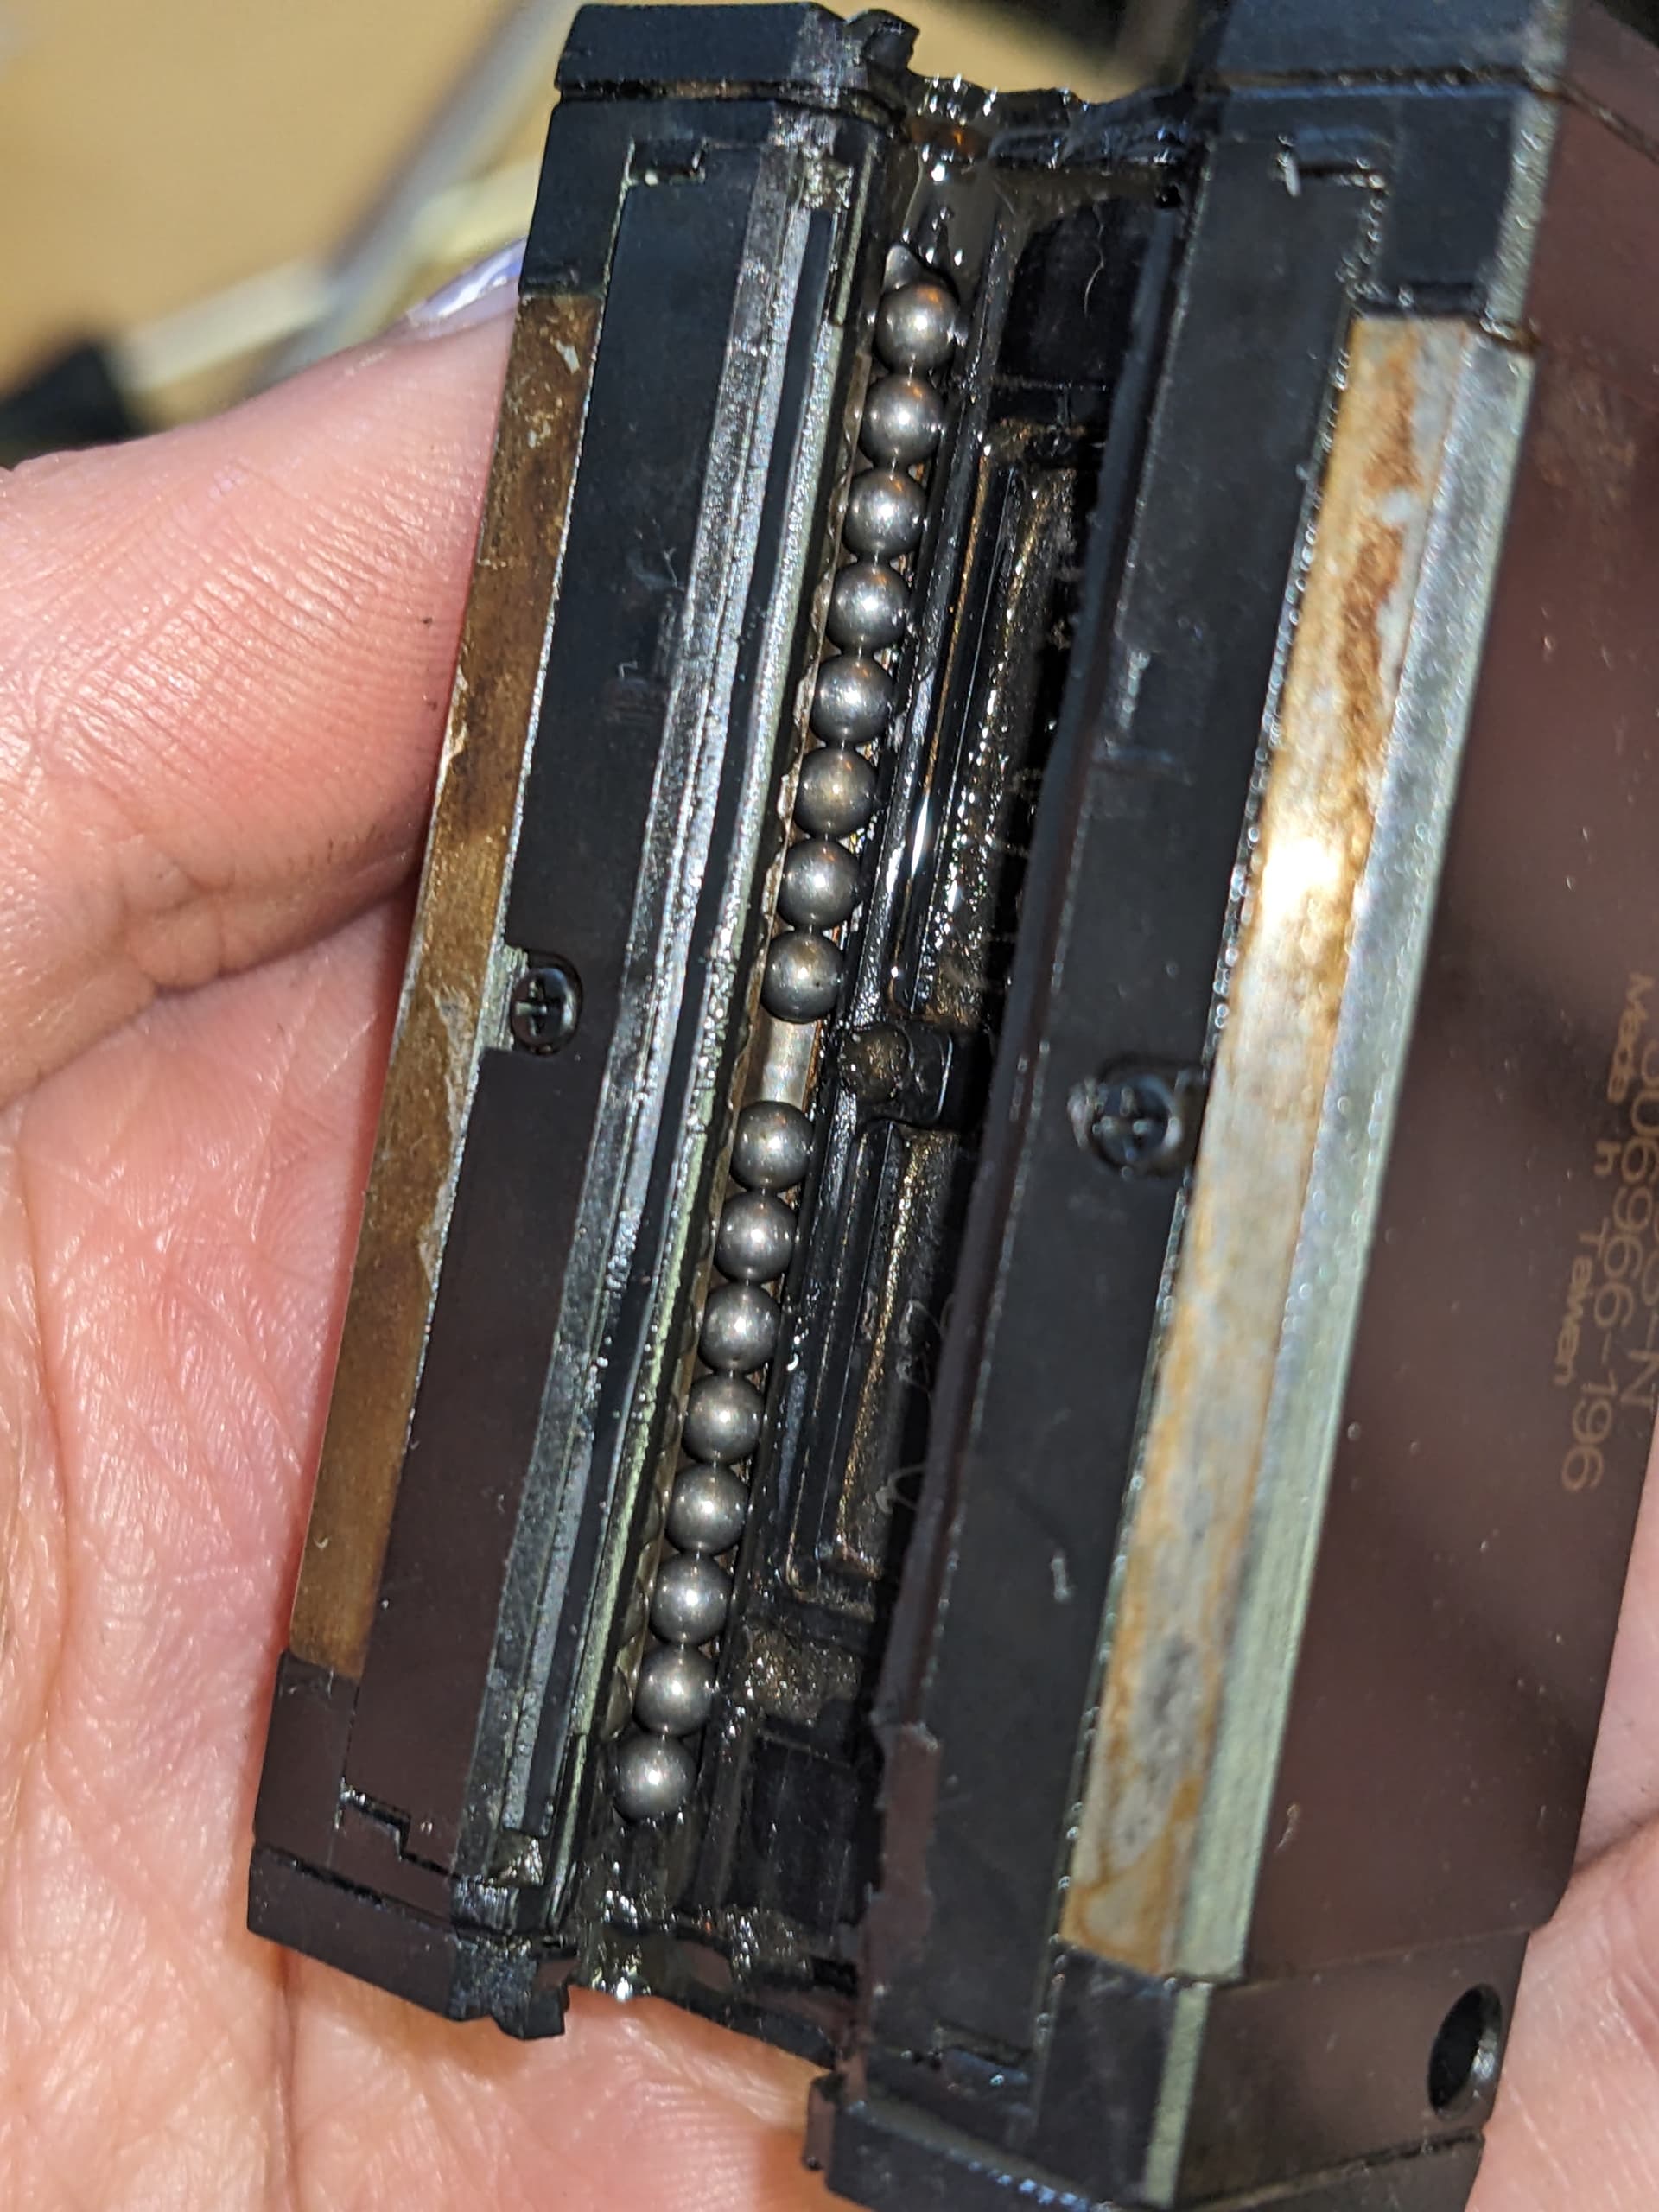
I think I will replace the linear guides carriages, I checked the one on the x-axis and it looks like there is some weird damage underneath (scuffs) and the bearings are missing (wide gap on one side). Considering this machine is about 10 years old according to a previous owner I think it’s a reasonable thing to do. I don’t know if I should replace anything else though…
That misalignment looks some mechanical issue… guides unfastened or some kind of looseness.
Did you check if the machine is everything square and tight?
We also checked and tightened belts, but we haven’t checked the alignment of the actual guide rails, or other components yet (quite a newbie in terms of lasers)
but I tried without it, and measured the discrepancy, and this is how lines changed, the numbers inside of lines are more accurate on lover speed, interestingly that on higher speed it did not change?
I want to post an update, maybe it will be helpful to someone.
We have replaced carriages on linear rails. This did not solve the issue fully, but things changed a bit.
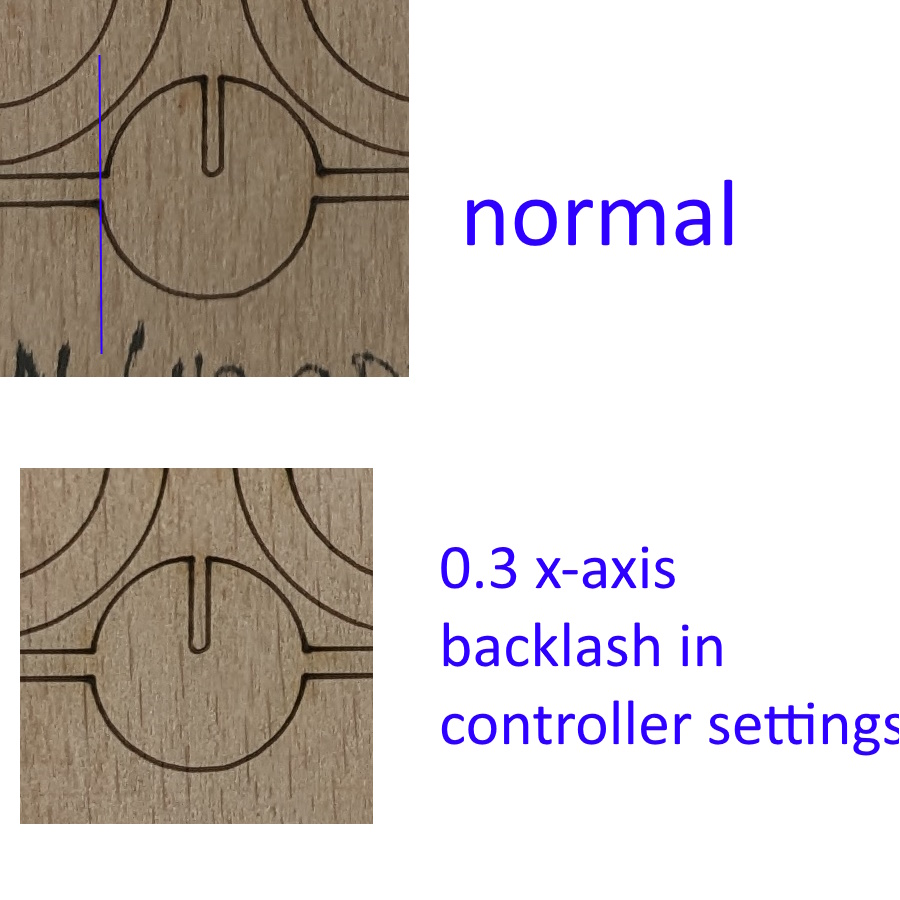
so now I have to cut circles separately, with “hide backlash” option, then adjust the X backlash in controller settings and cut the rest. The “hide backlash” settings shifts lines too much in the opposite direction if is used for the whole bit.
I wonder if I should replace belts or mottors, or the controller… Or everything if that’s mechanical
It is better, that’s true, but there’s still a shift in horizontal axis (0.3) if there’s no correction for backlash in controller settings. But simultaneously, if this correction is on, the bottom halves of circles are shifted instead of horizontal lines.
The term Hide Backlash is misleading: it does not make the backlash go away, the motion planner simply tries to hide it by moving the motors enough to take up the backlash before changing direction. This works well for some situations and fails completely for others.
The most challenging situation is exactly what you have: a circle (or shallow arc) with the change of direction in the middle. The abrupt motion sticks out like a sore thumb.
The only way to fix backlash is to track down the source of the mechanical backlash and eliminate it. This requires looking at every possible place where motion can occur between the motor shaft and the laser head:
Setscrews in couplings
Setscrews in pulleys
Belt anchors
Belt tension
Mounting screws in brackets
Laser heat attachments
Searching the posts around here for “backlash” will turn up a whole bunch of hints & tips & “I never expected that” solutions.
That’s likely because the head approaches the first pattern from a different direction than all the others, so the backlash doesn’t happen. You can see it by stepping through the Preview plot to see the fast moves between the patterns.
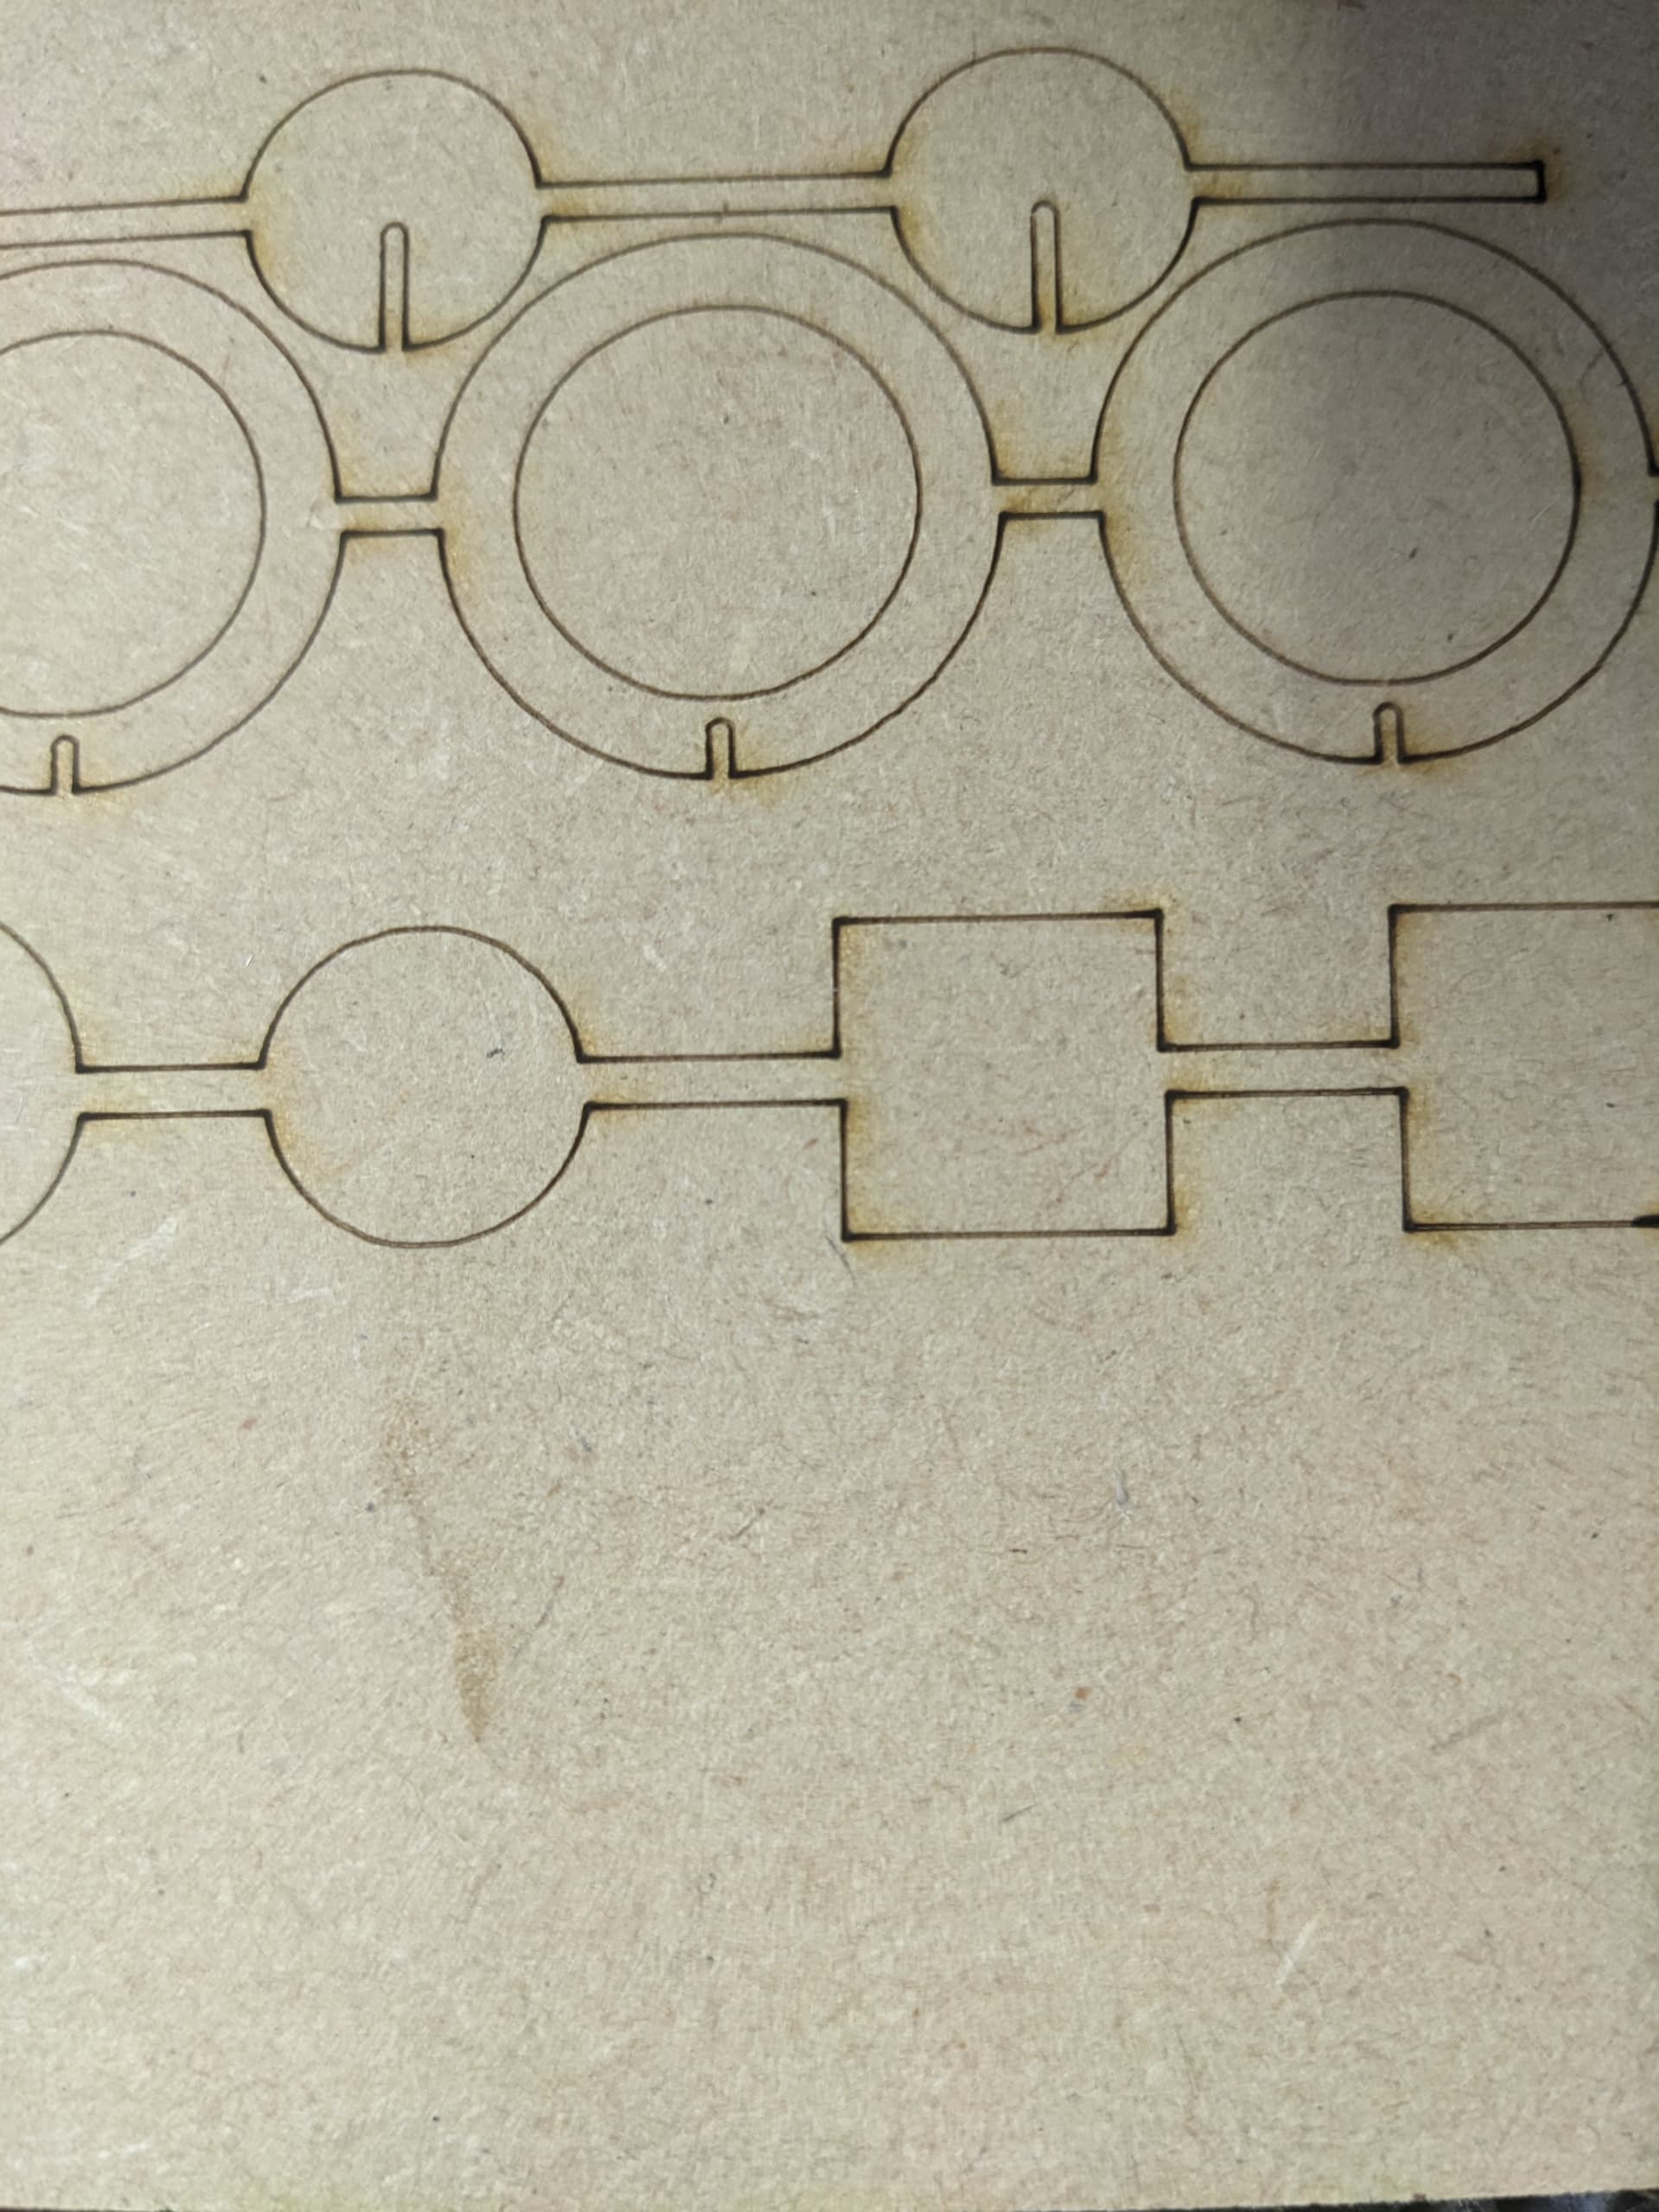
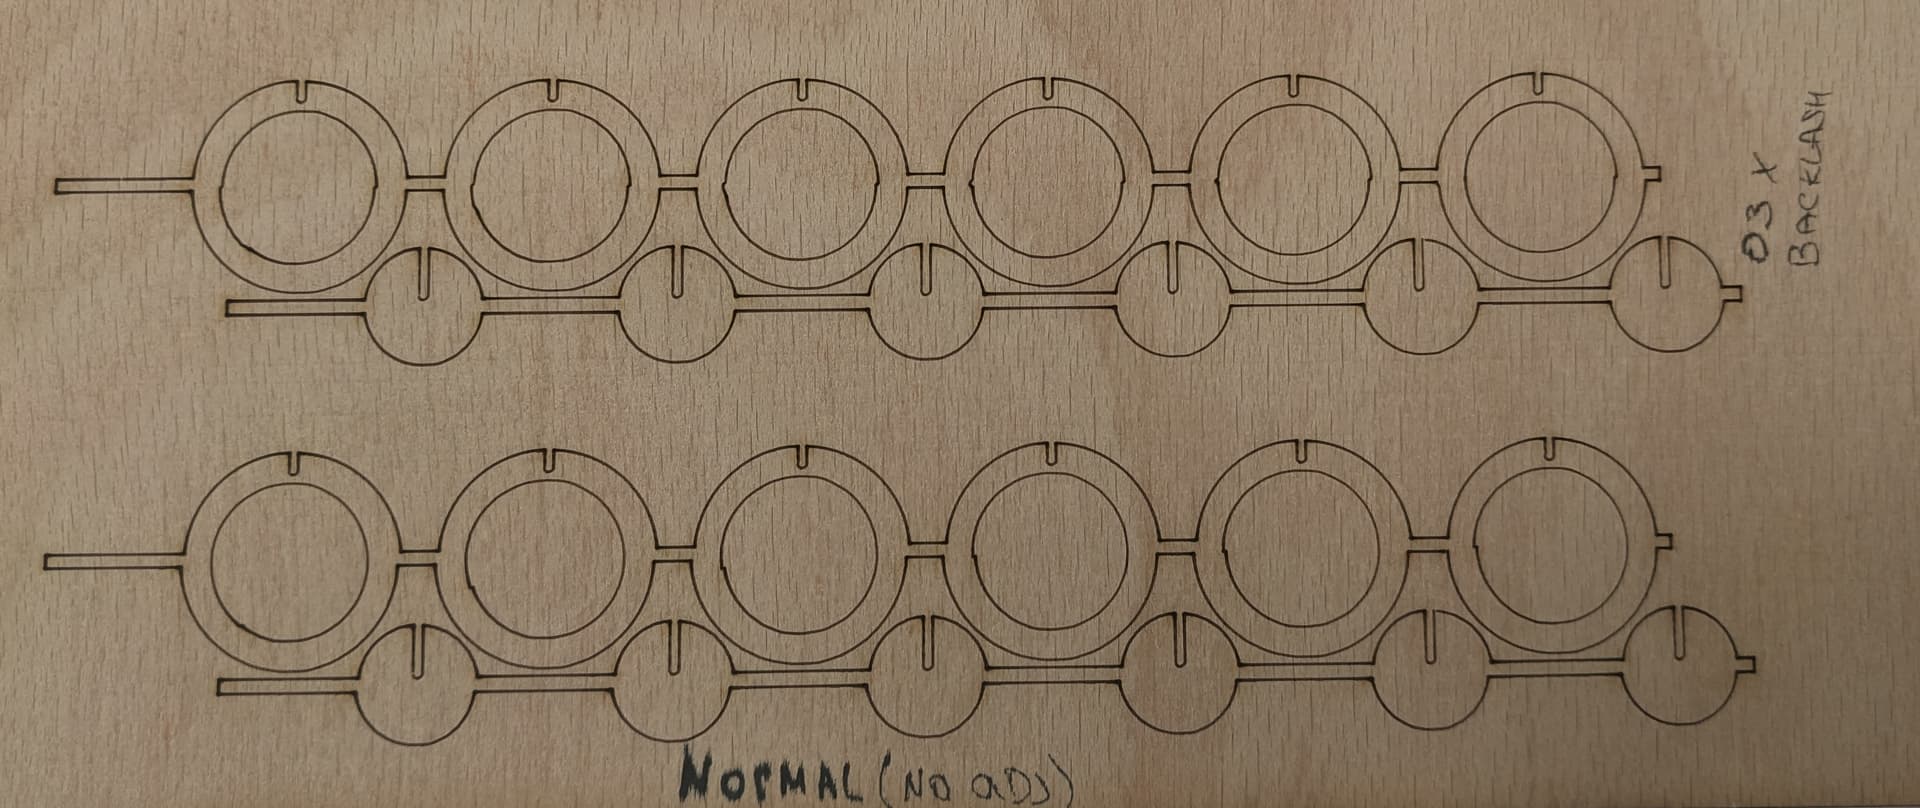
Thank you so much for your reply! Just to clarify, the thing that sticks out of the circle appears when I out 0,3 mm in controller settings for X axis backlash settings, otherwise (without any extras) I have this:
I have checked (to my understanding) belts, and pulleys, I wonder if it can be that the motors are losing steps somehow?
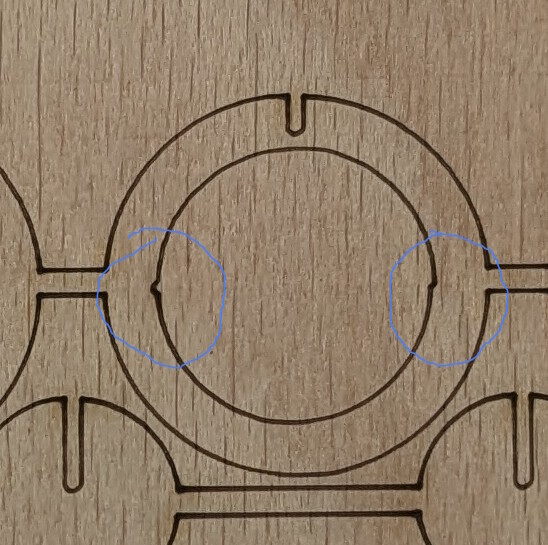
Assuming the two lines between the circular patterns should be vertically aligned, then the machine has a classic case of backlash in the X axis: the same X coordinate has a different physical location depending on the direction of travel.
Assuming the line is 0.25 mm wide, then the X backlash is about the same: the left side of the burn in one direction is at the same physical position as the right side in the other. The X coordinates in the LightBurn design are the same, but the X positions differ.
No, because that is cumulative: everything shifts and stays that way after each loss.
The X axis rides atop the Y axis rails, so the force required to move the laser head in the X axis applies stress to every joint between the head and the frame of the machine. Distributed along that path, the pieces can shift a total of 0.25 mm in response to that force, so each individual joint contributes a hair’s width of motion.
Given that this is a well-used machine, the most likely culprit will be worn belts, where the rubbery teeth no longer fill the spaces in their drive pulleys. Giving all the pulleys a good cleaning won’t hurt, either.
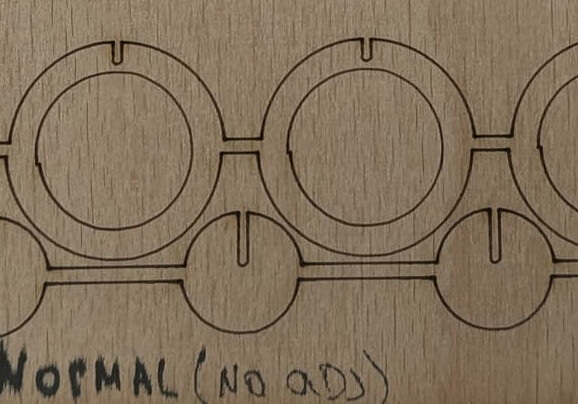
I am sorry to bother you, I had a topic here regarding my “second- hand” old machine, and I finally replaced belts. It seems that there is a tiny inconsistency left on circles, but it is acceptable for us, and much much better now. I wanted to post an update and the last image, maybe it will be helpful for someone in the future?
Thank you for coming back to me with this information. I can adjust the private message you sent me and merge it into the thread. I was not anticipating a belt-wear issue.
I am glad your engraver is working to your satisfaction.