Cameras, one topic more about it!

I know that the ideal, depending on the type of camera, is for the camera to be as close as possible to cover the entire working area of ​​the laser module.

What practical inconvenience will I encounter if I mount a camera about 1m (or a little more) away with a zoom lens mounted to only cover the work area?
The answer “could be much more expensive than a traditional camera” is also valid, but I’ll also consider that part. :wink:

I was thinking about something like this:
https://pt.aliexpress.com/item/1005009398680213.html?gatewayAdapt=glo2bra
https://pt.aliexpress.com/item/1005009352791328.html?gatewayAdapt=glo2bra
Note: (I believe that including sales links is not against the rules, but as I haven’t seen many of them I’m in doubt. If so, feel free to delete the links.)

I did some tests this weekend with this relic


(1280 x 960 @ 15 fps) that should already be in a museum but I believe that due to the resolution I couldn’t even calibrate the lens. (Actually finding a driver to work on Win11 was already an achievement! :smiley:

The reason for saying 1m or a little more distance is that, as I have a big head, if I go below that I will hit my head on the camera repeatedly when handling objects on the work table and it is not advisable to damage the camera. :innocent: :grin:

I can’t see the lens angle from the links you refer to. With the specified resolution, 1m height shouldn’t be a problem - if the lens can cover the area. For that price, you can try. However, remember to mount your camera in a way that doesn’t give variations in distance and angle to your machine bed/material height, the distance should be “static”.

Thank’s Bernd

I haven’t yet seen the camera’s specifications in detail, but it will have to be one that allows zooming in to capture only the work area.

The height issue lies precisely there; otherwise, a mechanical adaptation would be needed to move the camera out of the way to access and manipulate it in the work area. This doesn’t guarantee that the camera will always rest precisely in the same spot, ruining the calibration.

My “big” concern is whether the actual distance interferes with accuracy even when using the zoom limited to the workspace.

I haven’t seen a zoom function on cameras used with LB, “only” focus is adjustable. You will probably cover a much larger area with the camera shown in the ad, which is cropped during camera alignment in LB. As long as there is enough image information from the 8MP for “the rest”, it shouldn’t be a problem.

If you don’t have the option to mount the camera 100% static/stable, you can give up serious use of this tool.
The deviations will be frustrating. For example, if I forget to focus from 3mm to 5mm when changing materials, I have an error reading of about 2mm which is useless for reproducible work.

This other seller has the same camera with a short video.
https://pt.aliexpress.com/item/1005006903085394.html?

If it’s accurate, it seems to me that it will do what I want, or very close to it, although it’s only 2K 4MP 2560x1440 resolution.

My intention is to adjust the zoom manually, not using software. When calibrating the camera, I’ll zoom manually to restrict the image to the workspace and proceed from there. (I hope I’m making myself clear.)

That’s precisely why I started this discussion. :slight_smile:

I understand that.

I will always choose the highest resolution that can be purchased in this price range, 4MP is not enough at a distance of one meter - as far as I can tell.
I do not know what a 6-22 mm focal length corresponds to on this camera, i.e. what working area it covers. In the video I can not judge the distance, but it seems to me that the camera is being used as a microscope.

And this is the kind of information I am looking for.
Thank you again! :+1:

The useful area of my machine is 360 x 315mm. (400 x 400 machine).
It looks like the zoom of the 6-22mm camera is enough but not sure…

You are welcome. But even though I have experience with different camera systems on laser machines, I do not consider myself an expert. I am following your project with interest and hope it succeeds.

1 Like

I look at each comment as an opinion. And opinions are sometimes right, sometimes wrong, and sometimes they don’t meet our expectations.
This topic is for exactly that. Debate of opinions between various participants to better clarify a question among the opinions of all participants with more experience/knowledge than me.
Luckily for me, there are only two of us so far. :smiley:
I’m going to announce beer and peanuts, maybe that will attract more people to the discussion. :innocent:

2 Likes

If you still get a clear picture, the greater distance is not a disadvantage.

In fact, it can be beneficial to mount it farther away and use a long lens, because of how a longer lens tends to compress the view, and you get less perspective distortion compared to a wide-angle lens mounted closer.


You definitely want to fix the zoom and not touch it after the calibration. Twisting the zoom lens changes the optical path, throwing off the lens calibration. (Similar to an autofocus system. For this reason, we only use cameras with manual focus.)

Note that at longer focal lengths, even tiny camera movements shift the image more so, as Bernd said, it’s crucial to mount it well.

That’s correct., therefore, as I recommended before, I wouldn’t “settle” for 4MP because a relatively large portion of image information is lost during camera alignment, especially when we’re talking about long distances. 8 MP will be fine I think.

The idea I have, theoretically, is also the same, but I’ve never discussed the subject, and since there may be someone here who has already experimented, they might have a more realistic opinion.

In a very simplistic way, the more perpendicular the angle of approach, the better.

Actually, I’m more concerned about any movement of the laser machine than the camera. The camera will be fixed to the wall in a rigid support (I just don’t know which one yet), once fixed and tuned, it is not touched again.
The machine, on the other hand, is simply placed there, it’s not even screwed to the bench. That’s why my concern is more focused on the machine than the camera.

But thank you for pointing it out.

I confess I thought 4k would be more than enough. But the topic is exactly for this, to clear up doubts and clarify questions.

Taking your opinion into consideration, I’ve already ordered an 8K 6-22mm and we’ll see the result.

The worst that can happen is that the lesson costs me €45.

As soon as I take the test, I’ll post the results here.
For now, I’ll wait for the camera to arrive!
Thank you all!

3 Likes

Can’t you make a frame you can place your machine in?, I know I’m repeating myself, but stability of the camera and the machine to each other is crucial.

I’m following with interest how your project progresses, good luck.

Currently, the “bench” is a bedside table. (It’s not advisable to drill holes.) :innocent: :grin:

A bench with integrated fume extraction is planned, but it hasn’t been completed yet. It will depend on availability.

Don’t be shy about pointing it out; I understand it’s for a good reason, probably generated from personal experience. :+1:

I’m also curious about the result.
Thank you!

So I would suggest temporarily holding the machine in place with clamps, so you can still test whether the theory with your new camera works.

1 Like

The camera finally arrived!
At first glance, and from the test I did using the Windows “camera” application, the results seem promising.
I still need to securely mount the camera and assess whether the investment was worthwhile or just another expensive lesson. :innocent:
If I have time next weekend, I’ll do that.

1 Like

A little over a month after asking the question, here are the results.
This is the first time I’ve assembled and tried out a camera. Given that this is “Chinese” and I have some limitations in fixing the camera, I would say that it could hardly have been better, but I leave the final decision to someone with more experience than me.

First of all I have to thank @bernd.dk for the 8MP (4K) advice, I think the investment payed off.
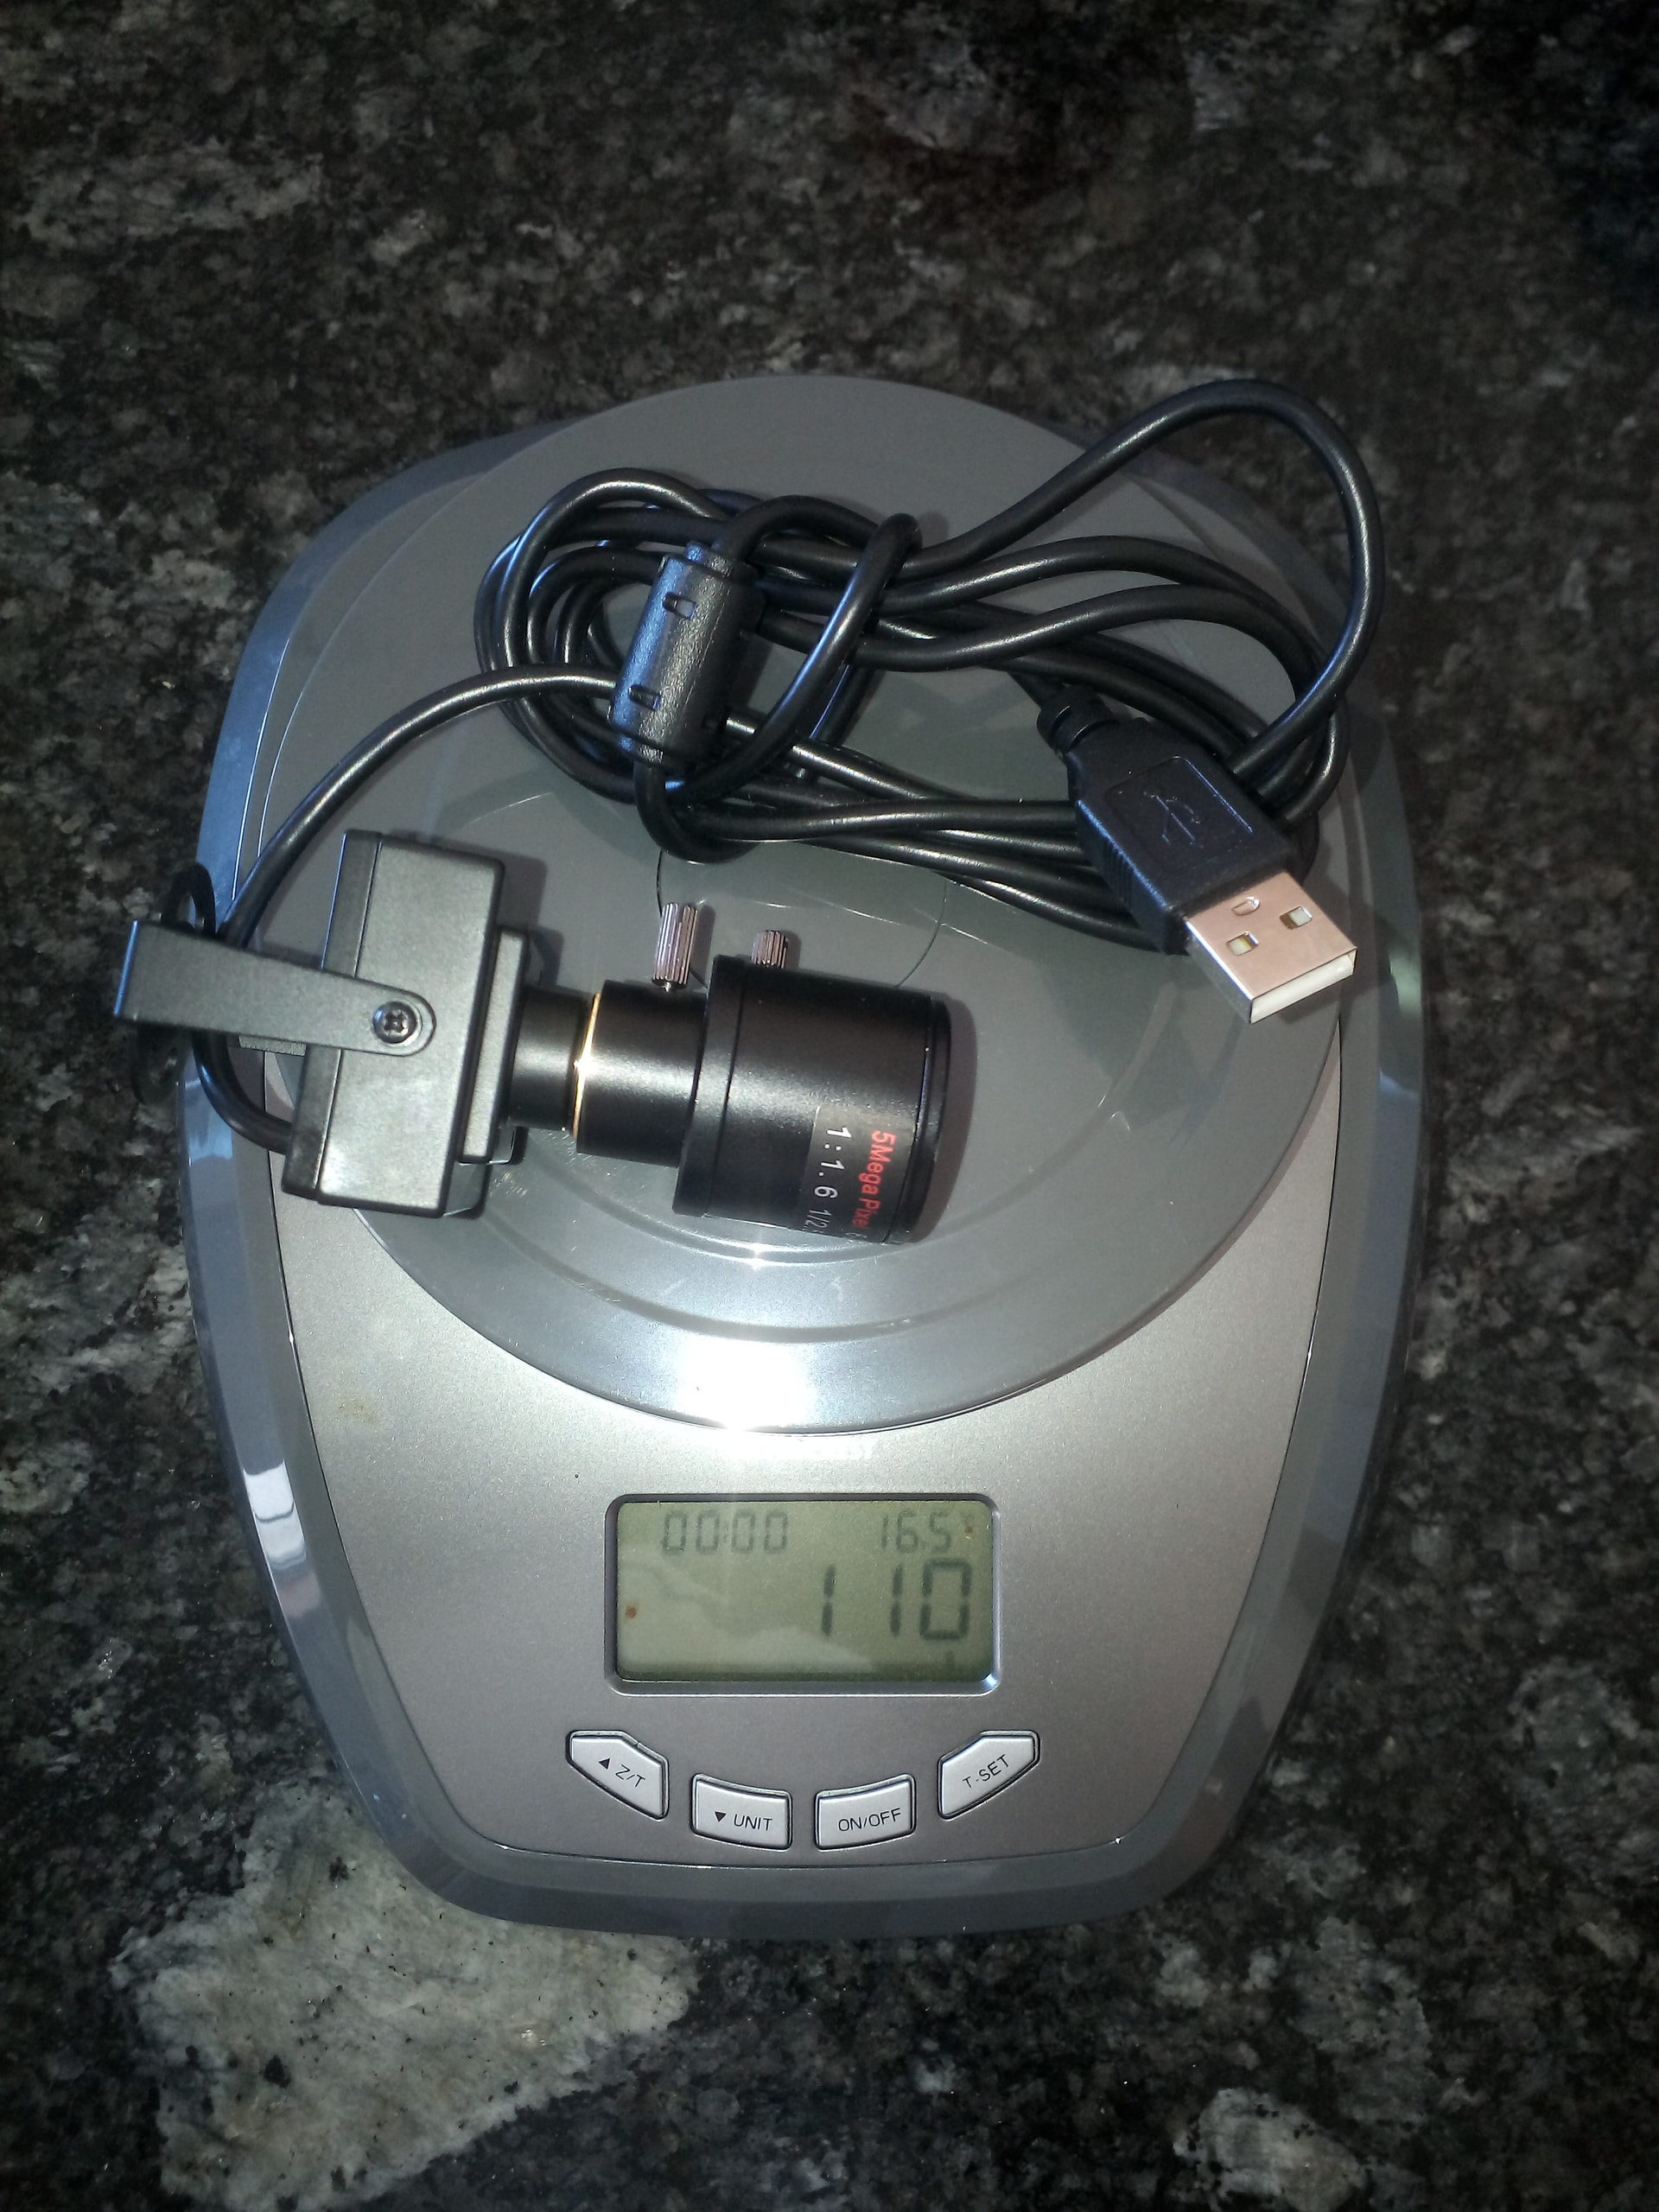
So, this is the camera in question, which cost around €45 and weighs 110 grams.

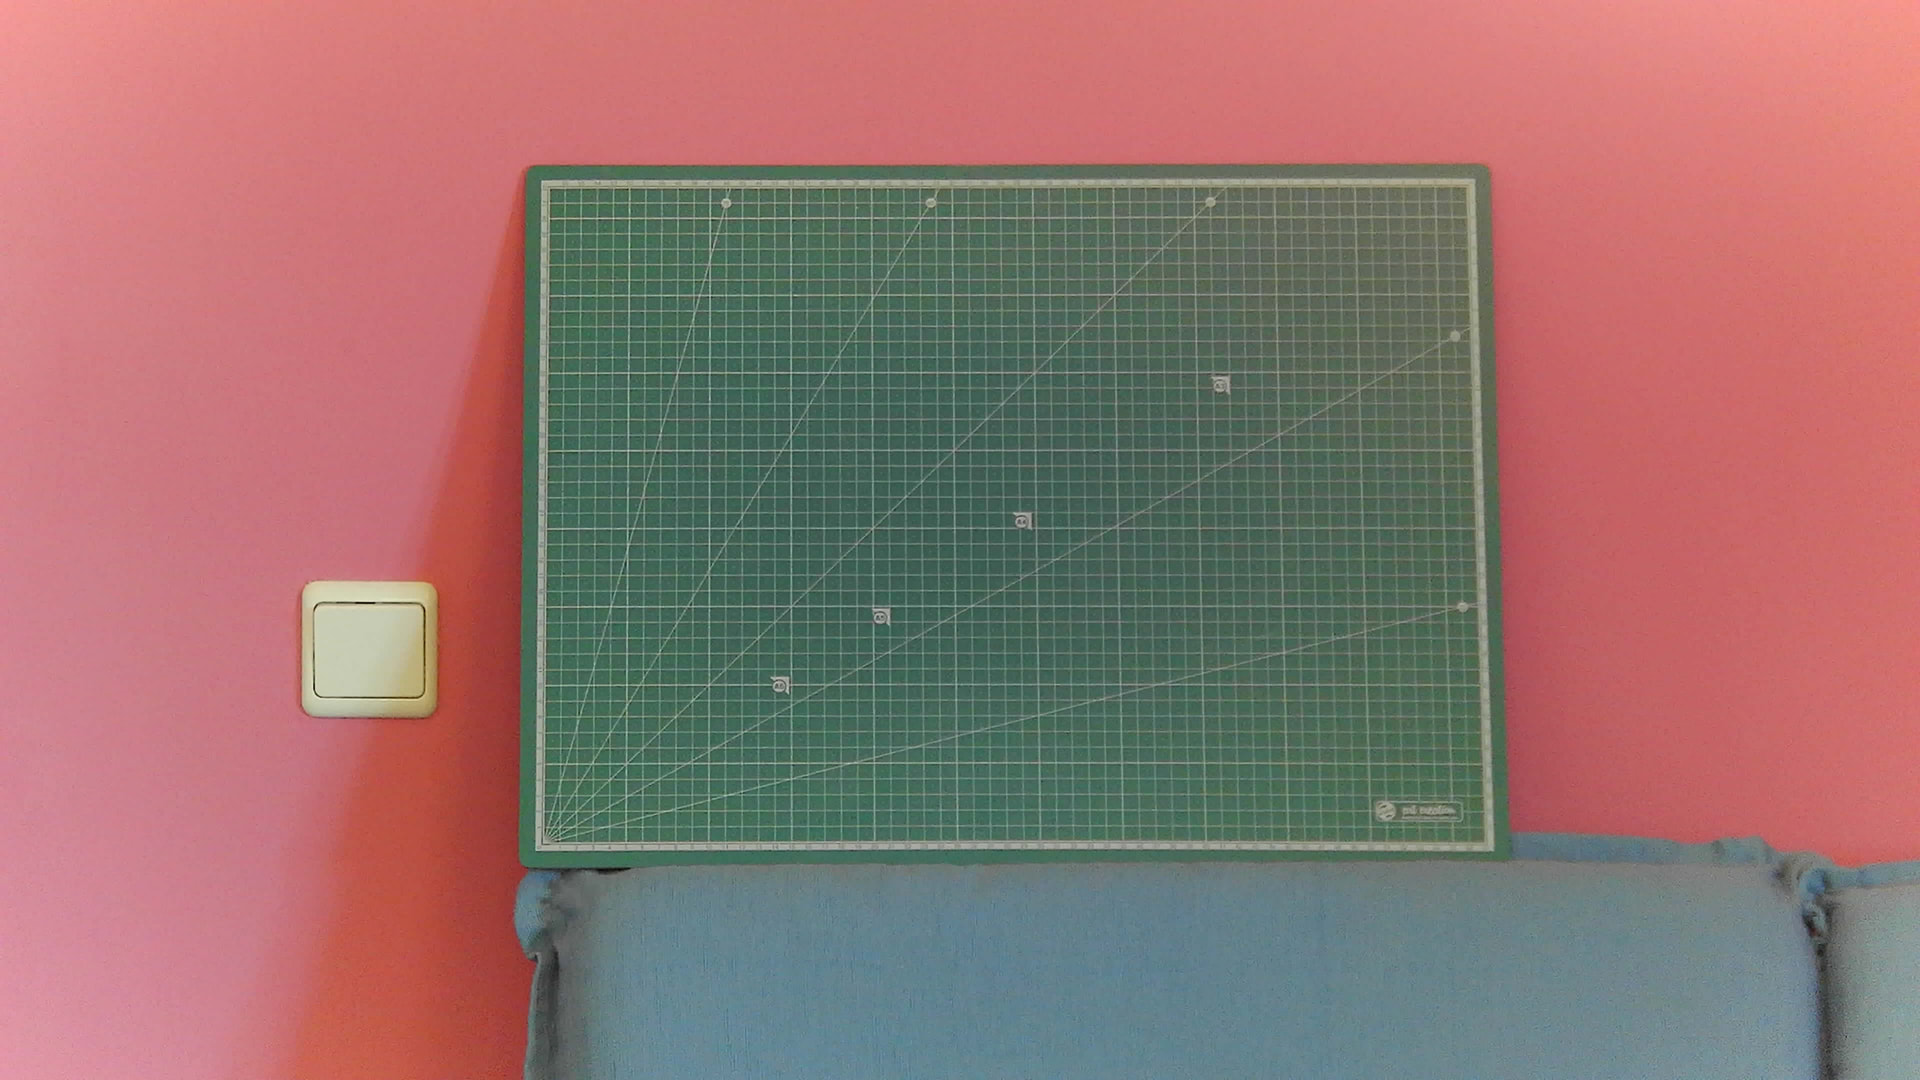
In a quick zoom test, I can show a green A2-sized cutting board at 4 meters (157-ish inches).
I was unable to test the honeycomb (40 x 40 cm) (15.7 x 15.7 inches) due to insufficient USB cable length.


That was already promising.

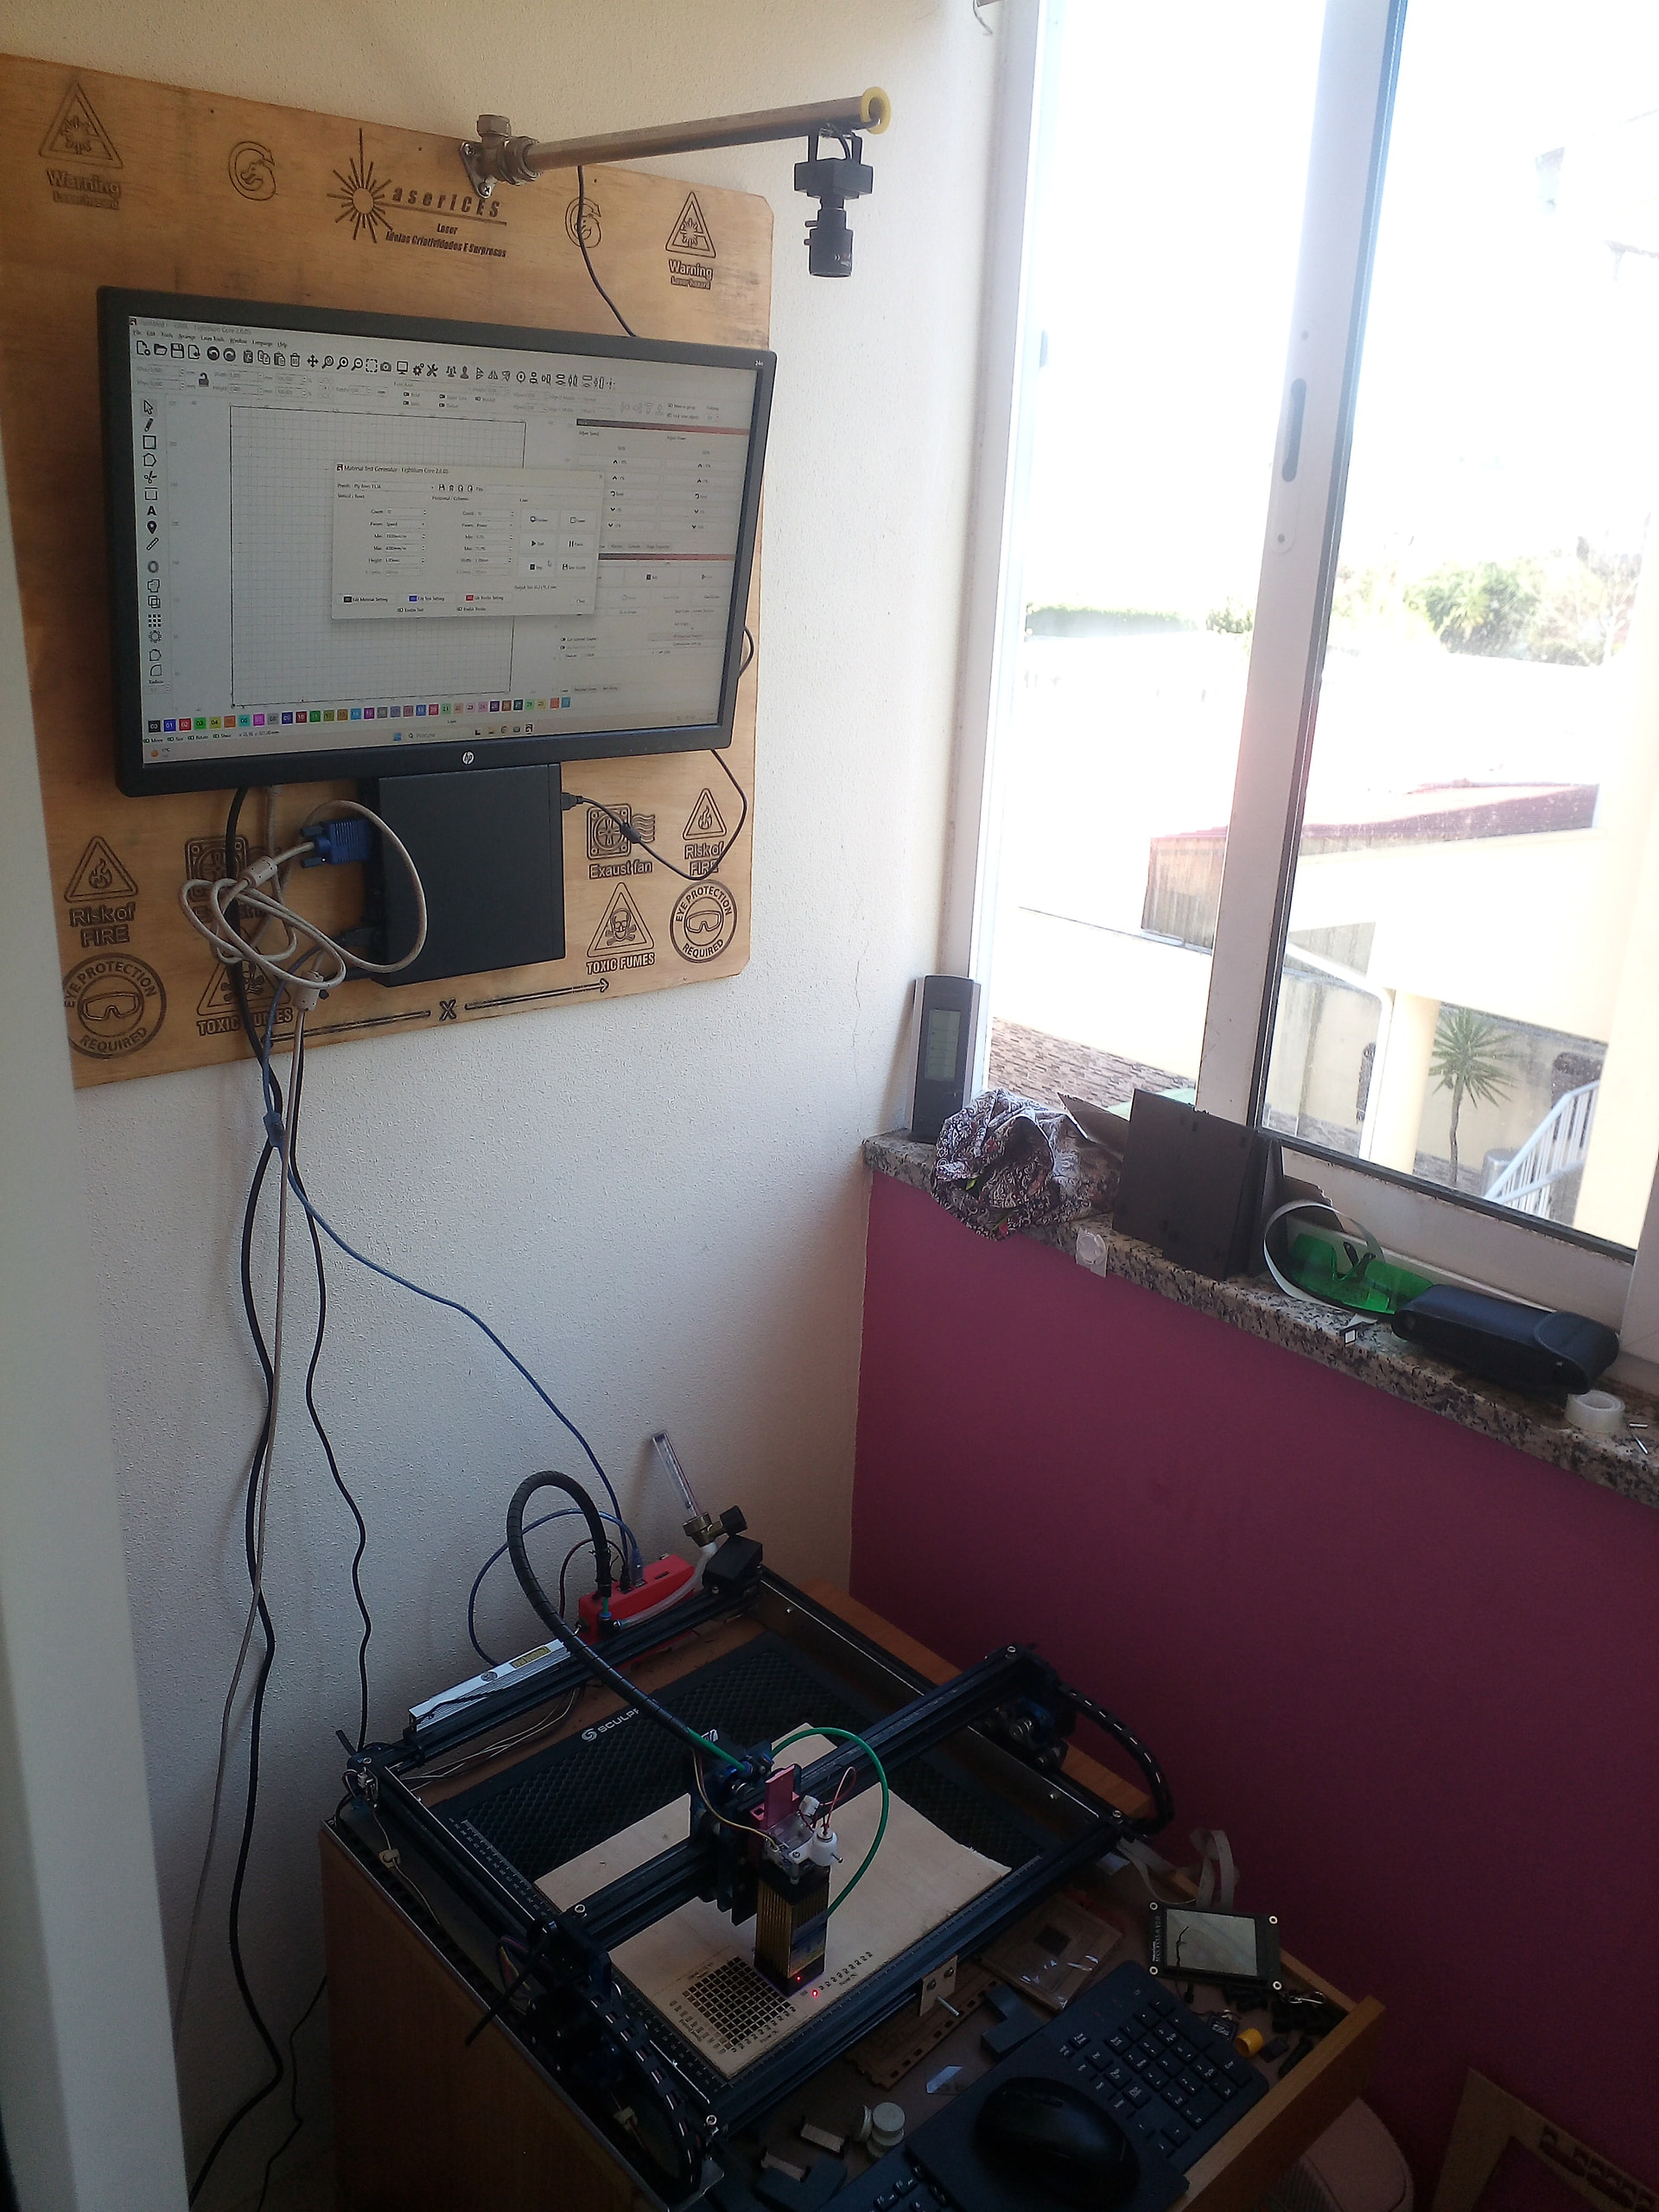
The camera was mounted on the panel where I have the rest of the setup fixed. I didn’t permanently fix it to the wall because I know the wall is made of brick and drilling holes as close together as I needed wouldn’t allow for an effective mount.


The rod is about 40 cm (15.7 inches) long and the height is 1.23 meters (48 ish inches) to the honeycomb .
It was also at this time that I realized how quickly I’m getting old… When I chose the camera, in my head, the height wouldn’t be more than 1 meter (39 ish inches) :smiley:

Or maybe the measuring device was wrong. :innocent:

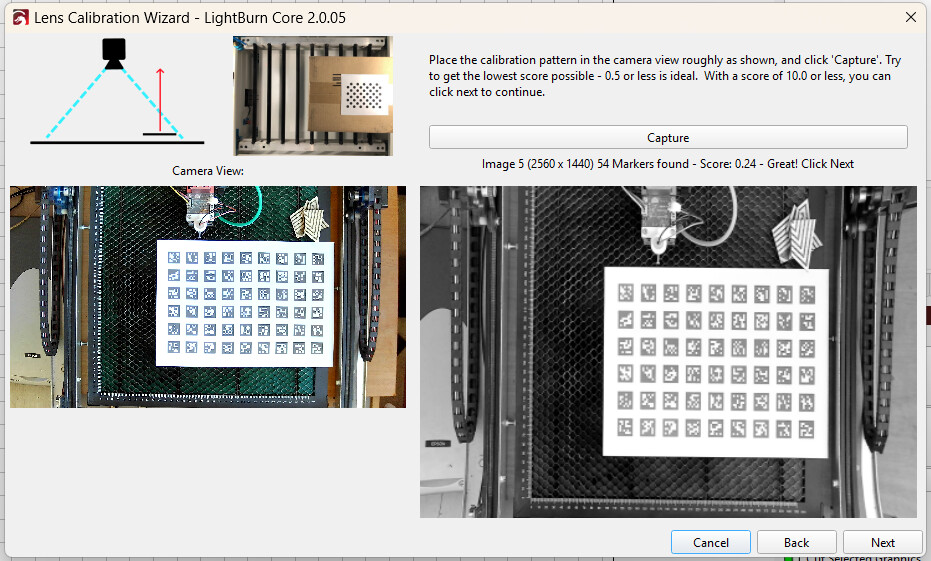
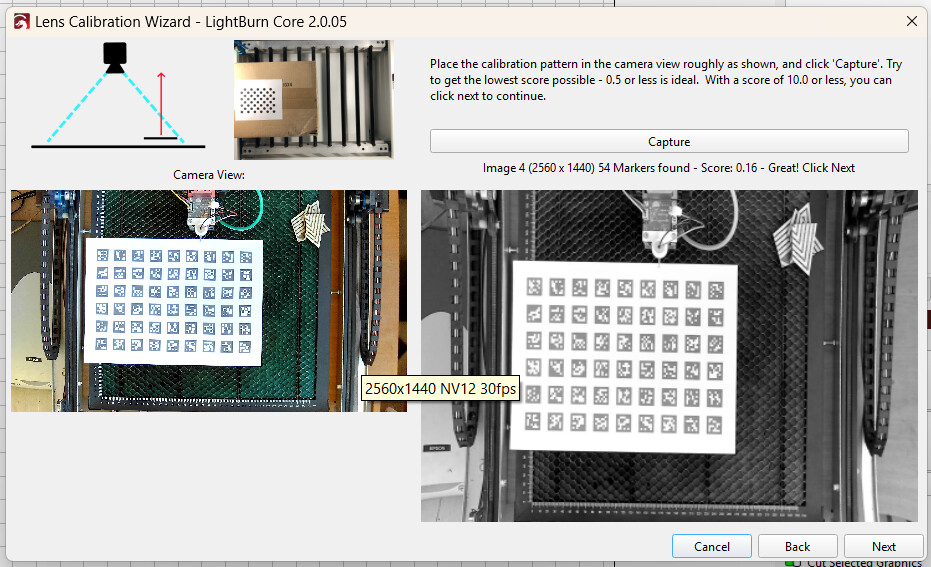
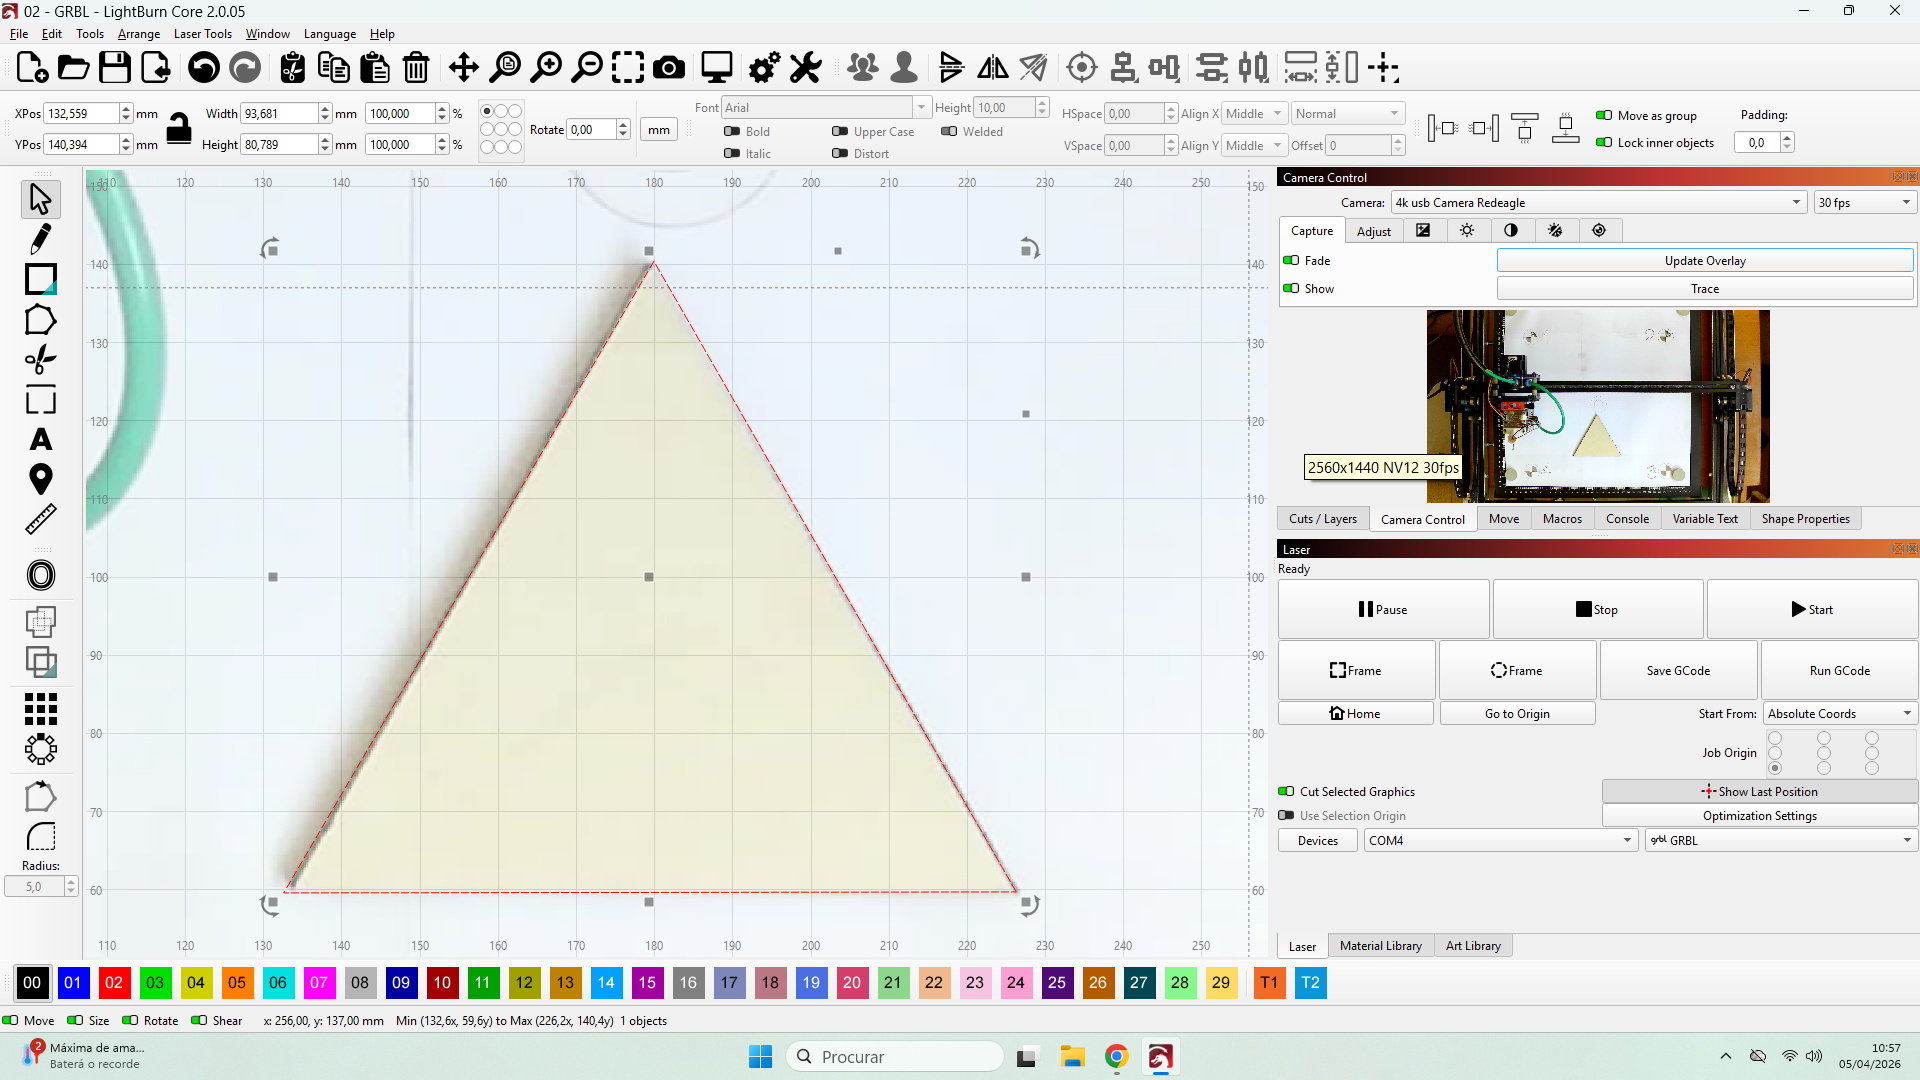
The lens calibration went smoothly. I used the “AprilTags” system, and while values ​​below 0.5 are ideal, I achieved values ​​between 0.24 and 0.16.


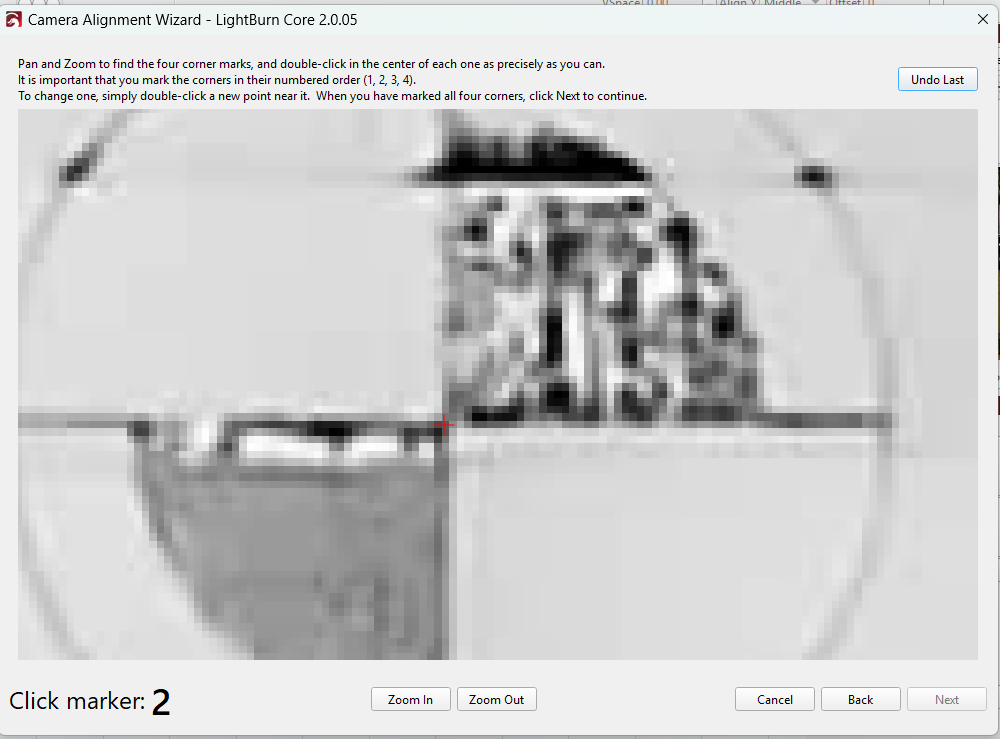
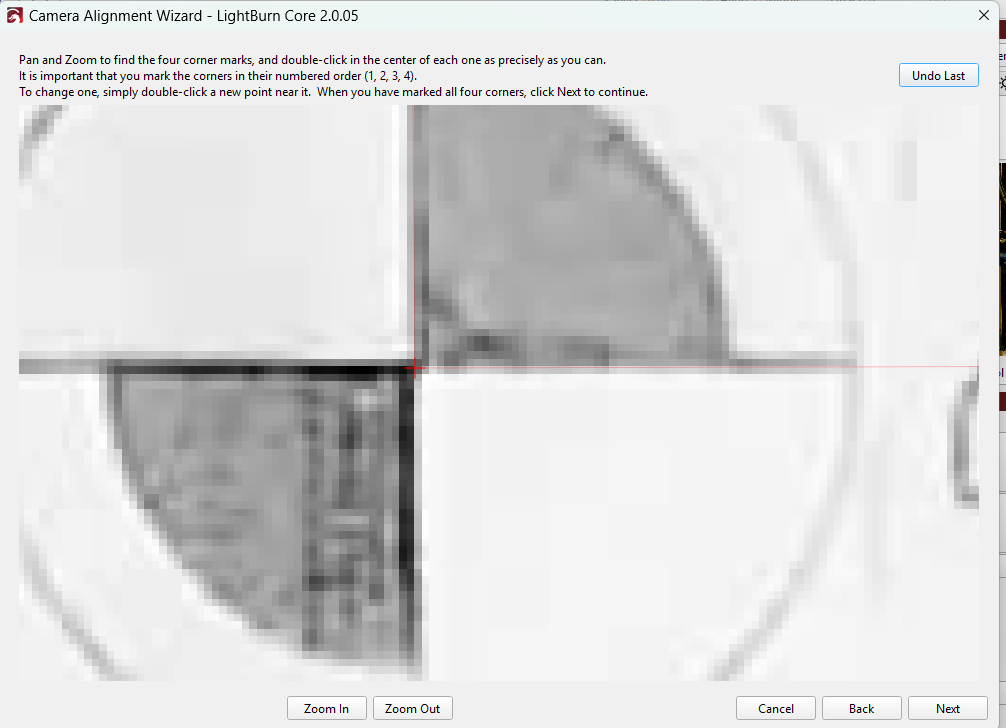
The alignment process, however, was the opposite; it took over an hour of trial and error (and some mistakes) to find the ideal scale value of 161%.


It started at 145% (default)
(Green line represents the jig holding the business card)

And finally I achieved the alignment (I would say perfect).

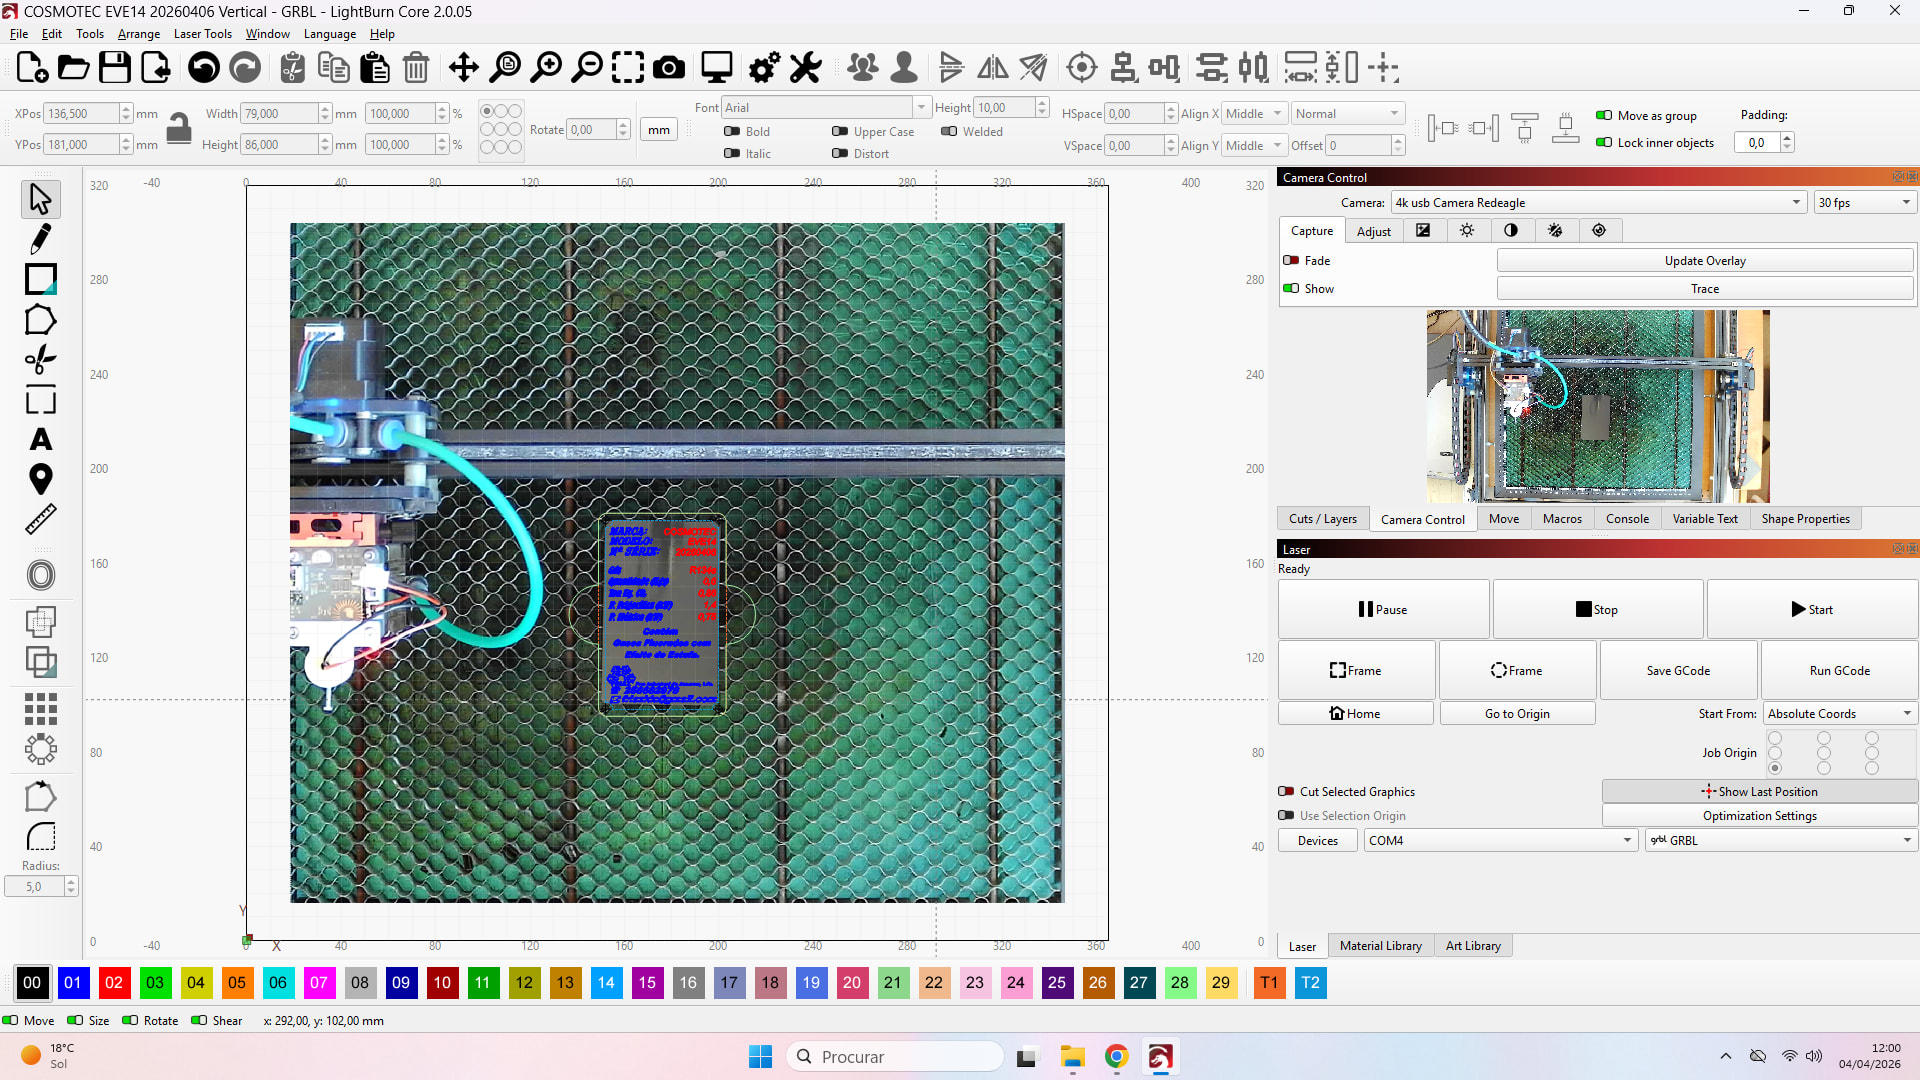
This is a business card in anodized aluminum (transformed into an equipment identification plate) previously made and now aligned with the image.

Then I tested a leftover 4mm plywood from a previous job and, basically, no alignment adjustments need to be made.
Of course, the fact that the object is in the center affects the results; probably if the test is performed at the edges of the work area, the result will not be quite the same, but I believe that for this type of work, modifications will not be necessary.
I believe that for work such as screens and other taller objects that extend beyond the edges of the work area, adjustments will have to be made.

What I ask next may not make much sense in a context of reliability of precision, since most cameras are fixed to movable parts (laser head) or panels like the machine’s lid, but is there a way to save the alignment settings to reload them later?

Example: After aligning to engrave a brick, I want to engrave a business card again. (The business card is to go on the brick when I throw it to whoever deserves it) :innocent: :grin:

All that remains is for me to thank you for your support and please, go celebrate Easter (for those who celebrate it, obviously), because not everyone has my life of being here on the forum instead of being with their family. :innocent:

1 Like

Congratulations on your camera arrangement, I’m glad you got a usable result.
The distance from camera to your laser table is almost double what I have here, but when the camera resolution can handle it, that’s fine.
Your precision probably won’t vary much on the sides because your coverage area is much larger than your machine bed and you only use the “center” of the image information where the deviations are not as great as across the outer edges.

If you can lower the camera at a later time so much that it doesn’t really capture more than your machine bed, the quality of the image and the precision itself can be increased further.

Yes, it’s possible and even necessary in my opinion when you don’t have the option to raise/lower your machine bed.
I’ll simply make calibrations for the most common material heights and save them as individual profiles. That makes it much easier to choose between material heights without having to do camera alignment again and again. You “only” need to do camera alignment and not lens alignment, if you use April Targets it is quickly done. But if you can’t reposition the target template at the different heights very precisely you should engrave it for each desired height, that is probably the most precise in your case and of course they must not be moved until you have aligned and saved the profile.. (I can reuse my April targets because I can place it 100% in the same position on the machine bed)

I hope you get as much joy from using the camera system in LightBurn as I have.

Happy Easter back to you and all the other friends here.

Thank you very much for your reply!
I don’t know if it’s because it’s too early and I’m not 100% awake yet, but I have several questions. :innocent:

  • I can’t confirm at the moment because the camera is at the post at home and I don’t have a camera installed here. But I would swear I didn’t see any option to save the settings in the “Camera Control” window. Am I wrong, or are the camera settings saved somewhere else? (“File menu > Preferencies > Export Preferencies” maybe)?
  • I already mentioned that it’s too early, but if I’m not mistaken, April Tags are used during lens calibration, and sights (targets) are used during alignment calibration.

Can you confirm? Because I’m already admitting everything!!! :grin:

Thanks! :+1:

…it’s a little hidden, right-click in the camera window and you’re on the right track.

That’s absolutely correct, but in the new version we no longer need to hit the target intersection but can use the 4 April targets from the camera alignment. - works amazingly well (here)

1 Like