Thank you for all the work.
Hello, Mr. CS.
I’ve finished the project.
I’m leaving pictures of the roller rotator I made, thanks to Mr. CS’s altruism and the know-how he demonstrates. Thank you very much, Mr. CS.

I wanted to tell you the following: I noticed in another post that you also designed another rotator, but using a mandrel. I’d like to know if you’re going to publish the files for this one. I don’t know if it’s finished, but if you do, I encourage you to do so. I’d also like to be able to make a mandrel rotator. Thank you very much.
Regards,
2 Likes
Hello Albert,
Your rotator looks great. Other than the stepper motor, did you have any problem getting all the items needed to make it? My goal was to design it so everything needed to make it was easy to get but was still able to work effectively. Was there anything in the build manual you think should be changed or added?
I will be putting the plans for the completed LongWorth 3 Jaw rotator up soon (hopefully this weekend). I redesigned it so all the parts should be easy to get with the most expensive part being the stepper motor.
I have built the new version and, while I am typing this, it is running it’s fifth mug. I want to be sure there are no problems and it is reliable.
Next I’ll add part numbers to all the pieces to make it easier to assemble, cut all the parts out and assemble them so I can make a manual showing the assembly process. Then I’ll post everything, including pictures of it working.
Also, thank you for posting pictures of the wallets you make. I’m always impressed on the craftmanship. They are amazing!
2 Likes
This may be confusing. The PDF is not made into a text file, it is still a PDF. You are only adding .TXT to the end of the filename. Once you remove the added extension, it is ready for your PDF reader program.
Hello, Mr. CS.
I haven’t had much difficulty finding all the components. The only thing I haven’t been able to find (because it’s Easter in my country) is the O-rings. I decided to print them with TPU on my 3D printer, but that will be in a few days when I have the 3D printer free.
I also replaced the M6 nuts on the roller axles with self-locking nuts, so I can still remove them if necessary (if I fix them with glue, it’s harder to remove them).
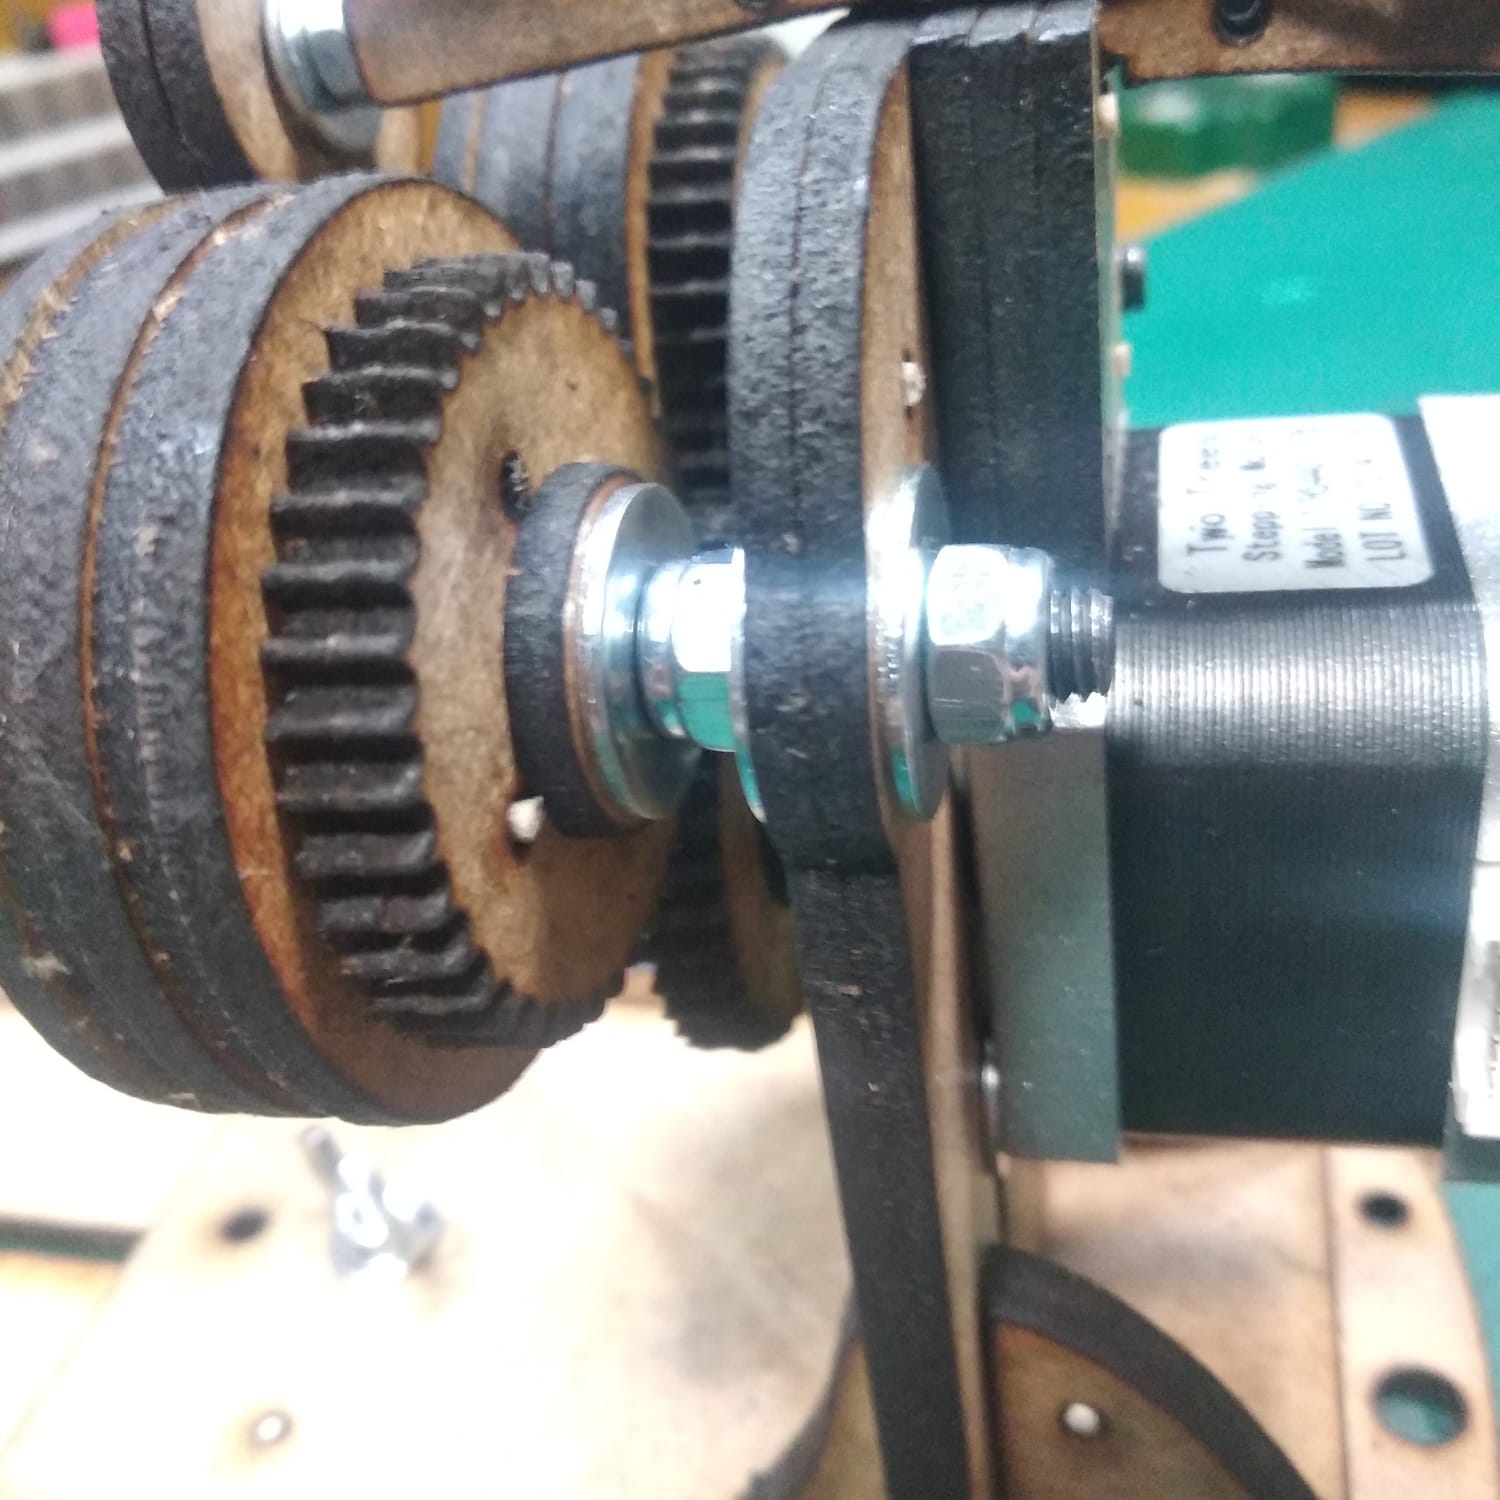
I added metal washers and wing nuts to the M4 x 20 screws that hold the front and back to the base. Perhaps a thicker base, like some legs, would be better. The screw heads are a bit tight and stick out a little, although keep in mind that I added metal washers.


Figure 15, from the PDF
I used an M4 clamp screw instead of an M3 or M3.5.

Figure 29, from the PDF
The nut and screw fit aren’t M5 as indicated, but M6, at least that’s the nut size I used. I also couldn’t close the nut casing; the nut is thicker than the space for it. I had to leave it open at the bottom, but since the nut fit perfectly, there’s no need to close the casing.

There were some extra spacers and sprockets in the Metric Rotary Front For Manual.lbrn2 and Metric Rotary Rear For Manual.lbrn2 files.
Apart from these comments, I think everything else was correct.
It’s always appreciated if you like my wallets. If you’re interested in a custom wallet, I can reciprocate by giving you my work (I like to thank altruistic people), although you’ll have to pay for the materials and shipping. But I couldn’t do it until August, it takes me a month to make a wallet.
Best regards
1 Like