I have a graphic with a strip I wish to engrave/FILL. I will use Pass Through since graphic is too large for my laser. This creates open ends twice each move of the workpiece. Do I need to close all of those open ends in the strip so I can engrave the strip? If so is there a quick way since I have eight open ends. They are all at different points on the strip.
Before you do the cut shapes operation set the fill layers to fill. The cut shapes tool will close the ends of any fill layer maintaining the fill.
Conversely you can use the line tool to connect the open ends of the lines.
1 Like
Thank you.
If I were to use ramping on this project would it make the lettering appear slightly “V”grooved?
I don’t know. I’ve not tried that function.
I am going to waste some time on this.
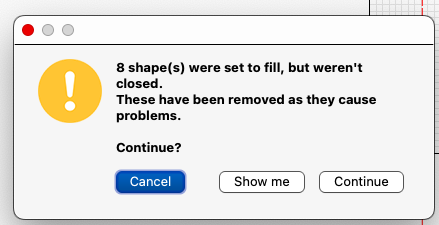
Cut shapes tool didn’t close open ends.
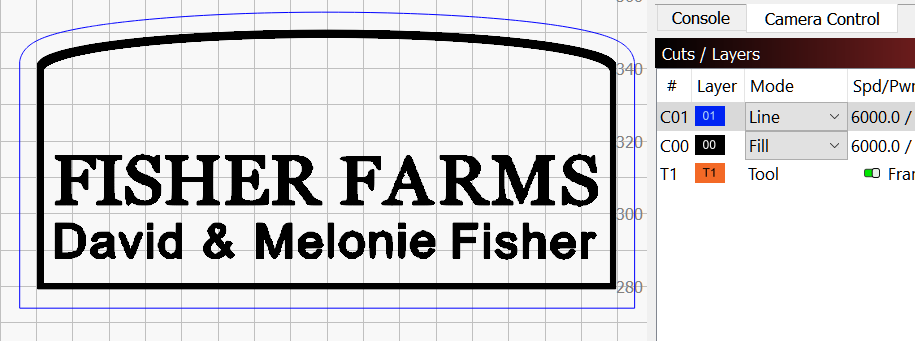
The graphic has to be in fill mode for it to close the cut. This was cut with the graphic in fill mode.Note how the lines are closed.

This was cut with the graphic in line mode. Note how the lines are open.
Just for the record… I am sick of screwing around with this program.
There are always a thousand little foodlin things that can cause something else not to work.
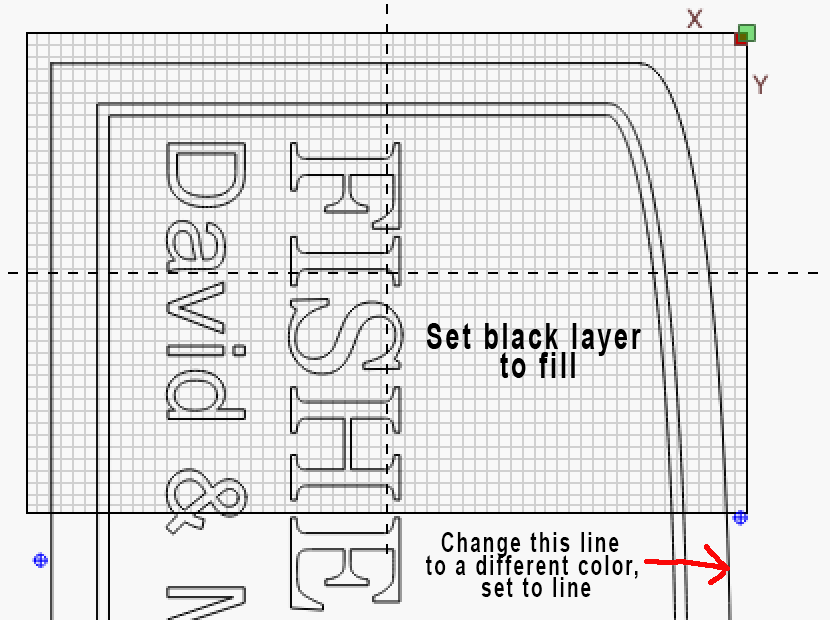
Am I correct? I need to have all three tool paths selected. My layers in this instance would need to be the red outline of the sign plus all the black lines. In the layers window I would have to have every line changed to fill.
Also: Do I not want to have the Tool Paths set at this time?
I am sorry. It just seems to be so complicated.
third time I have attempted to get this to work.

Don’t know if you can make any sense of what I have sent you in the message
BTW: I placed drawn line at all the intersections and it still wouldn’t work
When I ran the files the other day with everything set as a line, everything was good, today nothing works correctly.
Have no reason to try to run it that way again.
Making sure you’re understanding the procedure correctly. The tool path is only for cutting the shape into 3 sections. It can be done with just one tool path, cutting the center section, like my ornament in the above post. Once the center section is cut, click away deselecting everything then click on either top or bottom section and ungroup one time. When you cut the center out it automatically groups the outer sections, which you don’t want.
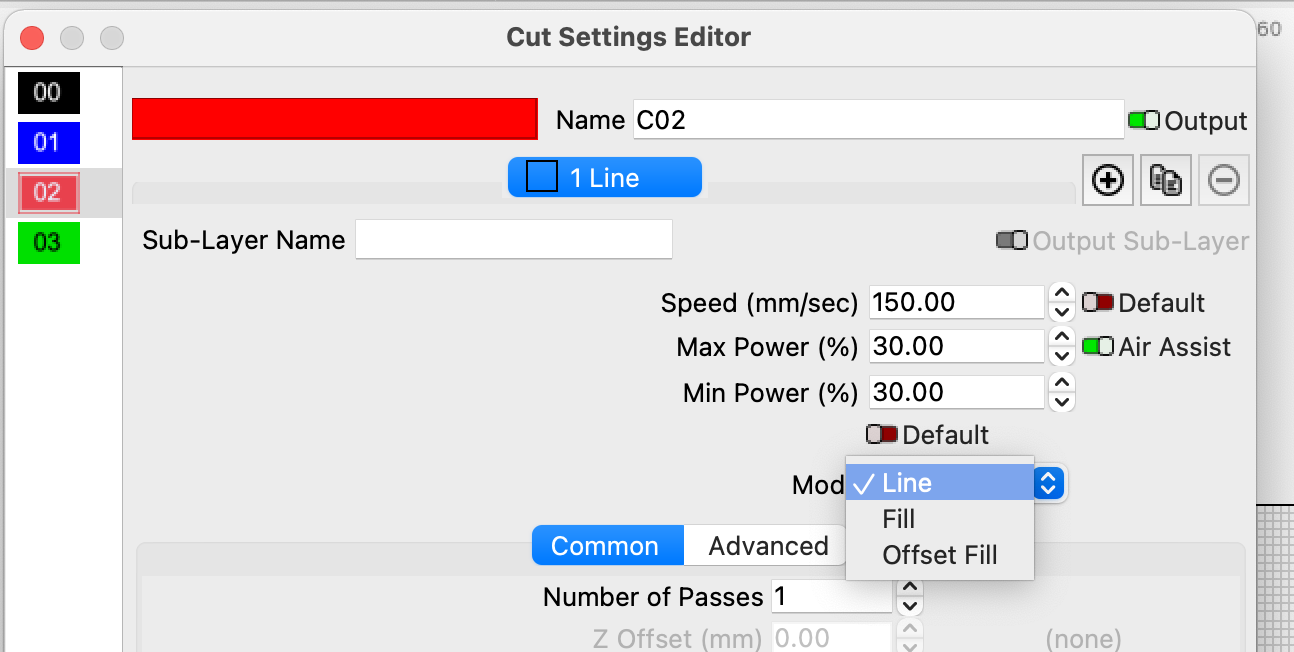
As far as what needs to be set to fill before cutting shapes, you only set the layers you want filled. The entire project should show the layers you intend to fill and the lines that are just score or cut. I believe you would want to change the very outer line to a cut/score layer, then the border and the text should fill properly.
Turn on Filled Rendering to see what it will look like on your screen. Window Menu>Filled Smooth.
The image I sent you happened to be one I had not set the outline to red single line. I tried making it fill also to see if that would help which it didn’t.
Been doing the single tool path, center, since you sent me that info. I have been selecting the top and bottom separately and ungrouping once.
I have no Cut/Score layer
Window Filled Smooth
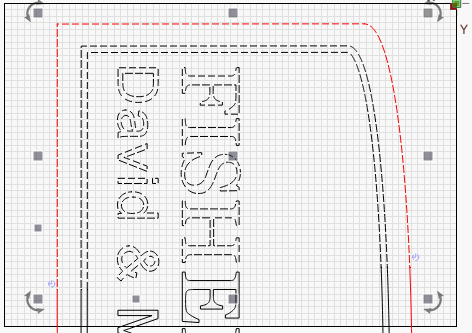
I tried to put a line across the two legs around the lettering. I expanded the render so I could see larger than life.The lines I placed were exactly on the lines either side. Gave me the same
My last two lines of text make no sense.
What I was trying to say is at the break in the Tool Paths I placed a straight line that touched each line either side on both legs included in the top section. No preview saying it had four breaks.
Show marching ants going completely around the shape. It tells me it is open. I didn’t even bother selecting the letters.
I’m assuming you want the double lines to fill. Upload your current file and I’ll take a look at it.

Do you need any of the other stuff" ?
Thanks Tim, I am really pulling my hair out with this.
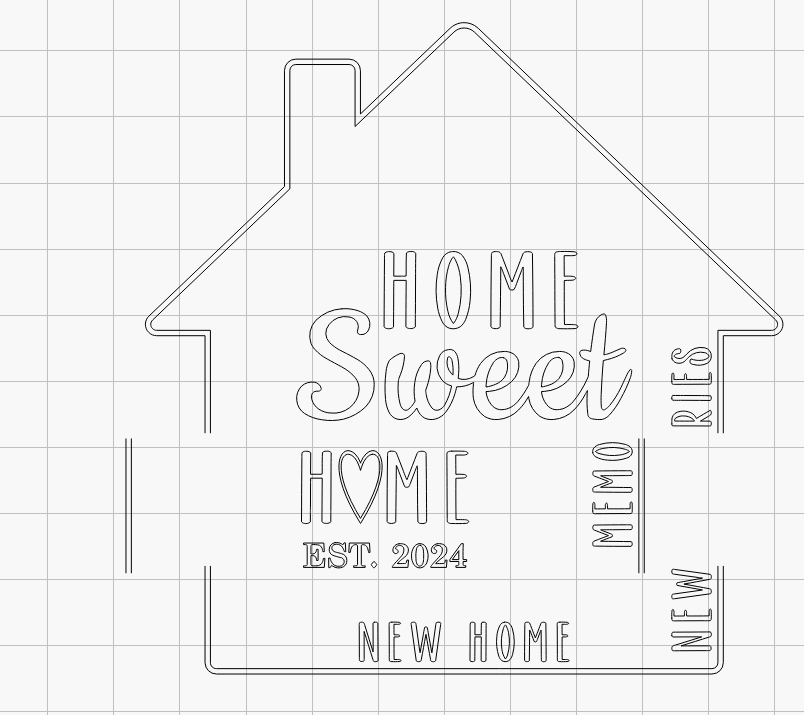
This just happens to be a file I had worked on before. Have done the workaround on the Ampersand and letters. All of that works great. I have always had a problem with parallel lines enclosing.
To me: What makes more sense than all this hanky panky is: The graphic would be drawn or whatever with the space between those two lines colored “Black” for instance as well as the lettering. Put it into LB and let it engrave the colored areas without all this fooling around that kills most of my time.
I need your actual lbrn2 file.
Of course, DUH!
Laser set-up Mel&Dave 12082024.lbrn2 (147.0 KB)
Will this do it?
I fixed the open shapes for the border and set the targets in place. I didn’t change any of the speed/power settings. You should be good to go with this once you get your settings set. If you turn on flood fill on the advanced tab for the black layer it looks like it will cut your time to about 1/3. Experiment with this in the preview window.
Laser set-up Mel&Dave 12112024.lbrn2 (116.2 KB)
1 Like
Likely your “frame” isn´t closed so yesterday I trace your image and gave it a go.
To check if your shapes are “pure” closed shapes read #5 of this post.
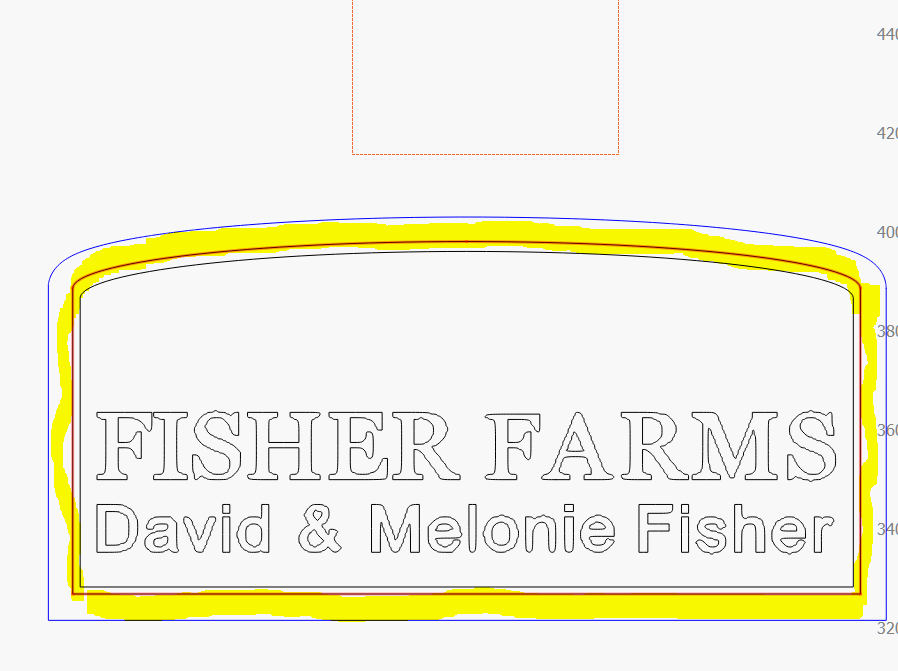
You just need to touch the shapes with the ![]() Trim Shapes tool to check for trouble points, when you touch the shape and all of it become a continuous red shape without points like in the above shape, it is pure close and ready for other operations.
Trim Shapes tool to check for trouble points, when you touch the shape and all of it become a continuous red shape without points like in the above shape, it is pure close and ready for other operations.
.