I’m going to create this topic more geared towards GRBL and diode lasers to share some Lightburn tricks (English is not my language so I may not explain it very well or even be wrong so if you have any questions, just ask). Will be adding “my things (and maybe others)” as I remember/use/create/discover them.
Remember in Lightburn you can get the same result in different ways.
.
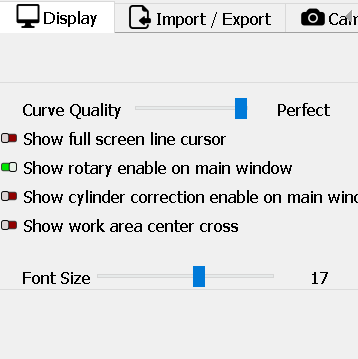
1.UI SIMPLE USEFUL TRICK FOR OUR EYES:
Set your Font Size to 17
2. STOP BURNING YOUR WOOD CUTS.
3. DO YOU WANT WANT TO “MASK THIS”?

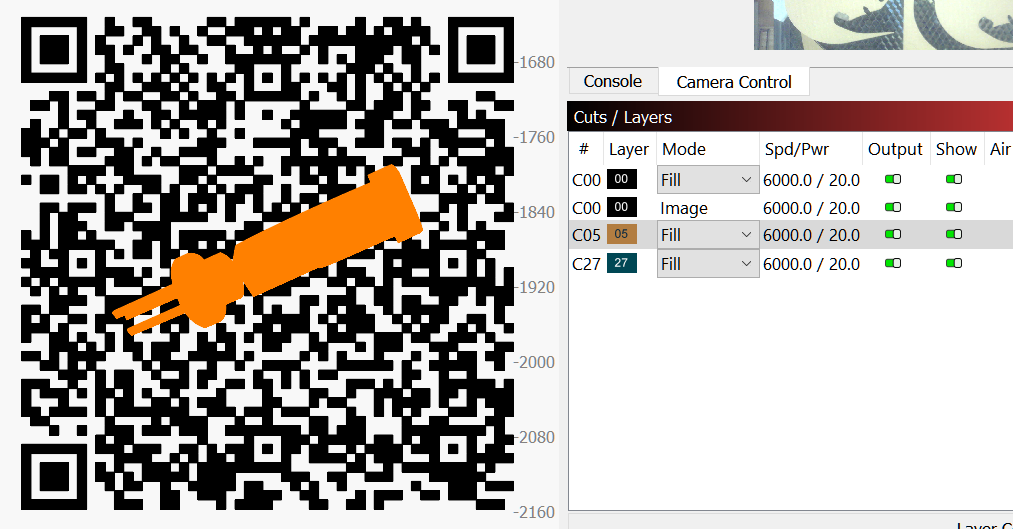
4. COLOR FILLING AIR DEFLECTOR FOR DIODE LASER:
for diode laser module 40 X 40mm 10Watt.

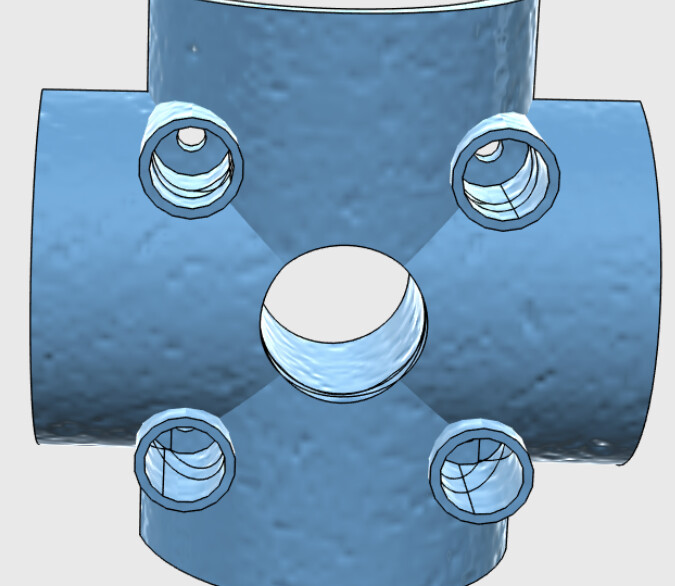
Diode_air_deflector.stl (3.8 MB)
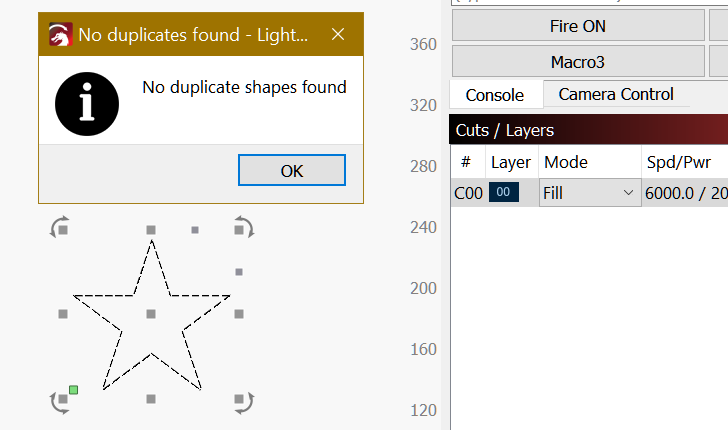
5. CLOSE AND CORRECT YOUR SHAPES FAST AND EASY world first with a “new” tool, the best tool trick.
.
Please note: You are only allowed to talk about or make videos of this trick if you refer to this topic.
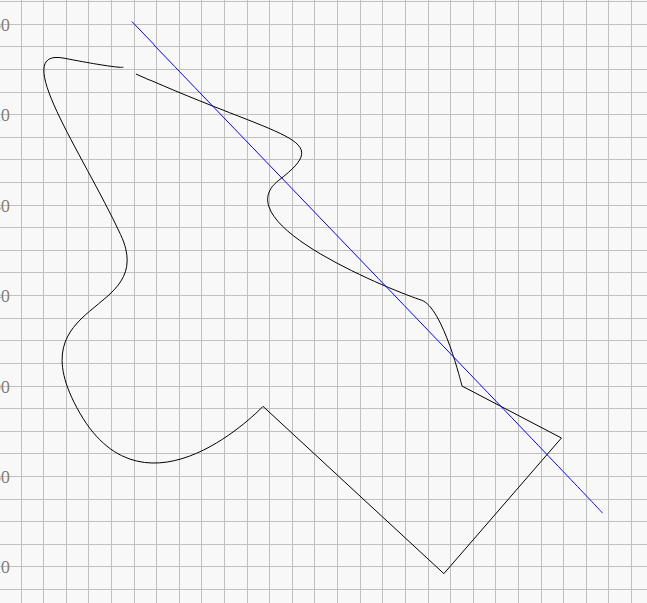
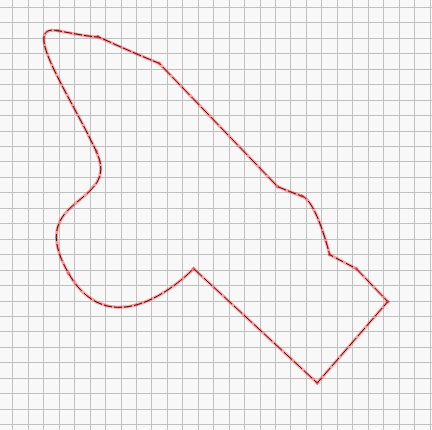
Let´s say you have a shape like this (big shape in this example for easier explanation) that you want to close or correct.
.
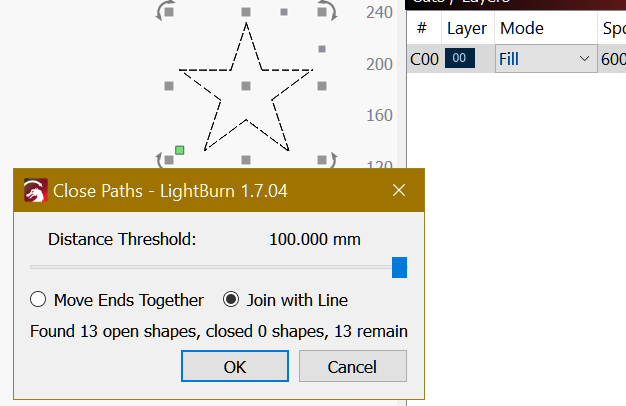
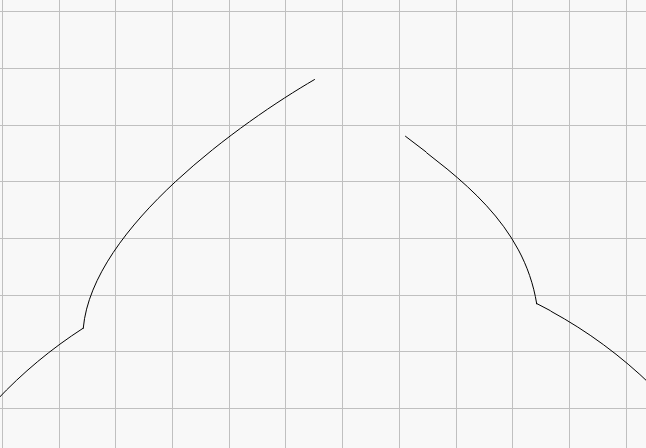
Select the Trim Shapes Tool and hover over one part of the shape you want to close, when you do that you easily see where your shape need to be processed.
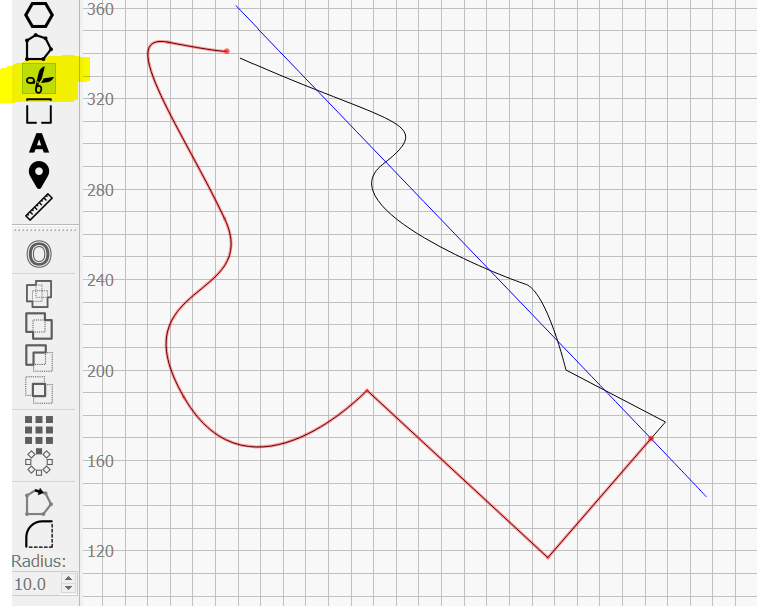

Process the shapes as per your intended result
When possible Trim Shapes Tool joins the new segment at the prior point of intersection but if not you could place the shapes on the same Layer do a Break Apart and then Auto-join selected shapes.

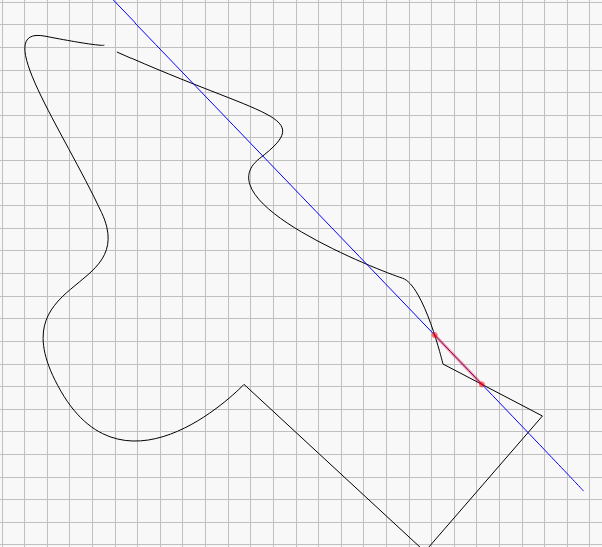
As the shape does not intersect or coincide at the ends you have to use Node Edit to join the ends.

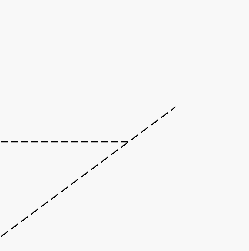
The shape is already closed but fortunately in this example when checking with the Trim Shapes tool I noticed the shape is highlighted but with a point
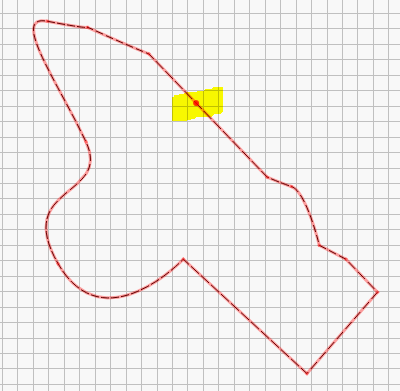
After zooming in at the point I can see a lost shape from the above operations (sometimes this happens).


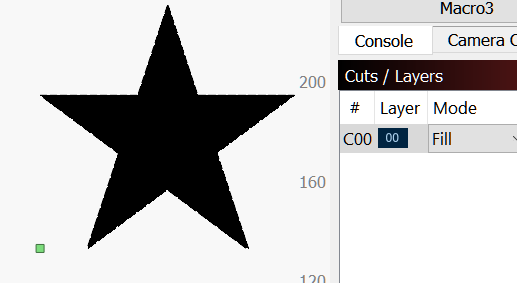
After we trim the lost shape the shape that we want is “pure” and finalized.
If you want to protect your shape first, create a “dummy” shape (highlighted) amd group (Shift + click C00 in Cut/Layers window)with the shape you want to keep (Black C00 in this case) to protect it from “deletion by the trim”.

(Sorry to call @BillieRuben @JessN @JackieG and @daniellb for Docs and video to this trick)
… … … … … … … ….Still with Trim Shapes tool
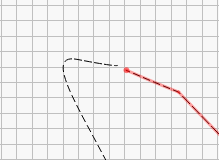
The resulting trace of a bad image has the following appearance:
Instead of using a time-consuming Node Edit yo can draw a circle or any shape per your objective that intersect with the traced shape and use the Trim Shapes tool.
Easy as 1 2 3 e.g:

set to same Layer and Auto-Join.
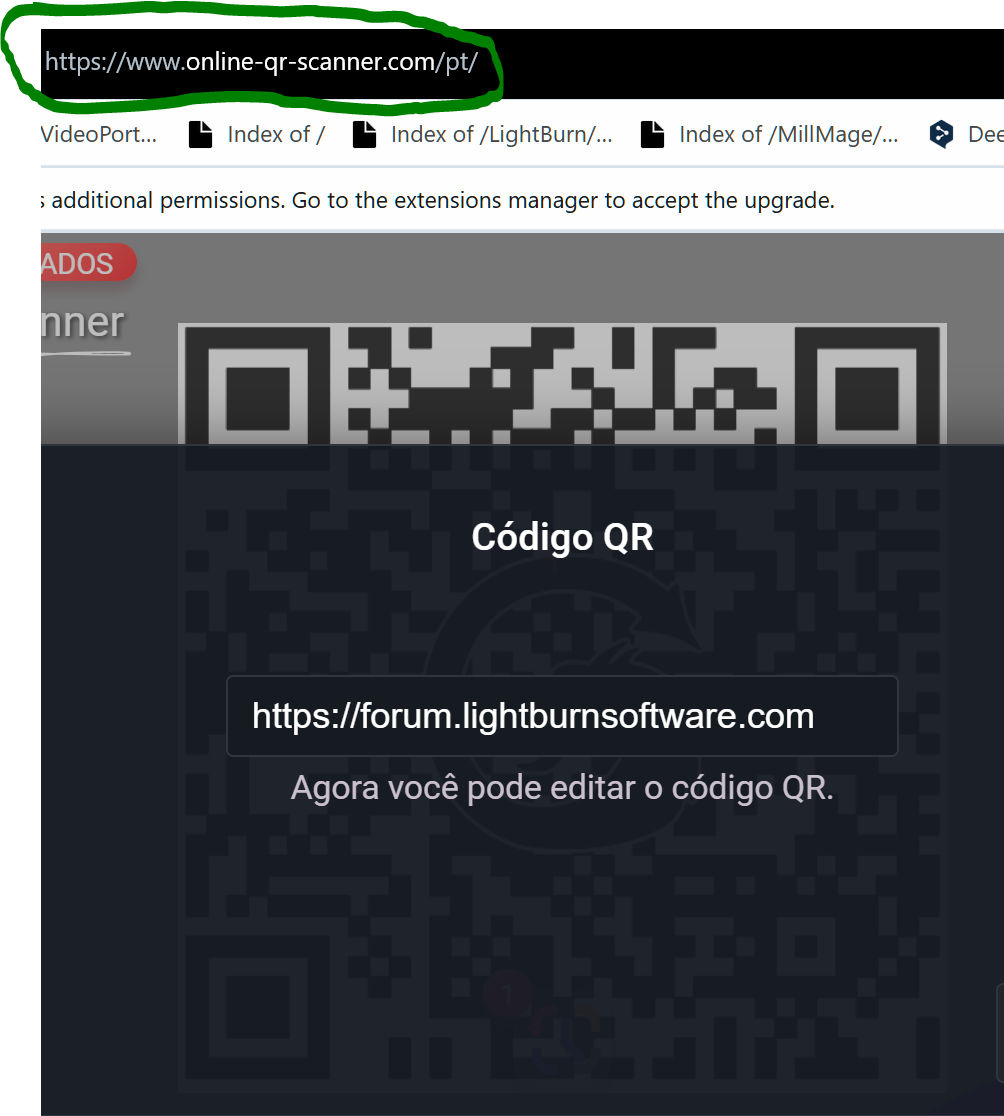
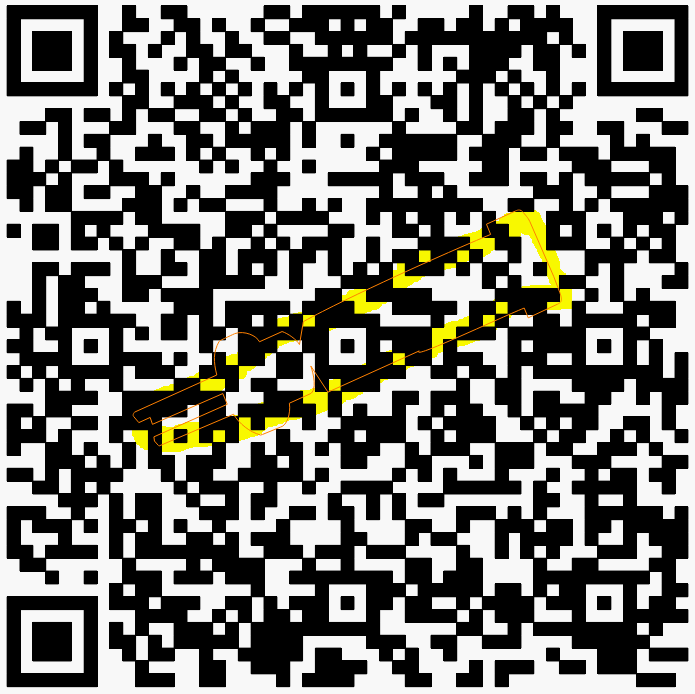
6. QR CODES with images in Lightburn another world first .
(easy if work with menu Window > filled rendering)
A)

Create your QR Code setting Error Correction Level to Very High and type your texts.
B)
Between each step do 1 or 2 duplicates and put aside as a backup so that you don´t have to start all over again.
.a)Select your Image.
.b)Do a rough but complete trace of your image (remove traced text) select all shape and menu Arrange > Create rubber-band outline from selection set to another Cut/Layer (color orange).
.c)Node edit the Rubber band(orange) to obtain a shape near the traced shape.
.d)Duplicate and drag the Node edited outline shape (orange) duplicate again and put aside.
C)

Place the outline shape aligned with image, select both, right-click select Apply Mask to Image, right-click Flatten Image Mask .
D)
Select the before duplicated outline and select the masked image and align both centers ![]() and “rotate” per your final position .
and “rotate” per your final position .
E)
Select the outline orange shape and place in place.
F)
Set the outline shape (orange) and the QR Code to Fill mode.
G)

Select both shapes or Boolean Assistant (Ctrl+B) then place the image in situ.
Click to see QR Codes, use your barcode app to check
(This points to import contact)
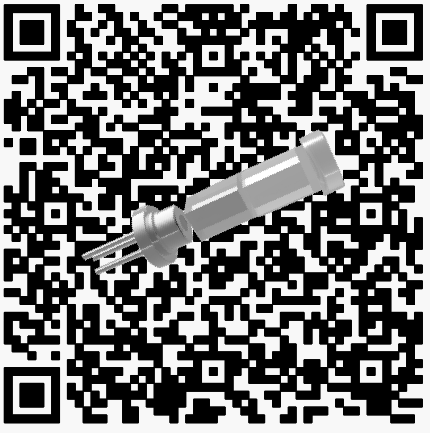
. (This one points to URL)

(All made with Lightburn)
( the place where you place the images or bigger images can mess with code integrity, always test)
.
7. How to check for micro trash shapes outside of your main design - the easy way trick - with an old tool.
Let´s say you try/run your project and depending on your Lightburn options you get “errors”

Your project seems normal but by watching the workspace something not good…:
Just hit Ctrl+A then Create a Rubber.Band Outline:
.


Now you now where are all the trash shapes, just delete the garbage around the vertices and at the end repeat to check if there is any left.
.