I would greatly appreciate your help on the following topics:
Are any of you using lightburn camera for Print & Cut / Contour cutting applications (cutting stickers or something like this). If so how precise are the results you get with it? (wanted to try this out myself but the camera I ordered is stuck in shipping due to COVID crisis)
I have tried the print & cut option in Lightburn but its not precise(attached an image to illustrate what I mean
Print & Cut is as precise as the input given. Do you have a red-dot pointer that is in-line with the beam of your laser? If not, you won’t get good results. It relies on the targeting of the markers, so you could also use a pulse from the laser to verify that you are lined up properly with the targets before setting the positions.
The camera feature can produce results that are 1/2mm accurate or better, depending on the calibration and the size of your machine. The print & cut feature is only sensitive to the accuracy of the target marking, so be as accurate as you can be with them, and the results should be very good.
You will get improved accuracy by putting the markers farther apart, so cutting a large sheet of stickers will likely be better than cutting a single sticker.
I do have a red dot pointer but it keeps dangling and shakes every time I try to calibrate it! It’s a real pain.
If you might know a jig or a 3d print which helps with this, it would really be helpful if you could point me in the right direction.
This sounds really promising, can’t wait to set up the camera once I got my hands on it!
The size of the sheet I tried cutting the stickers out of was a 12" x 18" sheet. As I couldn’t rely on the red dot, I pulsed the laser and got it to align the two points. I’ll give this some more tries and get back with the results (I only had a single sheet printed, was about to print some more but India initiated lockdown the day I was supposed to pick them up).
I totally appreciate the fact that Lightburn has these features and the Lightburn team has really thought through with what users like me really need. I can’t wait for the head-mounted camera feature, I hope it will be a lot easier to print and cut then!
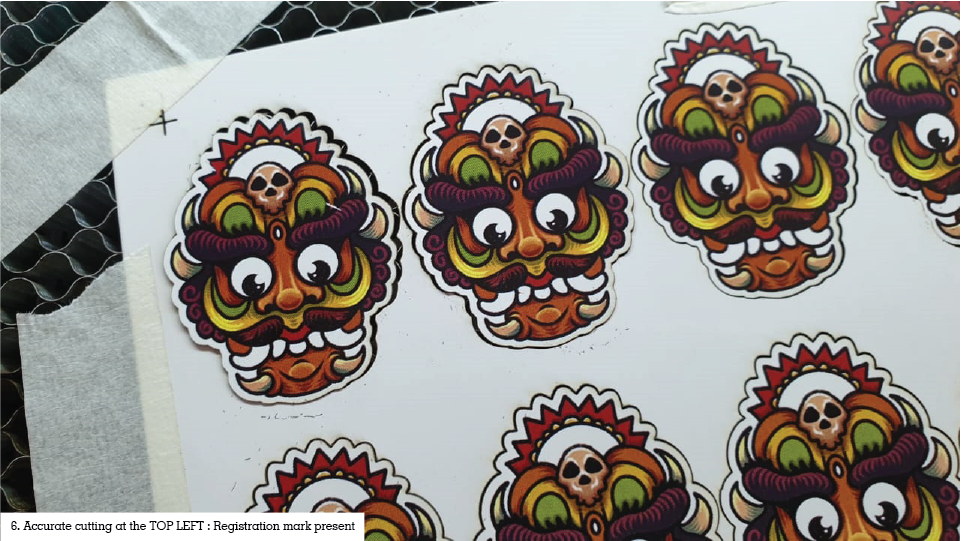
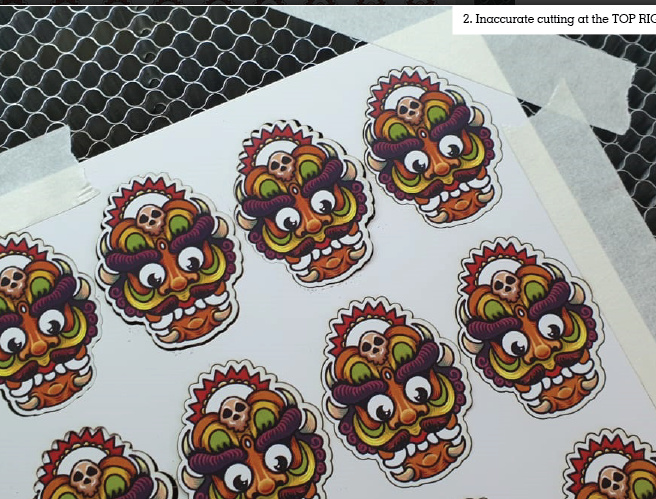
Here are my findings after doing several print and cuts:
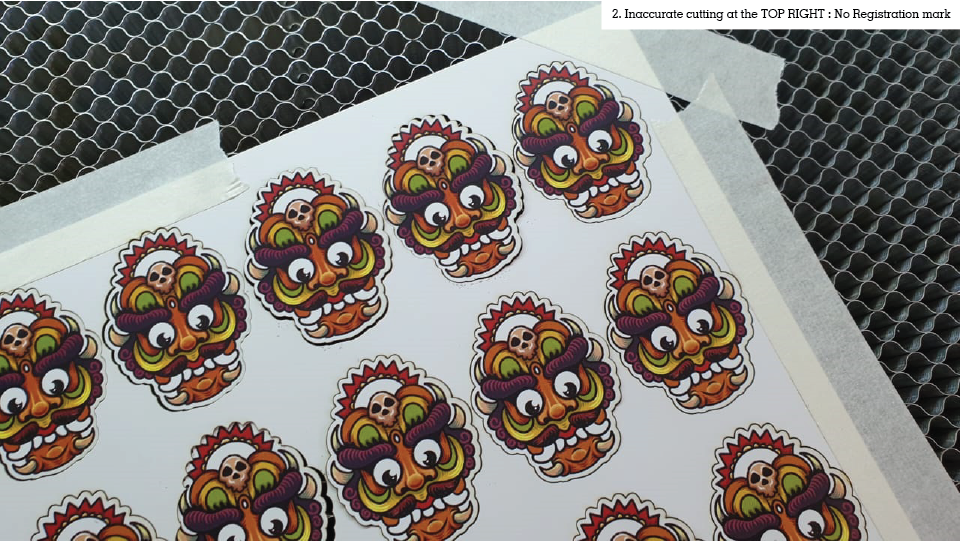
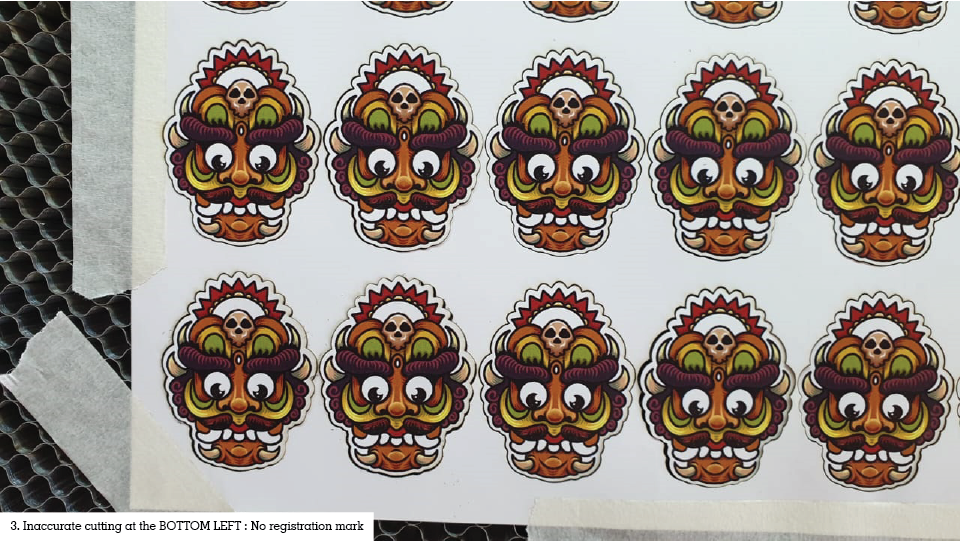
The cutting at the corner of sheets where there are no registration mark is inaccurate.
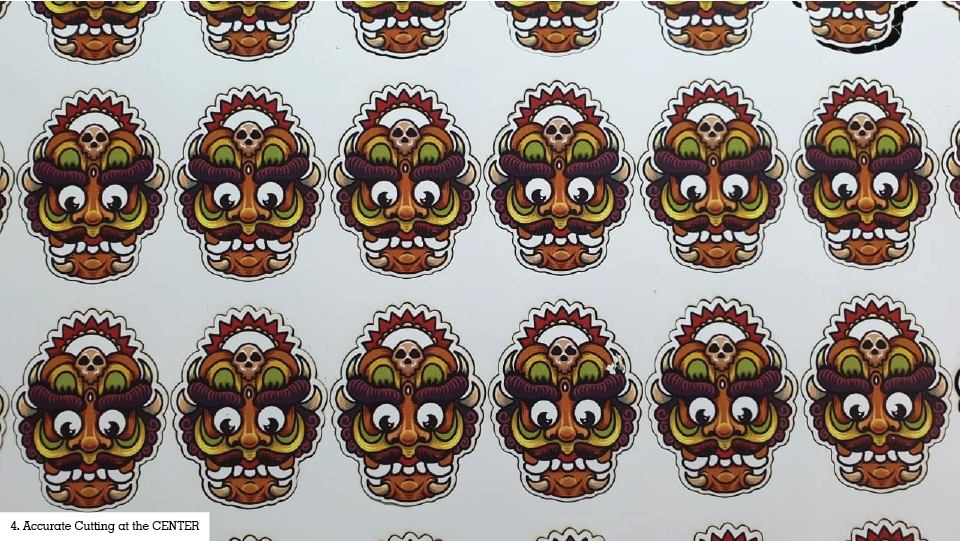
The cutting is fairly accurate at the center and near the areas where the registration marks are present.
I have attached several images illustrating the above. I had calibrated the X & Y of my machine before conducting these tests, hoping to produce more accurate results.
I think this might be solved if the print and cut has information from 4 registration marks rather than the existing two. I know that working out the feature might be tricky and would take a lot of time and effort, but maybe this feature could be a part of advanced Lightburn down the line.
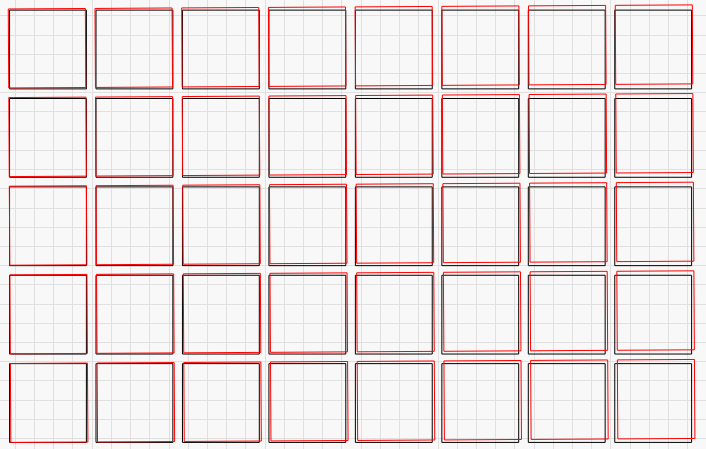
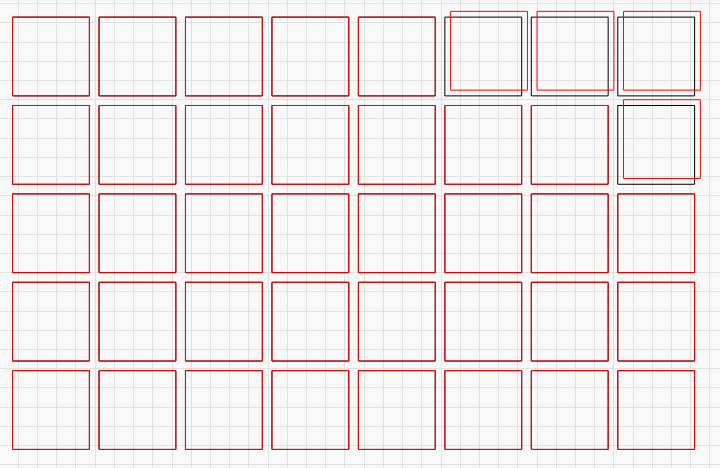
He does have diagonally opposite marks, which should give the best possible accuracy. I notice that when looking at the images, the shift in cuts doesn’t happen gradually:
The upper-right and it’s two immediate neighbors to the left and the one immediately below appear to all have the same shift, and the ones prior to that along the same rows are not shifted at all. This suggests that the machine lost steps before doing those last few cuts, not that the registration system is as fault.
Since this is paper, I’m guessing you’re running the cut at pretty high speed, so it might be worth lowering your cutting accelerations to see if that improves the output.
If the registration is off, it affects the entire design gradually, like this:
Speed : 30 mm/s
Sheet size : 12 in x 18 in.
Can you please help me out with lowering the acceleration, never tried this before, is there any tutorial in the lightburn documentation regarding this? Let me know.
Actually, the cut started from there, TOP RIGHT corner, it didn’t end there. It ended at BOTTOM LEFT.
The shifting occurs drastically moving from TOP RIGHT gradually moving towards the CENTER it goes accurate.
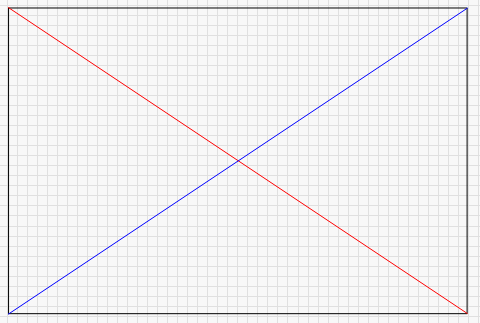
Also, try a simple test for me? Using the laser, mark a large square that is just inside the size of your sheet there, then measure the two diagonals. Are they the same?
The red line should be the same length as the blue line:
I did try this test after going through this thread.
The red and blue line were the same length. Initially, I too had thought that this might be the reason for the inaccuracies.
I am also having this issue and wondering if there is a solution. Basically mine is cutting best in the center top of the bed and gradually get’s off as it spreads out from there. Would love to know if there’s a way to callibrate print and cut. I’m quite sure the print is accurate to the measurements in lightburn even between the registration marks.