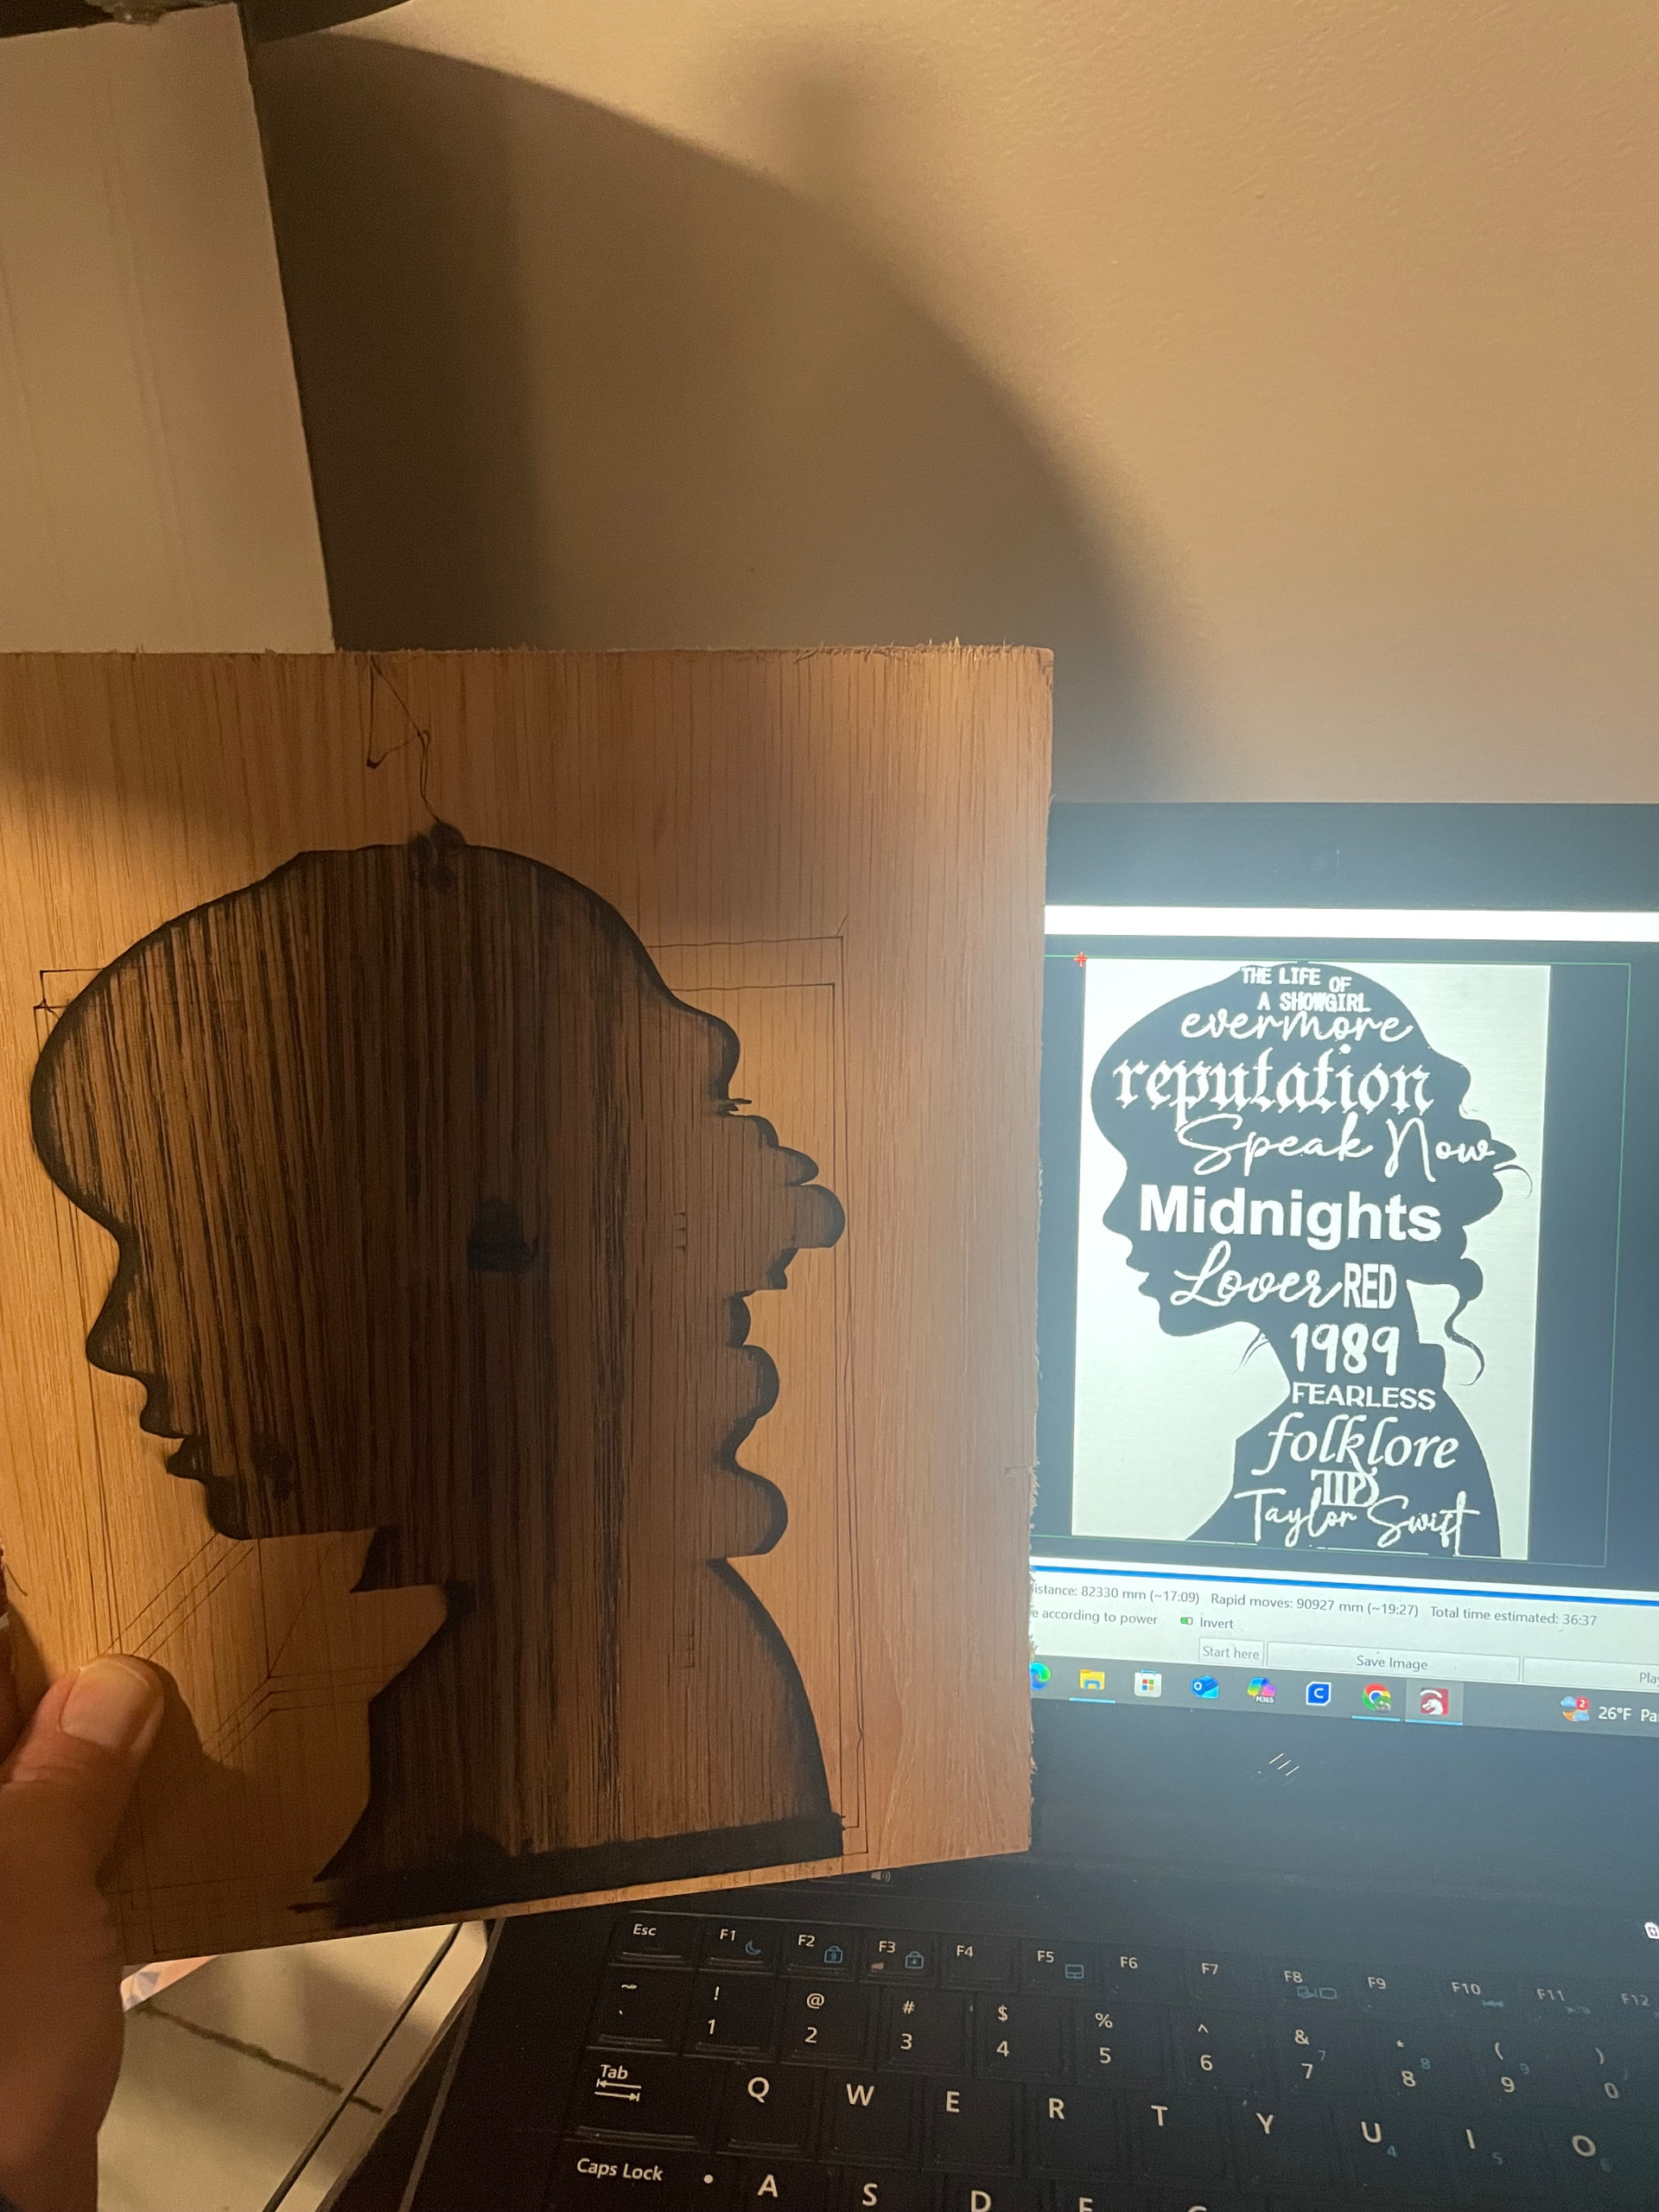
I have a Creality 5W laser attachment for my 3D printer. When trying to burn an image it is burning through the white lettering, even with the preview showing correctly. I’ve tried it with the lettering pure whit & transparent, but it does the same thing both ways. The darker burn spots were from me playing with settings during the job. I fixed the issue with it marking the traversal moves, but can’t seem to figure the lettering issue out.
1 Like
I’m not sure what I’m seeing in the preview.
The first quick check in LightBurn is to export the GCode and reimport it into a new file.
This will show if the unanticipated behaviour is being sent to the engraver by LightBurn or if the engraver is misinterpreting what LightBurn is sending.
Load the project up in Lightburn.
I threw together something quick to confirm. I picked the letter A in a Star.
Click File, click Save GCode and save the GCode file somewhere convenient.
Start a new Project in LightBurn.
Click File, click Import and import the GCode file.
Click File, click Save As, and type the word TEST along with whatever you like.
Please don’t use the same filename for this TEST as you do for your project.

If the project imports correctly, the unanticipated behaviour is in the Laser engraver.
If the project imports incorrectly, there’s something unwanted in the project file in Lightburn.
If you’d like to send me the file privately, I’d be happy to take a look. I won’t share it.
I don’t think it’s related to what we’re seeing here, but just in case, what was the fix for not marking the traversal moves?
1 Like
Hi Troy
Do you need to put an ‘Offset shape’ around the lettering and group it with the outermost shape line.So it burns all around the lettering, but not inside the lettering.
The Offset can be set to zero if you wish and the lettering can be on its own layer..with its own settings.
1 Like
I have a Creality 5W laser attachment for my 3D printer. When trying to burn an image it is burning through the white lettering, even with the preview showing correctly. I’ve tried it with the lettering pure whit & transparent, but it does the same thing both ways. The darker burn spots were from me playing with settings during the job. I fixed the issue with it marking the traversal moves, but can’t seem to figure the lettering issue out. I’m new to engraving, so hopefully its an easy fix that I’m just missing!
Upload the .lbrn file you’re working with for us to look at.
Thank you all! It’s a present for one of my daughters, so I had to wait until she was gone for a bit to try some of the suggestions. It ended up being a mix of things. I hadn’t saved the g code & imported it back in to begin with. I tried tracing the lettering & using an offset, but it kept erroring out saying there were 183 shapes that weren’t closed & wouldn’t move past 52% when it tried to create the preview or upload the plan to start burning. I finally saved the g code without tracing & imported it back with 2 layers. I’m still tinkering with my settings to clean up the edges & get rid of overburn. I’ll post a picture when I get it completed. Thanks again, I’m brand new at this & the info is greatly appreciated!!
Hey Troy
You could put masking tape on the material and that would collect the smoke residue leaving nice clean material when you peel it off afterwards.
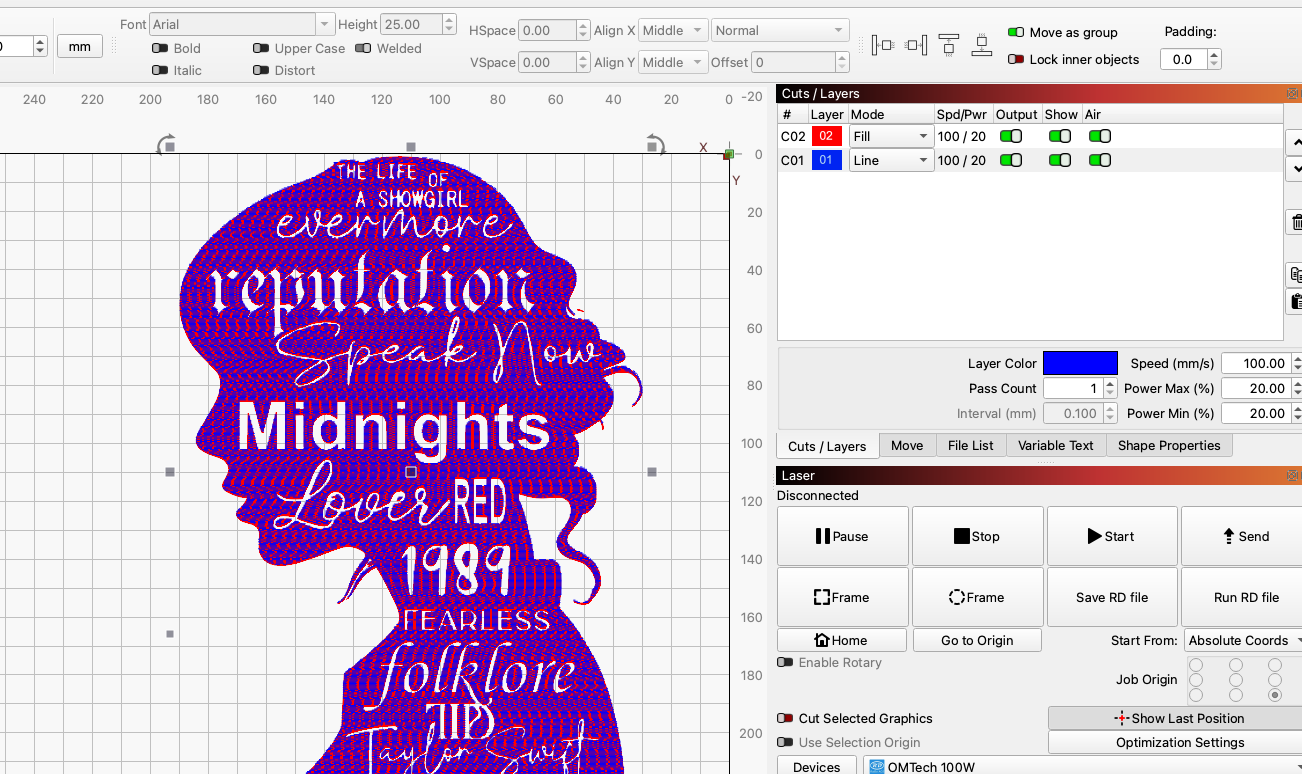
I thought I had it sorted out, but somehow it’s reverted back to the original issue of not recognizing the lettering. I went back to trying to use offset fill, but even with the trace it now shows over 4,000 open shapes set to fill. I’ve attached the .lbrn file I’m trying to adjust. I haven’t been able to get any of the close path or join tools to narrow much down. Is there any way to correct this without going node by node through the 4000 shapes?
TS Album Silouhette Threshold_backup.lbrn2 (1.3 MB)
Not sure how you got there but you had lines drawn inside the shape. I deleted the open shapes and saved the file. I did this by choosing show me on the error message, then changed the selected items to a different layer. I then deleted the new layer.

TS Album Silouhette Threshold_edit.lbrn2 (208.8 KB)
Offset fill is not what you want to use. Just use normal fill.
When I try that and save the gcode it automatically adds a line layer when I import the gcode. If I delete the line layer & try to engrave with fill only it just engraves the image with no lettering. I tried to just open the file you attached, but it did the same thing when I imported the gcode.
Sorry, I don’t understand what you mean by import G code. I just connect directly to my laser and send it.
I am connected directly to my laser as well. I thought someone previously said I needed to save the gcode, then import it to the file before sending it. Even when I just open the file you attached & hit start it engraves the entire image without leaving any of the lettering. I’m starting to think the old can’t teach an old dog new tricks saying is winning. I can build a house from the ground up or turn a bike into a custom scooter, but the lightburn software & laser may just not be my wheelhouse.
If you open the file that I sent and click preview, what does the preview window show?
It shows the file the way it’s supposed to look. When it plays it works from the bottom up & makes the engraved section black & leaves the lettering white.
That is what is being sent to the laser and how it should engrave. I don’t understand why it would engrave different than what the preview shows. Do you have similar problems with other files? Try drawing a rectangle and placing some text inside it, making sure everything is on the same layer and set to fill.
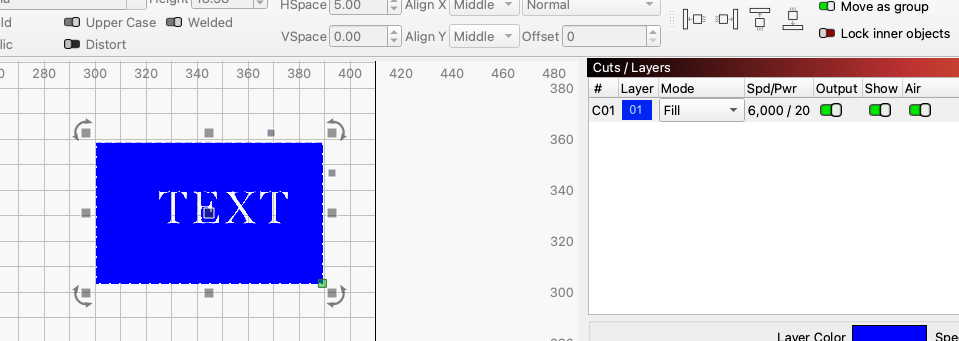
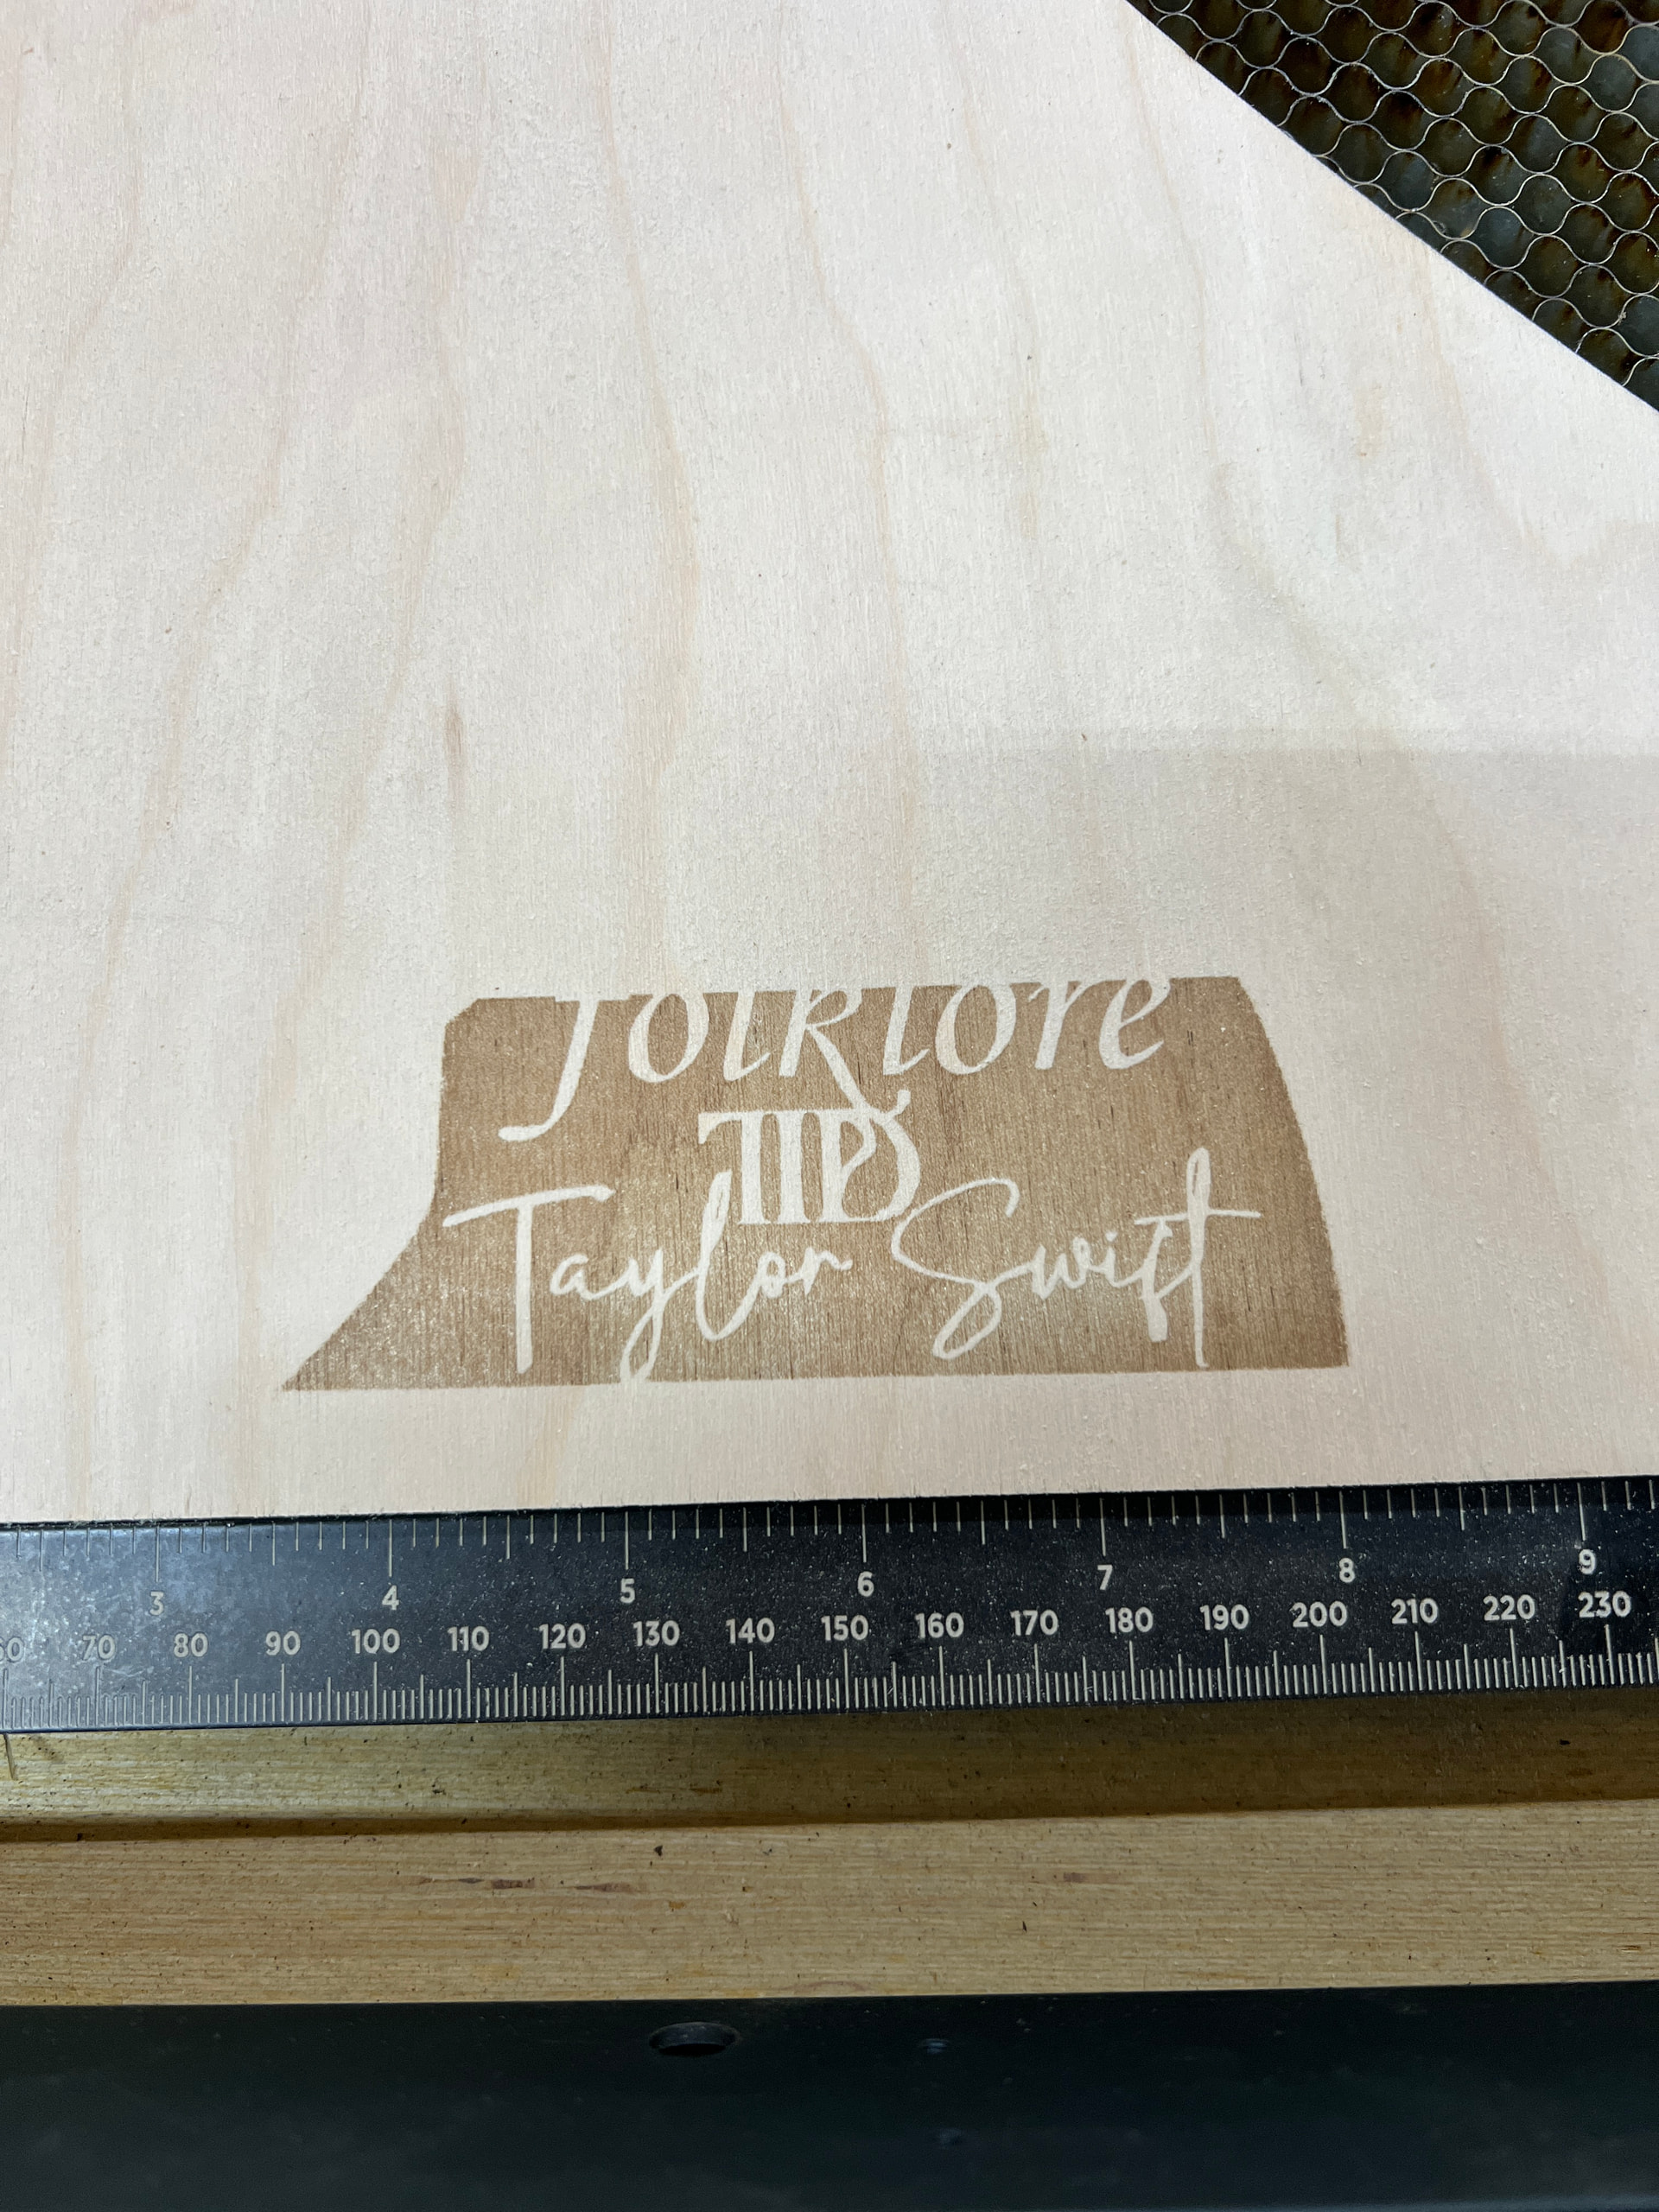
I just did a quick test with the file I sent. This is the result. No changes other than speed and power for my machine.
Yea, something’s not being read right. My test block printed all black also. What would cause the laser to not recognize lettering/blank spaces in the code?
Has it ever worked correctly or is this a new setup?
I bought it used. It supposedly worked fine before, but has done this since I set it up.
OK, there’s likely something wrong in your setup. Post the following screenshots (no phone pics please); Device Settings (Wrench & Screwdriver), the first 3 tabs, additional settings not necessary, full Lightburn screen with your project loaded and Laser window showing. In the console type $$ and press enter key, copy and paste all results here. There may be more needed, but this is a start.
EDIT: Did you use the creality config file when you installed the laser?