I wish you success with your Marlin custom firmware. I to hope to flash one with an edited PWM Hz upgrade.
Doc’
A few updates from the editing and compiling effort with the firmware.
I have been able to increase the frequency from 7.87 Hz to 50Hz, still too low but the effort is moving forward.
Here are the Edits for Miguel’s Professional firmware.
Line #
3246-------Comment out FAN_SOFT_PWM in Configuration.h
585---------Change FAN_MIN_PWM to 0 in Configuration_adv.h
613---------Uncomment FAST_PWM_FAN in Configuration_adv.h
72----------Change MF_TIMER_STEP from 5 to 4
…in Marlin/src/HAL/STM32F1/timers.h
154--------Comment out FAN_SOFT_PWM_REQUIRED
…in Marlin/src/pins/stm32f1/pins_CREALITY_V4.h
127--------Change PA_0 from TIM2 to TIM5
…In buildroot/share/PlatformIO/variants/MARLIN_F103Rx/PeripheralPins.c
615--------You can optionally uncomment and modify FAST_PWM_FAN_FREQUENCY
…In Configuration_adv.h if you need value different than 1kHz.
**** unable to edit this to have any effect yet, still testing ****
Your line numbers will surly be different. Control key + F key will give you a search window that will allow you to enter the label you need to edit.
The editor is “Visual Studio Code” a free editor from Microsoft.
Results: Frequency increase from 7.87Hz to 50Hz
Thank for the read, Help if you can.
Doc’
Nice. Can you confirm that this reduces the latency in the burn at least slightly?
Greetings, I sure can with the attached picture. I think that the PWM frequency needs to be way higher that 50Hz. I am trying to get some help to get to 1KHz at that value I think the resolution will be just a bit better.
I also have an Ender 3 S1 in route so I can mount my Creality CV 5W Laser kit on it and see what they have to offer.
Let me know what you think.
Doc’
I have messages and data on both the Marlin and Miguel’s forums. They must be real busy as I have not heard back as of yet.
D
Definitely better. 1KHz is generally considered the minimum required frequency to get good engravings.
Note that you may be able to adjust for some of this through “Scanning Offset Adjustment” in Device Settings. In your case this isn’t an ideal fix but might help you get acceptable engravings.
Hi, is there a peak setting for the Hz? I will look into the Scanning Offset Adj. All the tweaks might ad up. Thanks again
Doc’
This will depend on both your board and on the laser module. CO2 lasers are typically driven at 20KHz. Neje laser modules accept a wide range of frequencies but looks like between 0 and 20KHz.
Morning, Thanks for the frequency info, I will contact Sovol to see what their requirements are. It is not shown in the spec listing in their manual. Thanks for the upper target value.
How goes your custom firmware effort?
Doc’
I’ve done nothing with it. It’s fairly low on my priority list at the moment and don’t see that changing anytime soon.
I understand as all things come in their own time. I wanted to let you know that I have worked out the firmware bumps and now have a PWM at 1KHz. I have not had time to run any burns yet as it has been a long day and I just finished up compiling my notes.
I’m going to burn some tomorrow and in addition I will tweak the Hz up to about 20K and see what burns look like.
More new to come with pictures for sure.
Best Regards
Doug
Great news. Looking forward to the results and your writeup.
It’s unlikely your laser module is designed to go up to 20KHz so I’d suggest checking before driving up that high. I don’t see much value in going that high in any case for a diode.
Please ignore this if I am off base but I had issues and hope this might help.
I had bad issues with my controller which would cut outlines ok but refused to do fills correctly.
The output may not be updating fast enough for engraving. That was my problem. I changed to a GRBL board and that solved the issue.
I also found that my laser beam is not perfectly round so the X axis cuts beautifully but the Y axis would cut with intermittent gaps in the cut which I have surmised is down to the power of the laser beam.
Not sure if any of that is relevant in your case, but thought I would throw it out there in case it does.
Good point regarding the upper PWM Hz. I will wait until I hear back from Solvo Lasers. Now it might be best just to run the laser and work up the best speeds and power for fills. The write up is almost finished. Thanks again
Doc’
1 Like
Greetings Mark,
In this laser effort there is nothing off base and thank you for your comments.
Your issues are the same ones I’m having here, I can see if the output is not updating fast enough there will be an issue. To address along that line the PWM frequency came under observation and it has now been adjusted from 7.87 Hz to 1KHz through the firmware, testing to validate in progress. I was thinking along that updating speed potential as well but from the axis drive point of view in that the acceleration might not be high enough causing a delay in the movement…maybe? I’m going to work on speed, power and acceleration today to see what can be tweaked. I agree with the lack of a round laser beam, as mine is the same with the Solvo 5W. Mine is wide in the Y and narrow in the X as well. I have read that it is caused by the focuses lens… Inexpensive laser thus the lens. Although what I call Morse code cutting, dots and dashes was resolved by increasing the PWM frequency.
I like the idea of a board change as I’m currently using the Creality 4.2.7 MB with Miguel’s Professional firmware flashed on it. Which GRBL board do you use and are you working with a 3D printer? What is your flavor of firmware? You have some good food for thought thank you again.
My Best Regards
Doc’
Hi Doc. In the end I had it in my head I was going to try GRBL so made up a unique system just for the laser using a lot of parts I had laying around from other 3d printers I had made and broken up.
After a lot of googling, I settled on this design - laser engraver skeleton_cnc by Kaksdelat - Thingiverse
I use it mainly for doing 100mm ceramic tiles. and now it works flawlessly and the 3d printer can be used for what it was designed to do.
The GRBL board I brought was the Arduino CNC Shield V3 and I now hook up an old laptop running Linux and Lightburn. It was cheap to buy and easy to put together. It has given my old 3.5w laser a new lease on life as it was rubbish at cutting wood.
Dang Mark that is a nice looking project and I’m glad to hear it is a top shelf laser. Since I’m a project guy I might just look into working one up. I get lots of parts from https://openbuildspartstore.com/ They have lots of project stuff and are fast shippers.
Thank you for all the information on your project. Who knows what happens next.
Regards
Doc’
Here are the notes so far.
The firmware edits to allow a 1KHz PWM laser signal from a Creality 4.2.2 or 4.2.7 Board.
The PWM firmware edits:
Marlin > configuration.h: Your line numbers could be different ! The lines are shown with the edits.
Comment out Line 3247 // #define FAN_SOFT_PWM ( add the // marks to the front of the line )
Marlin > configuration_adv.h: Your line numbers could be different ! The lines are shown with the edits.
Edit Line 585 #define FAN_MIN_PWM 0 ( change the value here to 0 )
Uncomment Line 613 #define FAST_PWM_FAN ( remove the // marks from front of the line )
Marlin > src > pins > stm32f1 > pins_CREALITY_V4.h
Comment out Line 154 //#define FAN_SOFT_PWM_REQUIRED ( add the // marks to the front of the line )
ini > stn32f1.ini: Your line numbers could be different ! The lines are shown with the edits.
After Line 131 -DSS_TIMER=4 -DTIMER_SERVO=TIM5
Add new Line 132 -DSS_TIMER=4 -DTIMER_SERVO=TIM8)
CAUTION !!
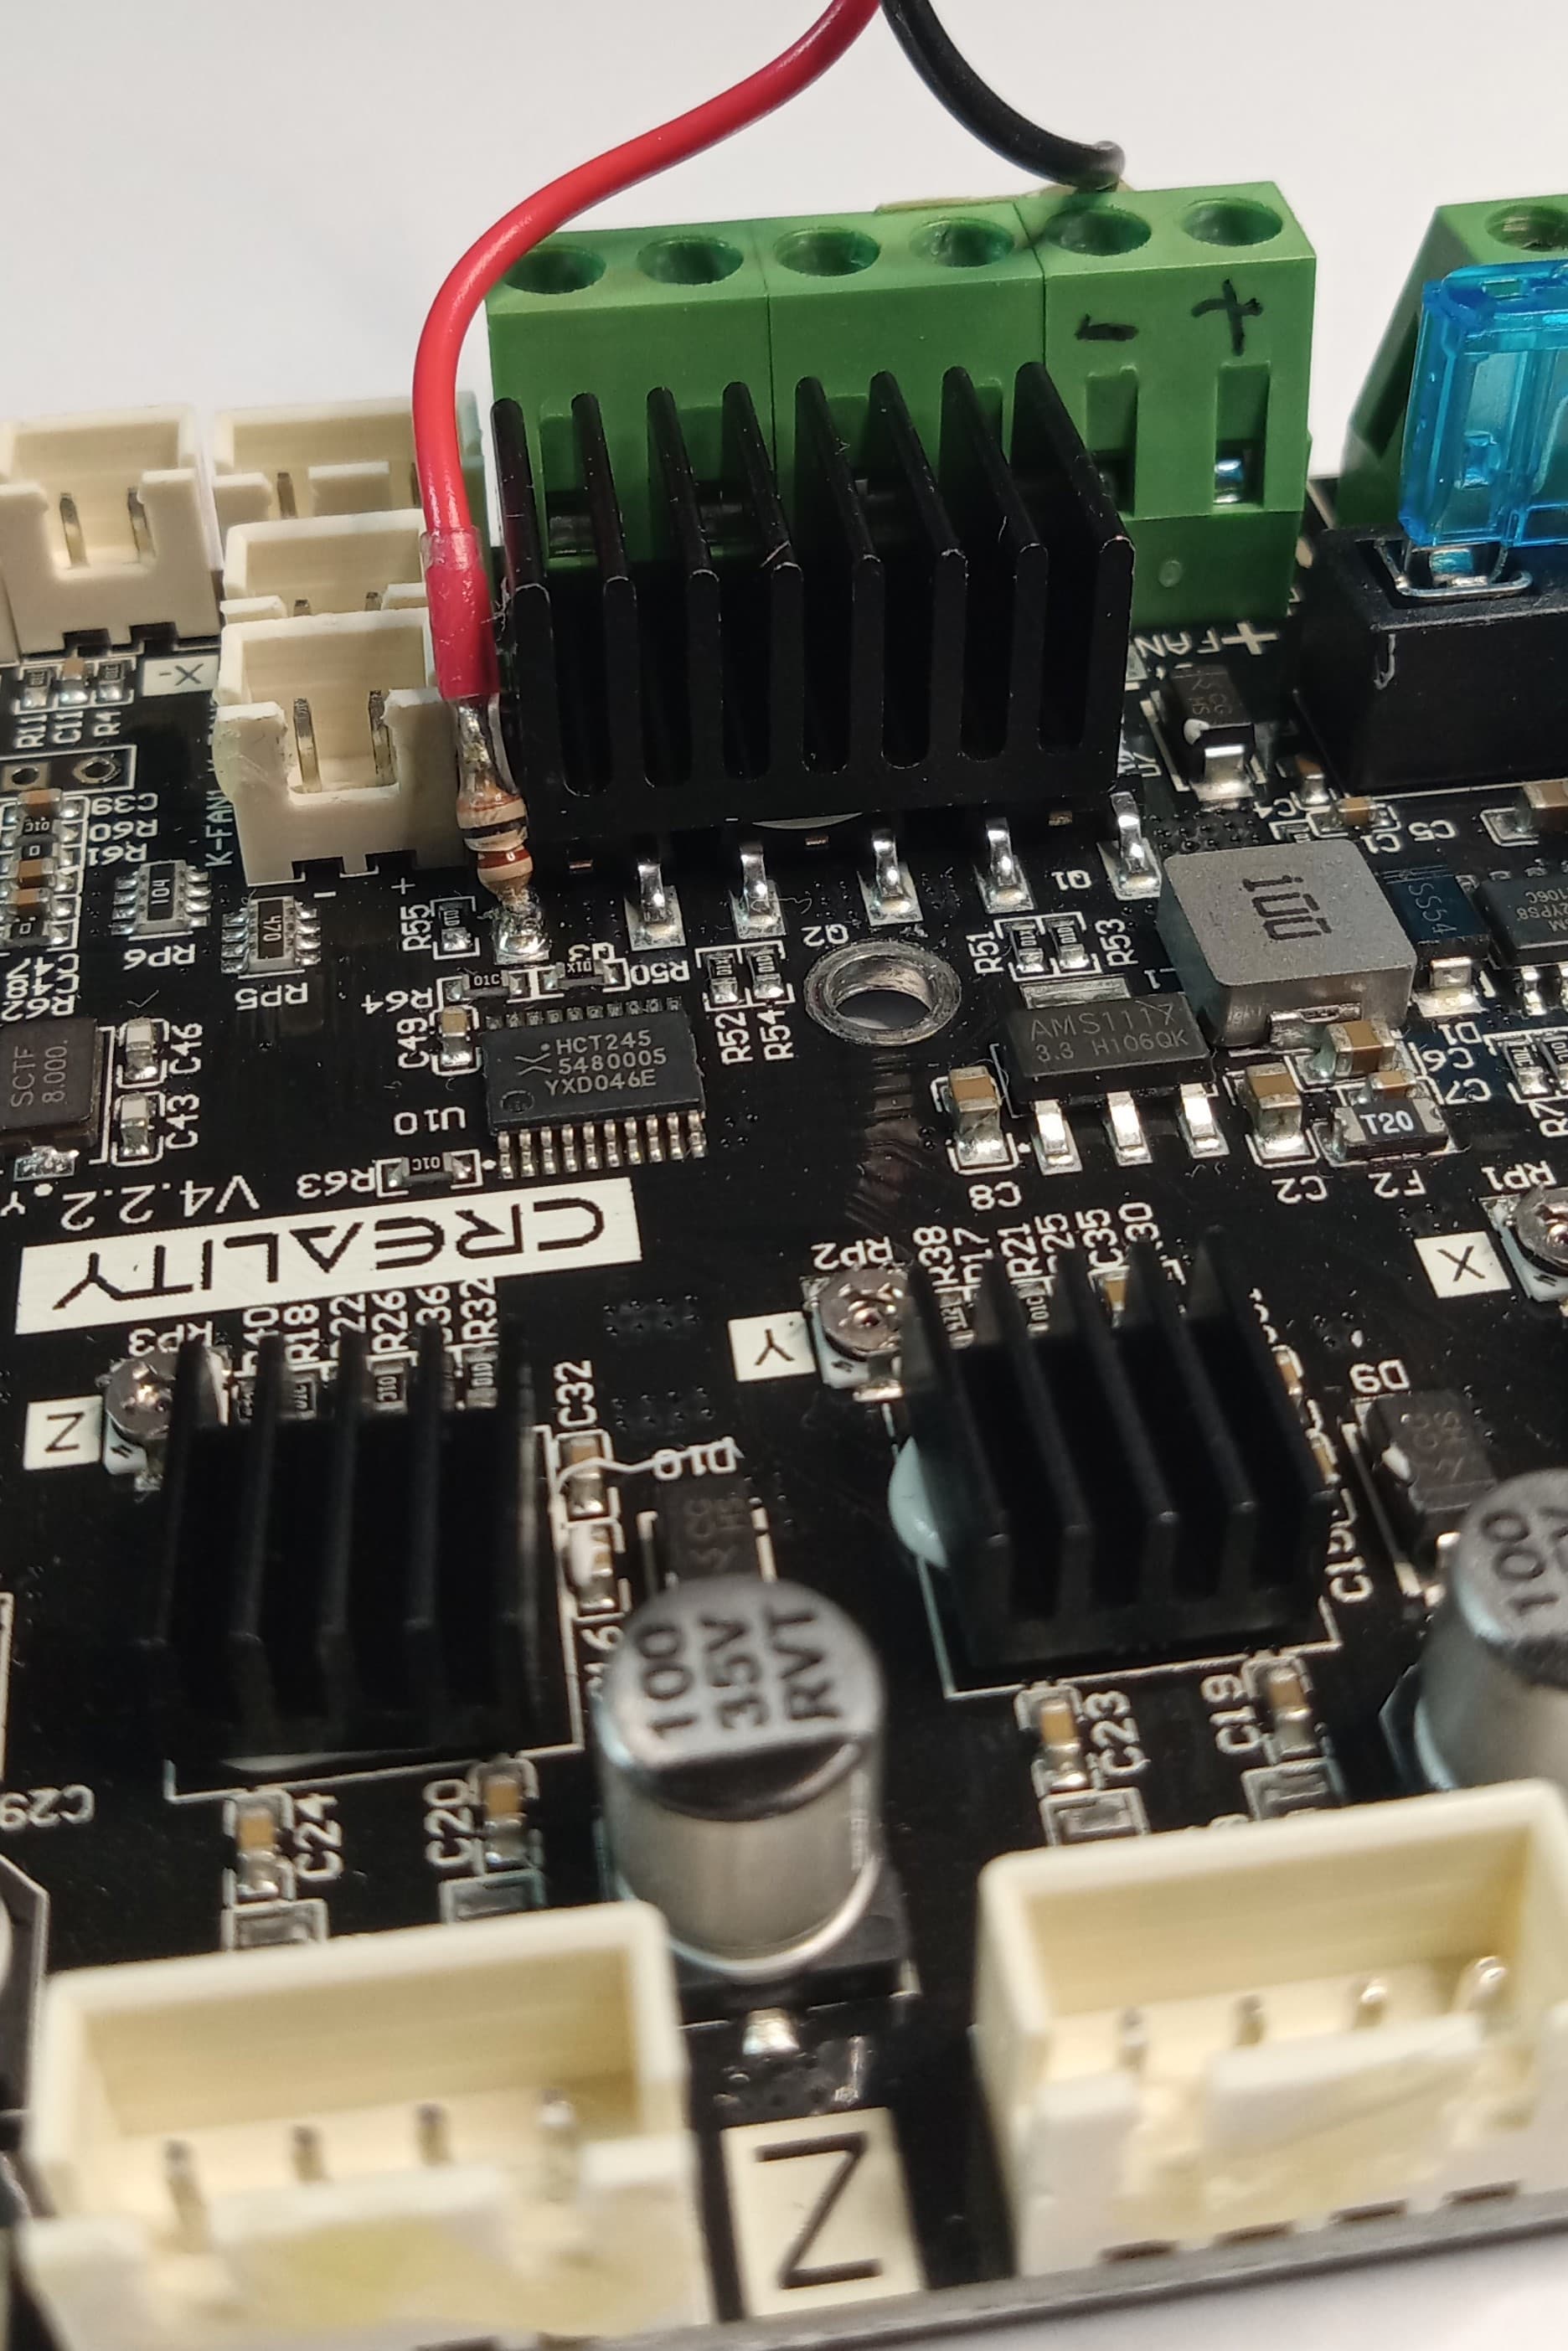
The Hot End parts cooling fan and the Mother Board cooling fan both are variable speed that operate from the Q1 MosFet that is connected to both of the fan plugs. They will NOT operate with the 1KHz signal. I run the MB cooling fan straight from the main 24vdc supply. and the Hot End parts cooling fan I leave unplugged.
I run a PWM cable from the gate of the MosFet, 100 Ohm required resistor, and dc (-) to the laser for PWM control, see the picture it shows a 4.2.2 board but the 4.2.7 is the same. My Ender3 Pro is now a dedicated laser printer. Switching back to the filament printer mode will require plugging the fans back into their old sockets, Unplugging the cables at the laser end and secure them and re-flash the printer with the previous firmware.
Regards
Doc’
1 Like
Thank you for documenting this. This has come up in the past without resolution so this is likely to help people going forward.
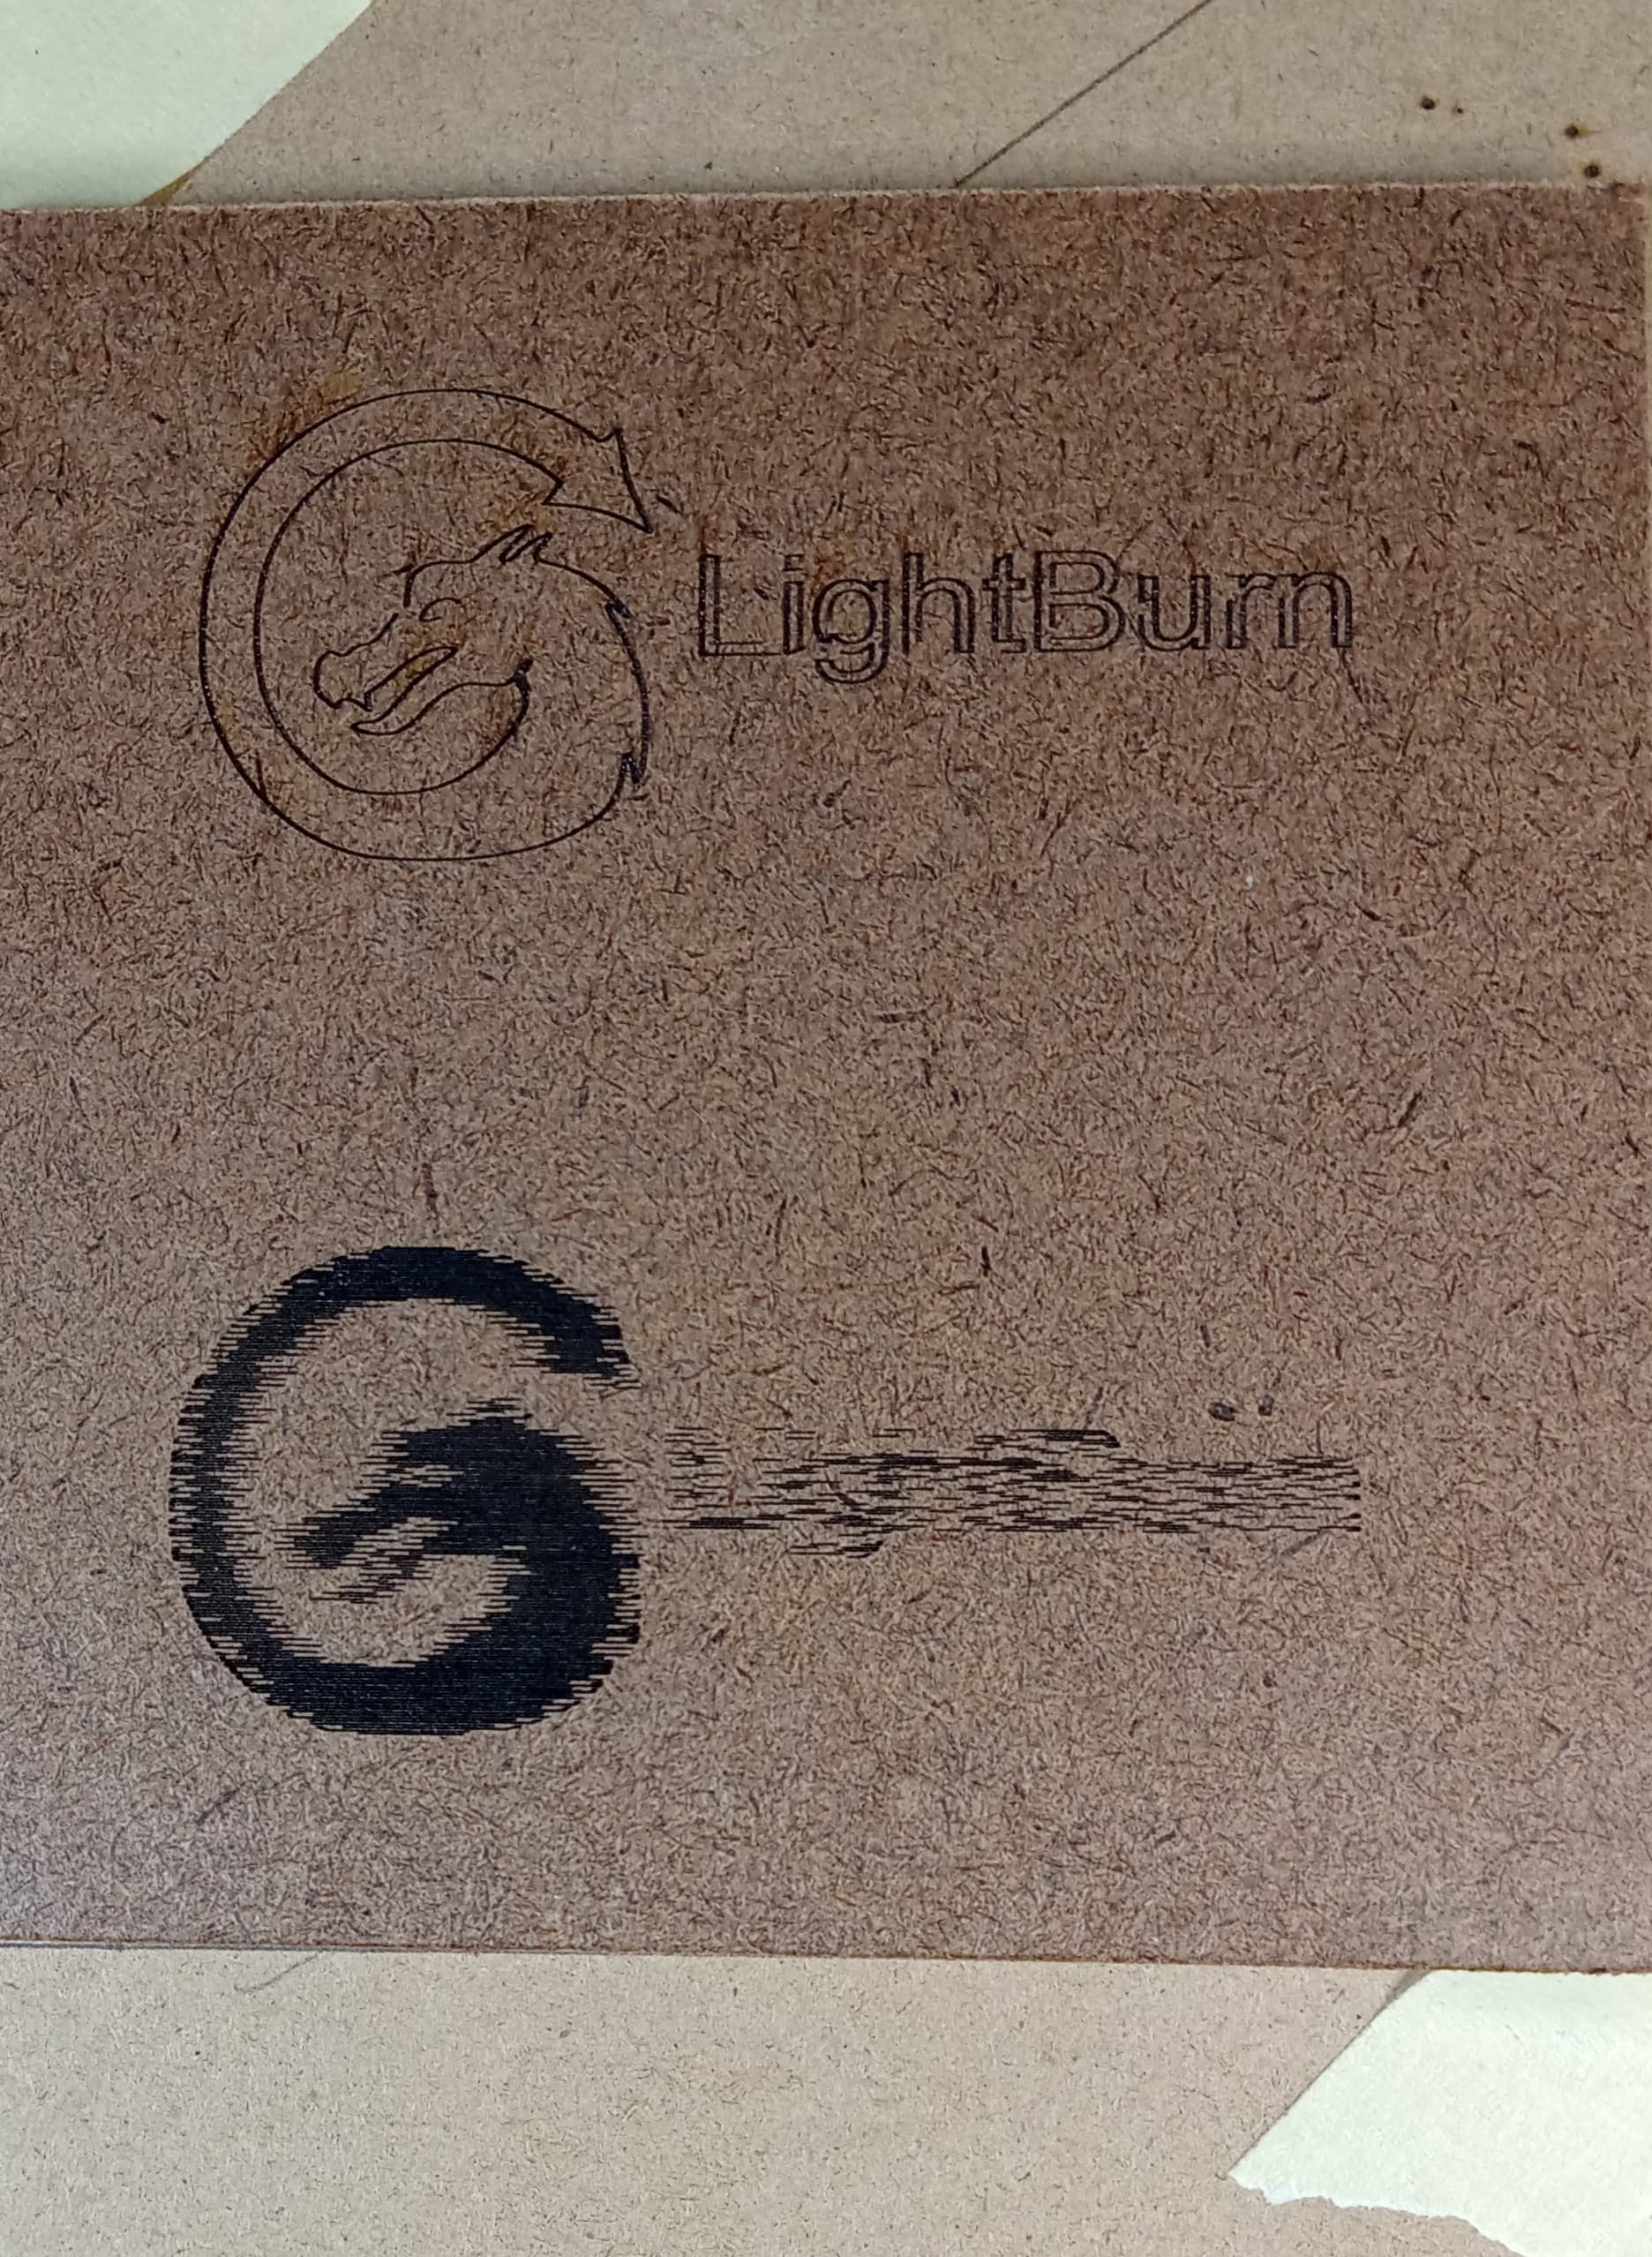
Do you have any photos of the improved engraving as a result?
Just off the laser, Humm more to be done. Speed 900mm, Power 12%, X & Y Acceleration 1000, Line Interval 0.2000, Z offset =0.0
Doc’