I have a file for garden tags. There are no cut lines around the tags. How do I create them?
Thanks
I have a file for garden tags. There are no cut lines around the tags. How do I create them?
Thanks
No image and no file makes it pretty hard to answer your request.
That started out as:
Select them all, create a Rubber band outline around them, Radius the corners a bit, then add the little circle at the middle of the big one.
Put Variable Text fields where they’re needed and arrange the text file to look like a CSV file (if it’s not already).
Use the Grid Array tool to make a bunch of copies with the fields incrementing as needed:

Set the Fill (for text) and Line (for cutting) layer parameters to match the material, then Fire The Laser:

It’s really hard the first time, straightforward the second time, then it’s no big deal.
If the file you have contains graphics (rather than text), then draw one outline to match one tag of graphics and duplicate as needed.
Mike here is the file I am working with.

Thanks,
John
Looks good, but I do not think Variable Text is going to work for you here. Maybe you can use a T-shape marker with the text across the top.
You should also know some of the letters will not be fully formed because you did not use a stencil type font. For example, the hole in the middle of the “O” will fall out so you will just have a round hole there. Aa, e, g, R, Dd, Bb, Pp, and Qq will suffer from this. However, a quick edit with small connecting bars and the Boolean Tool can fix them.
They’ve done all the hard work for you, so it’s a lot easier than I thought: that gray outline is the cut, leaving the letters standing in silhouette something like this:

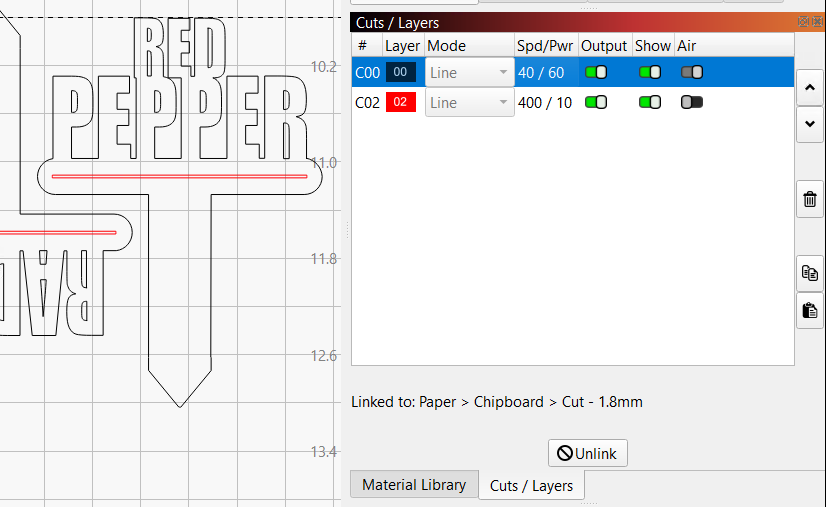
Import the SVG into LightBurn, which automagically assigns the gray & red shapes to separate layers:
I have Material Library entries for chipboard, so a couple of clicks assigns the cut & mark settings to those layers. If I had a little less blood in my caffeine stream, I’d have put the cut layer last …
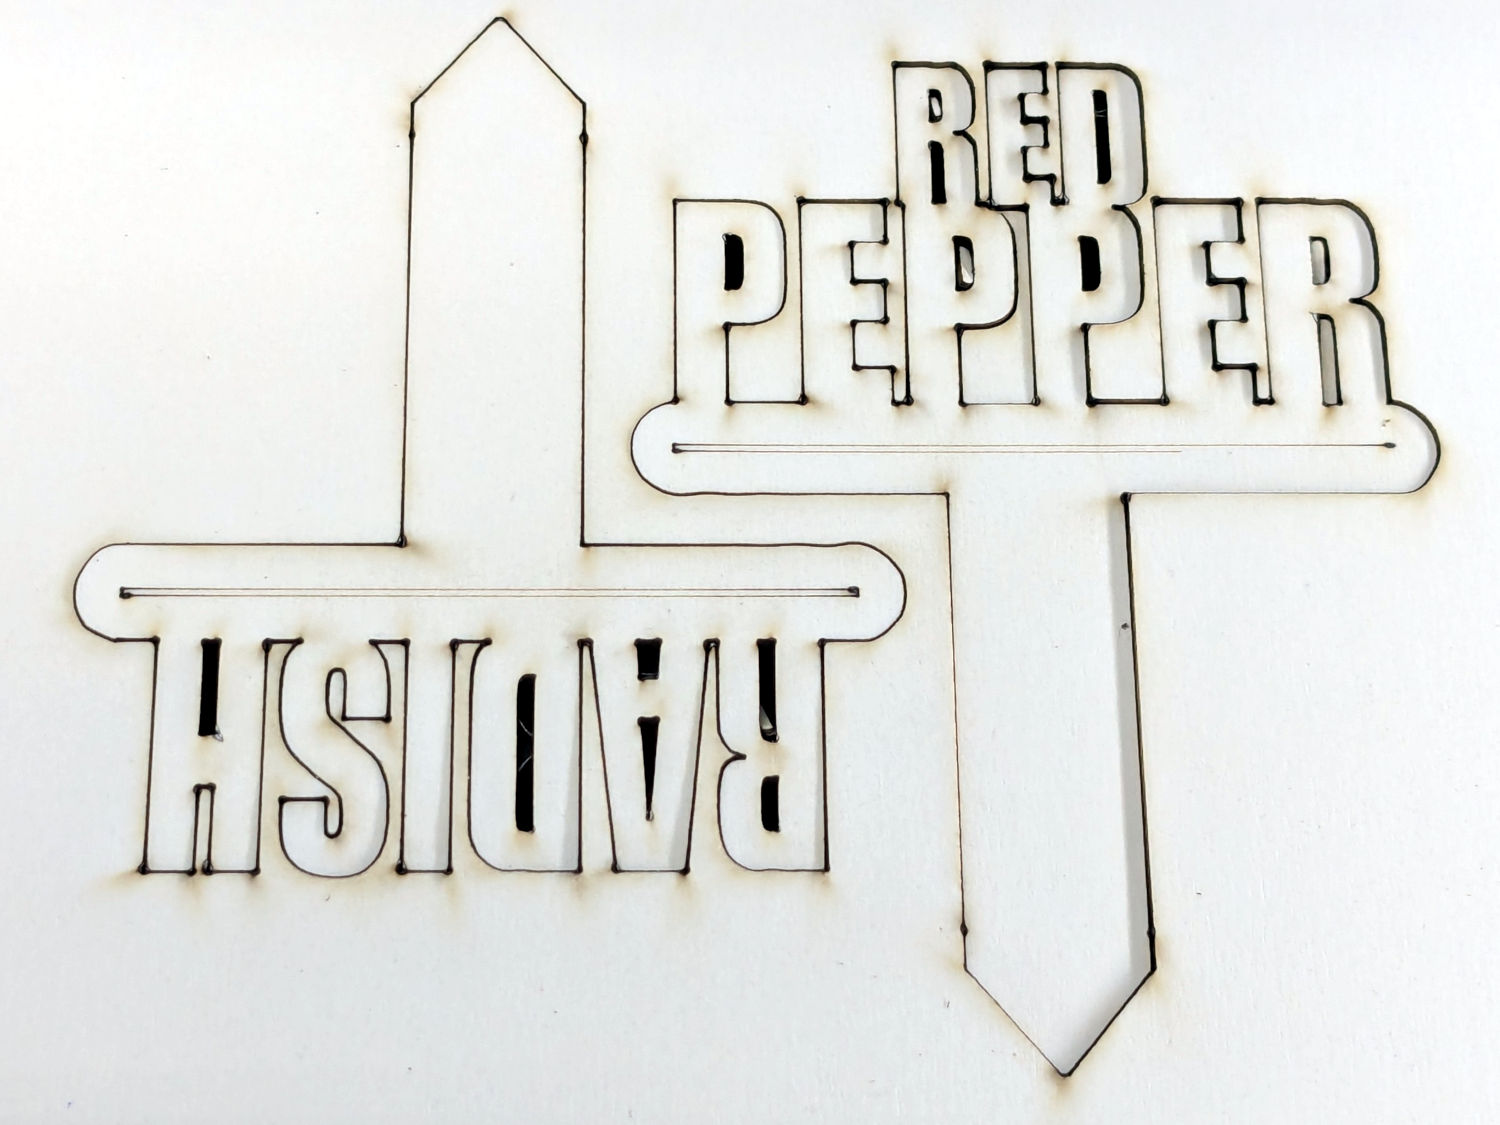
Slap something on the platform and Fire The Laser:
They fall right out, stand up tall, and look pretty good:
The settings need fine tuning to improve the horizontal mark, but that’s the general idea.
Thank you for the response. Now I see what is going on with the file. What type is the lettering? What font and style? Is it rastered text? I need to change some of the plants to what I have.
For the ones I made from your file, the font is whatever the original designer / artist / whatever selected when generating the layout; we have no control over that. All I did is define the laser parameters to cut that design.
Edit: Changing that text will be a challenge and you may as well start from scratch so it’s your IP. Some ideas from my simple sticks:
Aligning two lines of text will be a challenge!
For the wood markers I made, Fira Sans Condensed Heavy seemed chunky enough to keep the letters from falling apart.
Here is a link to a Cuttle parametric file I made. If you sign up for the free version of Cuttle, you should be able to download 10 different ones per month. If it works for you, and you want more, PM me and I can send you those. https://cuttle.xyz/@LayeredPaperArt/Garden-Stake-8qye52KV5npF

Would it be possible for you to send the file for garden tags that you showed me how to create? The one that starts with a circle, adds a rectangle, and a point and then is arrayed. Thank you. I can handle the text, but developing the array is above my skill level, still working and learning.
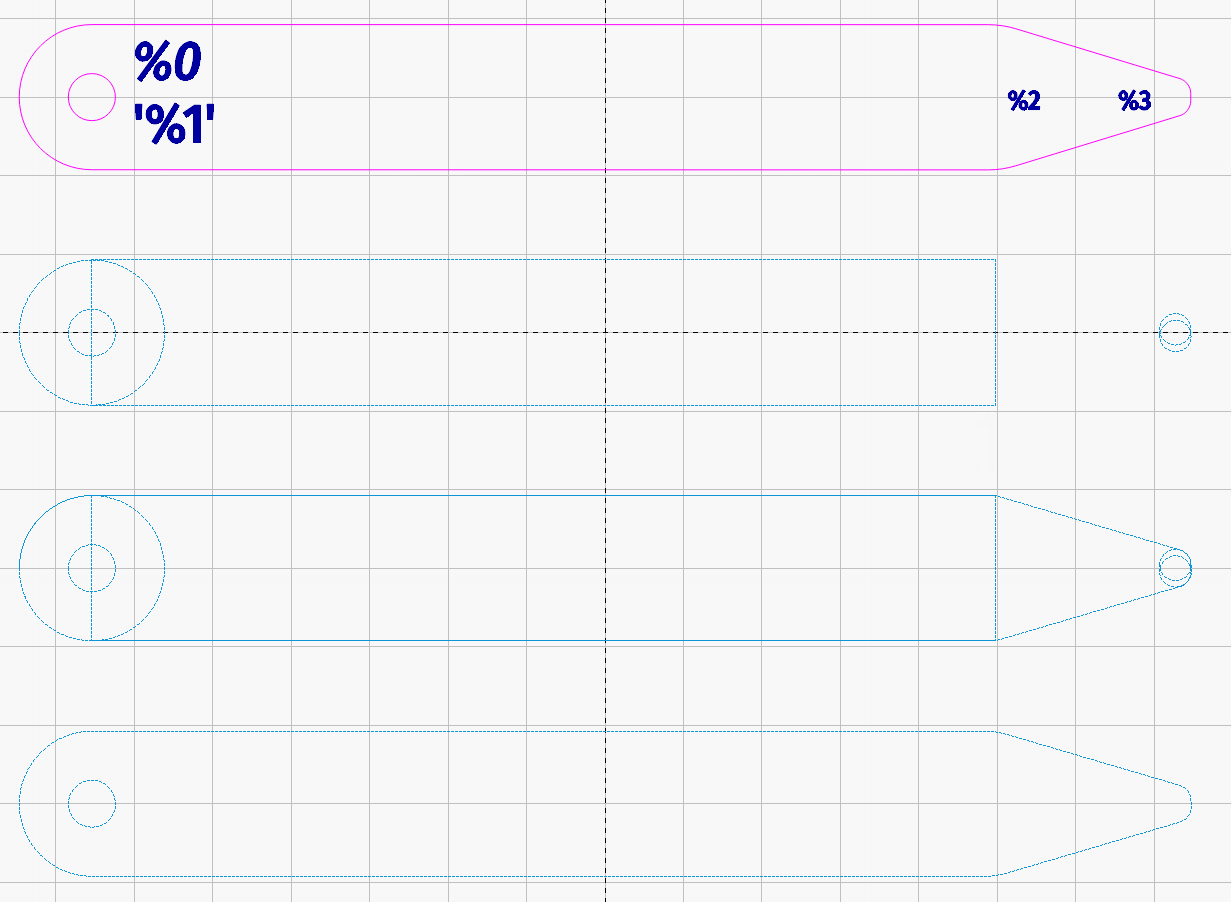
The overall layout:
Trolase large markers - CSV template.lbrn2 (1.7 MB)
The CSV file to fill in the names:
Perennials.csv (1.6 KB)
The shapes creating the tag looked like this:
As are we all!
Welcome aboard … ![]()
Thanks for sending the files for the garden markers. They worked well once I figured out how to turn off the text you were importing form the Excel file. Got ahold of where I got the original place I got the original markers from. Not much help, gave me standard LB instructions that didn’t include how to delete the original text and create new text that LB would cut around.
It’s easier than you think, but it uses a bunch of LightBurn tools.
Start with one of their tags, which you must Ungroup from the rest because the SVG imports as one huge group:
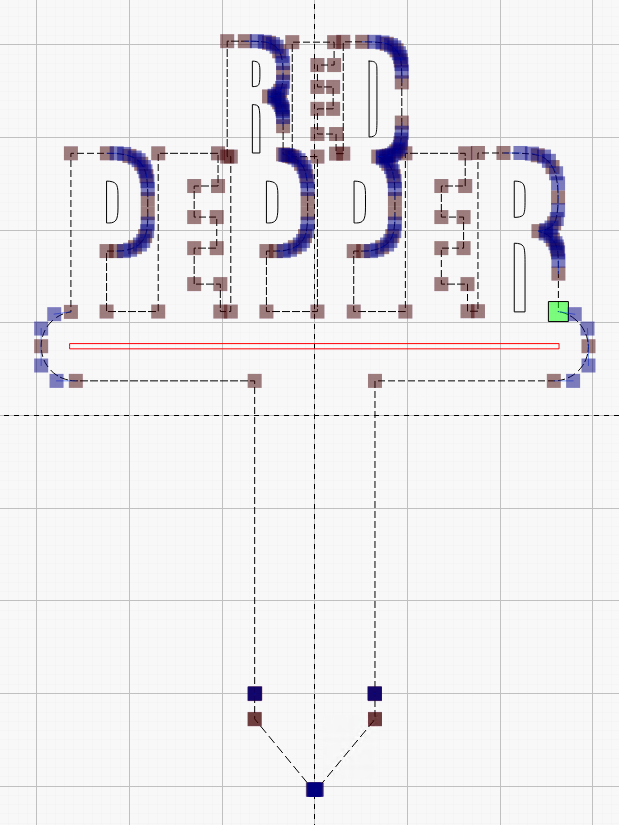
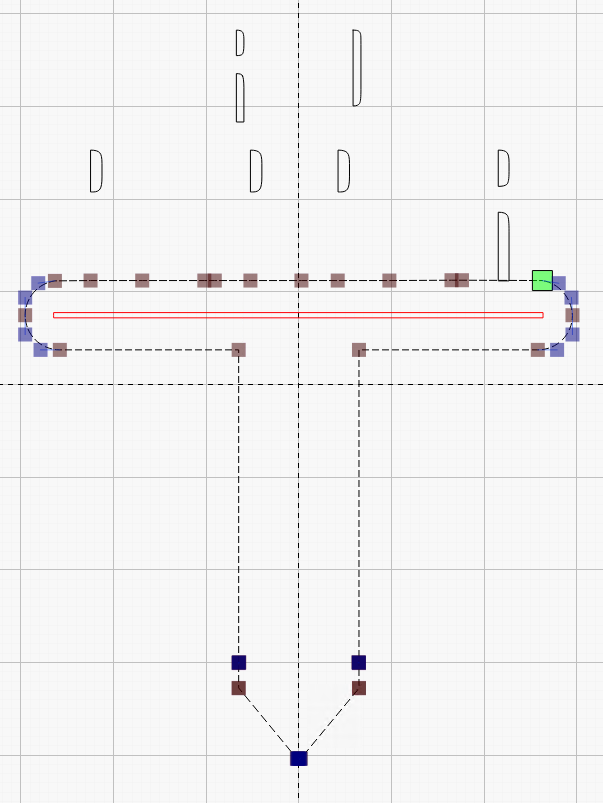
Use the Edit Nodes tool to show all the nodes around the perimeter:
Drag-select a rectangle around the letters, but not the top of the T-shaped base, then hit D to delete them:
The interiors of some letters remain behind, so get out of the Node Editor, drag-select around the junk, and hit Delete.
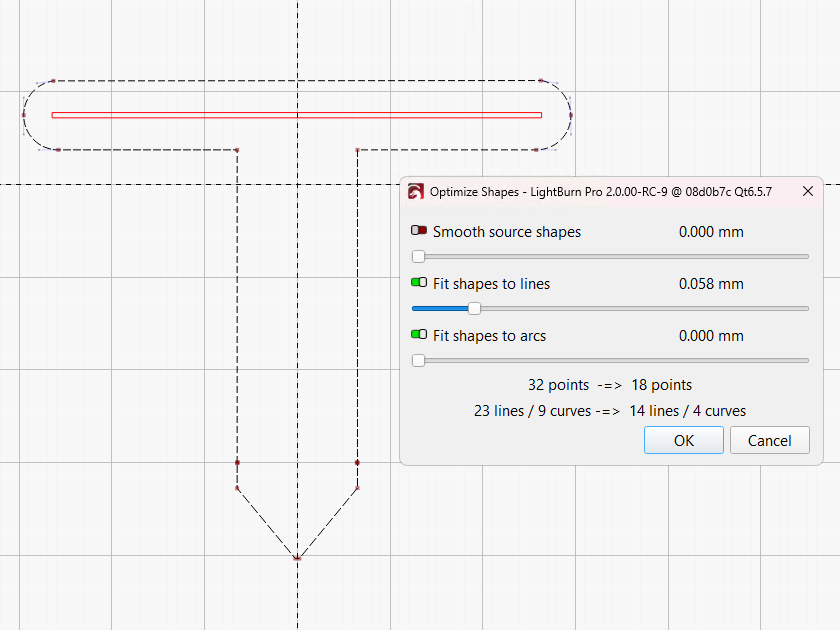
Click to select the T shape, then use the Optimize Shapes tool to tidy up the top line of the T:
You’ll want to Duplicate that shape and move the dupe off to the side so you can use it for the next tag.
Now, the magic happens … ![]()
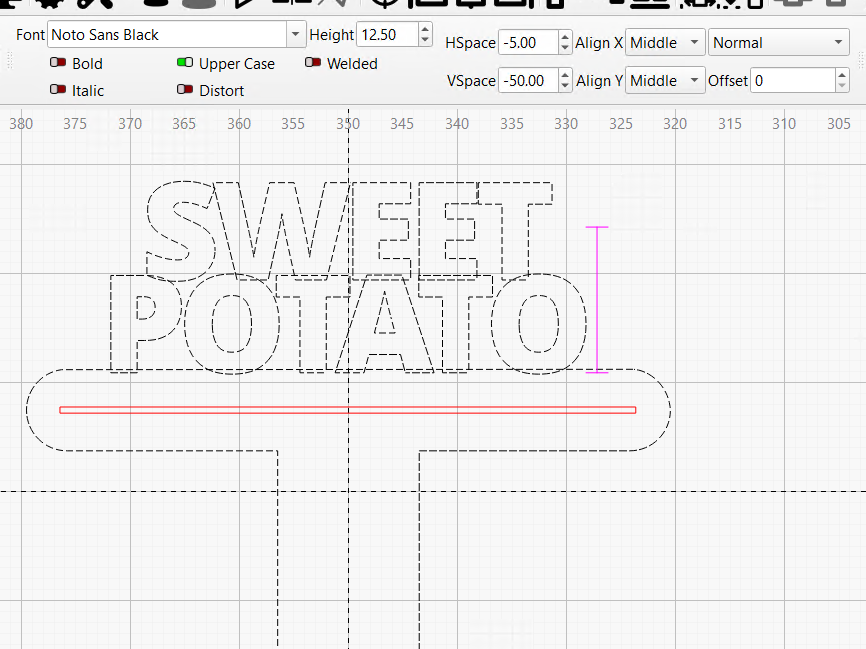
Use the Text tool to start typing letters. Choose a chonky font, turn on the Upper Case switch (this is no place for ascenders & descenders), and Name That Plant:
Adjust the Height value to make the lower word wide enough to fill the T.
Reduce the HSpace and VSpace values to mash the letters together with plenty of overlap, because otherwise they’ll fall apart.
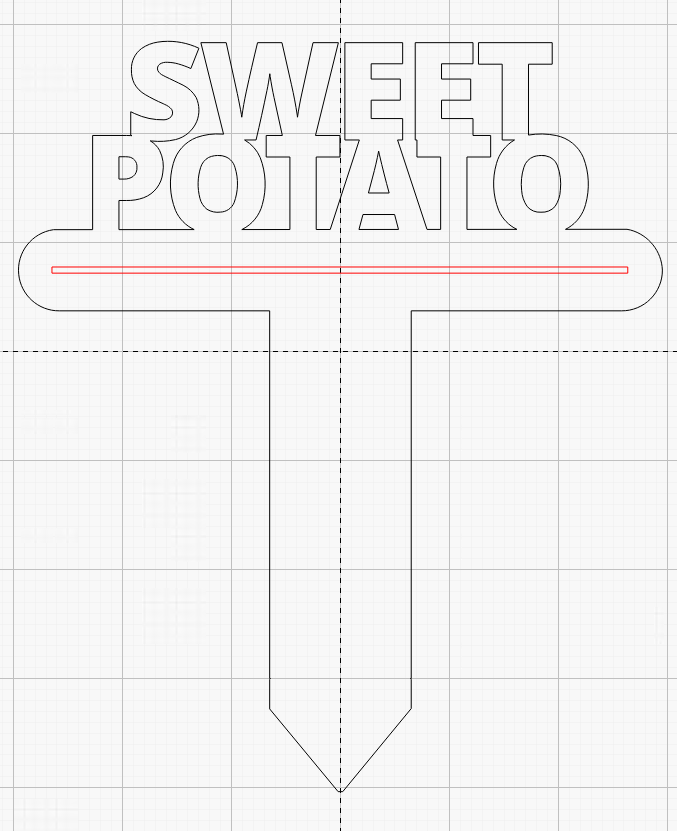
When you’re happy, get out of Text, Align the text block over the T, and move it down enough to overlap the T.
Select both the text and the T shape, then Weld them together:
Set the Red layer to mark and the Black layer to cut whatever material you’re using, then Fire The Laser:
Protip: Let Ctrl-Z become your copilot.
Bonus: Make duplicates of the shapes and drag them off to the side as you make progress, so you can restart from those checkpoints.
Thank you. This uses way more tools than I know about. Your directions are very good. I think I can make it happen now.
John
Correction: Uses way more tools than you KNEW about. You know them now. ![]()
Me too!
Still more tools to learn I am sure. Always good to have more trucks to do something new.
This topic was automatically closed 30 days after the last reply. New replies are no longer allowed.