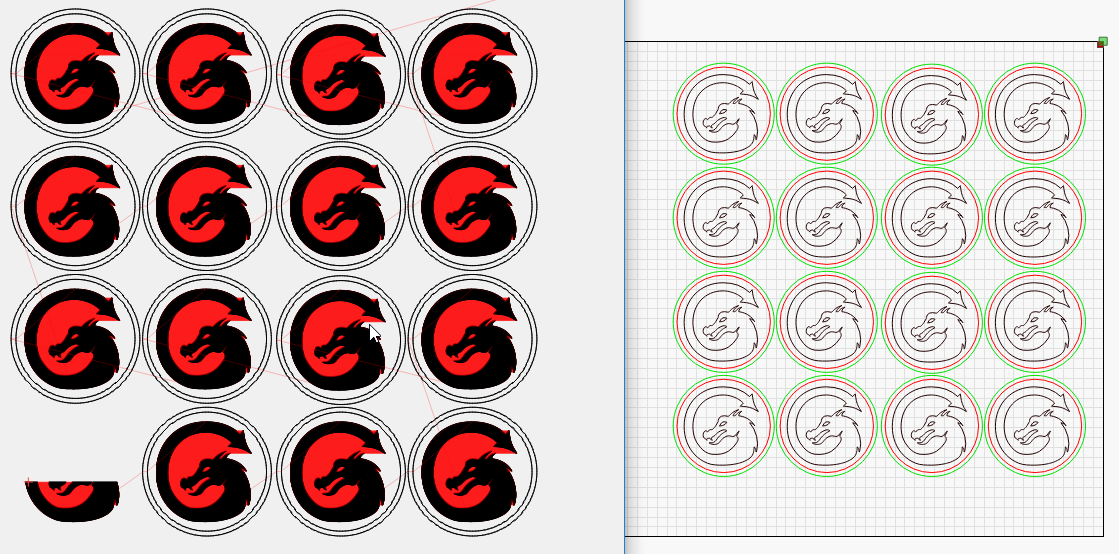
help me out here - i have a design that is lots of groups on a page…think of it similar to coins…where the centre engraves and the outside is cut
by grouping each object it does what i want in terms of engrave - then cut - then move on to the next …no problem
but it doesnt seem to cut in a logical order…ideally start on the left - cut the entire line move to the next line again left to righ
ive played with the cut optimisation settings but this doesnt seem to make much difference…i think its cutting them in the import order but that is not what i want
ive tried setting the cut priority to an entire row and having cut by group / followed by cut by priority but it doesnt seem to be achieving a logical cut order
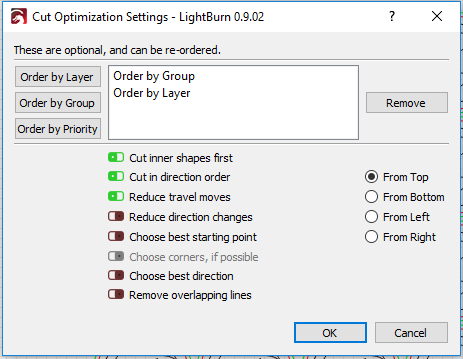
Not sure what you mean by multiple inserts. The group order is from the root level only, so if you create a dozen root-level groups, and tell the planner to cut in group order, then layer order, it should do what you’re looking for. If you also tell it to cut “from top” (or another direction) it will do that as well. The video Rick linked above goes into detail about this.
I did a quick mock up of three layers - the dragon (a group of vectors to be scanned), an enclosing circle that’s just surface marked, and a final cut circle. It runs as expected in a zig-zag going left to right, then right to left, as shown (follow the red traversal lines between the circles):
Make sure you group each object that you want cut / scanned as a top-level group
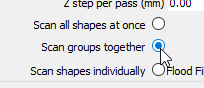
Make sure any fill layers are set to scan by group, not scan all shapes together. If you scan all shapes together it will scan all shapes on that layer in the whole file first.
Make sure “Order by Group” is first, followed by “Order by Layer” - The order of the options is important.