Cutting Lines Begin&End to thick

Hello Team,

I have a problem

at the beginning and at the end of a line there are always slightly larger holes. There where the laser accelerates and brakes.

I know that there used to be a function so that the laser moves beyond the engraving and only then brakes, of course without engraving.

This function existed in any case with images. But I can’t find it anymore. Do they do it differently in the current version?

Thanks in advance!

I believe you are looking for ‘overscanning’ which is in the cut settings editor

Sounds good. But i dont have this option anymore.

I know it was there in an earlier version.

Do i have to enable it before?

I don’t believe it needs to be enabled. I am running 1.2.01 and it’s there for me. Perhaps you could show a screenshot of your ‘cut settings editor’

Okay, i got the Option on Fill + Line.

But i need it at Line only.

I need to cut out something very precise and the thicker parts at the beginning and at the end are very bad there.

Or is there another way to avoid this?

Apologies I thought you were referring to images.

Yeah, that option is not available for ‘Line’ only, as the laser head it is not scanning, just following the lines.

I don’t know what to suggest really, perhaps higher speed/less power and more passes

You could use lead in/lead out. if that would be suitable.

I tried that, but thats not the solution that i need.
Or i am doing it wrong.

Thank you for that.
But thats not suitable for me.

I have to cut something out from a very thin foil.

The type of machine and what kind of controller might help us answer your question.

Not all controllers work the same and have the same options.

You profile does not have anything on what equipment you have…

:smile_cat:

I think you’re referring to overscan. That only works for fills and images and is not available for lines.

Its a RuiDa RDC6445S Version: RDC-V26.01.13

Yes. But thats what i need for Lines.
Otherwise I always get points at the corners and I want to avoid that.

If I engrave with very little power, the corners are cut out because the laser slows down here. However, it should only do this behind the line so that exactly this problem does not occur.

Hi Matthias,

You can reduce your “Min Power (%)” setting.

As the laser begins to decelerate into the corner the power will also begin to be reduced down to as low as the Min Power value - which can be optionally set to right down to a value as low as your laser can still fire at.

Okay that would help with the example above,
but I don’t think it will help me with my problem of cutting out exactly.

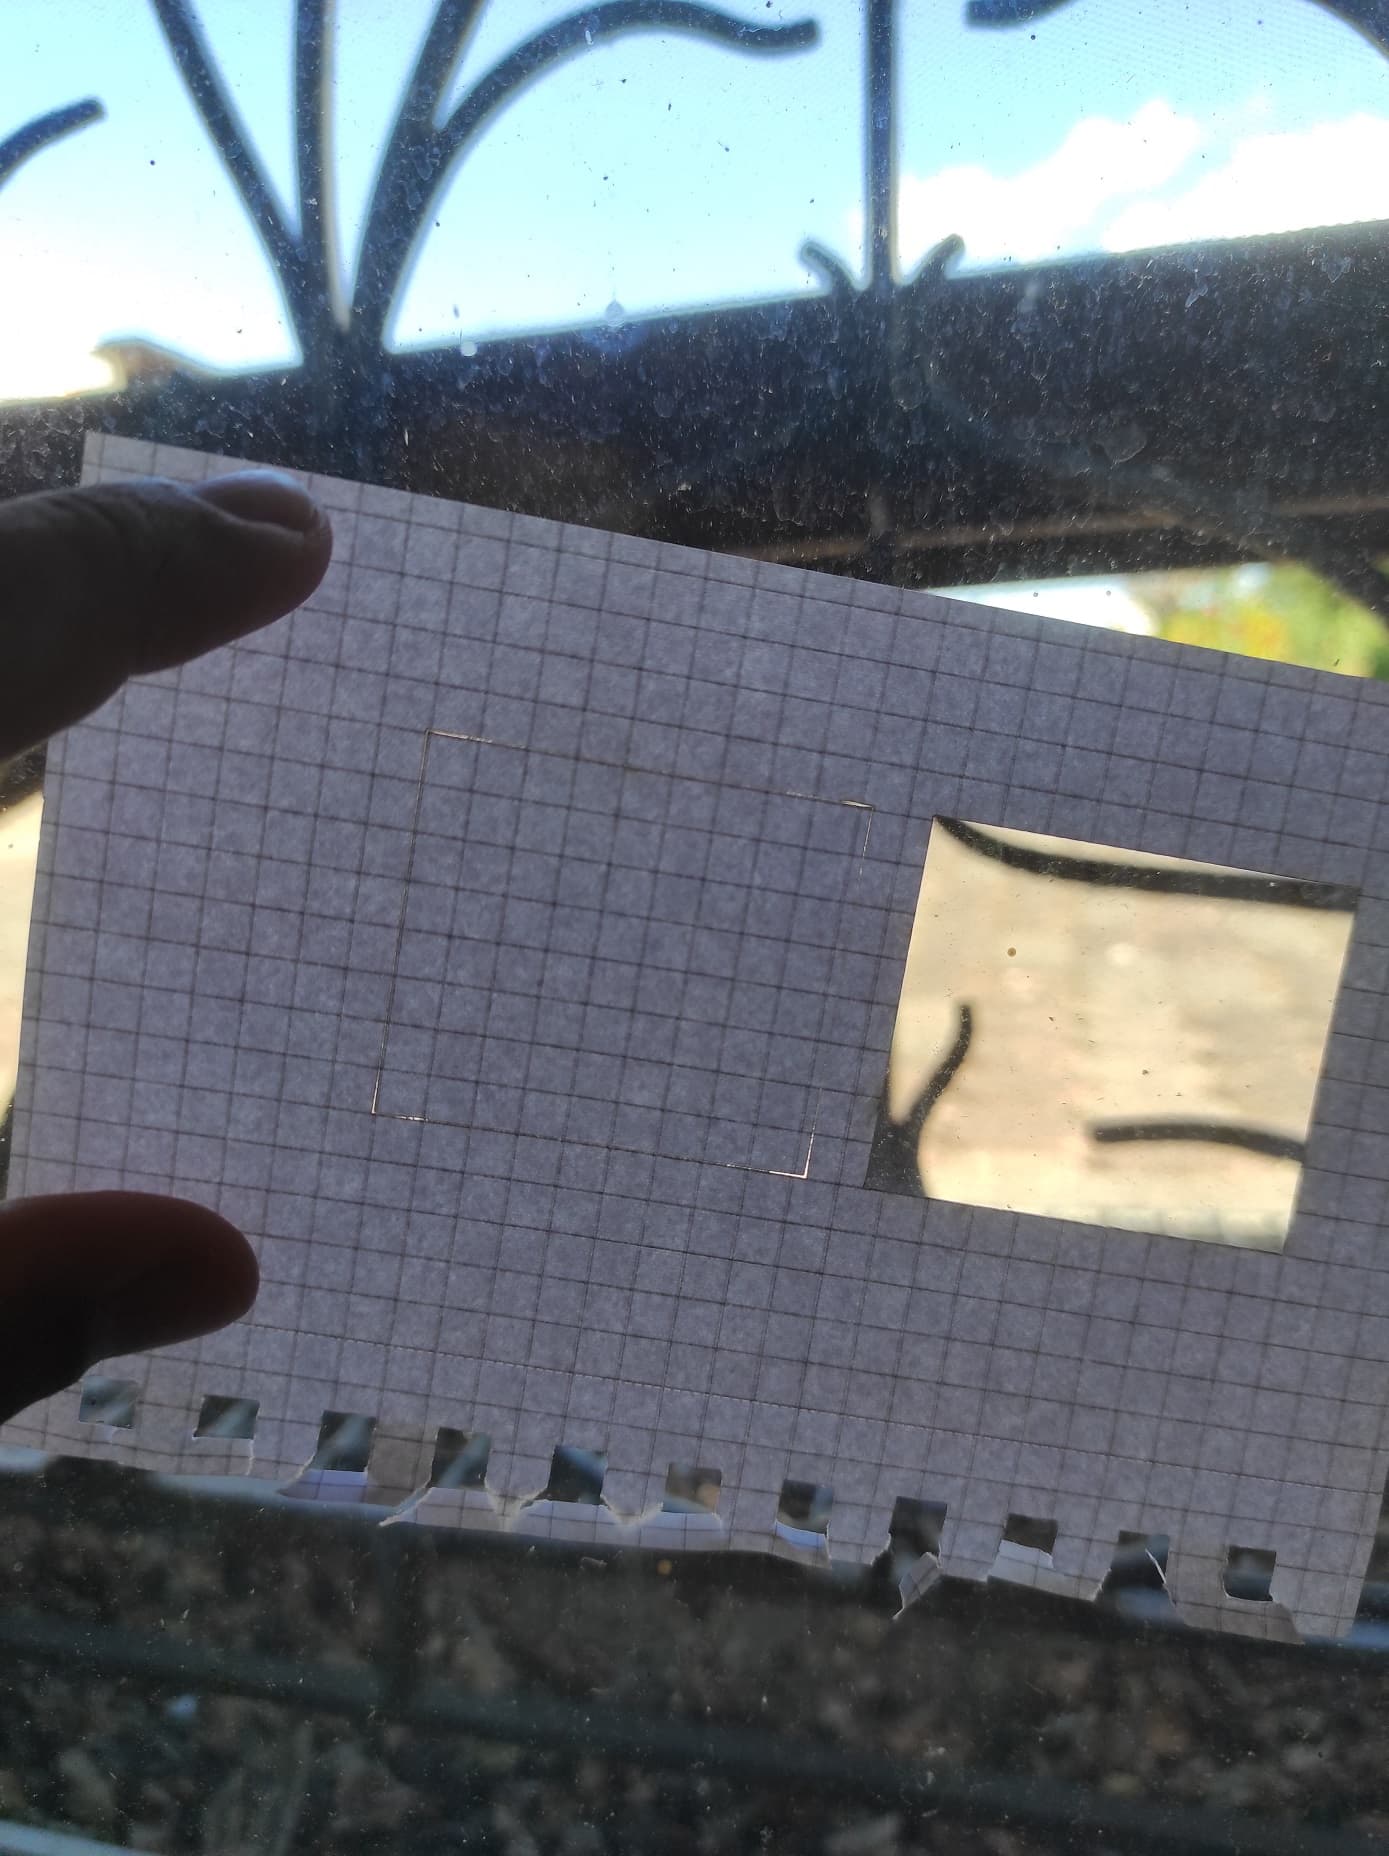
I have a special film that absorbs light and it would be bad if there are holes at the corners. Sounds perhaps a bit trivial, but the film is very expensive and should absorb the light in a camera and there you would see the small holes then probably. The customer is very meticulous.

That’s why I thought of the overscanning function only for lines.
The laser accelerates a little before the actual cut and brakes only after the cut. So there should be no holes.

What makes you say this?

Laser power compensation during acceleration/deceleration is handled by your controller. However, the controller will not go below the Min power specified in the Cut setting for that compensation. These features are specifically meant to compensate for overburning scenarios.

Because I need a certain power to cut the foil.

How long should I test to find out to which power I can drive down in connection with the acceleration?

With overscanning it is also possible that the laser accelerates before and brakes afterwards.

With a dsp controller, the hardware figures out the ‘overscan’ for you… you have no control over that… Ever get the ‘slop’ error… that’s generally it’s computed overscan going outside the defined work area.

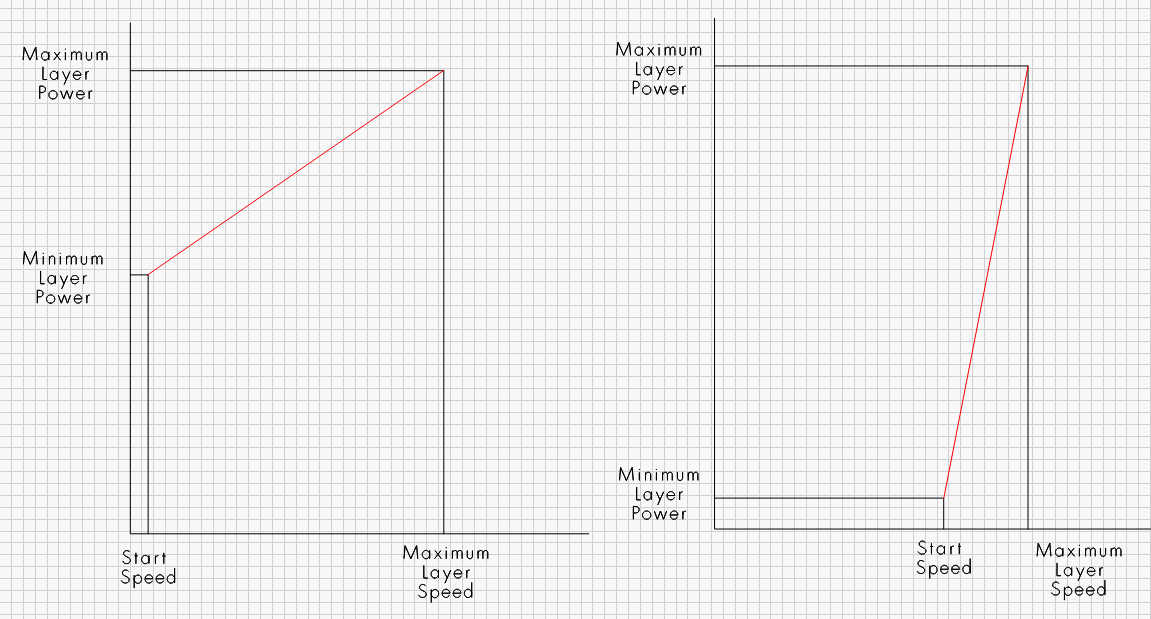
You might want to keep in mind how power is applied with the different settings… The red line is the change in power/speed.

You can change the start speed on the controller ‘Edit → Machine settings’ and you have minimum/maximum/speed on the layer…

As you can see anything at or below the start speed will get minimum power…

How many watts is this machine?

Good luck

:smile_cat:

Thanks first of all for the answers to all of you.

The laser has 60 watts.

My problem is that if the power is too low, the foil does not cut properly but starts to melt.

With 40% power I get a nice and clean cut. But not at the corners.
If I lower the power here, the foil will melt again. And I don’t have much space for testing because the foil is expensive.

I have never had any problems with this, but it is very noticeable here and I can’t sell it with holes in the corners.

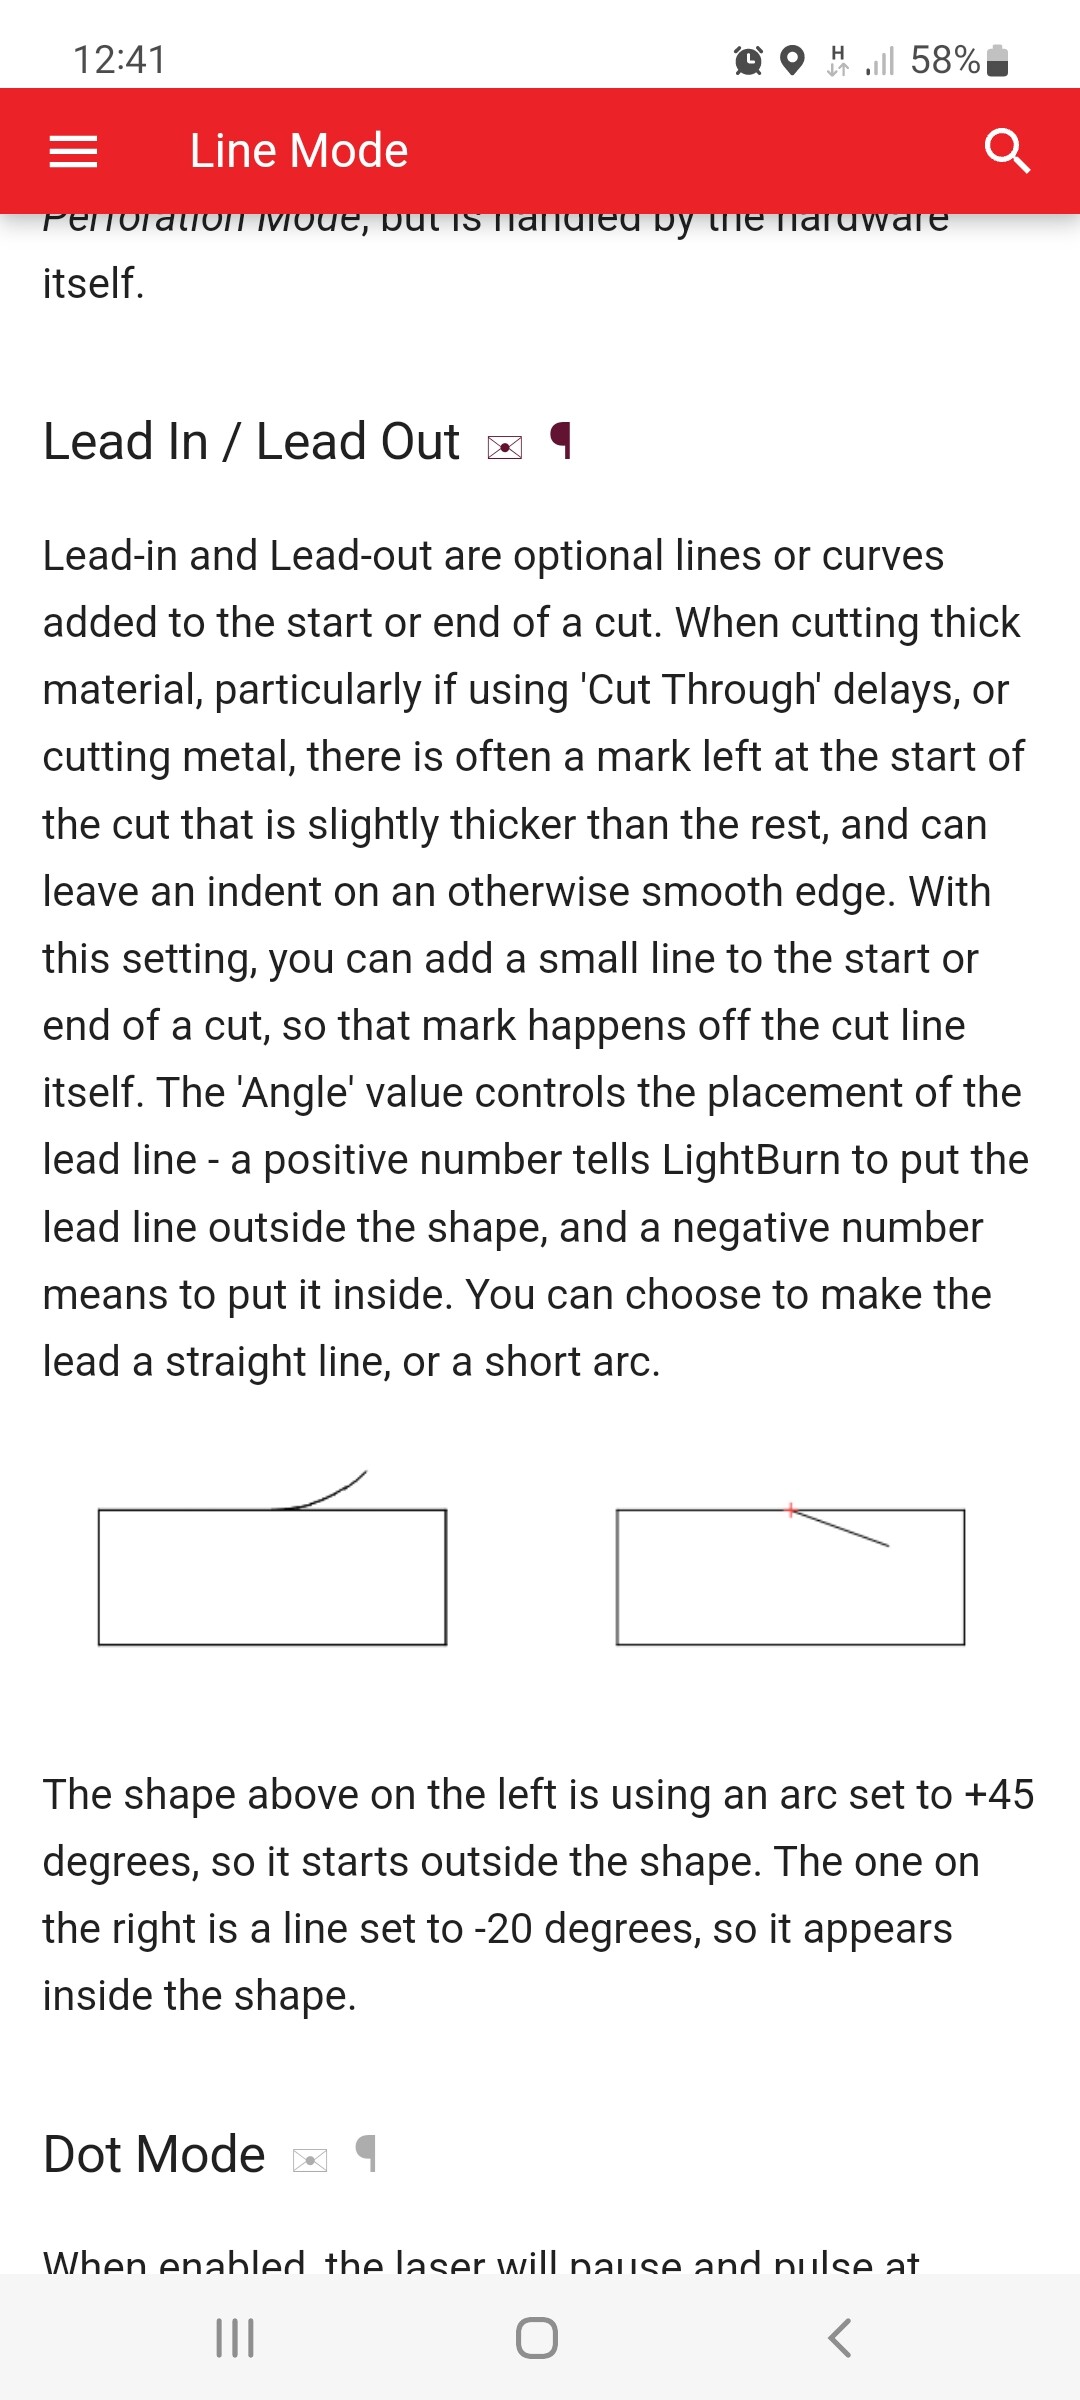
I would not have thought that it would cause such a problem. Unfortunately, a lead in is not possible because I need the outer and inner edges of the film.

I’ll have to have a look at the setting for the start speed on the controller.