I’ve been working on a similar problem with two different lasers at the maker space where I volunteer. I haven’t solved it yet (and we think we are are maybe seeing two different issues, but here’s where I’m at…
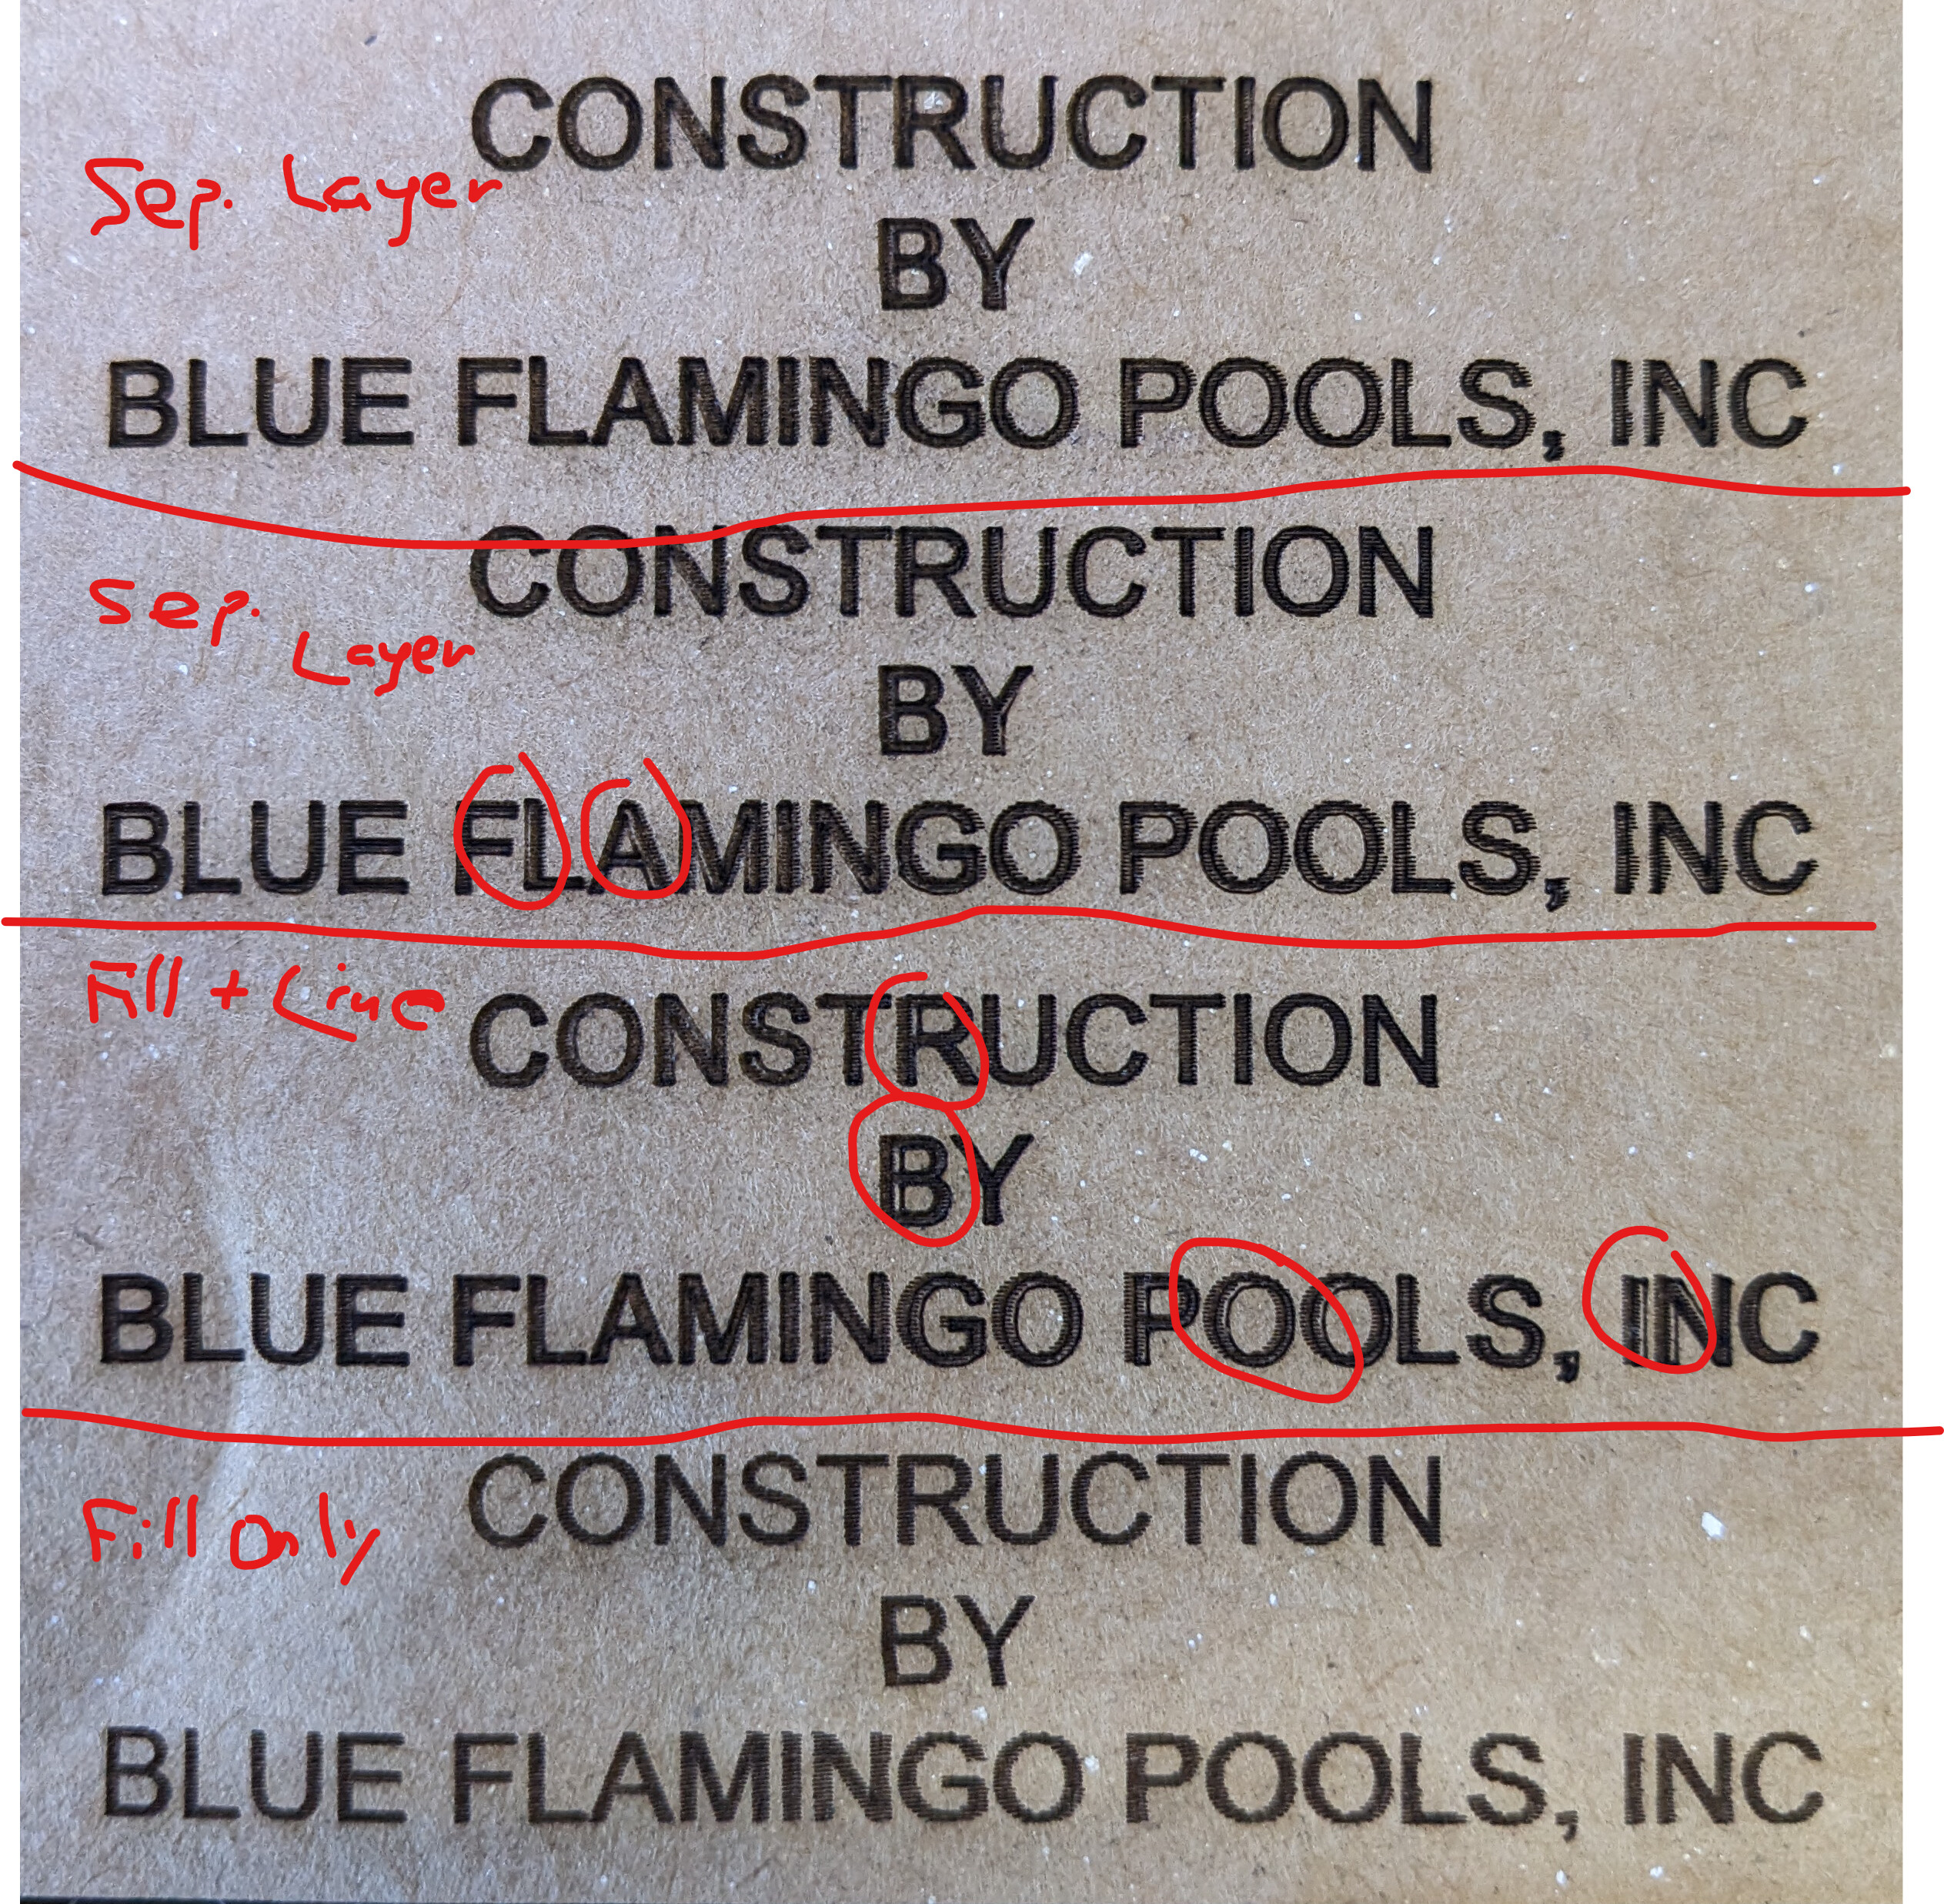
The original picture shows precisely the same issue I see on one laser. If you look closely at the “F” in Flamingo or the “P” in Pools, you’ll see that the fill shifted to the right a small amount in the middle of the fill on each letter. This is how I match it to my problem.
If you do a preview of the file, you’ll probably notice that the offset in the fill seems to “fix itself” or recover - after the laser hits the error spot, some later text looks OK again. In the file, the laser uses a combination of relative and absolute moves. For example, the laser would use an absolute move to get to the location of the letter P, then relative moves as it does it’s fill. The recovery comes when it gets to the next absolute move. If the error were caused by a skipped step on one of the motors, it could never recover. This implies that either there is a corruption in the file (a relative X move that should have been .2mm turns out to be .22 or something like that), or the Ruida controller decides to move it extra on its own (unlikely).
To confirm this on your laser, you can use pulse to mark a dot on your material before running the job, then another after the job completes and the laser returns to the origin. If they are in the same location and you had shifting like that seen, the laser could not have lost steps. If the dot is in a different location. I also sometimes etch (not cut through) two small squares with their corners touching outside of my design. One square is etched as the very first thing, and the other as the very last thing. If the two squares are just touching after the cut, you haven’t lost any steps during the whole job. If they are not touching, then you did lose steps. These don’t take much space or time and are a handy way to monitor laser performance.
We suspected the corruption happened when the file was being moved to the laser over USB cable. We are currently running a test where we changed the connection from Serial/USB to Packet/USB. Serial USB does not have error checking. TO change this, in the Devices Wizard, edit the laser and step through the wizard - you’ll see the screen). The Packet/USB should have some error checking. So far, this has resolved the issue on one laser. You might also use the Ethernet connection - it has has error checking.
We also thought we could spot a corrupted file by comparing a file before it’s sent, and then downloading it from the laser. This turned out to be a real PITA. Ruida’s download capability is challenging, either to a USB thumb drive, or back to the computer. We have not had a successful download of a file which produced shifted prints. You also need to make your LightBurn workflow be “Save RD file and Send RD file” to be sure you have a precise “before” file. I did find a program online that would decode the .RD file that is created by LightBurn, but it needed code changes to decode a whole file. But we’re ready to compare files if we get a chance.
As for slop (the laser head moving a little too far, or bouncing at the start or end of a fill line, you would not expect to see this “switch on and stay on” on those letters L and P. You’d expect to see everything being in error, and maybe ragged edges on the fill strokes, but those are not present.
On our second laser, we have seen lost steps - The “before and after” squares or pulse test showed this. We’re still working on this case, but we’ve seen errors on fills more than lines. The laser has two lasing modes - one for fill and one for lines. You can see these in the the machine settings (Edit menu > Machine settings). Our current suspicion is that the acceleration and/or Jump-off speeds are too high on the fill, because they are higher than on the line mode.But we haven’t dived in on this yet.