Thanks to the contributions from @Hank (Glassware & coasters for a good cause) and from @richfaraone (Ortur YRR Rotary Setup Video Guide & PDF), I was able to get up and running fairly quickly on my first Glassware project. These glasses are to add to a set of glasses our daughter had custom made for our Summer home several years ago. The set did not include Wine Glasses so this was a great opportunity to try my hand at it.
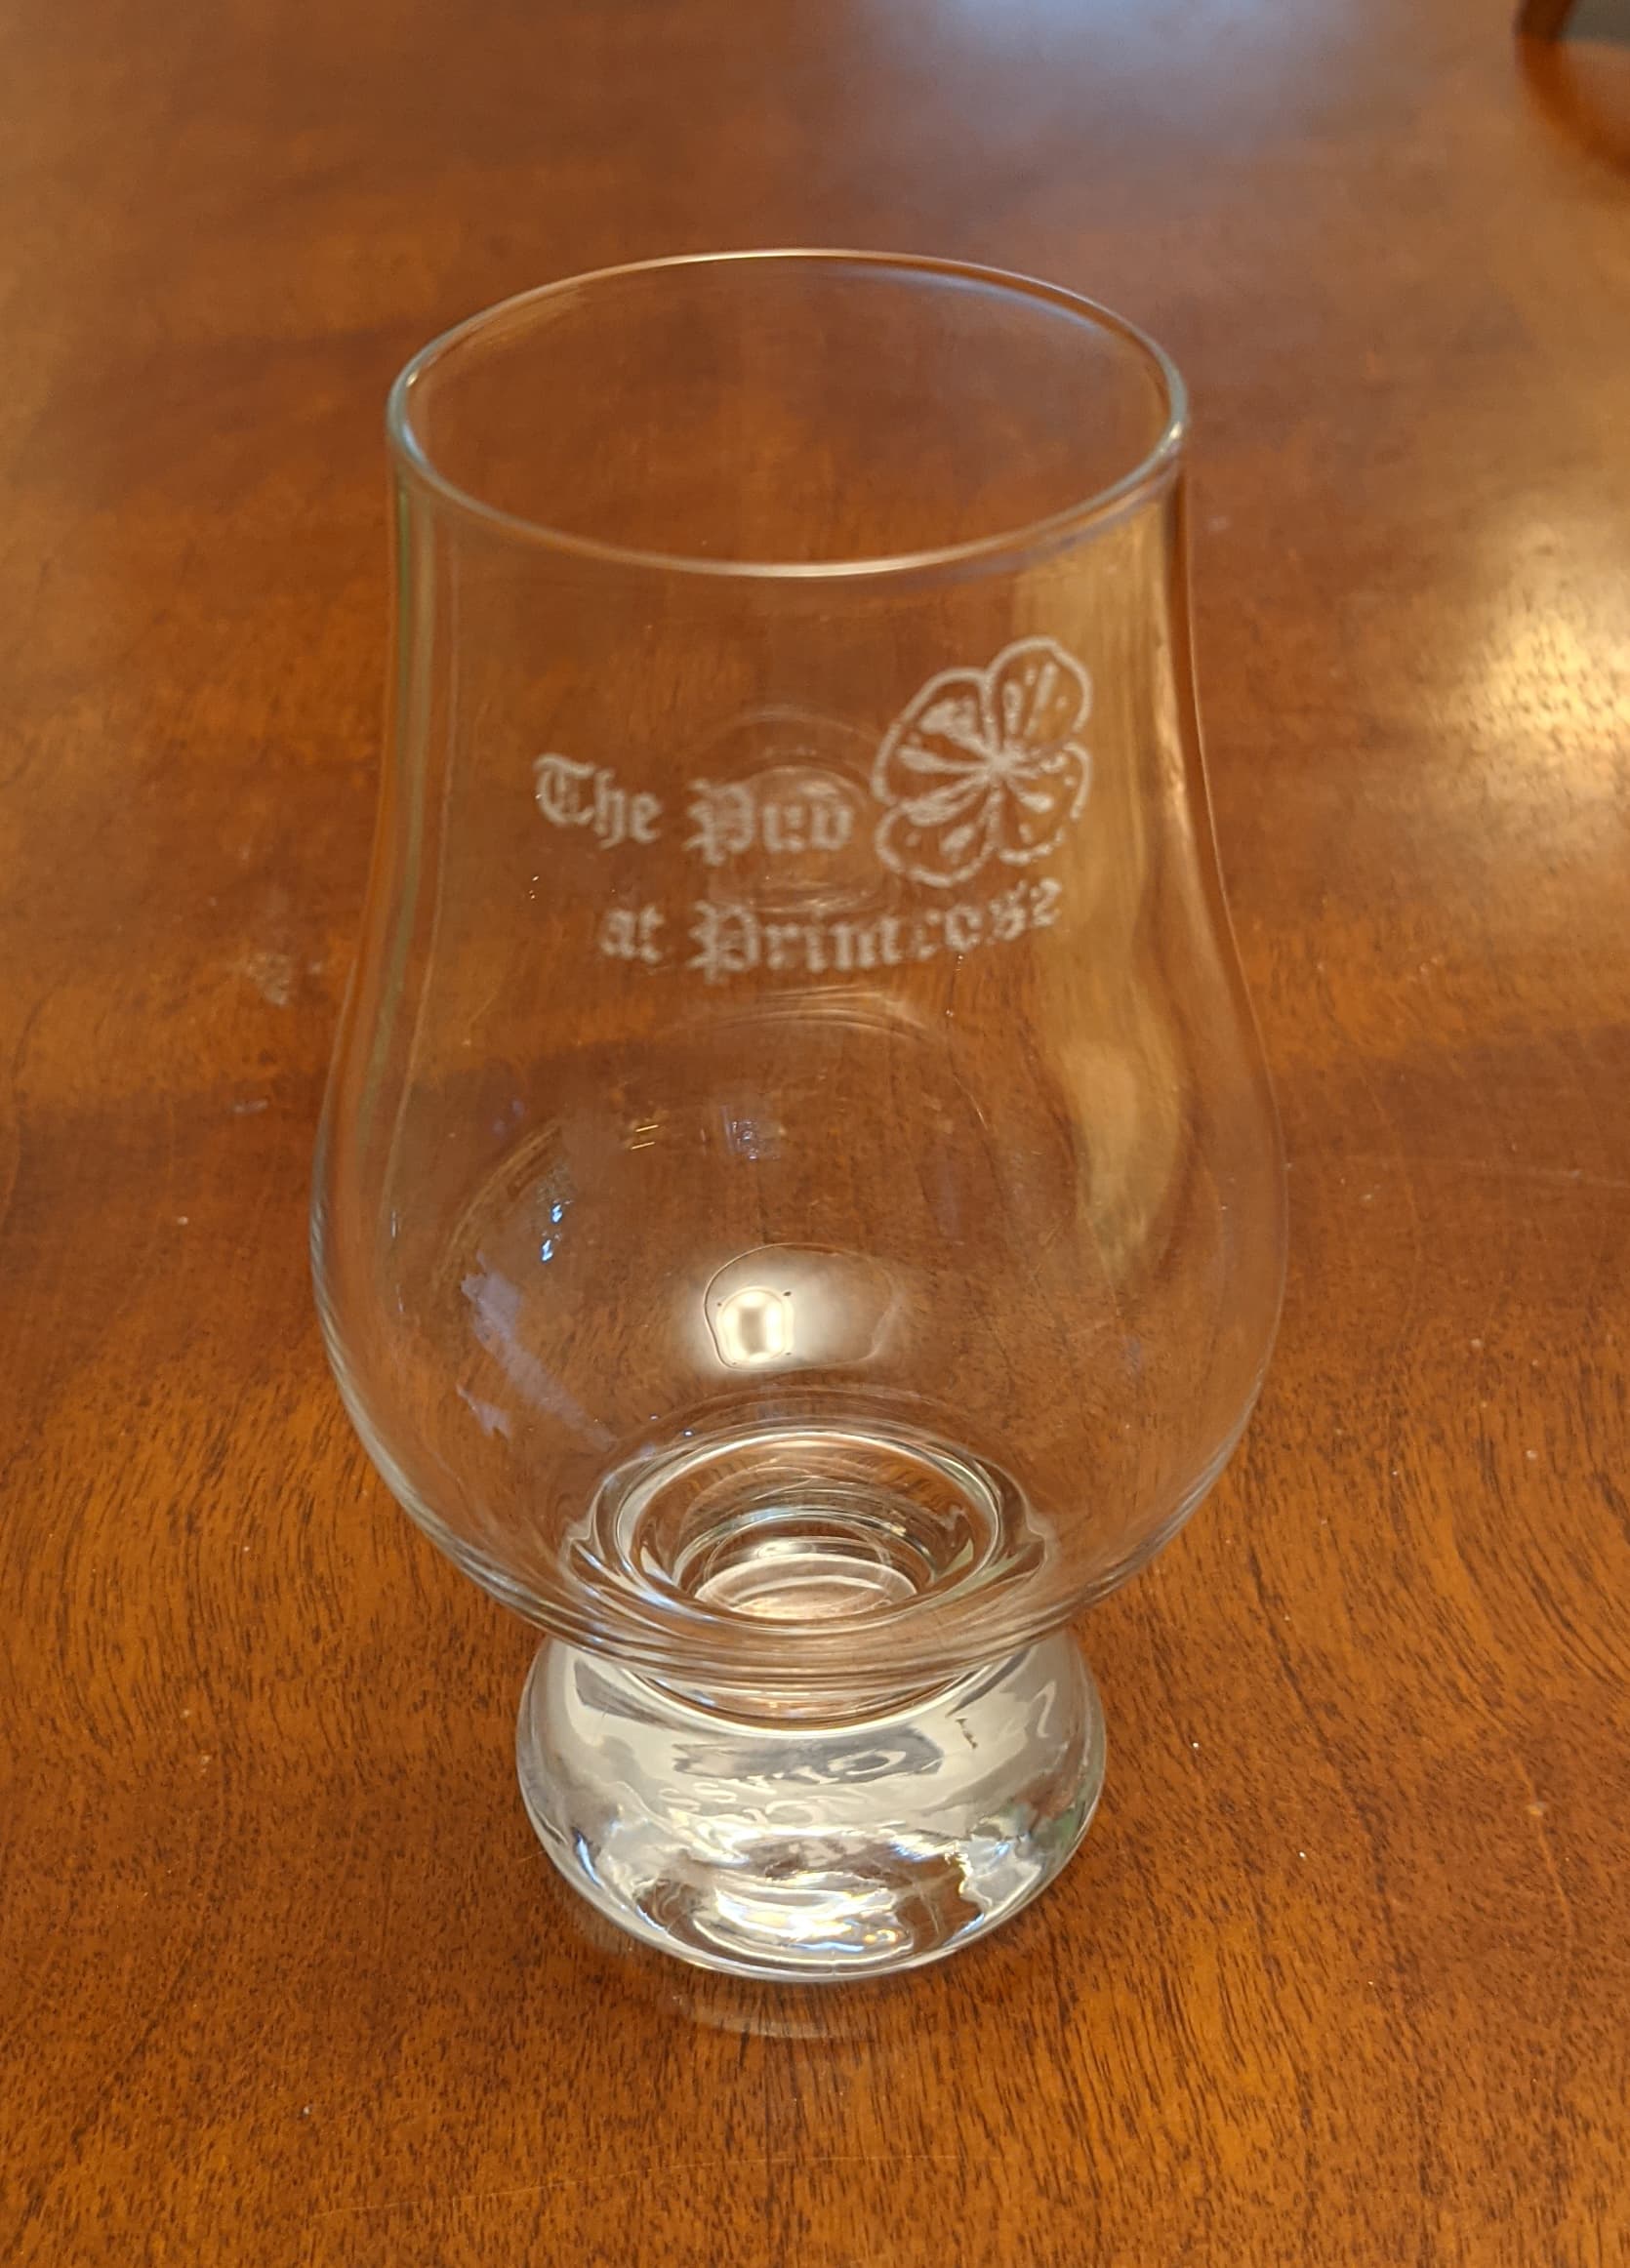
It turns out to be a pretty good match to the original (perhaps even better than the original
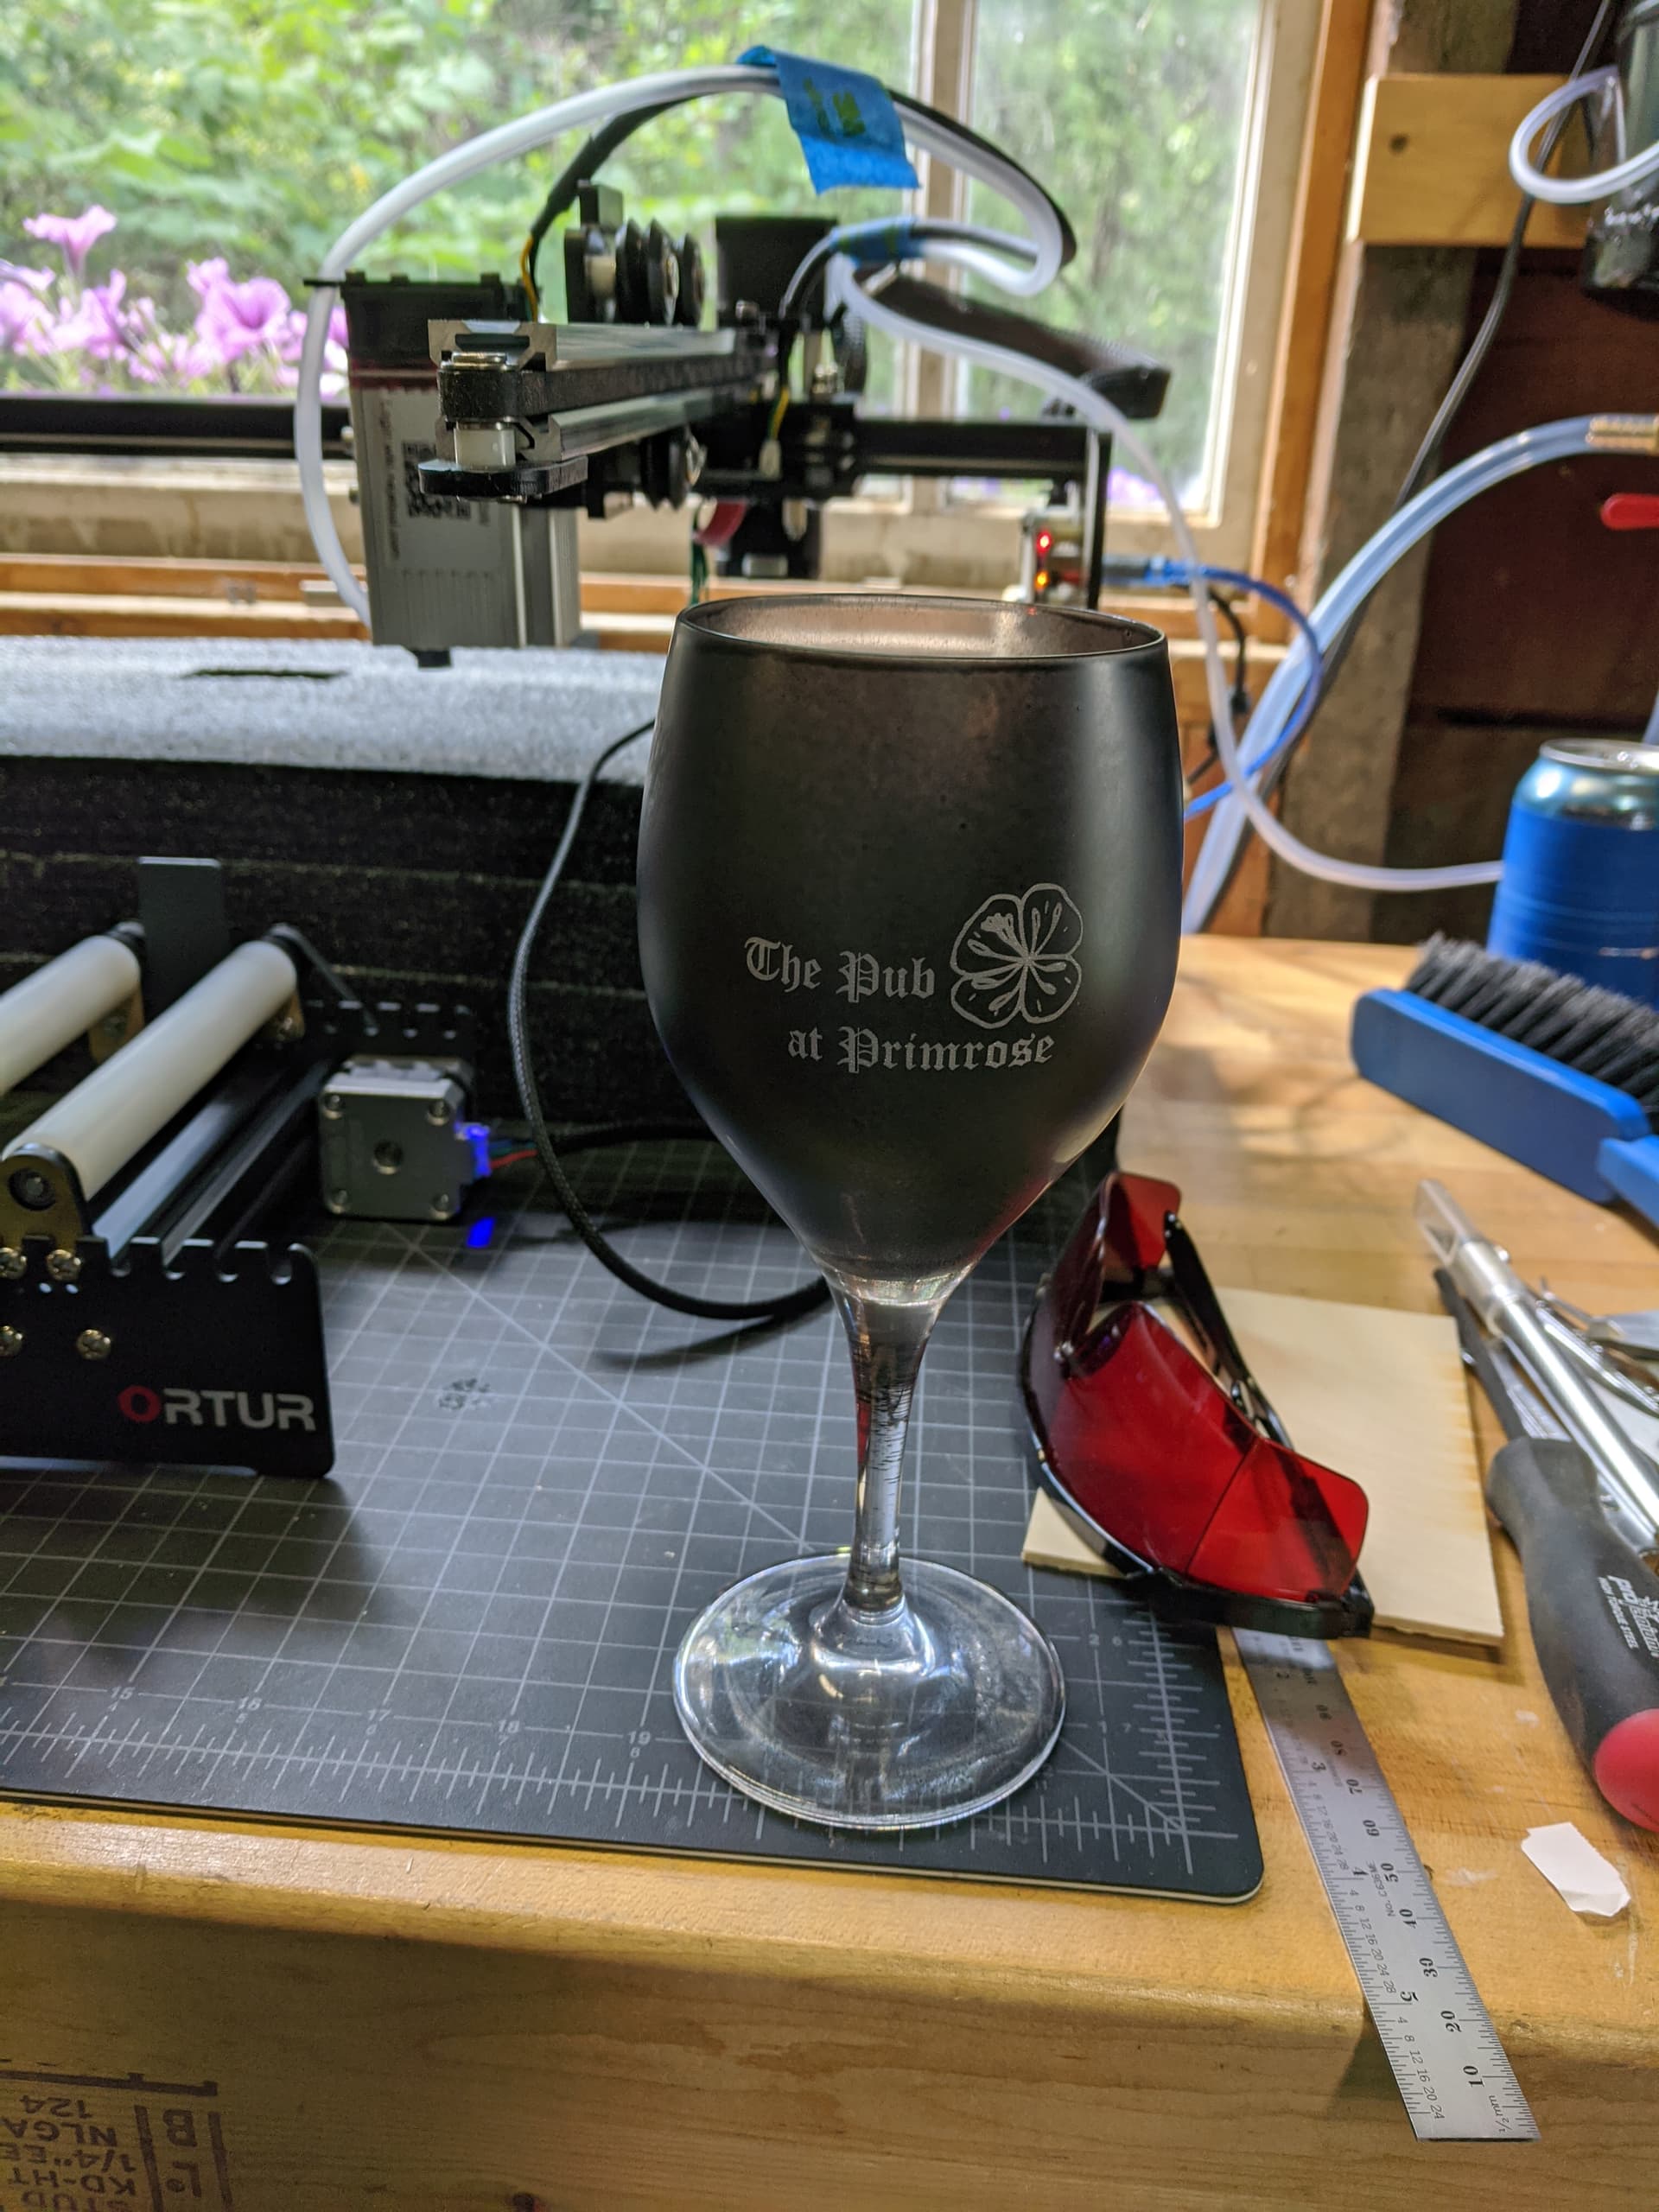
(ignore the test pattern on the back of the glass, I’m sure it’s just a reflection of something
I used Black acrylic paint (couldn’t find any Tempera in town) air brushed on, fill mode, 2.5% overscan, 0.100mm interval, speed 910mm/min, power 70%, NEJE Master 2S Plus with 30W diode, Ortur YRR Rotary. Here’s the glass as it came off the ‘press’…
Next up, waiting for the Tempera to arrive and making an adjustable jig to hang the YRR off the front of my work bench. This will allow a full range of sizes with the laser fixed to the top of the bench…
Thanks again, Hank & Rich!
UPDATED: Aug 24,2021: updated exposure speed from 1300 to 910 mm/min. This yielded a more uniform etching.
Hey Tom. Great work.
I have been trying to do wine glasses with and without stems. The problem I have is that the glasses always want to wander down the rollers so I do not get a straight engraving. I noticed the rollers on your rotary are close together. Did you try other spreads of the rolls and this proved best? I’m not sure where to go with my issue. I have put a bag of sand in glass - it helps a little but is not a fix. I need to raise one end of the rotary to make the surface of the glass reasonably parralel to the laser. That seems to work to get an even burn but I have the wandering problem still.
In my case, the fact that the glasses had stems was key to keeping them aligned. The top edge of the glass was held in place with the plate that is included with the YRR. The bottom edge, the base of the stem, was held in place by adjusting the position of the rotator with respect to the base of the shelf. I’d position the rotator along X axis so that it really couldn’t move much laterally.
I’m not sure what to do with a stemless glass that is curved top to bottom. I’ve seen pinch rollers that hold the glass against the rollers (probably better than you bag of sand), but I haven’t added anything like that yet.
I’m not sure what you’re calling the rotator, Tom. When I use the support and put the stem of the glass on it, the stem will roll up the wheels of the support. I might have a better result if I found something to hold stem to the support. Do you have a picture of your set up? That would be helpful for me.
one thing might be that I’m using the cheapest glassware I could find to practice with and symmetry doesn’t seem to be a priority with cheap stemware.
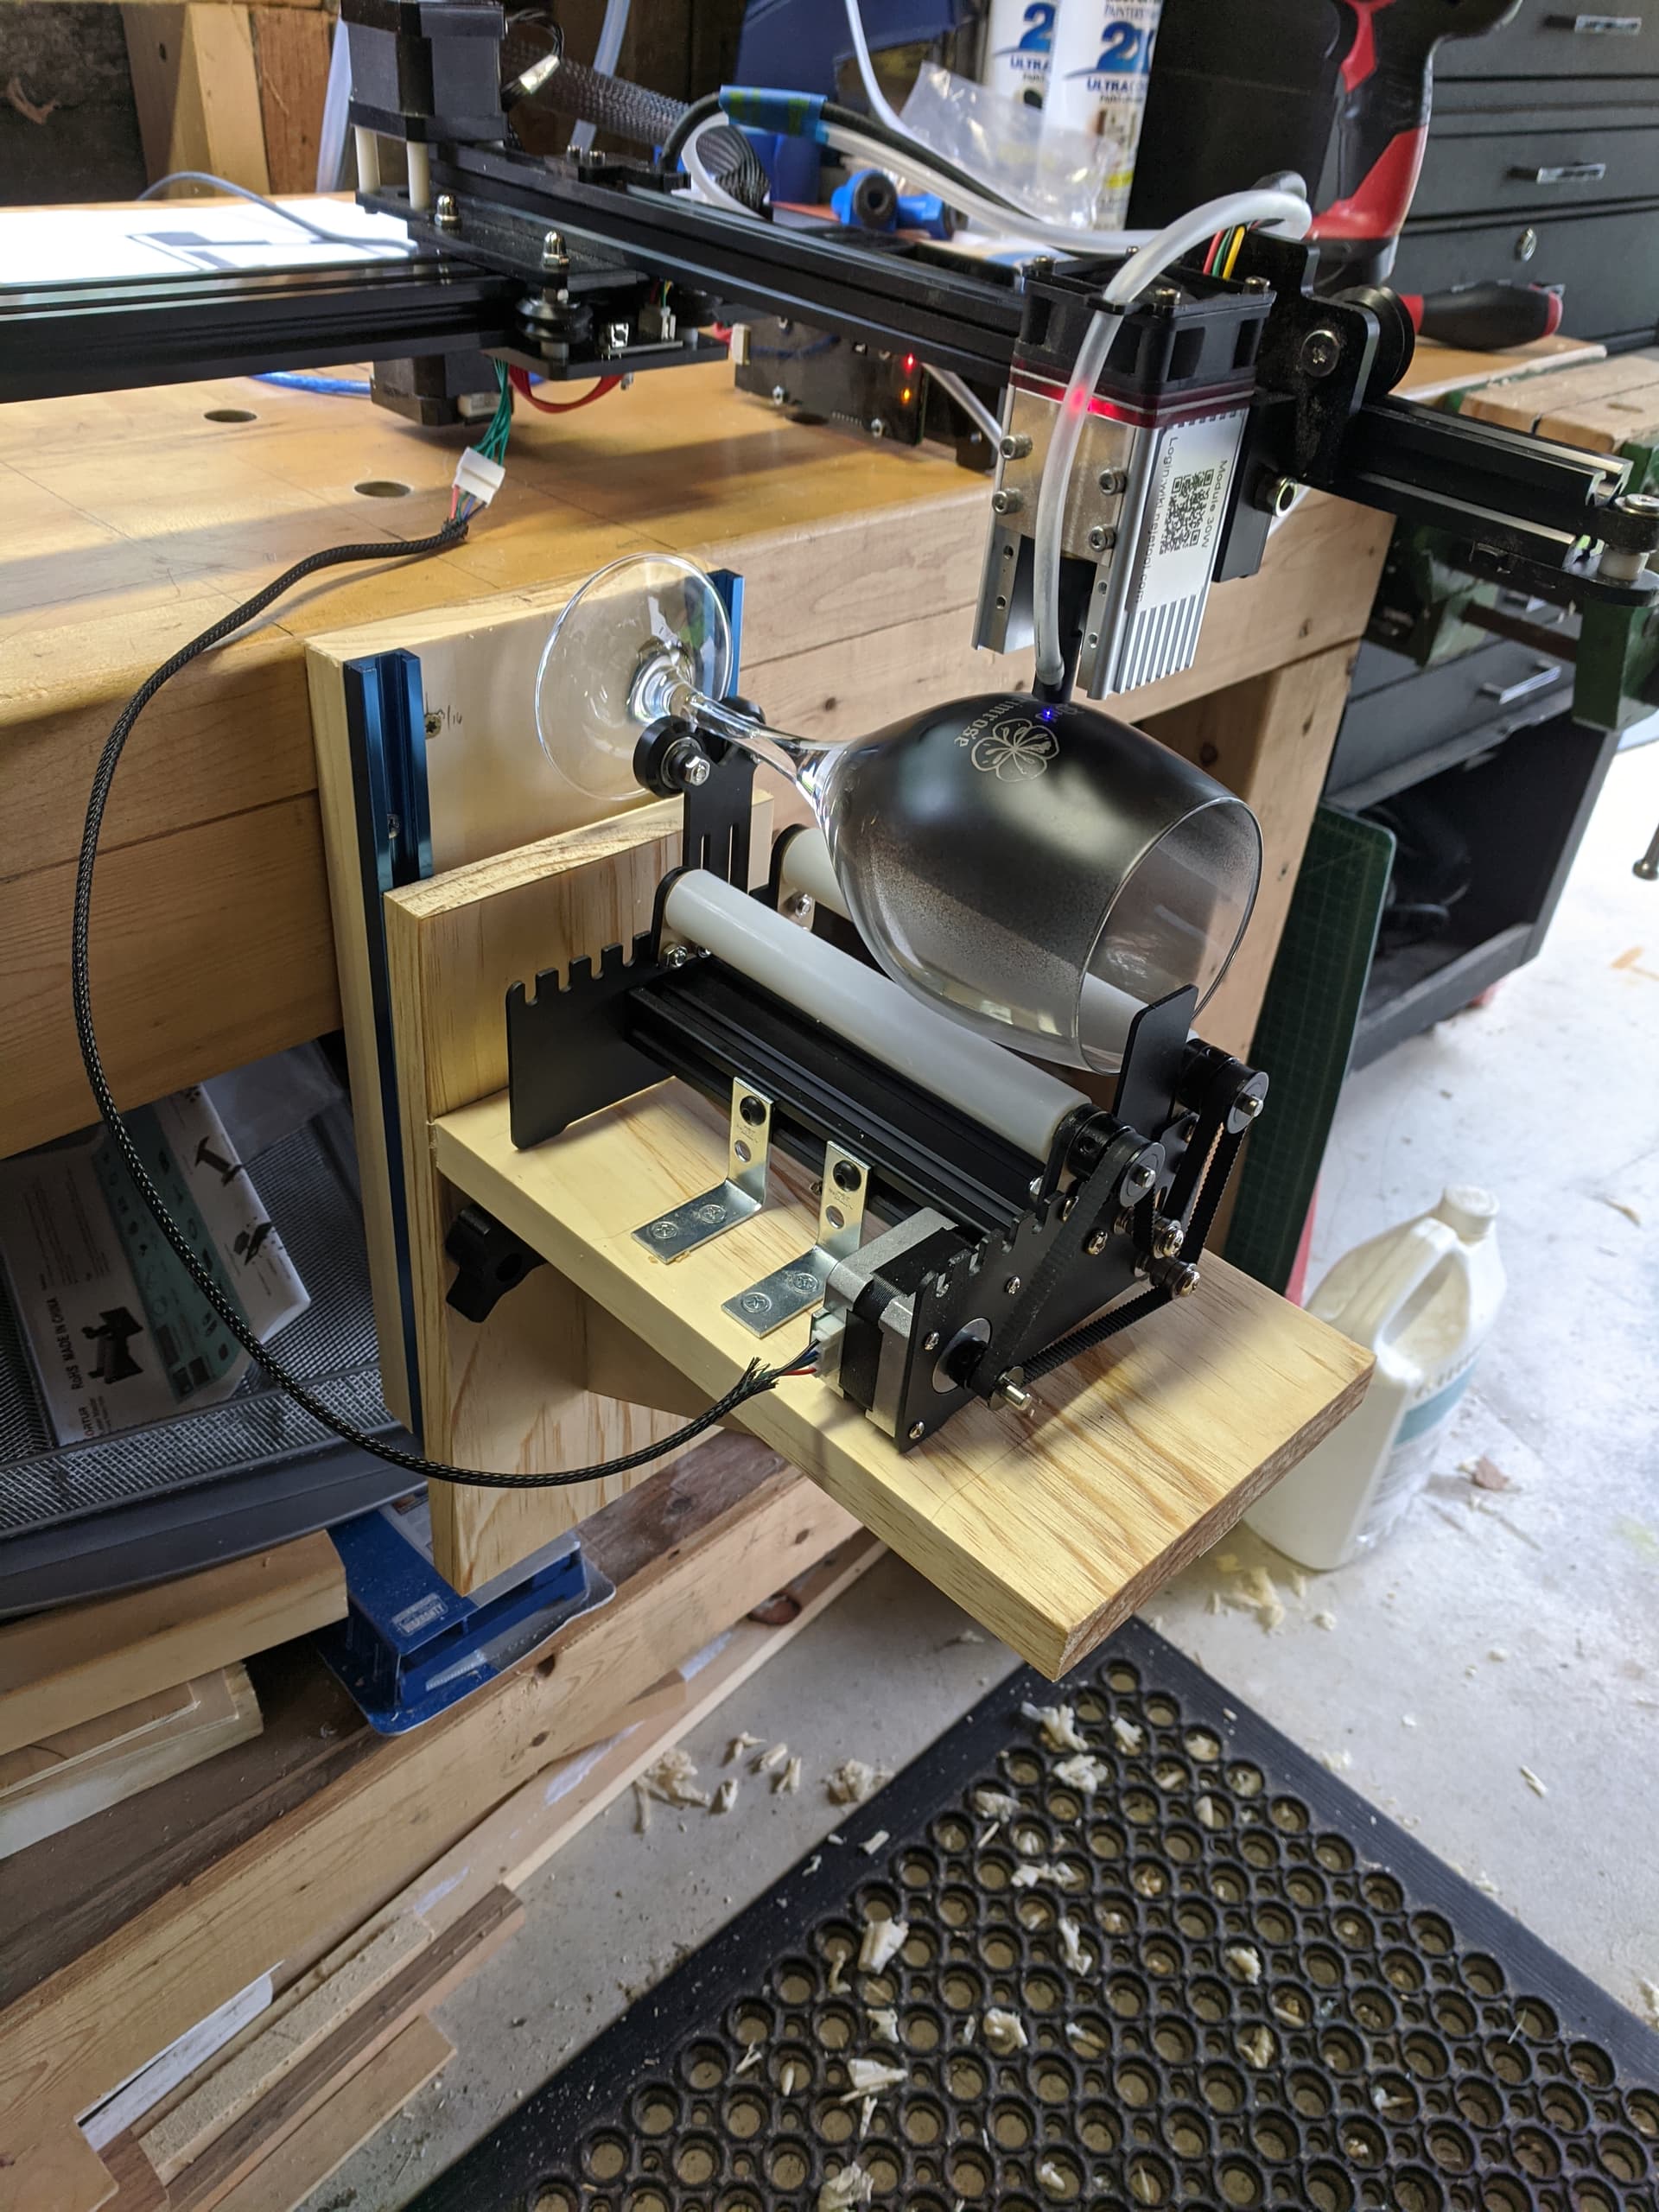
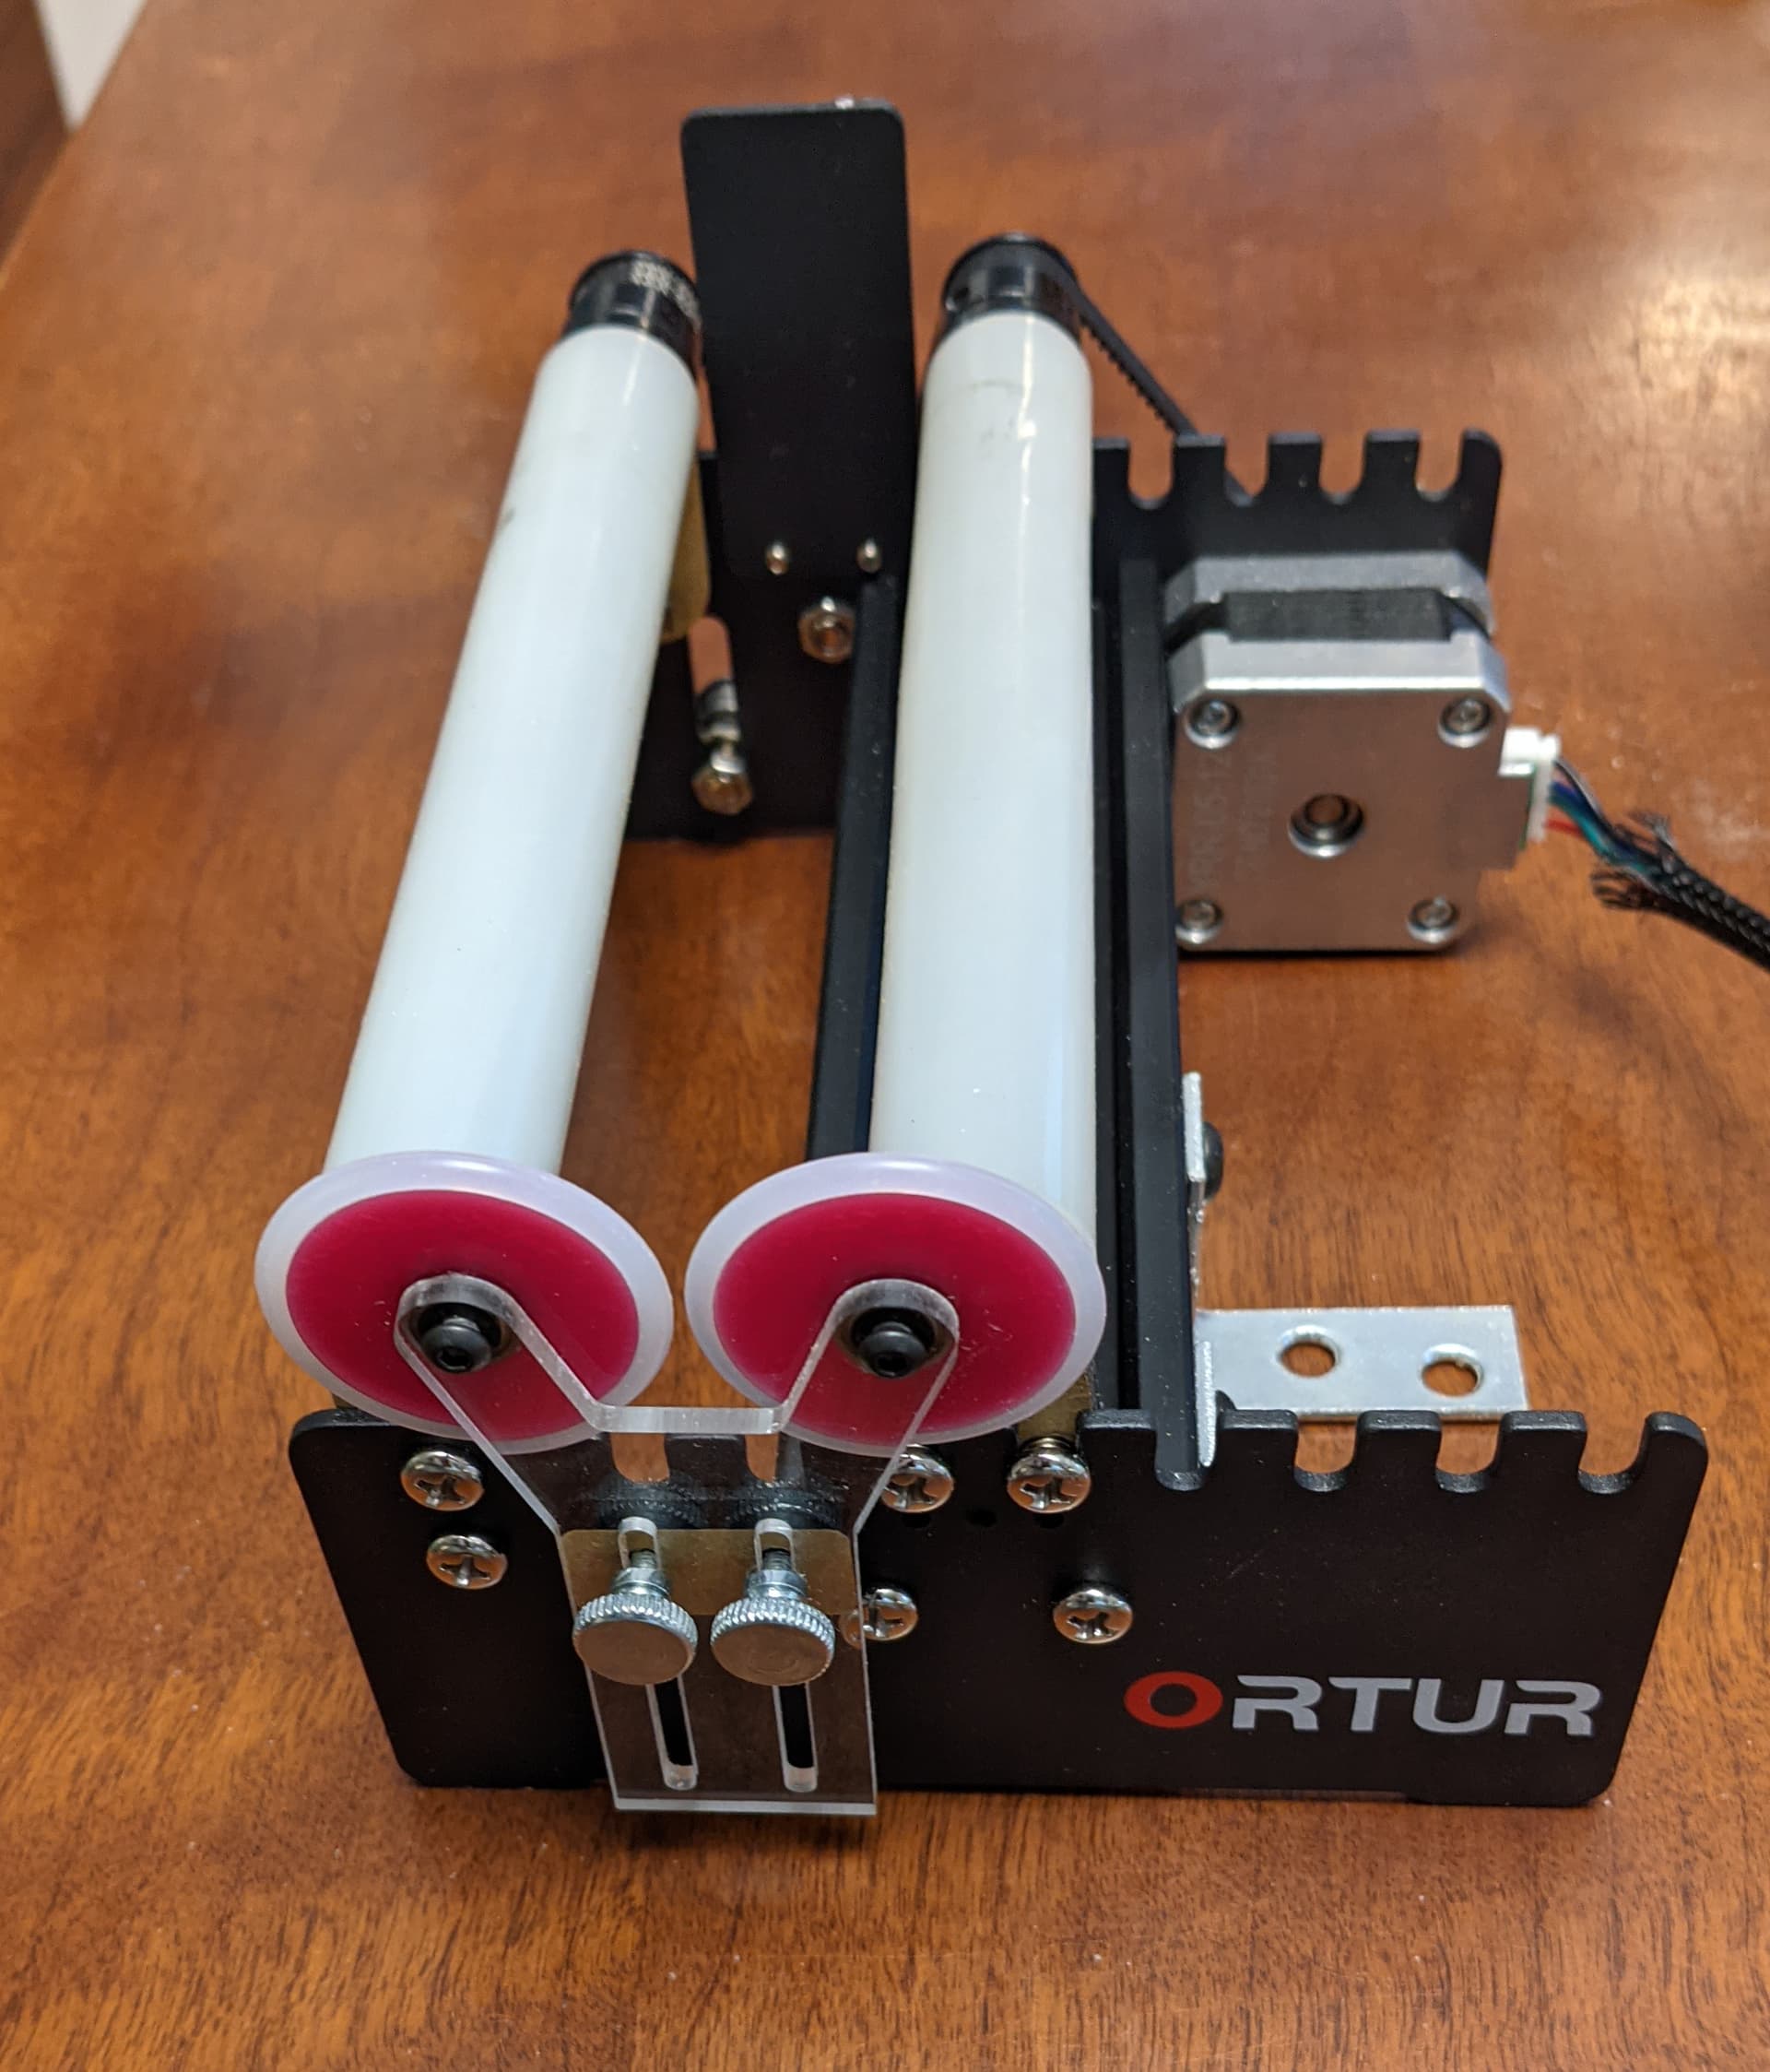
Here is my setup I was referring to. The jig attaches to the front of my workbench with the laser hanging out over the shelf. It is very solid and easy to adjust.
Note that the position of the rotator (along the roller axis) is adjustable on the shelf and, in this case, the bottom of the glass stem just touches the T-Track and, therefore, keeps the glass from shifting in that direction while the standard plate at the top of the glass keeps it from creeping in that direction.
The shelf is adjustable over a 6 inch range vertical so I can accommodate pretty large diameter objects.
BTW, I tried Black Tempera paint and that was not successful (the air brush coverage was too light). So, for me, I think the black acrylic paint is the best bet. Very reliable and easy to clean.
Is that 10W optical power or 10W Electrical power?
If the latter, then you’ll have to go at least 3x slower than my settings. If it’s optical power then you’re about 1.7X the laser I used so you can probably cut the intensity to about 60% of what I used (try 45%). These are obviously just starting points since beam size will also factor into the etching power, so have at least one glass to calibrate the setting and do smaller patterns.
Re cleaning, I’m not sure. I probably used IPA and a nylon mesh pad and then finished with soapy water (dish soap). It cleans up very easily.
Great job! Glass is one of the materials I still haven’t had hands on time with. I might need to give it a go soon. Would make for some great gifts during the holidays :).
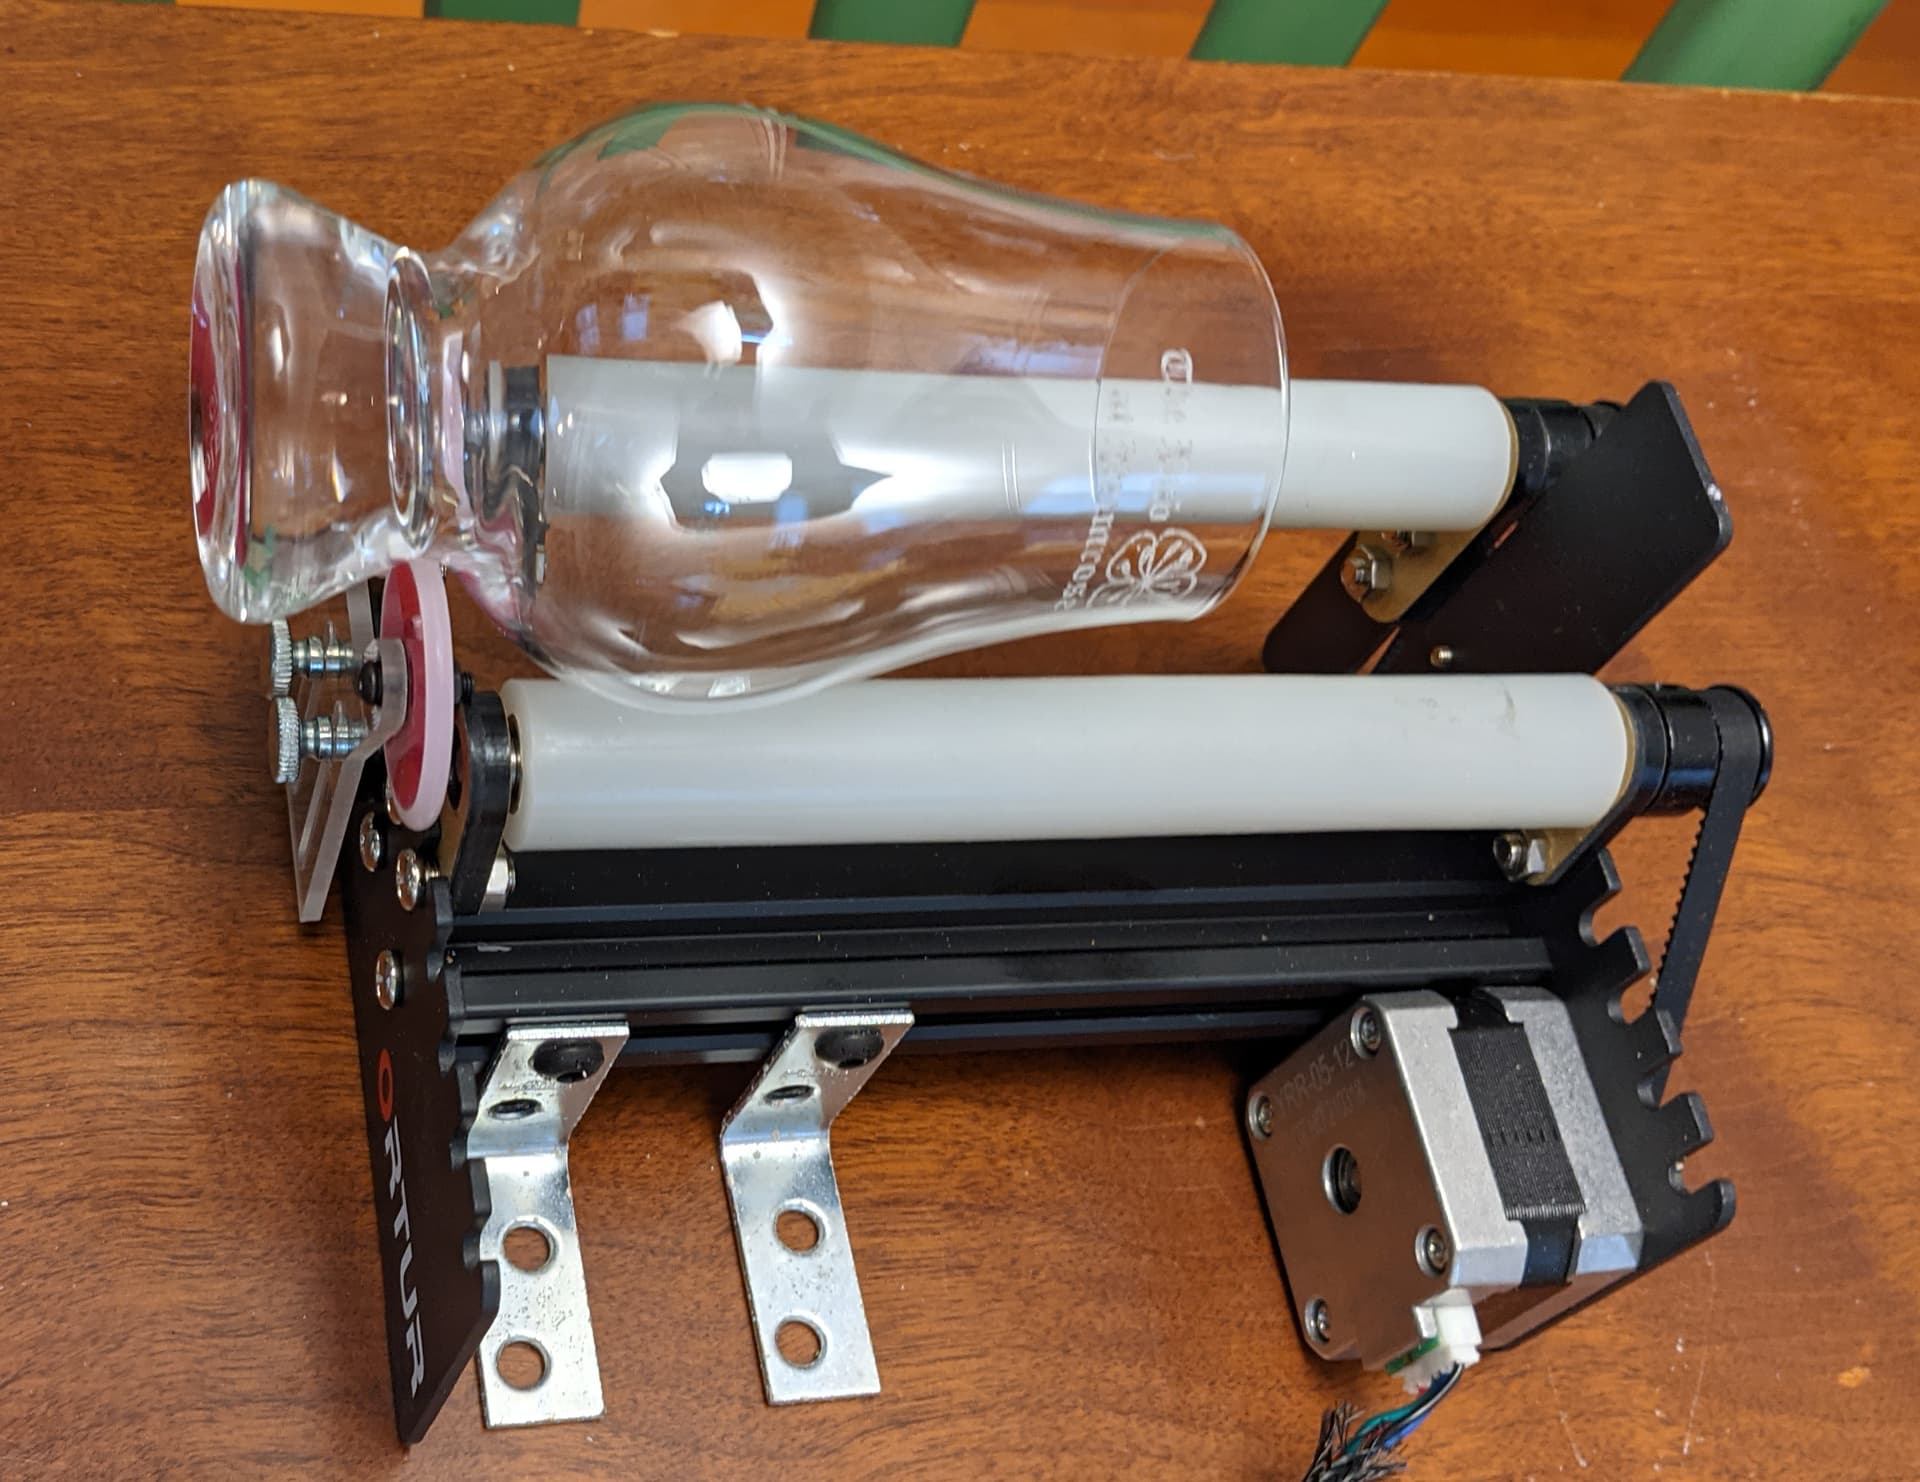
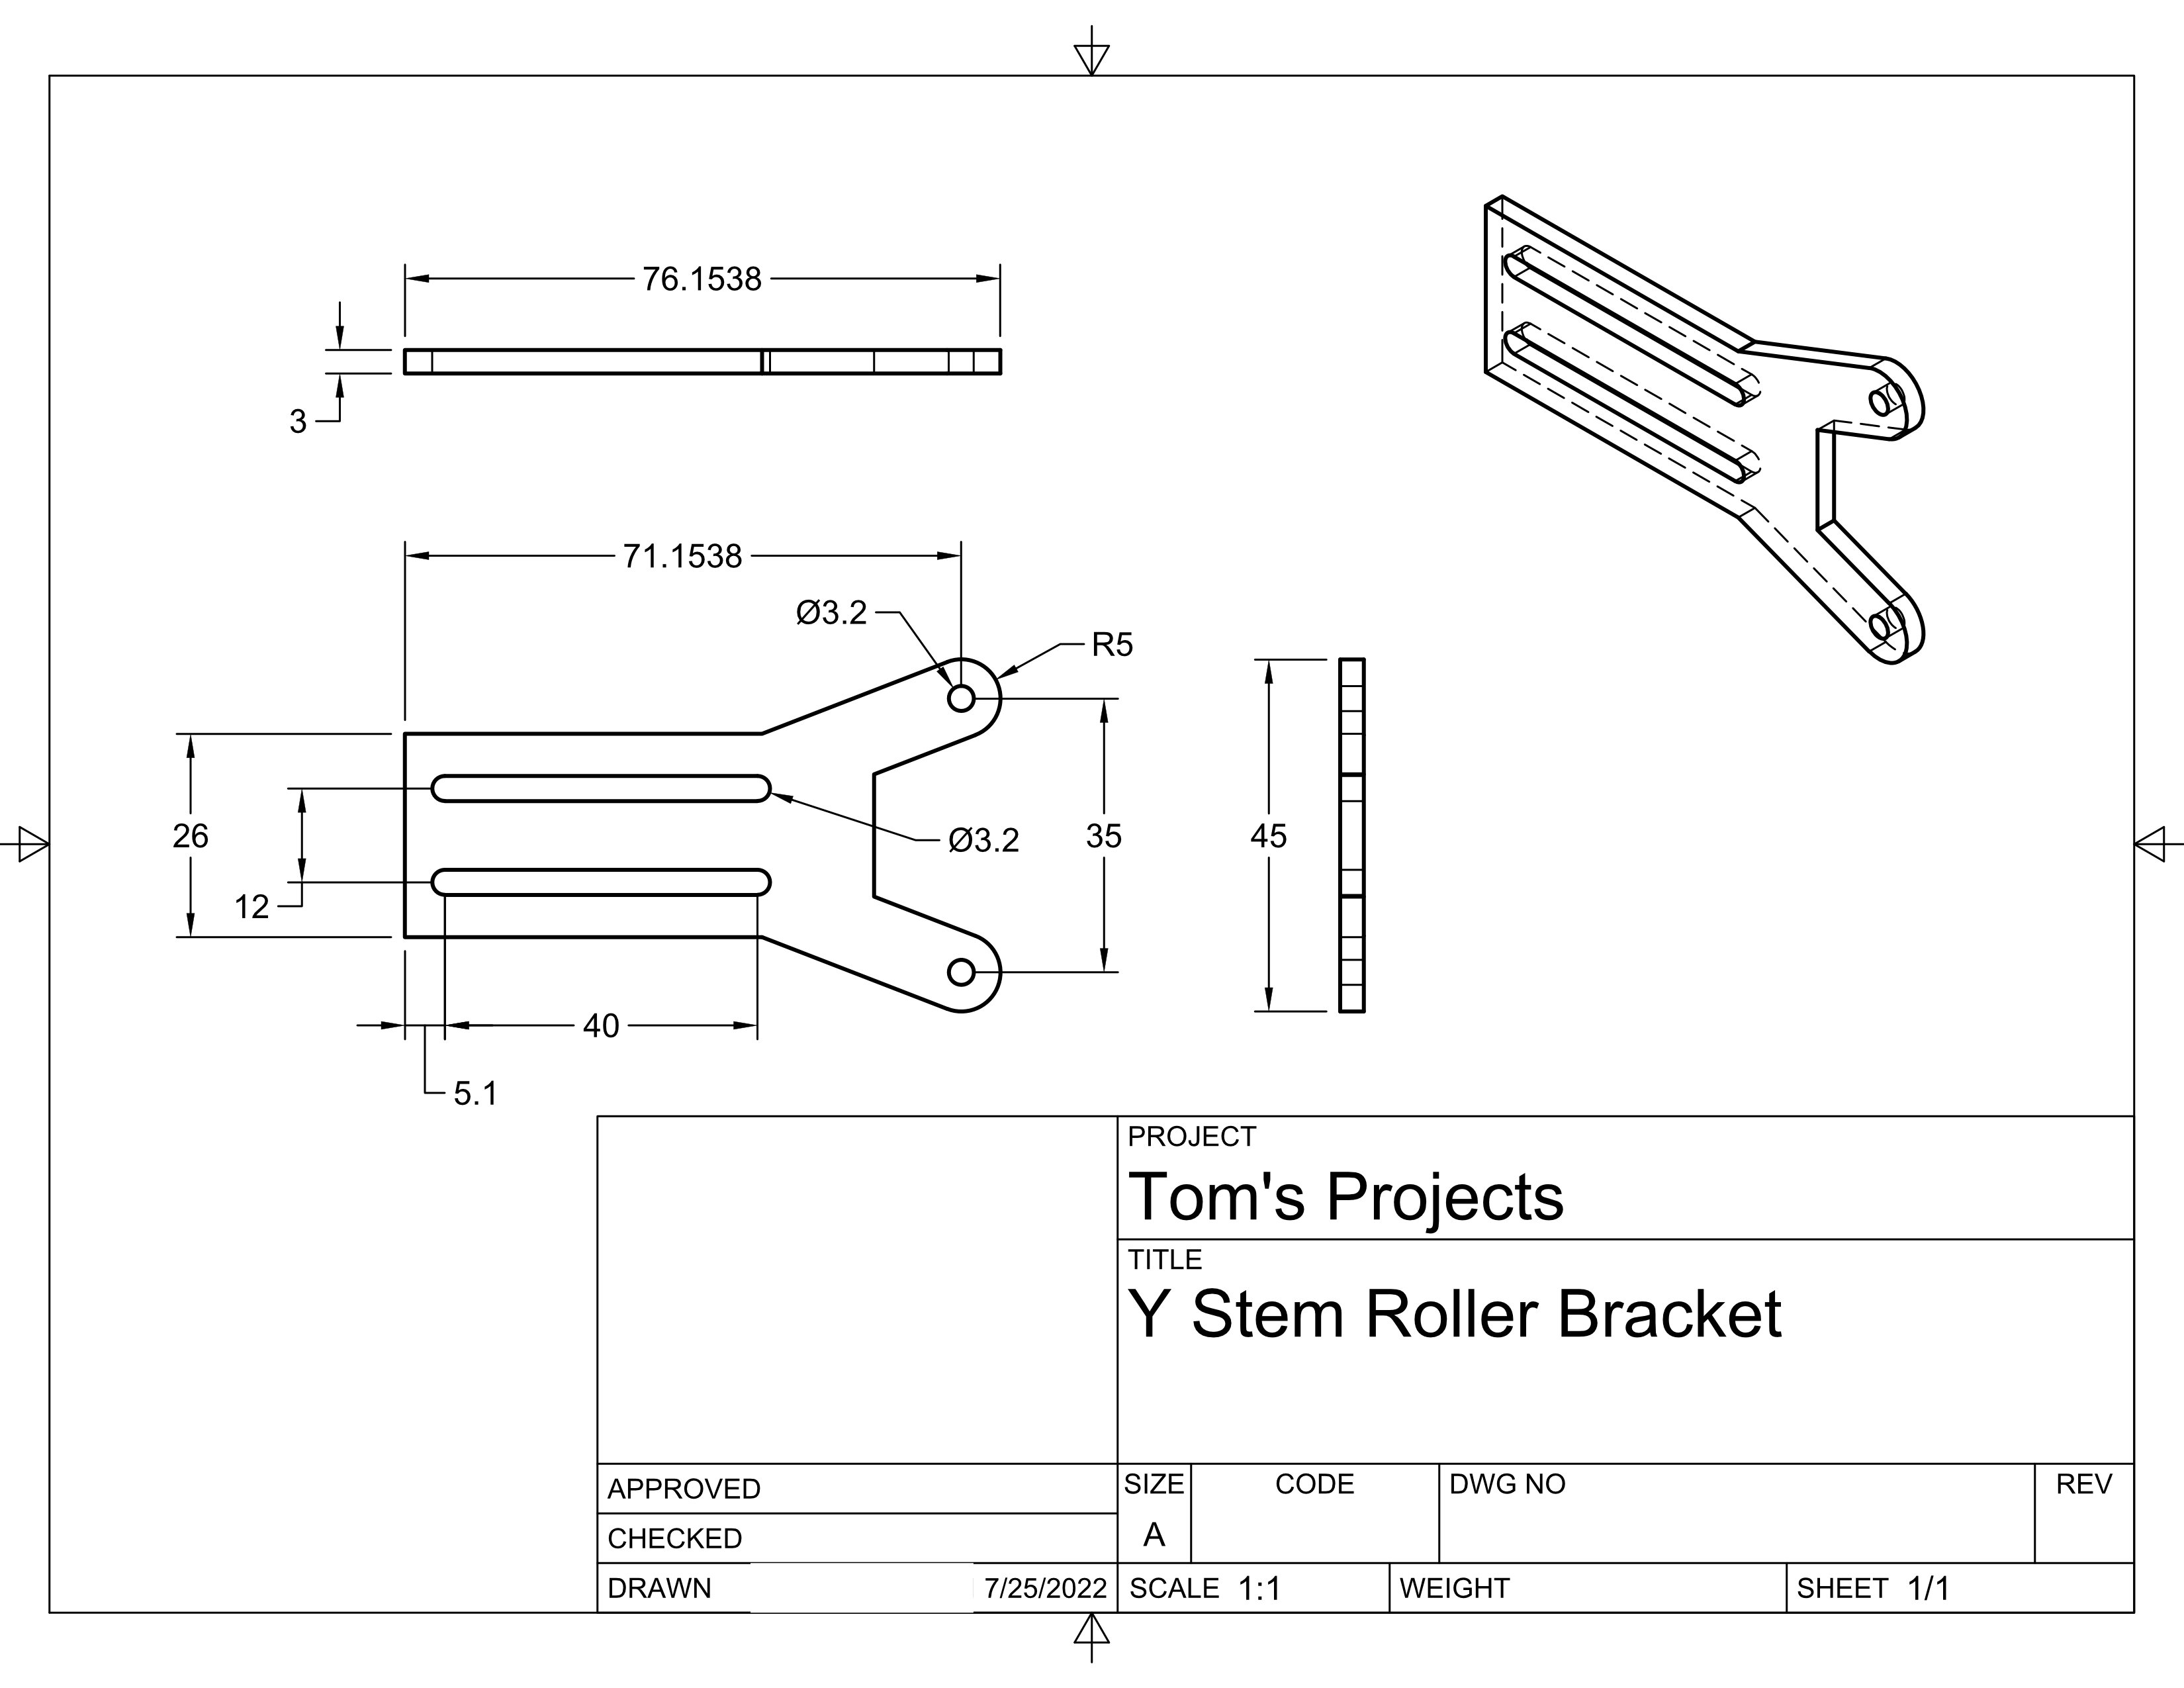
Those who use the Ortur Roller will probably recognize that the short, thick, ‘stem’ of this glass doesn’t work with the original roller. I replaced the original stem support with a new one that will support practically any type of stem including a simple tapered glass.